Moto Guzzi V700, V7 Special, Ambassador, 850 GT, 850 GT California, Eldorado, and 850 California Police models
Updated:
If you are looking to replace the original rear drum brake with a disc brake, here are a couple of ways to mount the master cylinder.
Greg Field's method
Thanks to Greg Field for posting this information on the Wildgoose Chase forum. In Greg's own words:
Drums work OK, but it seems I have to grease everything three time to get through a Seattle winter. I'm tired of that, so I grafted on the disc rear end from a T3 before I left for the National in June (2008). Here's one way to do it, for anybody who's interested. The T3 swing arm, u-joint, rear drive, wheel, axle, caliper hanger, and caliper bolted on directly, so no point in recounting that. The difficulty was in mounting a master cylinder. That's easy if you're willing to weld mounts onto the frame, but I needed to mount the m/c without making any undoable mods to the frame. I decided to try to make a plate that mounted to one of the engine-trans studs at the rear and to a standoff from an existing hole in the footboard mounts at the front.
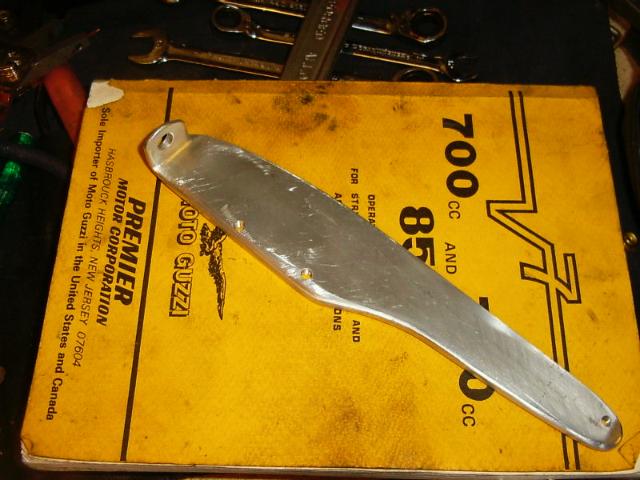
Here's a view of the plate. I hacksawed it from thick aluminum plate and file-finished to shape. Then, I bent a tab at the rear and drilled it to go over the engine-trans stud. I drilled and tapped it at the front for the stand0ff bolt, and fitted it up.
Photo courtesy of Greg Field.
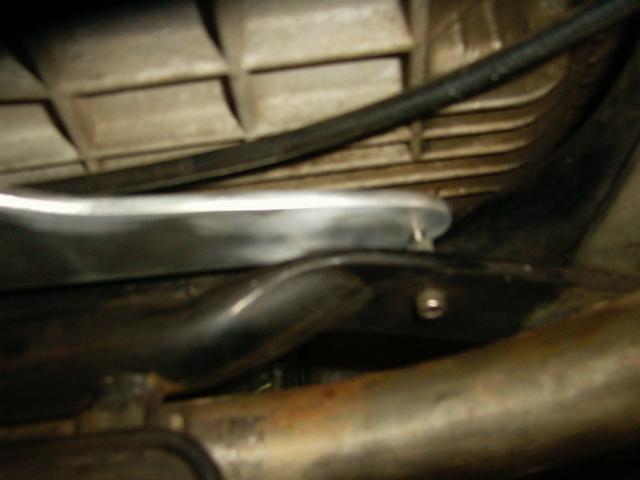
Here's the standoff at the front. It's stronger than it looks.
Photo courtesy of Greg Field.
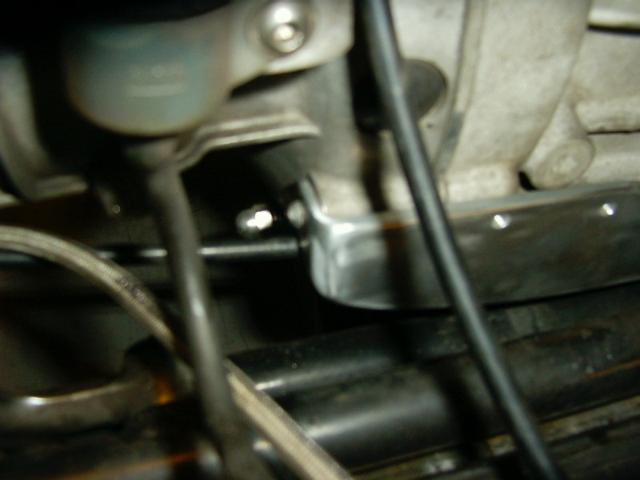
Here's the rear mount, to the engine-trans stud.
Photo courtesy of Greg Field.
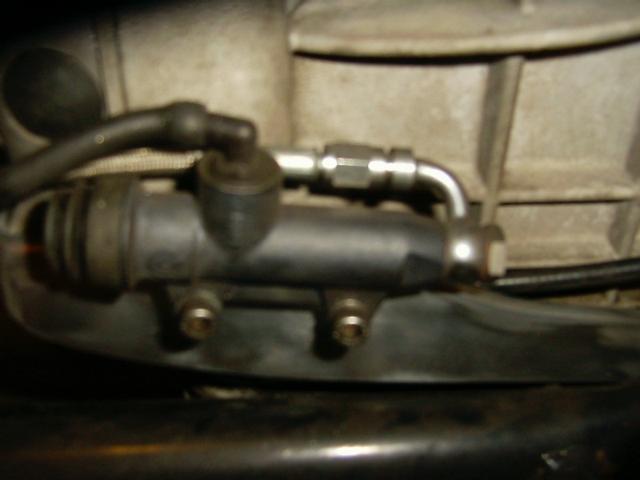
Then I trial-fitted an 11 mm master cylinder to get it mounted at the right angle for best leverage from a pushrod mounted to the top tab of a T3FB brake pedal. This meant that the m/c was tilted downward slightly, so it's not parallel with the engine. It works great, so I don't care about that. Function was more important to me than looks. I cut the plate for the angle, and then drilled and tapped the plate for the mounting screws and mounted it up.
Photo courtesy of Greg Field.
Then, I bent a little bracket for the m/c reservoir. The bracket also mounts to one of the engine-trans studs.
Photo courtesy of Greg Field.
The completed set up. Works better than I had dreamed and will sure ease my maintenance burden when the rains begin to fall. Now, to get that DOT 5.1 fluid outta there...
Photo courtesy of Greg Field.
Ralf Brinkmann's method
I extracted this information from Ralf Brinkmann on the old Yahoo! Loopframe_Guzzi news group (which has now moved to Groups.io). In Ralf's own words:
Please keep in mind - I'll convert to the Guzzi Integral Breaking System, your intentions may differ and possibly will require a MC with smaller diameter. Due to my limited time my long term hobby project is still under construction and not tested on the road.
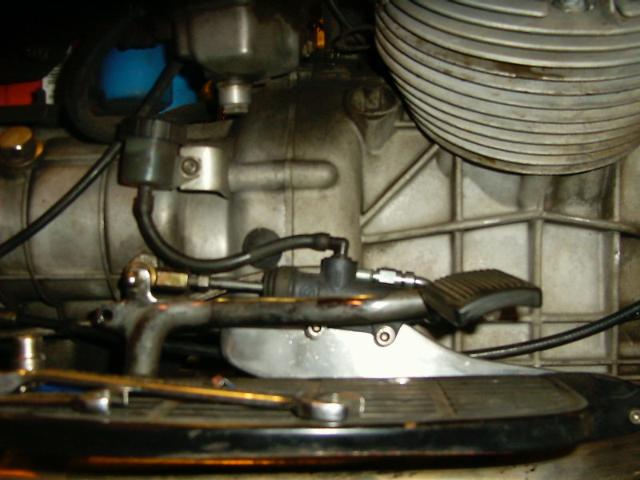
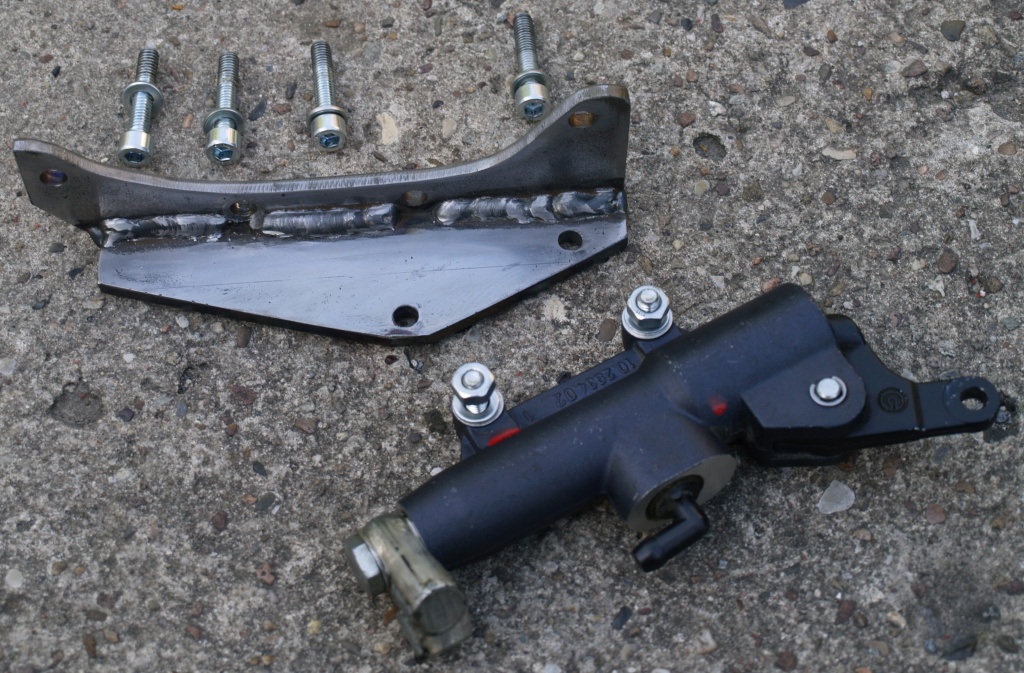
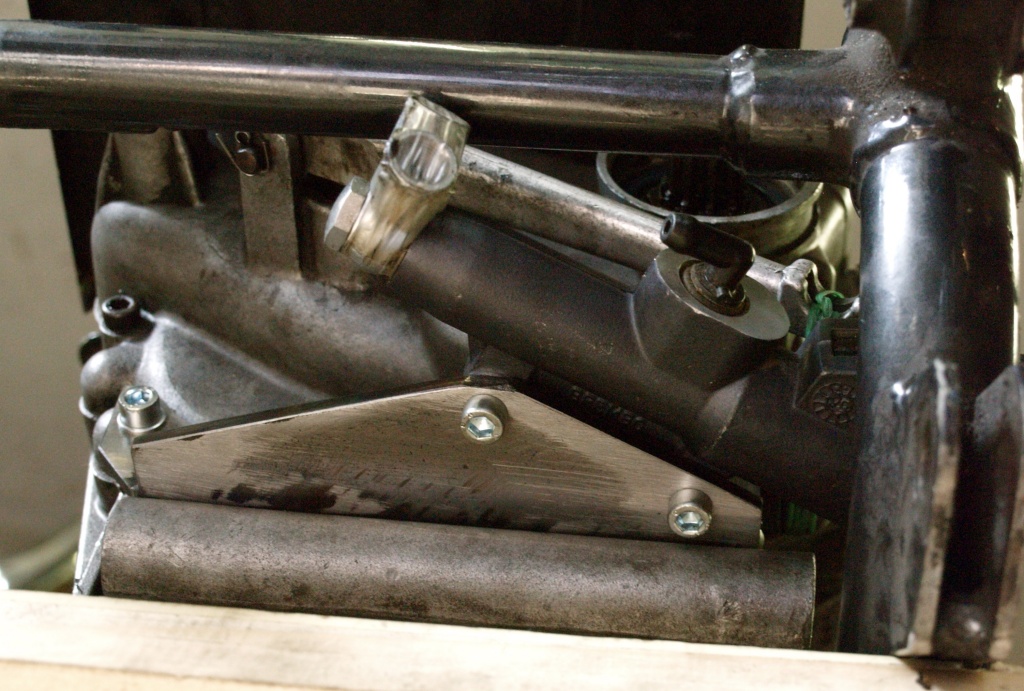
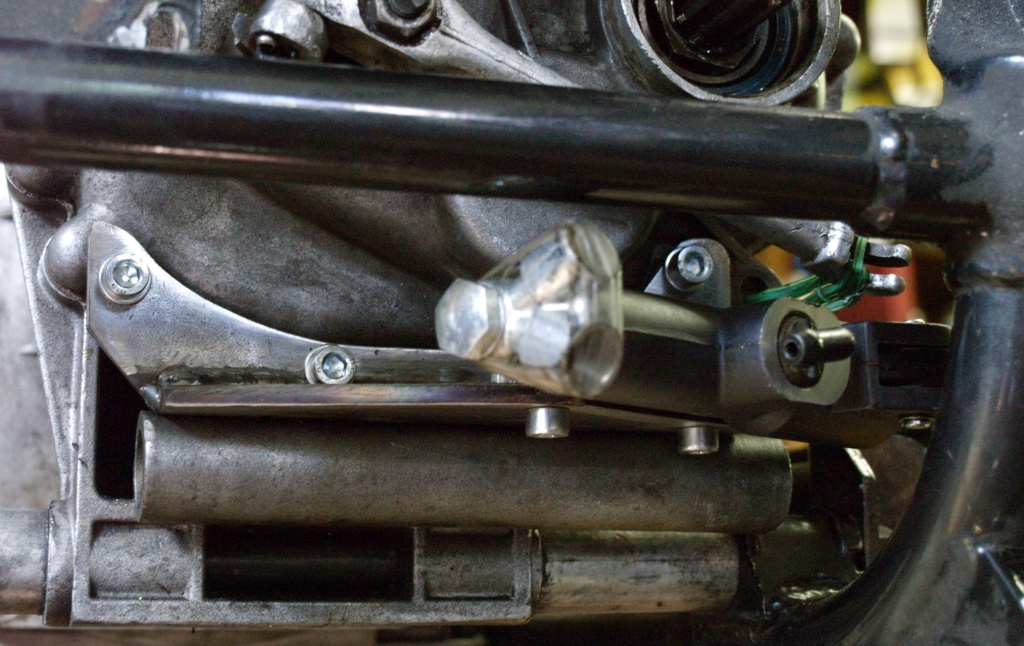
For the bracket I used two 5 mm flatt iron and rounded edge and seam (behind the visible seam) with a file. If I would make it again I'd cut the bracket as single piece out of a square tube (S235JRG2 DIN 2395) - no welding and rounding required.
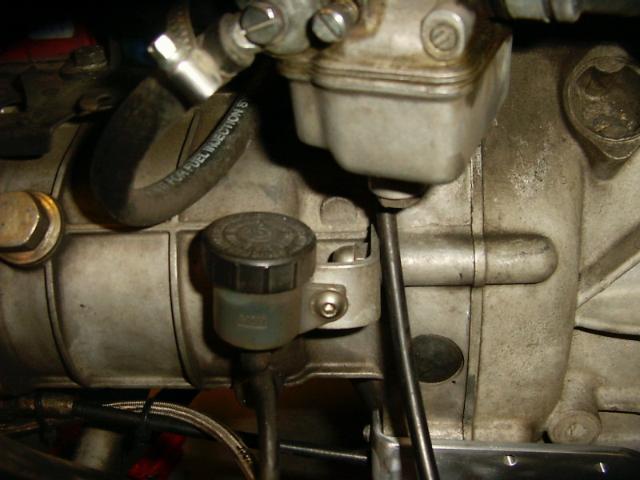
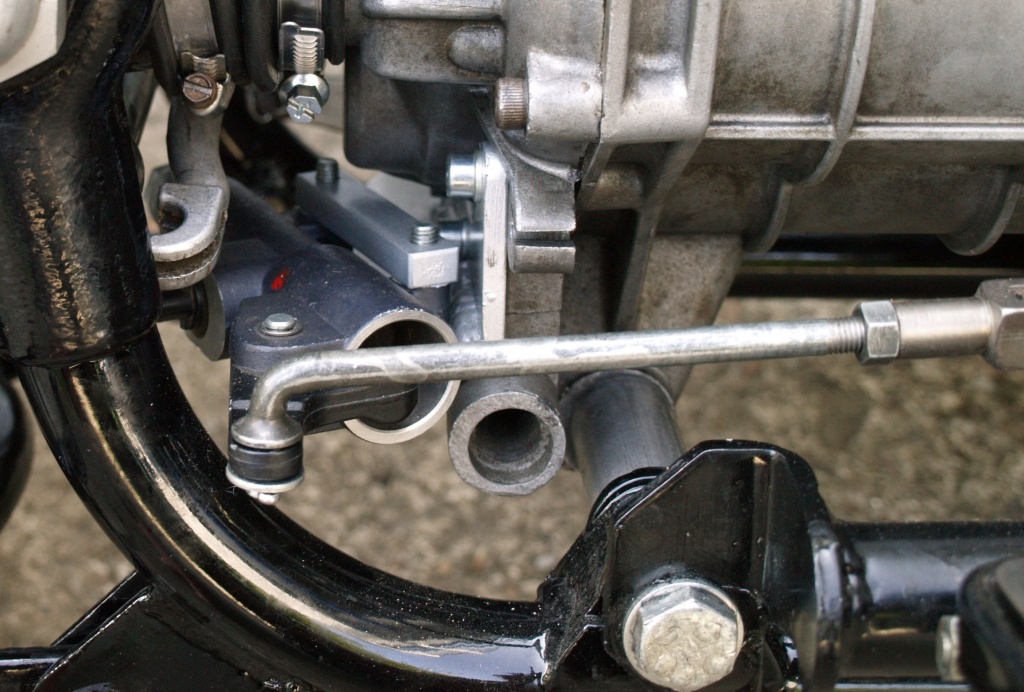
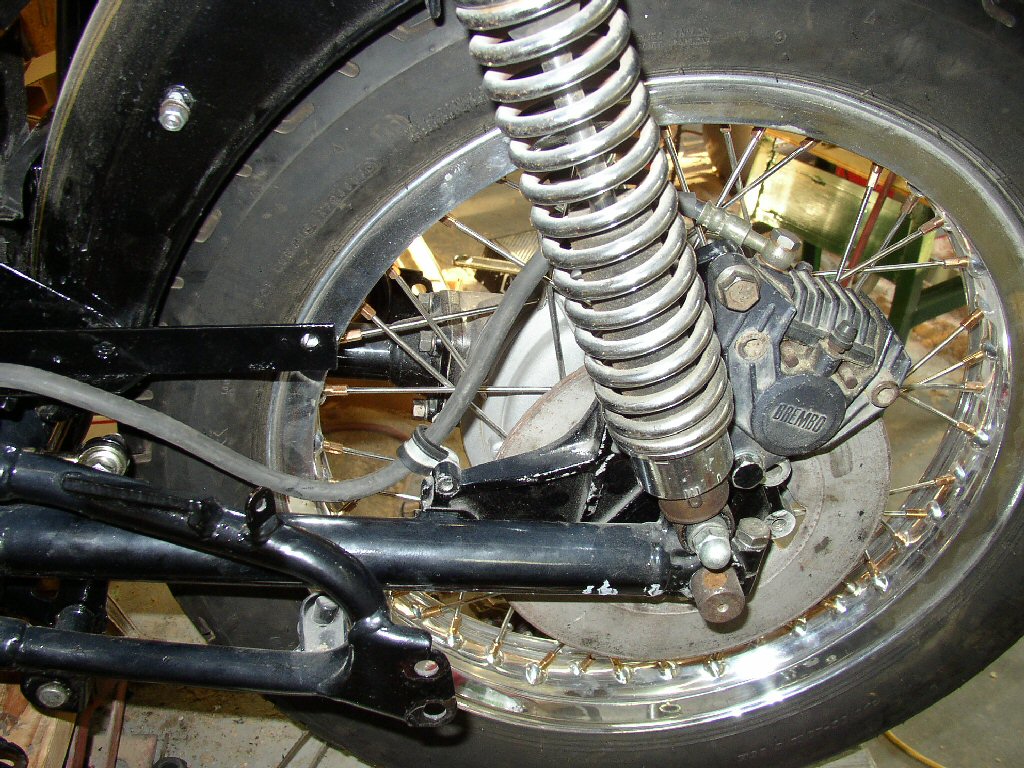
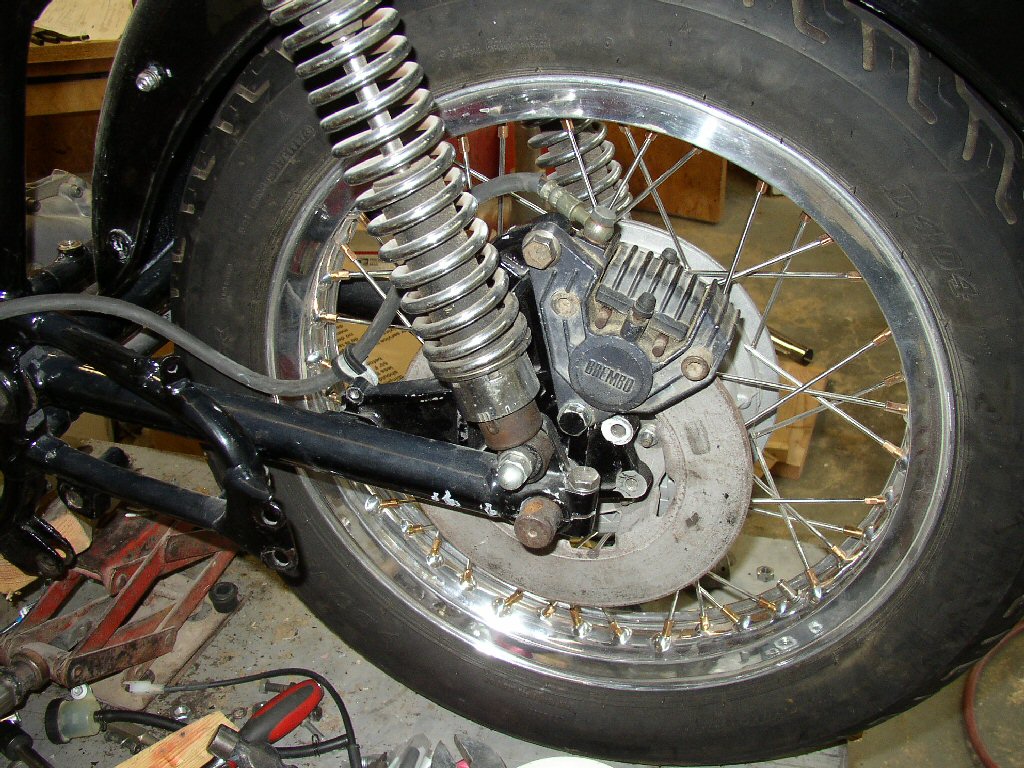
The 16 mm Brembo master cylinder is used on several small block and big block Guzzi twins, e.g. as rear master cylinder on the MG Jackal. The brake rod is a shortened Cali-III rod.
Photo courtesy of Ralf Brinkmann.
Photo courtesy of Ralf Brinkmann.
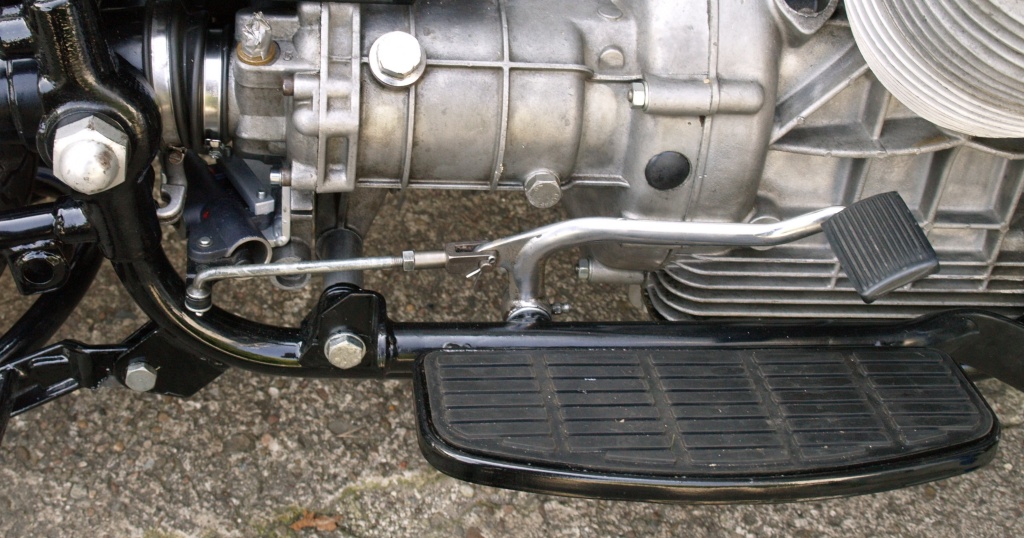
Photo courtesy of Ralf Brinkmann.
Photo courtesy of Ralf Brinkmann.
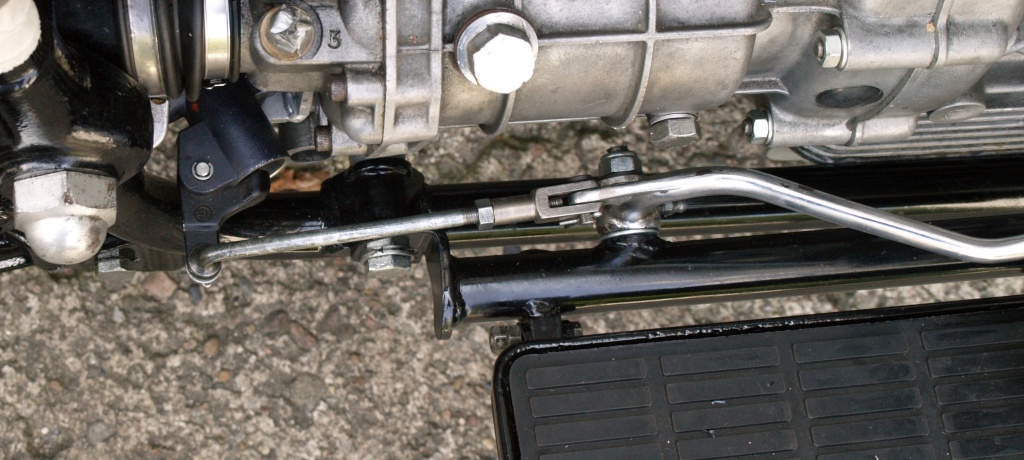
Photo courtesy of Ralf Brinkmann.
Photo courtesy of Ralf Brinkmann.
Mike Ittner's method
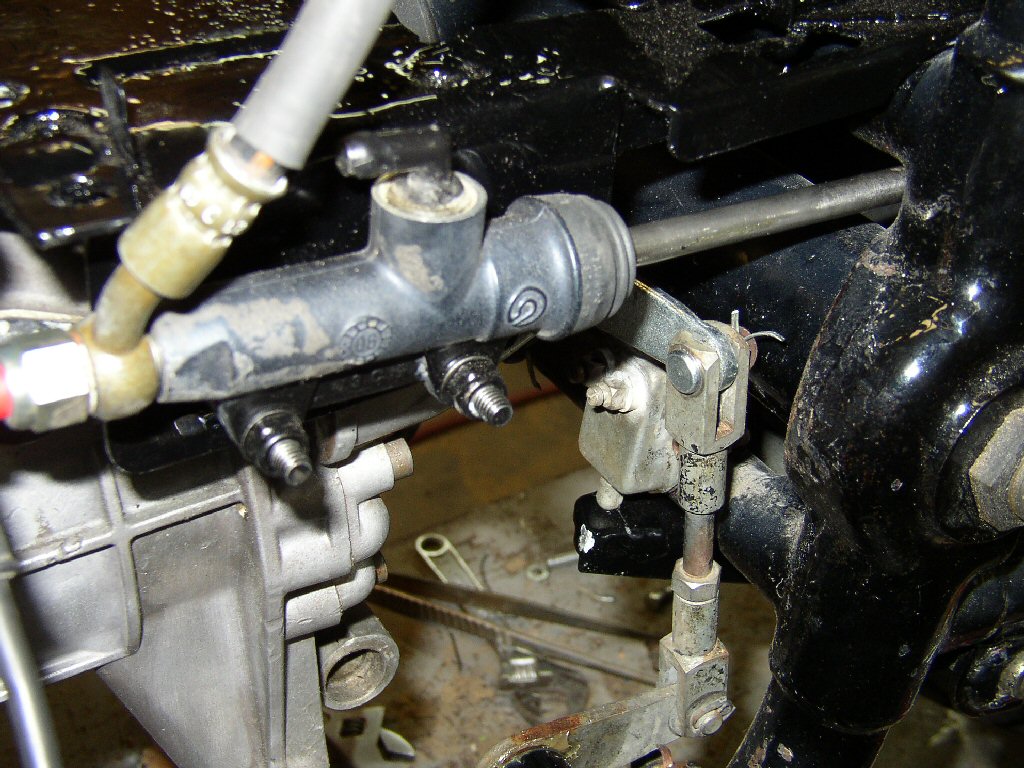
Thanks to Mike Ittner for sending me the photos and description in a private email. Mike used an 11 mm Brembo master cylinder (Brembo part number 10.4776.50) with a rod and clevis (Brembo part number 70.6002) and a remote reservoir (Brembo part number 10.4446.40) that Moto Guzzi fit to many sport motorcycles, including the 1992 - 1995 Daytona, 1997 - 1998 Daytona RS, 1996 Daytona Racing, 1996 - 1999 1100 Sport Injected, 1100 Sport Carb, Centauro, V11 Sport, 2003 - 2005 V11 Cafe-Ballabio, V11 Le Mans, 1100 Sport Corsa (MG# 30666900). In Mike's own words:
The brake push rod is a close fit but clears the transmission linkage by a good half inch and runs between the top of the swing arm and the frame member. With the starter in place the neighborhood will be a little crowded but I don't foresee any problems.
Photo courtesy of Mike Ittner.
Photo courtesy of Mike Ittner.
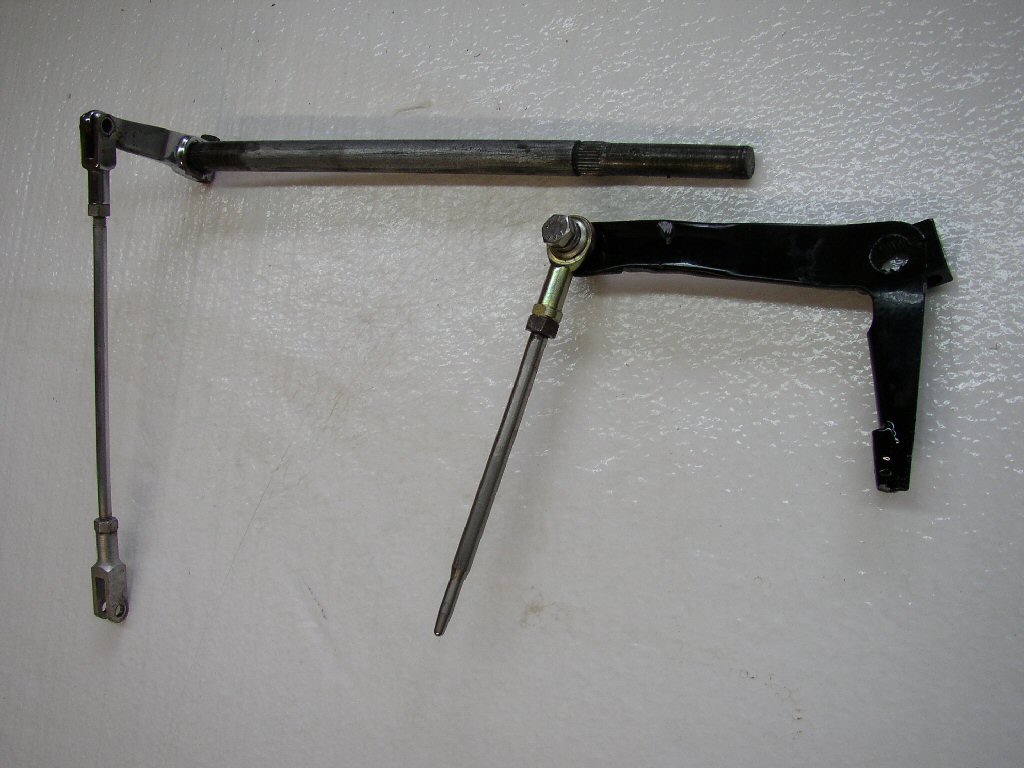
The L-shaped brake rod actuating lever that also acts on the brake light switch was extended an inch in height to accommodate the master cylinder push rod.
Photo courtesy of Mike Ittner.
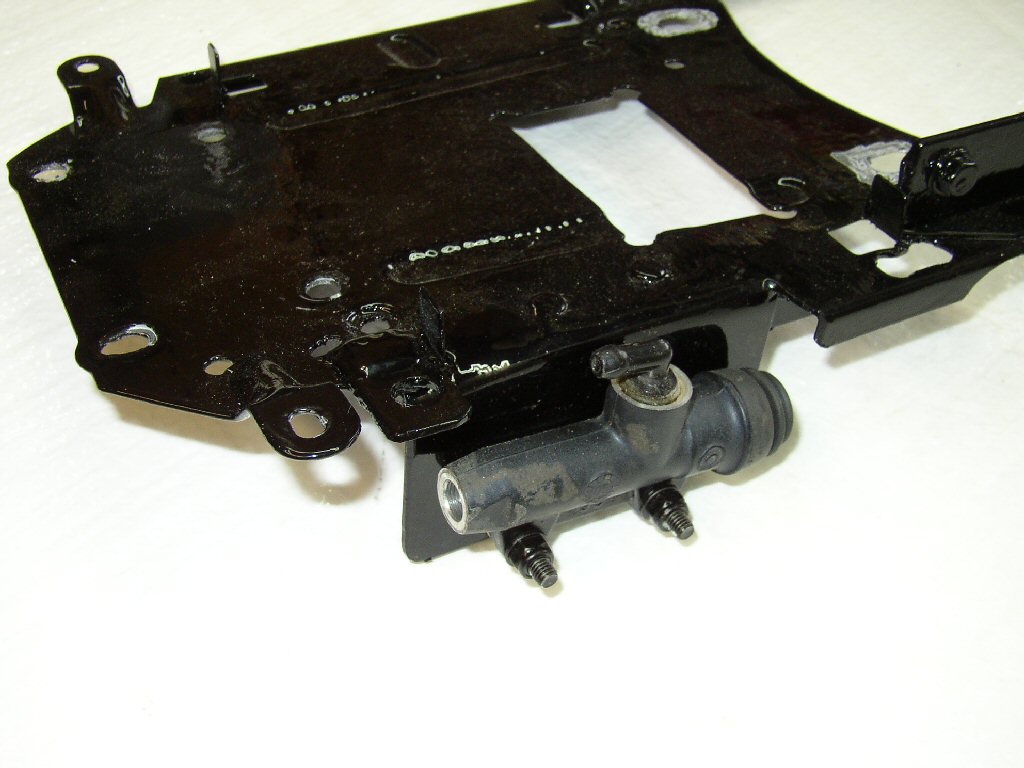
I notched out the battery tray and welded a plate hanging down to hold the master cylinder.
Photo courtesy of Mike Ittner.
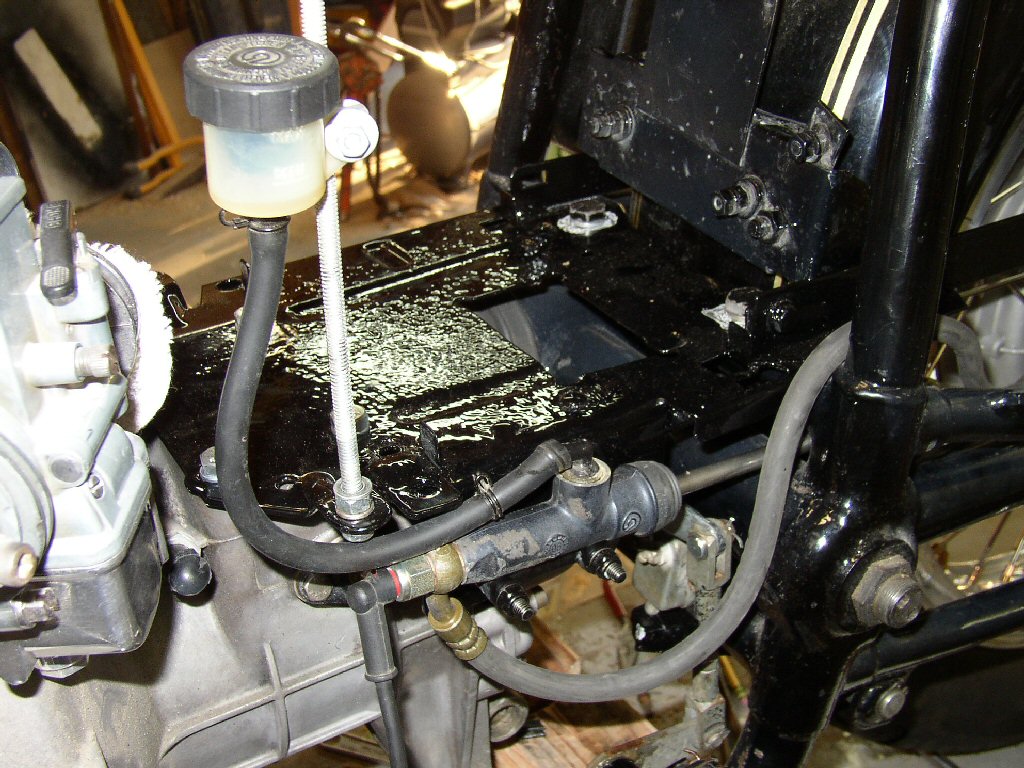
There is a rod sticking up from the tray to hold the brake fluid reservoir and the brake line runs back to the stock T-3 setup.
Photo courtesy of Mike Ittner.
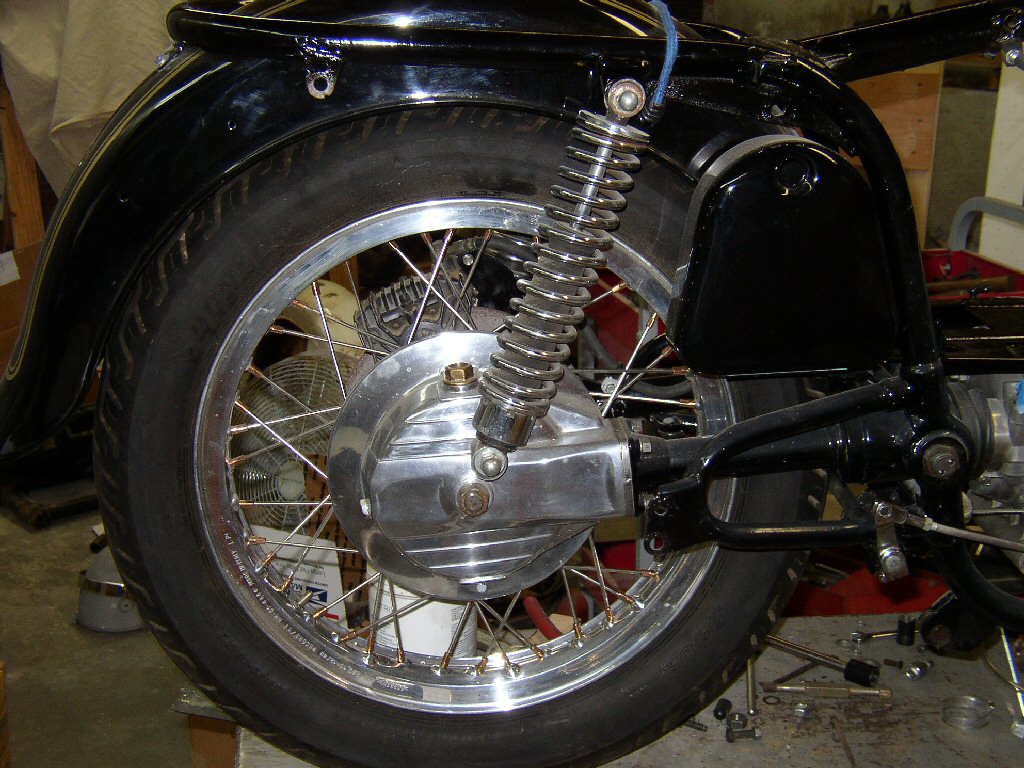
The rear drive, swing arm and rear wheel are also T-3 just to make it all bolt on and avoid modifications. They can be done and are not difficult but I just preferred to have everything match.