Generator repair - Bosch
Moto Guzzi V700, V7 Special, Ambassador, 850 GT, 850 GT California, Eldorado, and 850 California Police models
Created:
Updated:
Thanks to Dan Eberhardt for documenting the rebuild procedure for Bosch generators.Step 1: Basic testing prior to disassembly
With the generator off the bike and prior to disassembly perform the following checks:
Check the resistance of the field windings. It should be around 5 ohms.
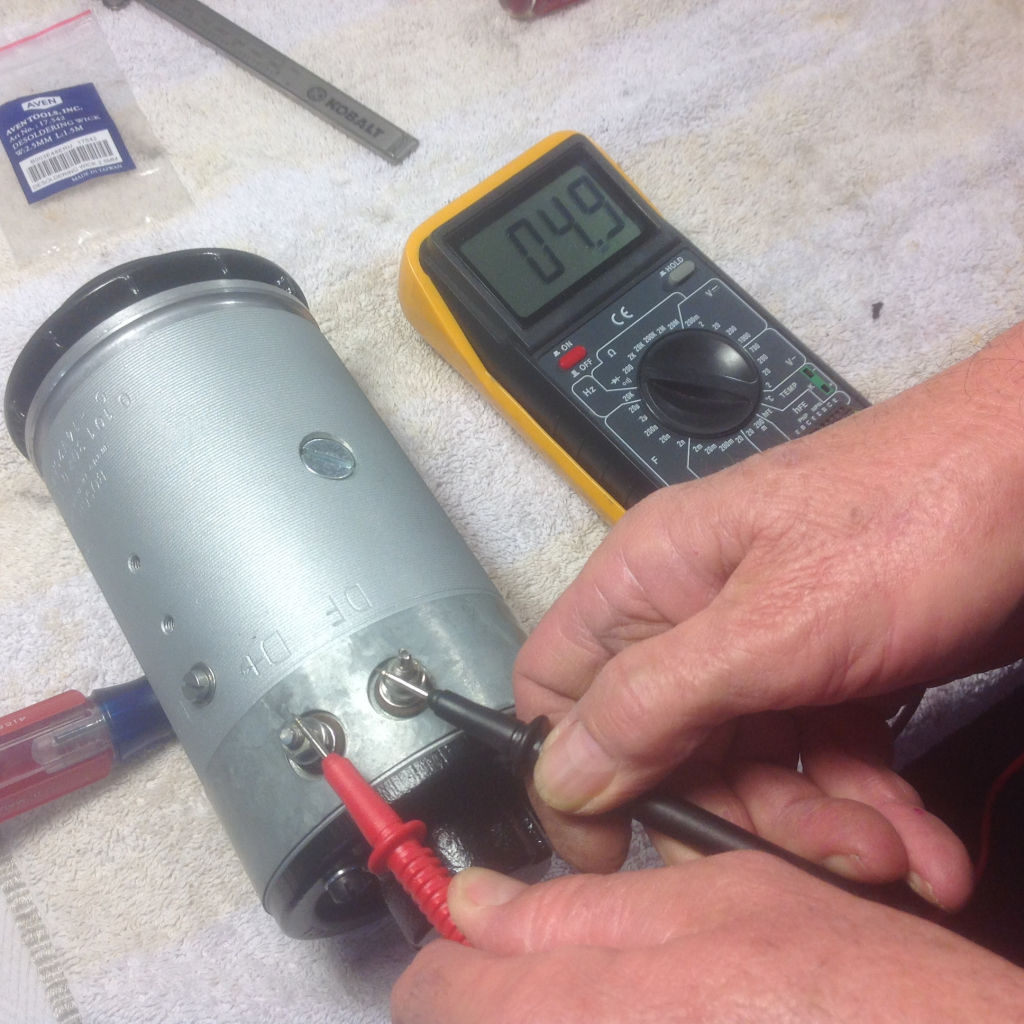
Photo courtesy of Dan Eberhardt.
Run the generator as a motor by installing a jumper
between the DF and D minus positions and connecting to a 12 volt battery. Make sure the generator is secured as it will turn just like an electric motor does. Only connect to the battery momentarily, do not let it run for more than 3 to 5 seconds at a time. Note: this is also the best way to polarize your generator once you have rebuilt it and just prior to putting it back in your bike.
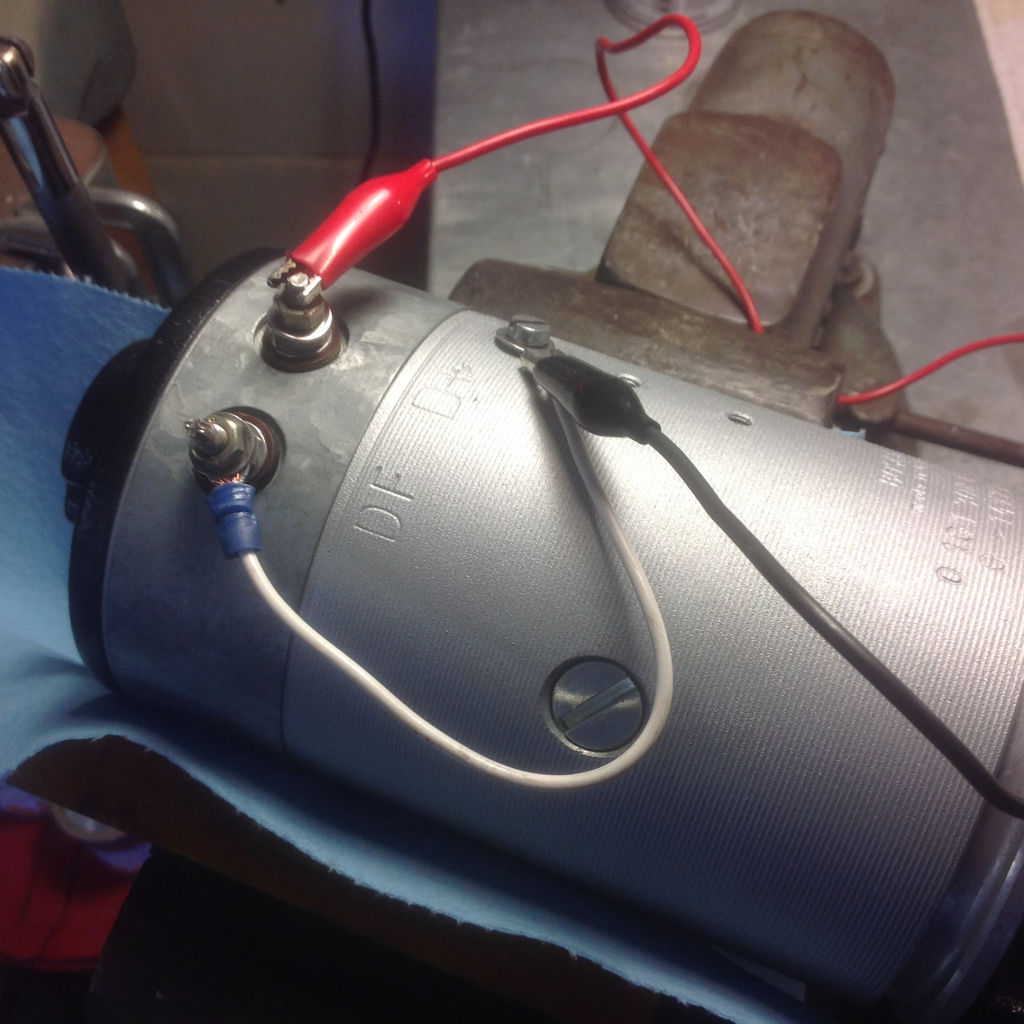
Photo courtesy of Dan Eberhardt.
Step 2: Disassemble the armature
Remove the sheet metal band at the brush end of the generator

Photo courtesy of Dan Eberhardt.
Remove the brushes by first removing the slotted head 5 mm screws, then pull back the tensioning spring with a small 90 degree hook tool to allow enough room to pull the brush out.
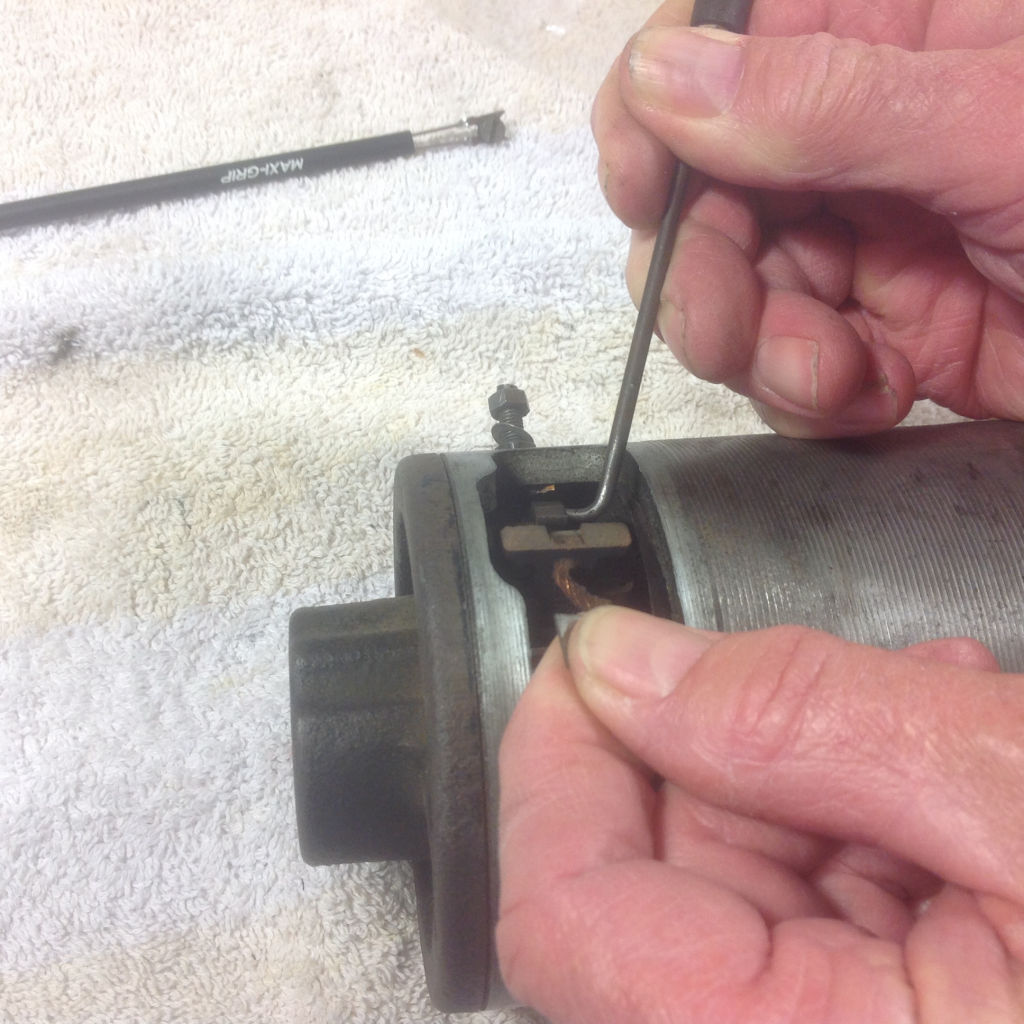
Photo courtesy of Dan Eberhardt.
Remove the two long slotted head 6 mm screws from the brush end of the generator.
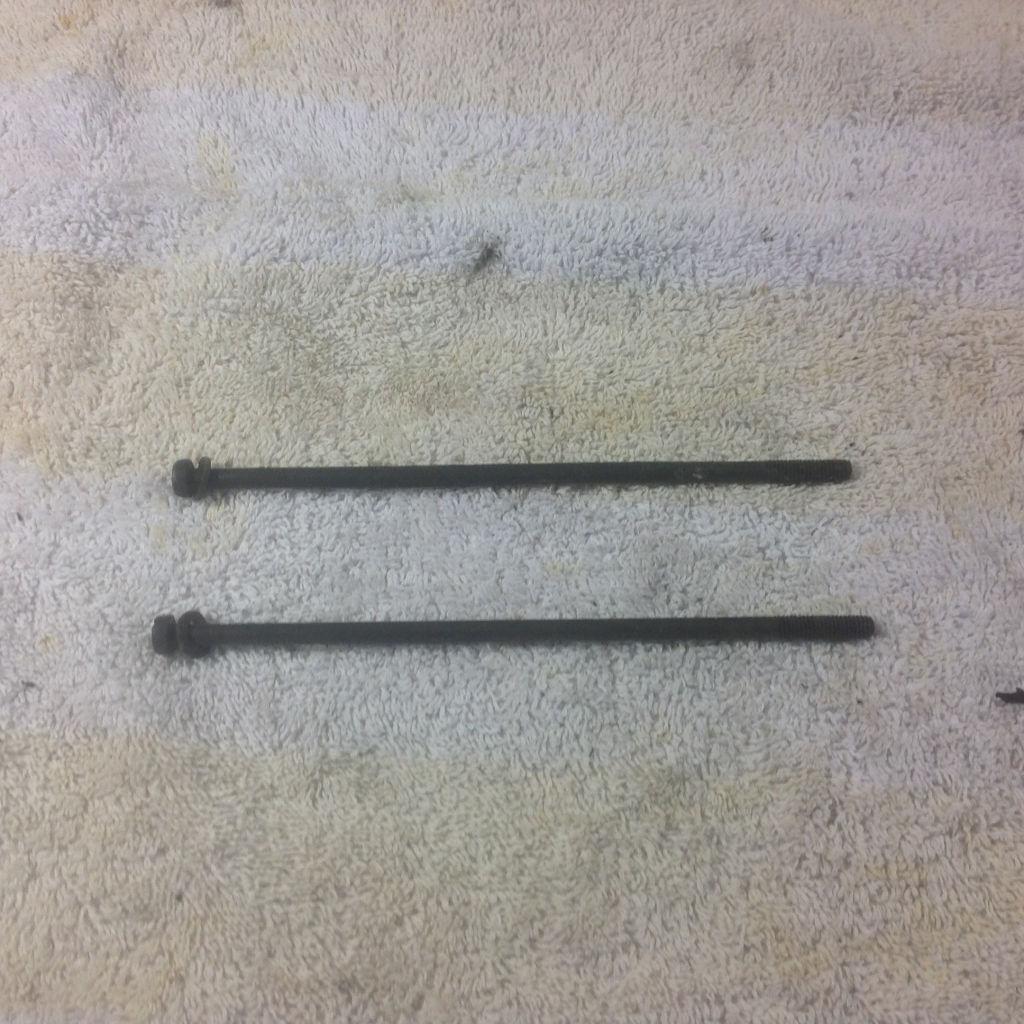
Photo courtesy of Dan Eberhardt.
With the brush end of the generator resting on the bench carefully pull the armature assembly up and out of the generator housing, (you might have to insert a razor knife blade at several locations between the generator housing and the bearing housing to get it moving). Note: be very careful to not allow the armature to damage the field winding insulation which is made out of wax coated crepe paper, even if you are planning on re-wrapping the field windings you don't want to damage the clear insulating coating on the copper field wire. Once removed, put this assembly in a vice using soft jaws
or the equivalent. The picture below shows this assembly removed and in the vice.

Photo courtesy of Dan Eberhardt.
Step 3: Armature disassembly continued
With the armature assembly in soft jaws
vice or the equivalent remove the jam nut and washer in front of the pulley and remove the pulley with preferably a 3 jaw puller. The pulley is susceptible to cracking so go slowly and tap on the puller head occasionally. Once the pulley and the woodruff key are out of the way remove the bearing housing using a 2 jaw puller as shown in the picture below, (you don't want to pull the housing at it's perimeter since it is aluminum and fragile). Be careful not damage the bearing securing plate with the feet of the puller. Once the bearing housing is removed flip it over and a spacer should just fall out.
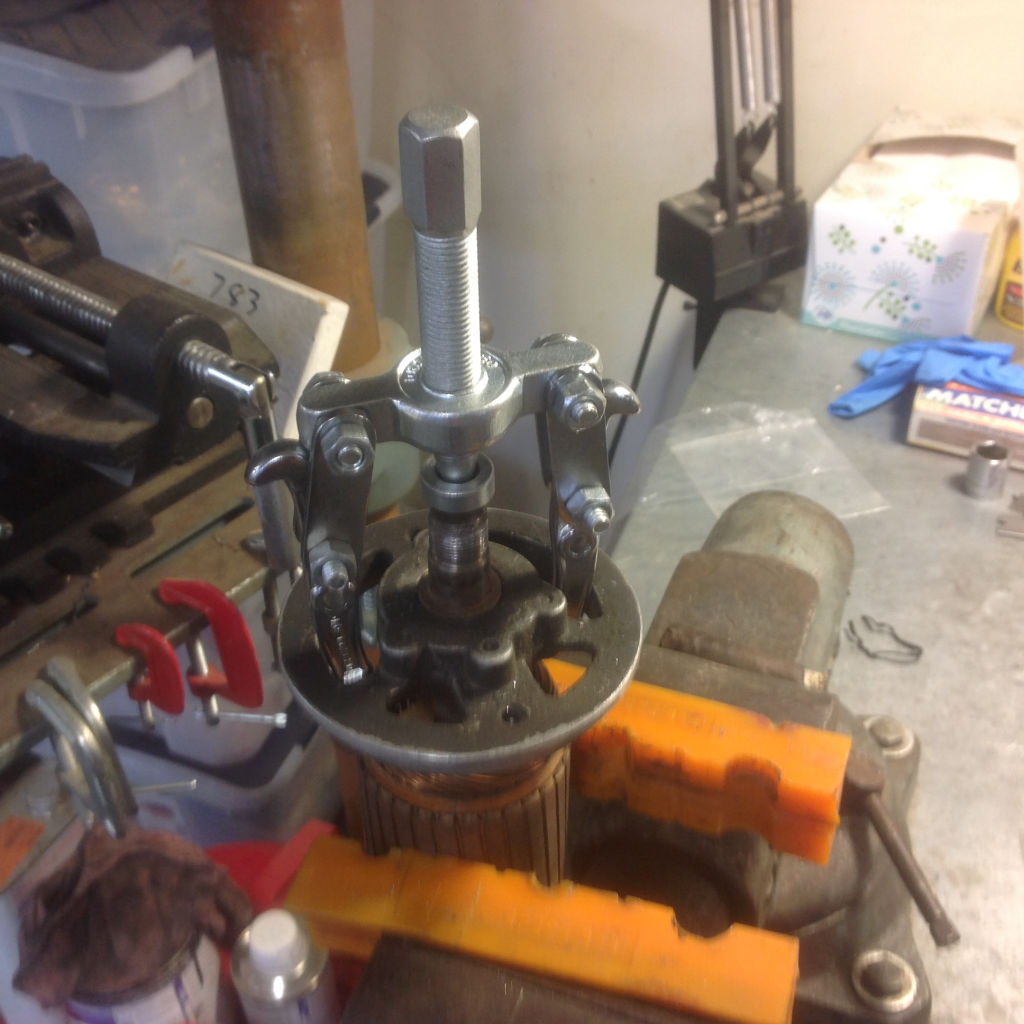
Photo courtesy of Dan Eberhardt.
Next remove the two slotted head 5 mm screws, the bearing securing plate, the bearing and the stainless steel grease shield. Note in the picture below the spacer mentioned above. It fits into the front of the housing assembly in a recess created by the stainless steel grease shield.
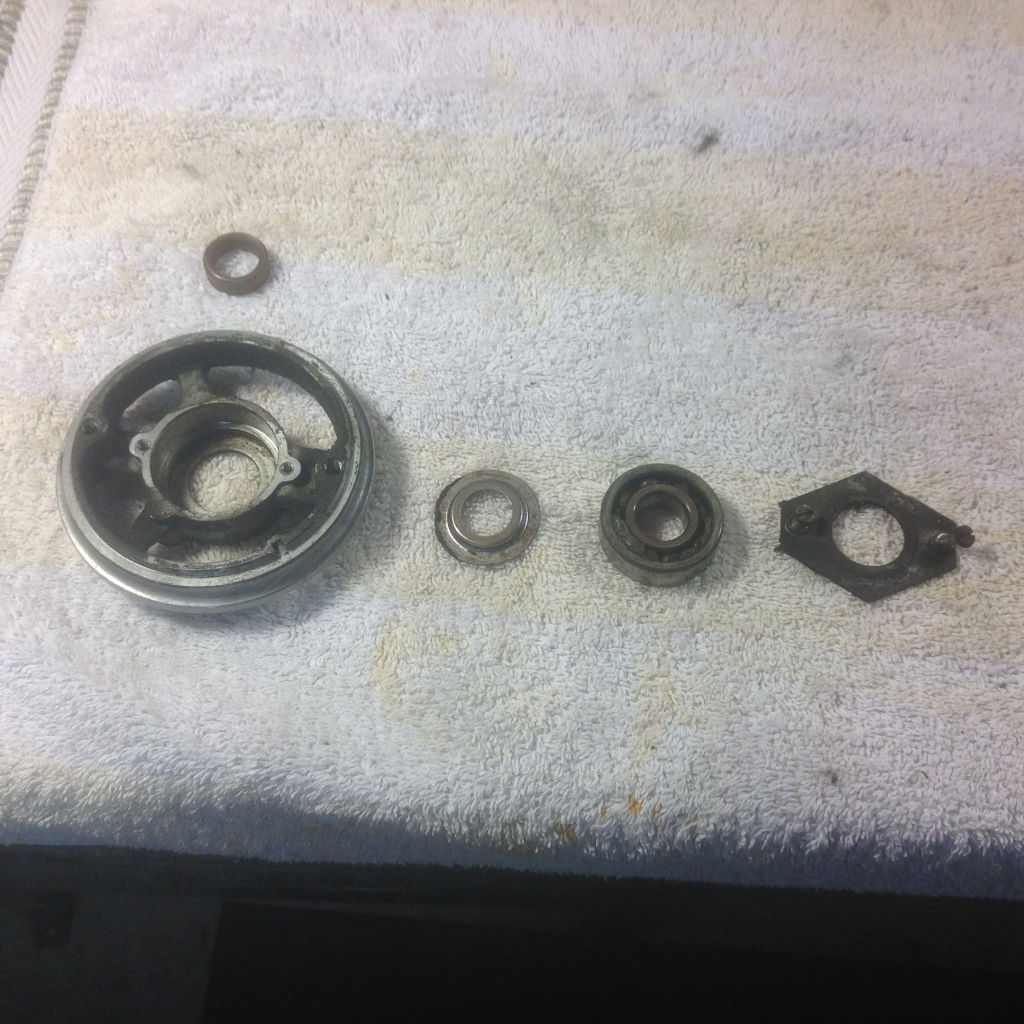
Photo courtesy of Dan Eberhardt.
Flip the armature over and remove the brush end bearing with a bearing separator being careful to not bugger up the copper grease shield. If you do bend it a little it is fairly easy to straighten out.
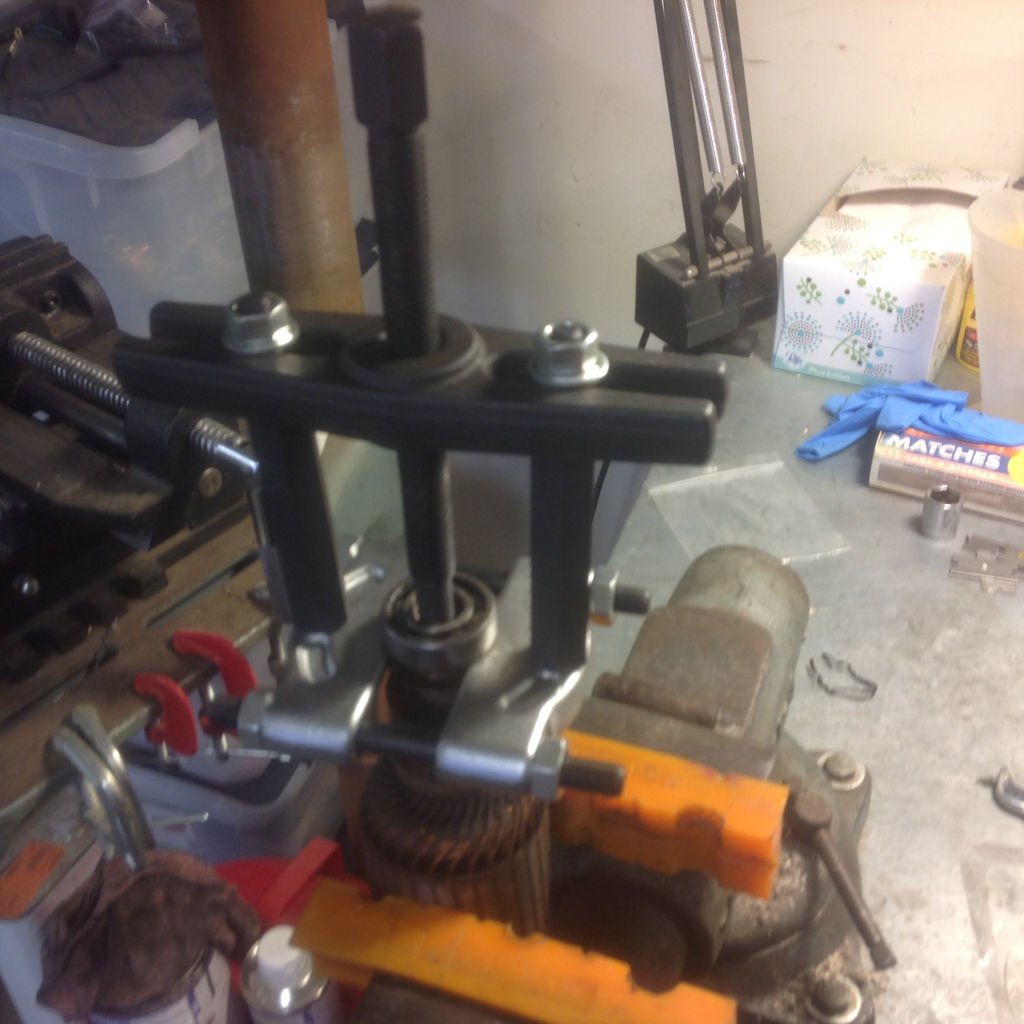
Photo courtesy of Dan Eberhardt.
Next remove the copper grease shield.
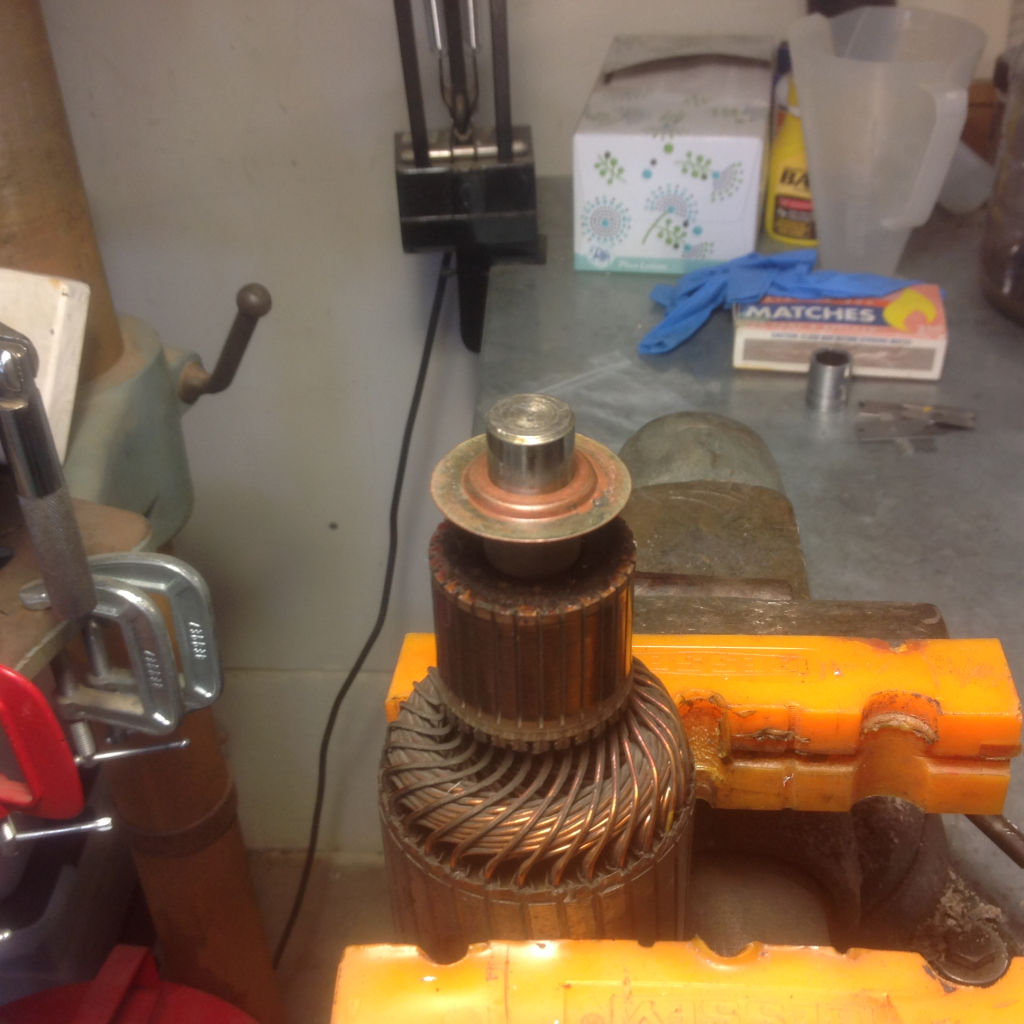
Photo courtesy of Dan Eberhardt.
And now remove the spacer. Note that the spacer is beveled on it's top side.
Step 4: Removing the brush end, pole shoes and windings
With the generator housing on the bench and the brush end facing up remove the one 5 mm slotted head screw. Note for later assembly that this screw goes into the 90 degree flange of the plus side winding connection. Once the screw is removed pull the brush end out of the generator housing, (once again you may need to insert a razor knife blade between the generator housing and the brush housing to get it moving). As Rob Schneider says: You can do it
!!!
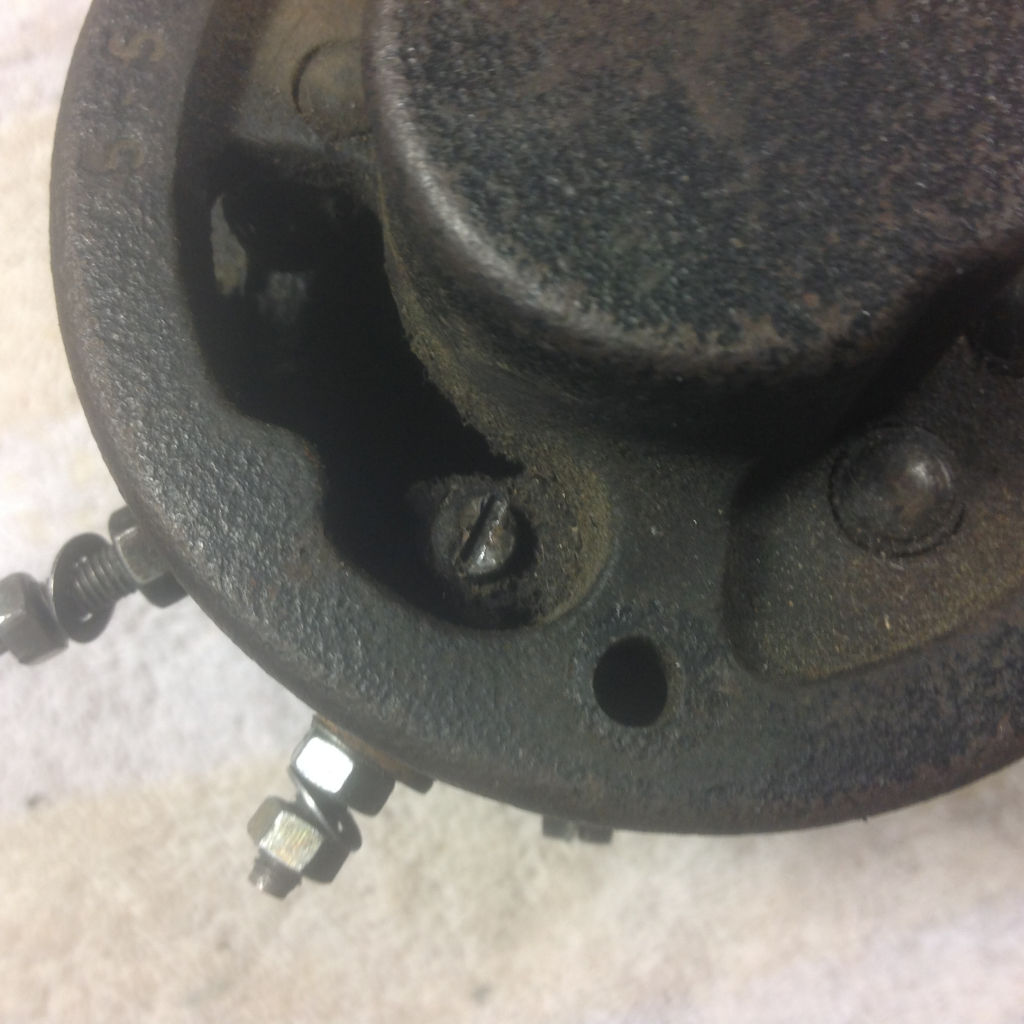
Photo courtesy of Dan Eberhardt.
Disconnect the DF and D Plus
connectors from the generator housing by removing the two nuts and wavy washers at each connector. The DF connector has 4 crimps at the end that will need to be filed down just enough so the nuts and washers may be removed. Note that the D Plus
connector has the 90 degree flange that is threaded to accept the 5 mm screw which attaches the brush housing previously removed. Also each connector has 2 each round fiber washers, 1 each fiber ferule and 1 each square fiber washer which conforms to the generator housing radius. Once the connectors are disconnected just push them to the inside of the housing.
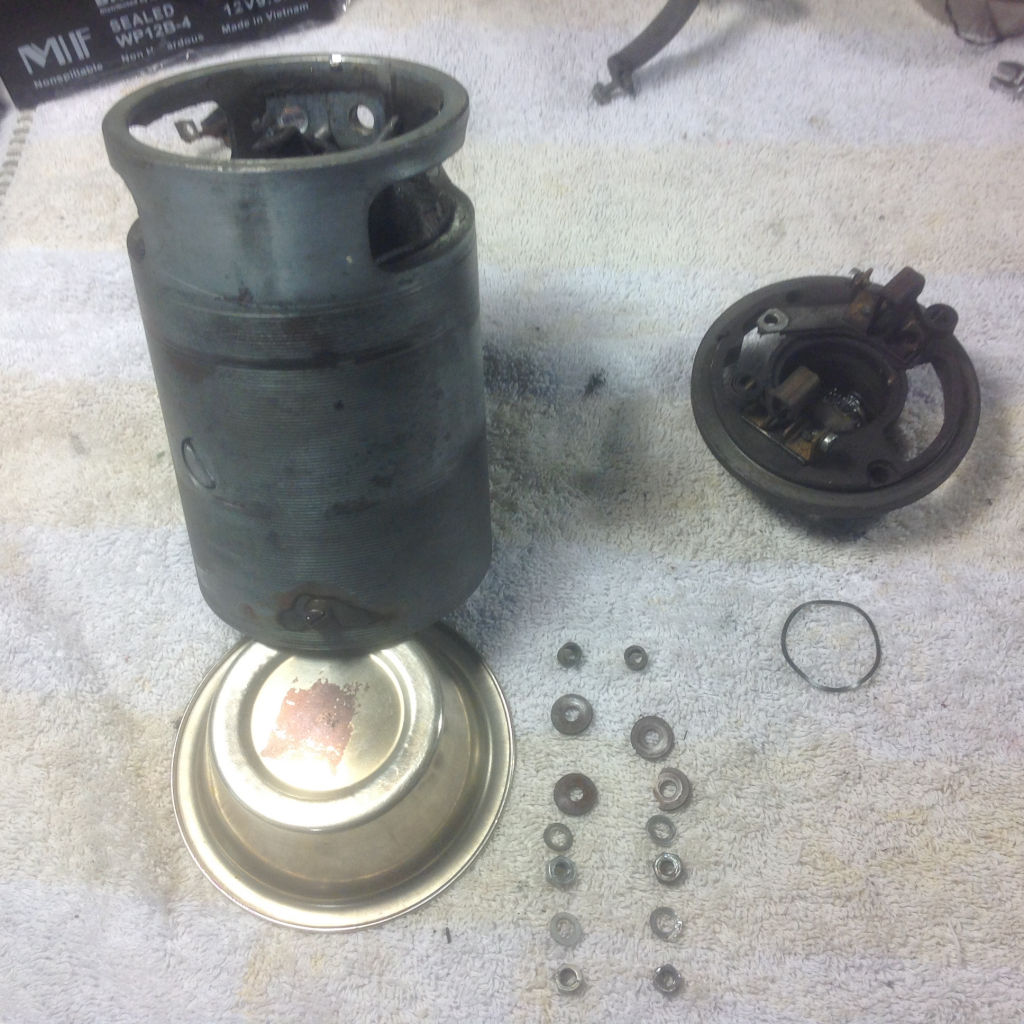
Photo courtesy of Dan Eberhardt.
Now it's time to remove the 2 each pole shoe screws. Make sure to mark the steel pole shoes DF and D Plus
before you remove them as they are not interchangeable. It's best to have let the pole shoe screws soak in some PB Blaster or equivalent Snake Oil
for a few days if possible since they can be hard to remove. The best way I have found to remove them is with a pneumatic impact wrench with a 1⁄2 inch wide impact driver flat screwdriver bit. Sometimes an easy out
is the only thing that works. Just make sure to stay in the center of the screw so you don't damage the pole shoe threads. You can purchase new pole shoe screws from Harper Moto MG# 10700224 for USD $3.88 each.
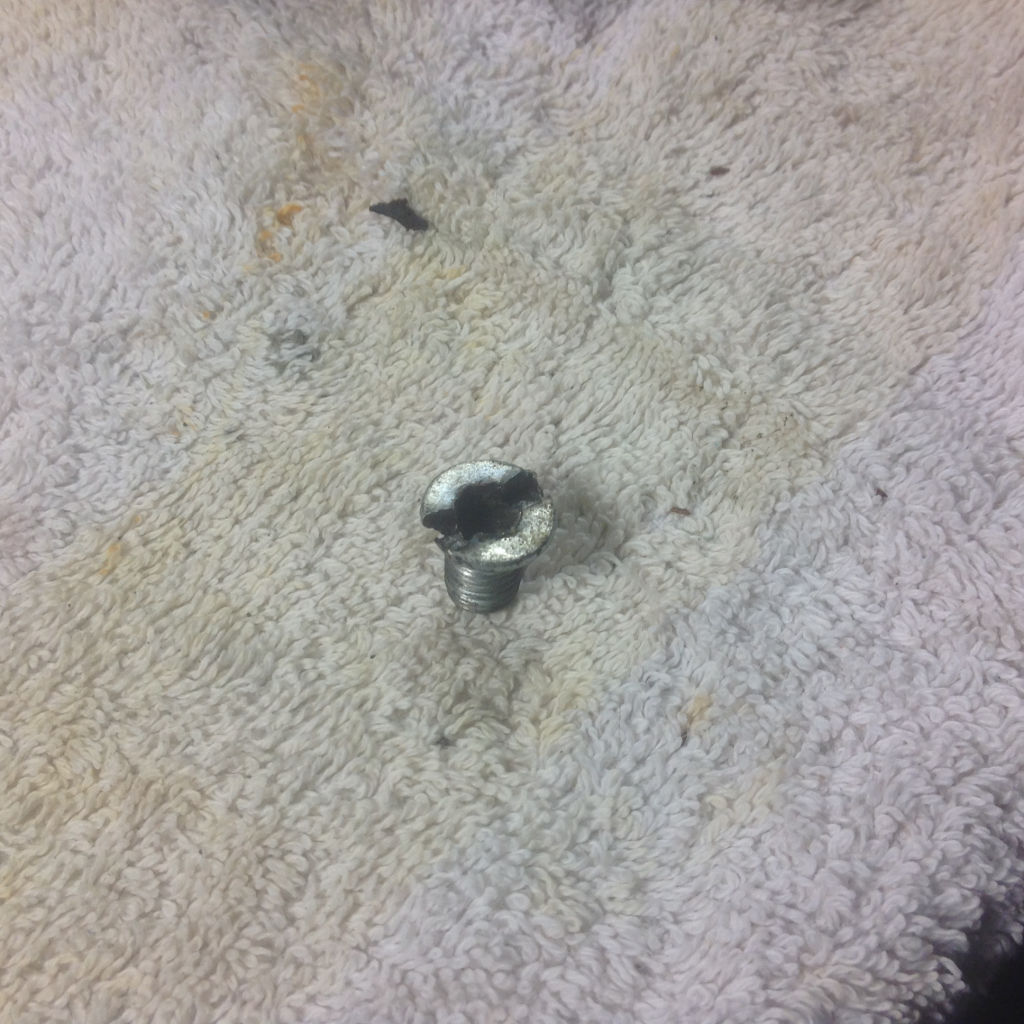
Photo courtesy of Dan Eberhardt.
Once you finally have the pole shoe screws out, remove the steel pole shoes and windings. The two windings will be soldered together. If you plan on re-wrapping the windings which is highly suggested get out your soldering iron and melt the solder so the two windings may be separated.
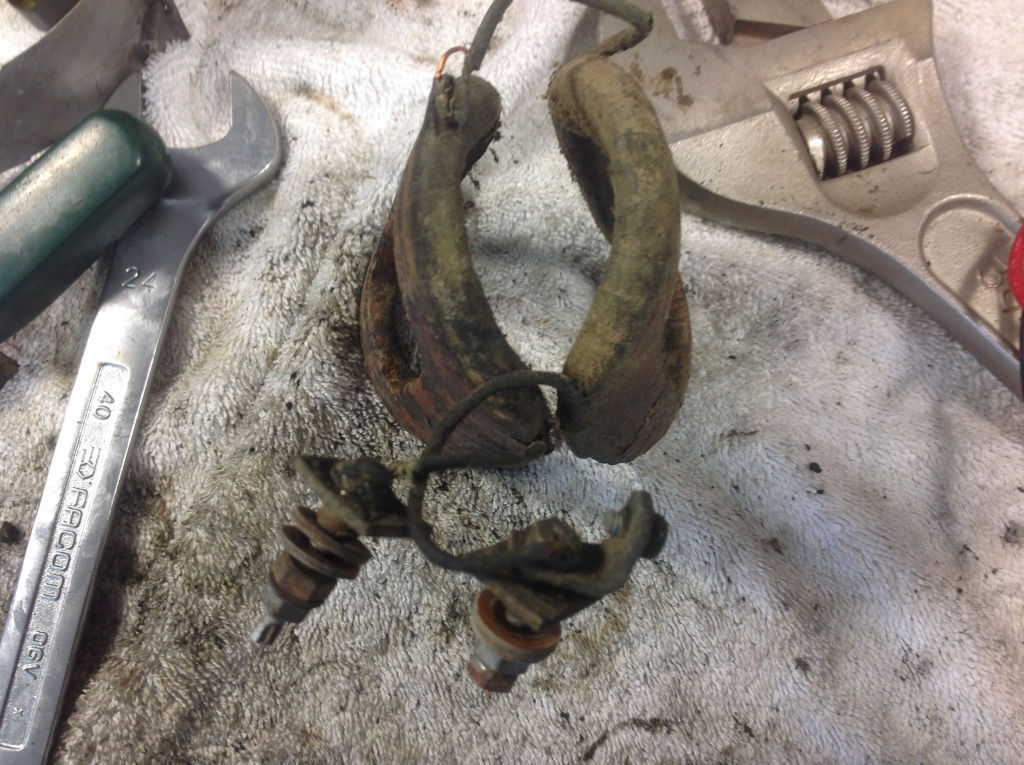
Photo courtesy of Dan Eberhardt.
Step 5: Clean parts and prepare for paint
Now that everything is disassembled, clean all of the metal and aluminum parts with Stoddard
solvent (aka Mineral Spirits). Do not clean the armature in solvent. Check the generator housing for wear at the locating stud as the housing usually shows quite a bit of wear at this area from previously rattling against the engine block cradle due to a broken or loose generator bracket occurring sometime in it's past history. The picture below shows this typical wear.
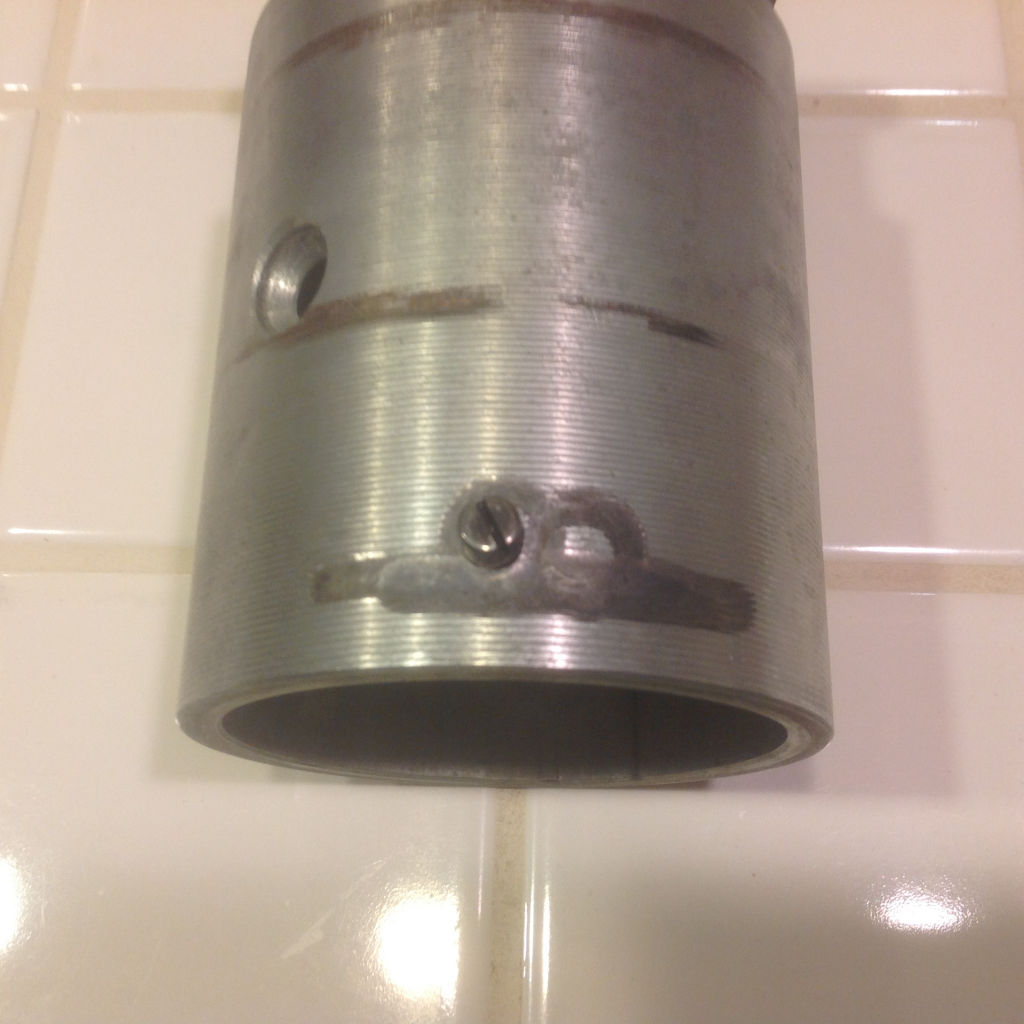
Photo courtesy of Dan Eberhardt.
It's a good idea to fill these divots
with JB Weld. I like to insert a silicone plug flush with the surface at the stud threaded area since it makes spreading the JB Weld across the hole much easier.
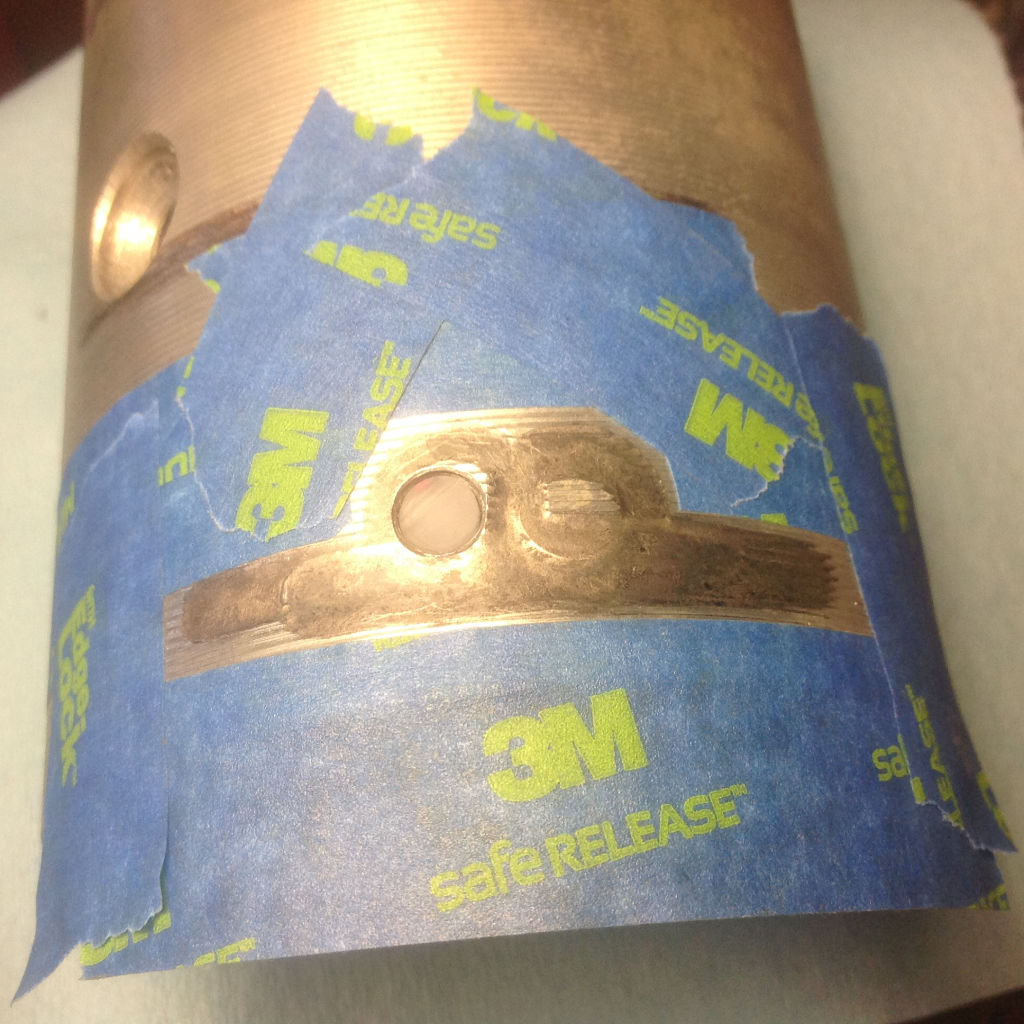
Photo courtesy of Dan Eberhardt.
The picture below shows the JB Weld filling in the divots.
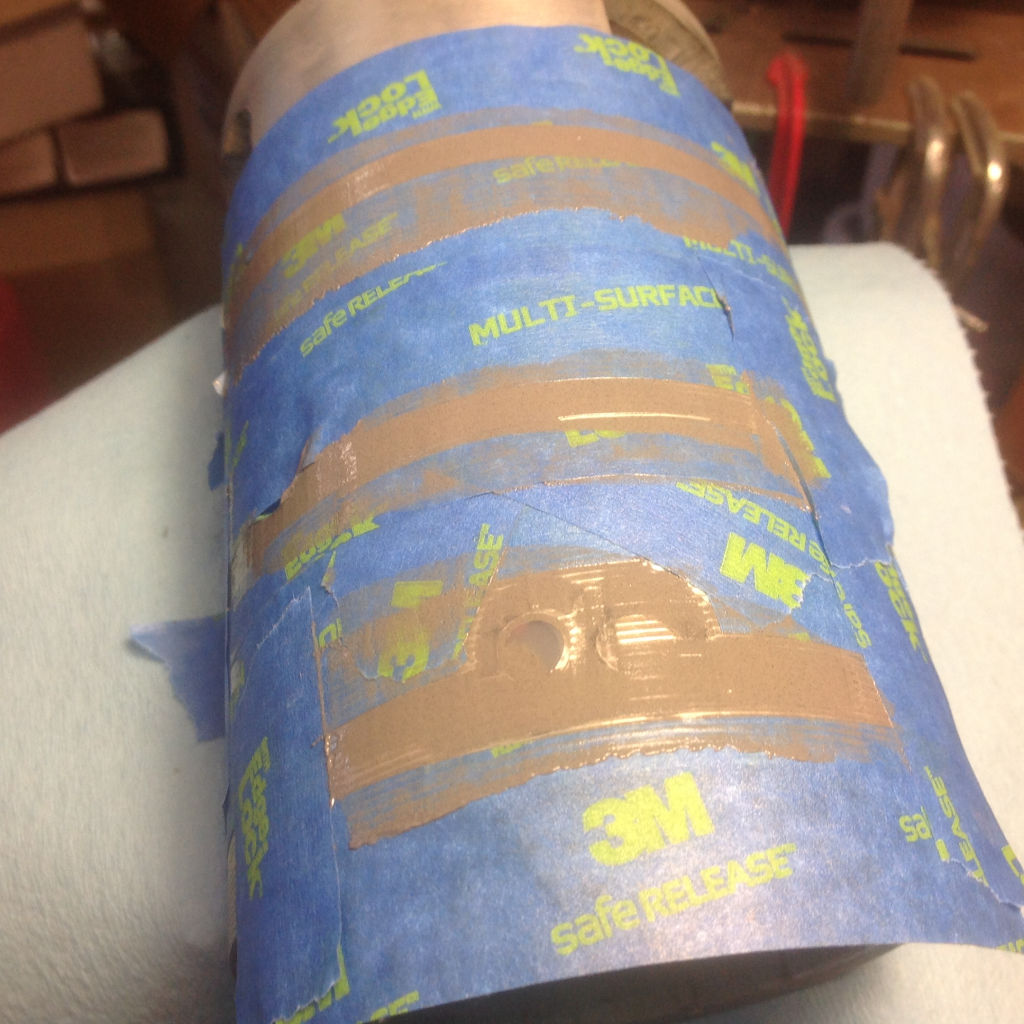
Photo courtesy of Dan Eberhardt.
I like to paint the outside of the generator housing with CRC brand Bright Zinc-It
Instant Cold Galvanize paint. Semi gloss black paint works great for the brush end housing and the pulley. I mask off where the v belt rides in the pulley with and old piece of v belt cut to go around the circumference.
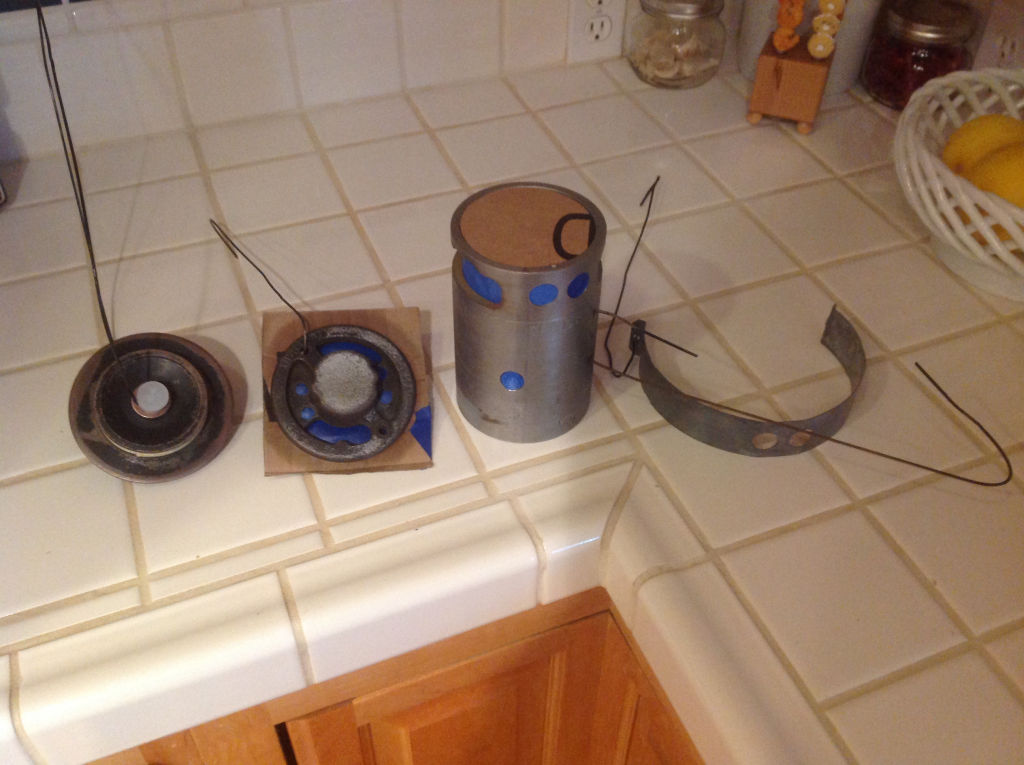
Photo courtesy of Dan Eberhardt.
Clean up the commutator end of the armature with some fine crocus cloth until it is a nice bright copper color using a back and forth motion being very careful to not slip onto any of the winding wires. Make sure to clean out the spaces between the copper commutator segments with a wood toothpick. Clean the rust off of the iron segments in the same fashion. Once all the sanding is done clean the copper and metal segments with a soft rag soaked with contact cleaner. Note: Bosch recommends that the commutator out-of-round should not exceed 0.015 inch and that the depth of the space to the insulating mica between the copper segments should be at least 0.012 inch. I just eyeball
this depth and pray to the Guzzi gods that my commutator is not out of round. It seems to have worked in the past.
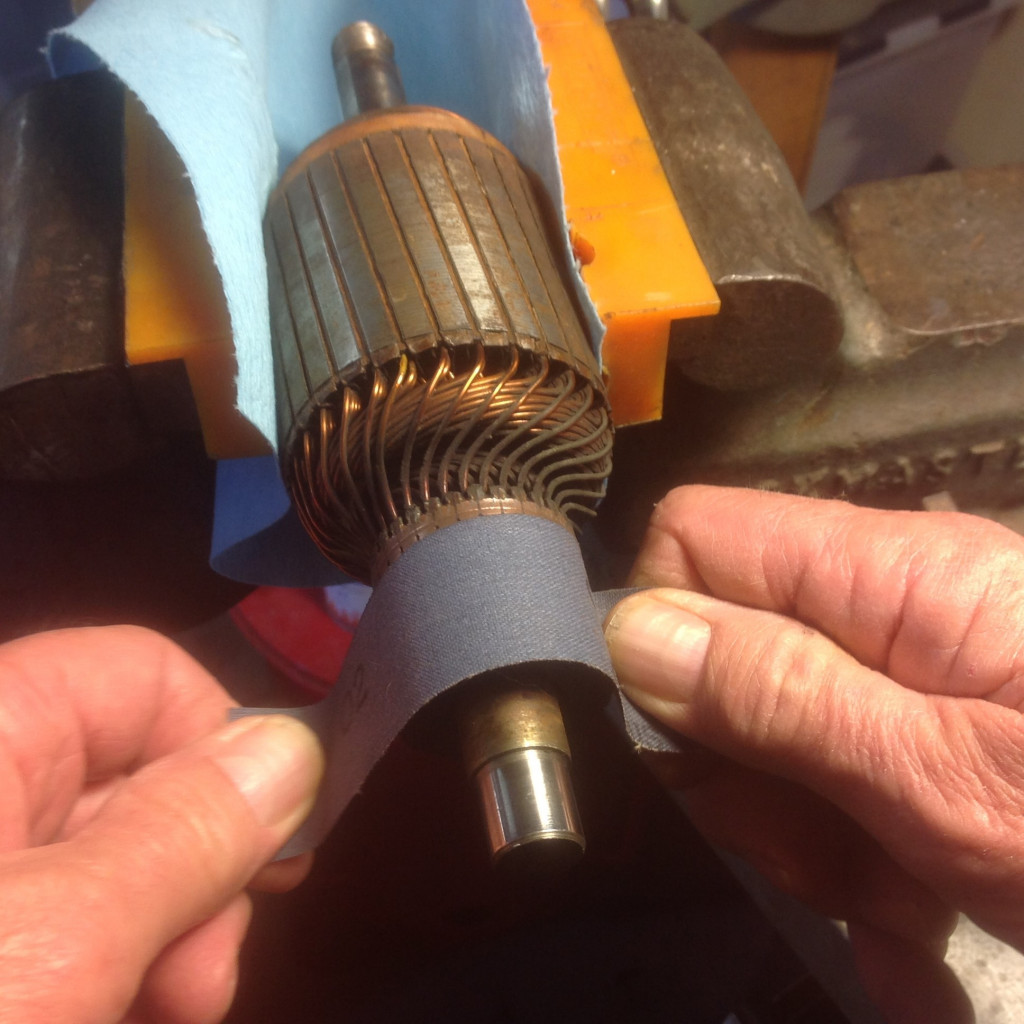
Photo courtesy of Dan Eberhardt.
Cleaned up armature. Note that on the left side (pulley side) of the armature there is a spacer. This spacer should not be removed but it should rotate freely.
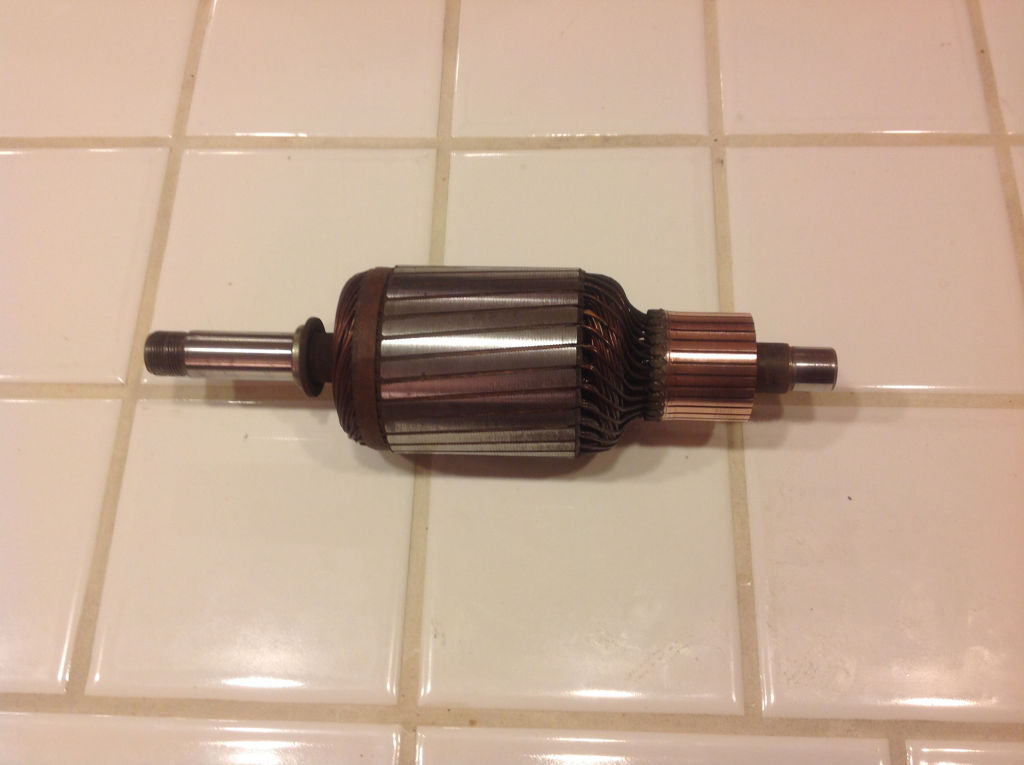
Photo courtesy of Dan Eberhardt.
Step 6: Wrap the windings
Remove the 40 plus years old wax coated insulating crepe paper from the windings in preparation for re-wrapping them. Once the old paper is off put a few pieces of the new insulation tape (1⁄2 inch wide Scotch 27 Glass Cloth Electrical Tape - Class B
Insulation) around the windings to hold them in place. With the windings unwrapped and prior to re-wrapping them, now is a good time to check the condition of the wire insulation on the connector ends. If it is brittle or otherwise damaged, unsolder the connection from the lead and slip on some heat shrink tubing and shrink it on. I use 1⁄8 inch tubing with red for the plus side and blue for the field side similar to the way the factory did it. The set shown in this picture did not need this added heat shrink, However, I have included a few pictures below where this fix was required.
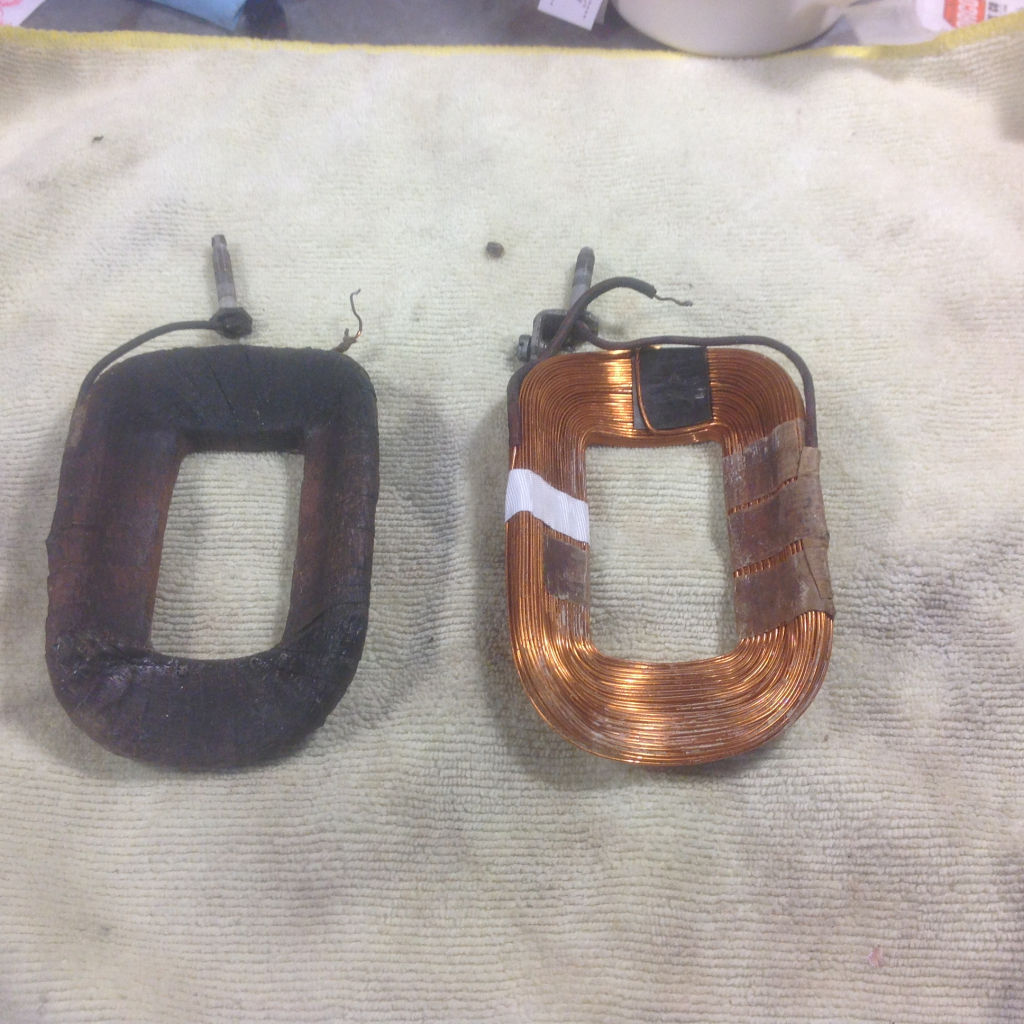
Photo courtesy of Dan Eberhardt.
Overlap the new insulation by 3⁄16 inch to 1⁄4 inch (roughly half) as you wrap the winding.
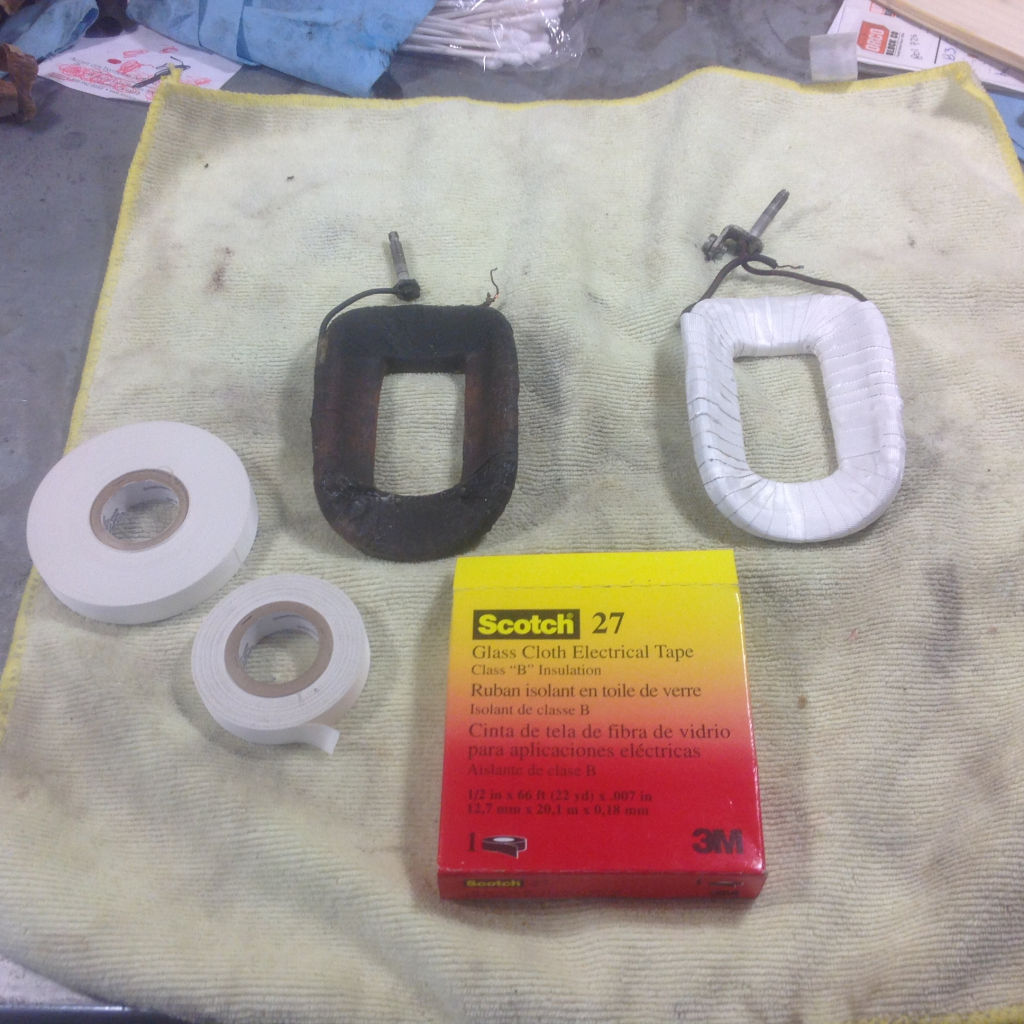
Photo courtesy of Dan Eberhardt.
Once the windings are re-wrapped solder the connections back on. Prior to soldering the two windings back together I like to check the resistance of each winding by itself. The resistance of the individual winding should be about 2.5 ohms.
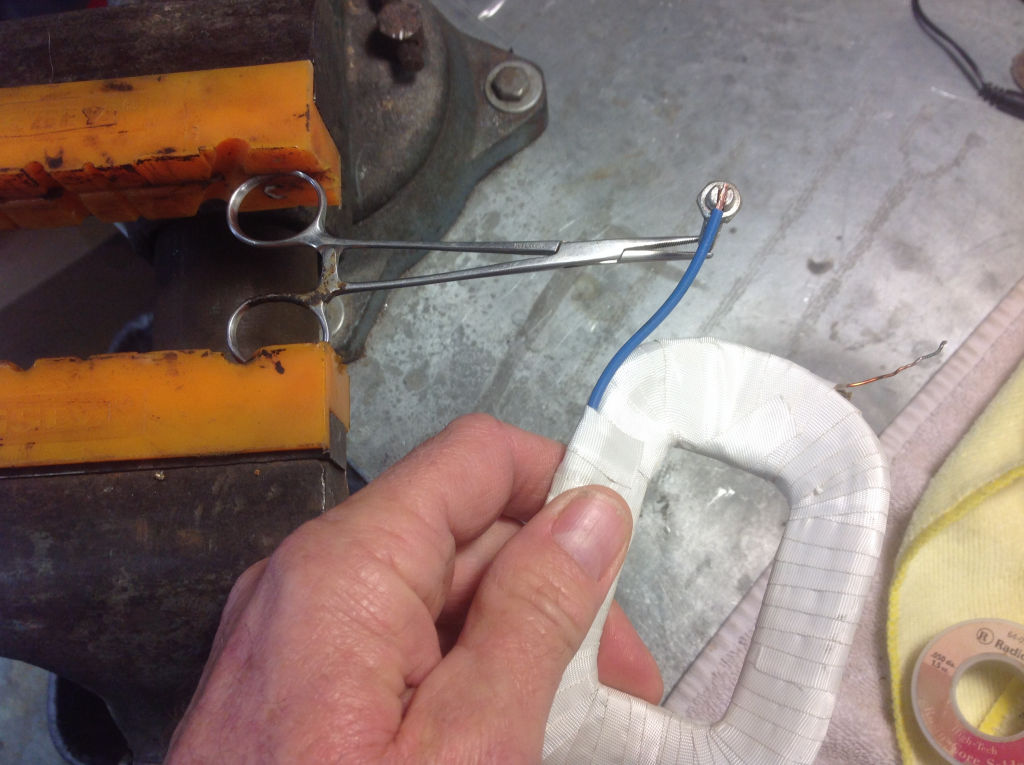
Photo courtesy of Dan Eberhardt.
Now solder the two windings back together. When soldering the two windings back together it's a good idea to slip some heat shrink on and fold the soldered end over so the heat shrink will slip over it. In the photo below I have some white heat shrink slipped over some other white heat shrink so it is hard to see.
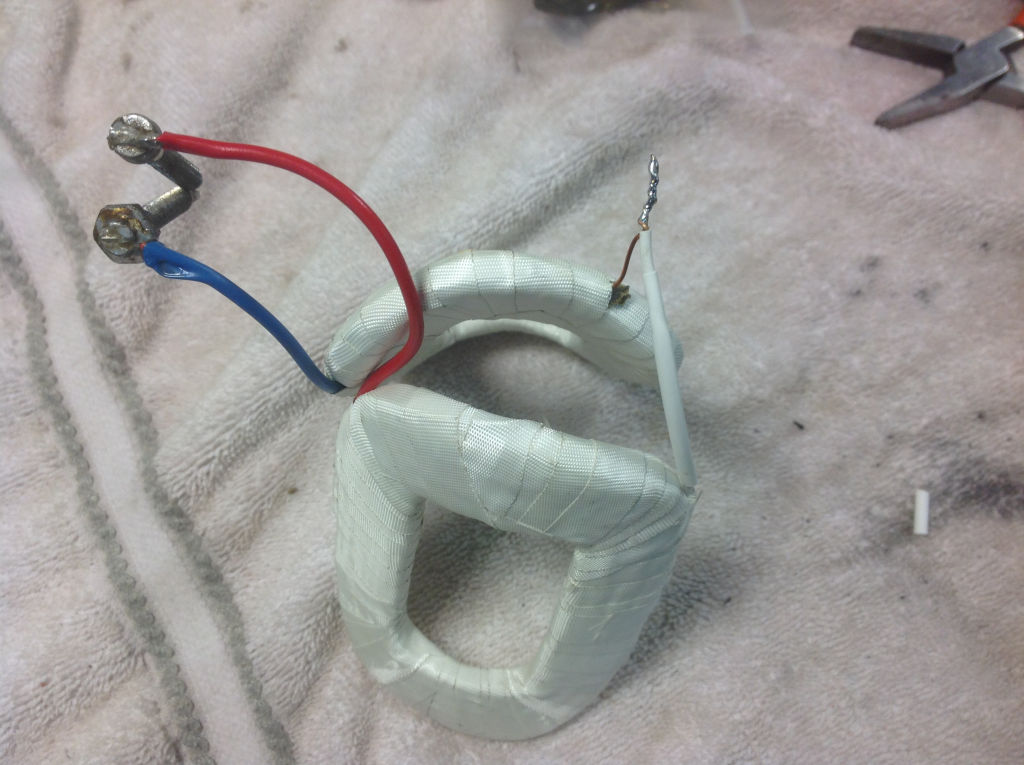
Photo courtesy of Dan Eberhardt.
You probably noticed when you were cleaning the generator housing that there was a piece of coated paper at the brush end. This piece of paper may be replaced with two pieces of the new insulating tape and should extend into the brush access opening about 1⁄8 inch.
Step 6a: Install the windings
Install the windings, pole shoes and DF and D Plus connectors into the generator. Remember to install the pole shoes the same way you previously marked them as they are not interchangeable. Remember the D Plus connector is red and has the 90 degree bend on the end that the brush end attaches to. Each connector has a fiber insulation ferrule, 2 each round fiber washers and a square fiber insulator and two wavy washers. You will notice that the square fiber insulators do not have the holes in the center. Face the long side towards each other as shown in the photo below. Remember to use some Blue
thread locker on the 10 mm pole shoe screws and tighten them very
tight. Like Austin Powers says: Toyt like a Toyger
.
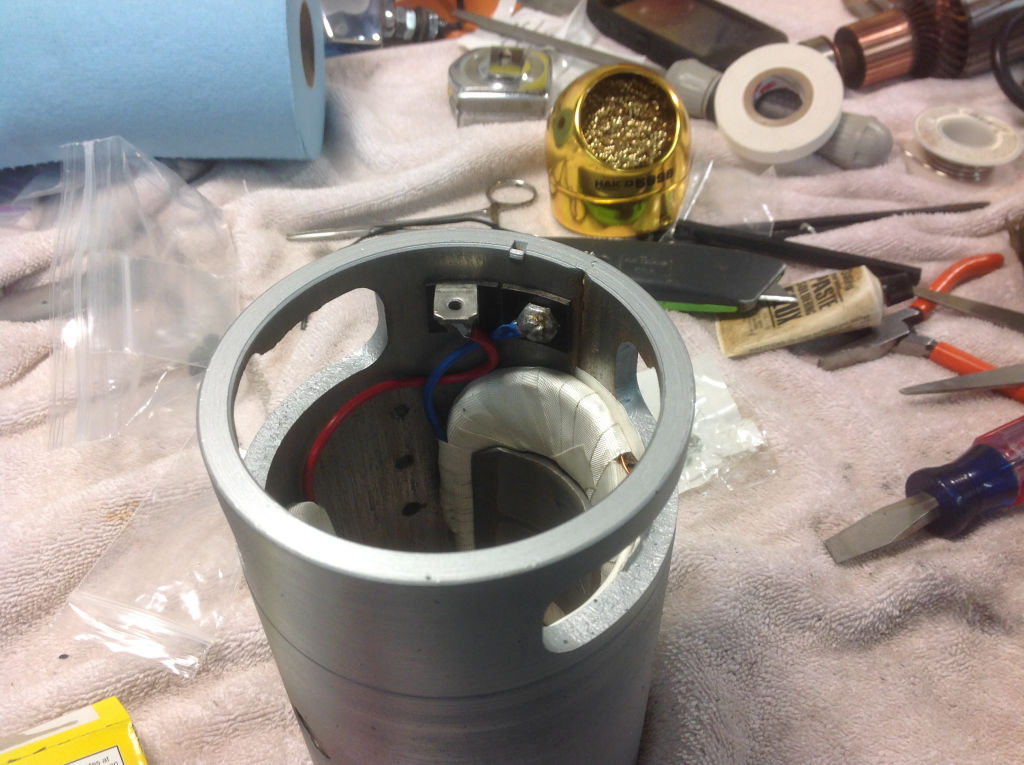
Photo courtesy of Dan Eberhardt.
Photo courtesy of Philip Santora.
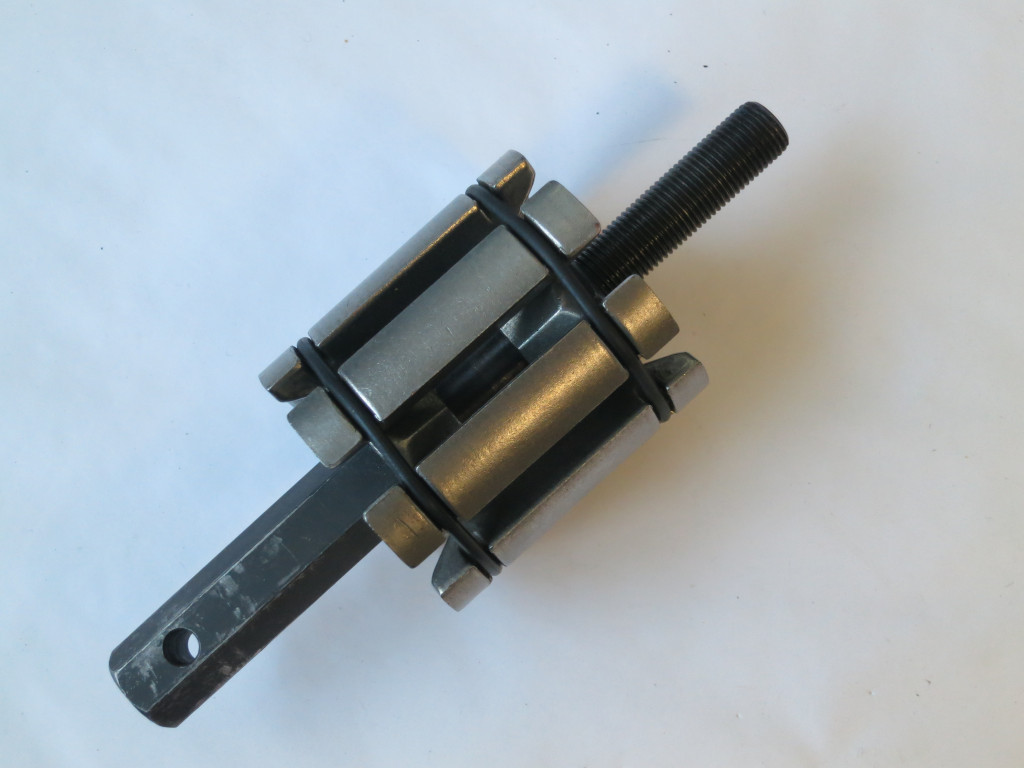
Photo courtesy of Philip Santora.
Step 7: Assemble the armature
Now onto putting the armature back together. Slip the collar onto the shaft at the commutator side taking note to remember to put the beveled side of the collar facing up. The bevel will fit into the concave portion of the copper grease shield which is slid onto the shaft next. Then install the bearing. The bearing has a friction fit
on the shaft and may be tapped onto the shaft using the collar that installs on the pulley side of the armature, but make sure to put something on top of it like a small block of wood to protect it when you tap the bearing on to solidly seat against the copper grease shield. You may also use a socket or piece of pipe that closely matches the inner race of the bearing. You do not want to apply any force to the outer race of the bearing. Note: the original bearings used in these generators was not a protected
bearing and required re-packing throughout it's life span. After researching which bearings to use for this particular application I have concluded that a shielded
bearing is a better application than a sealed
bearing. Mainly because a shielded
bearing has less friction than a sealed
bearing. Use a 6202-ZZC3 bearing at the commutator end and a 6203-ZZC3 at the pulley end.
The picture below shows the pieces laid out ready to be assembled.
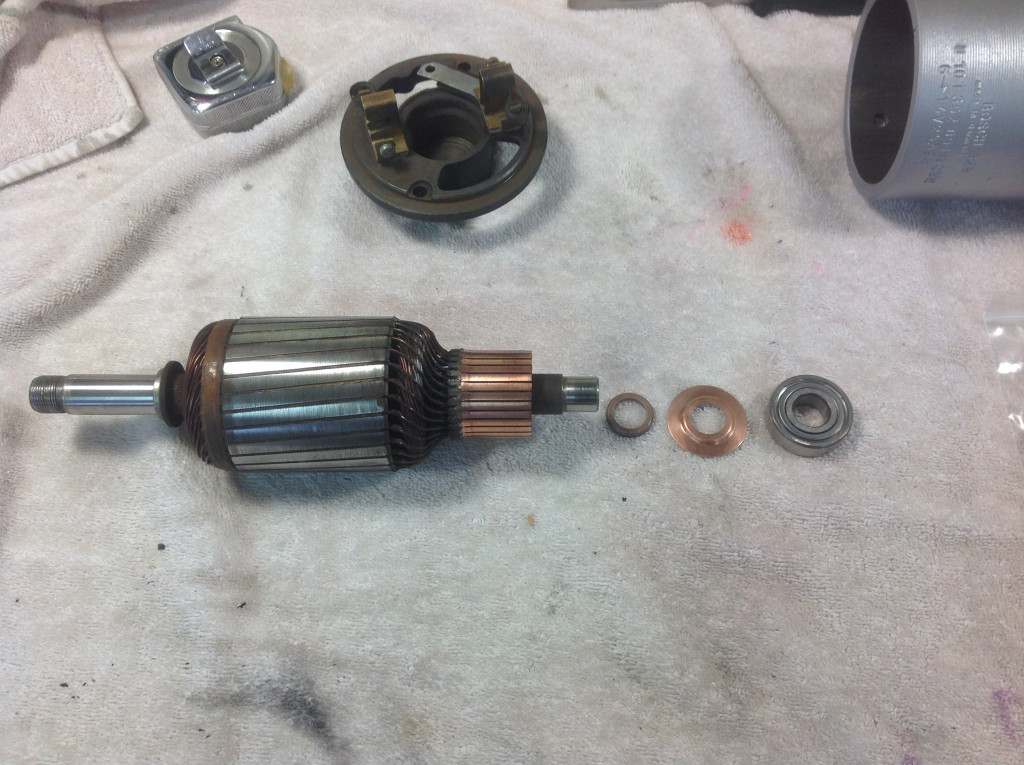
Photo courtesy of Dan Eberhardt.
The picture below shows the pieces assembled.
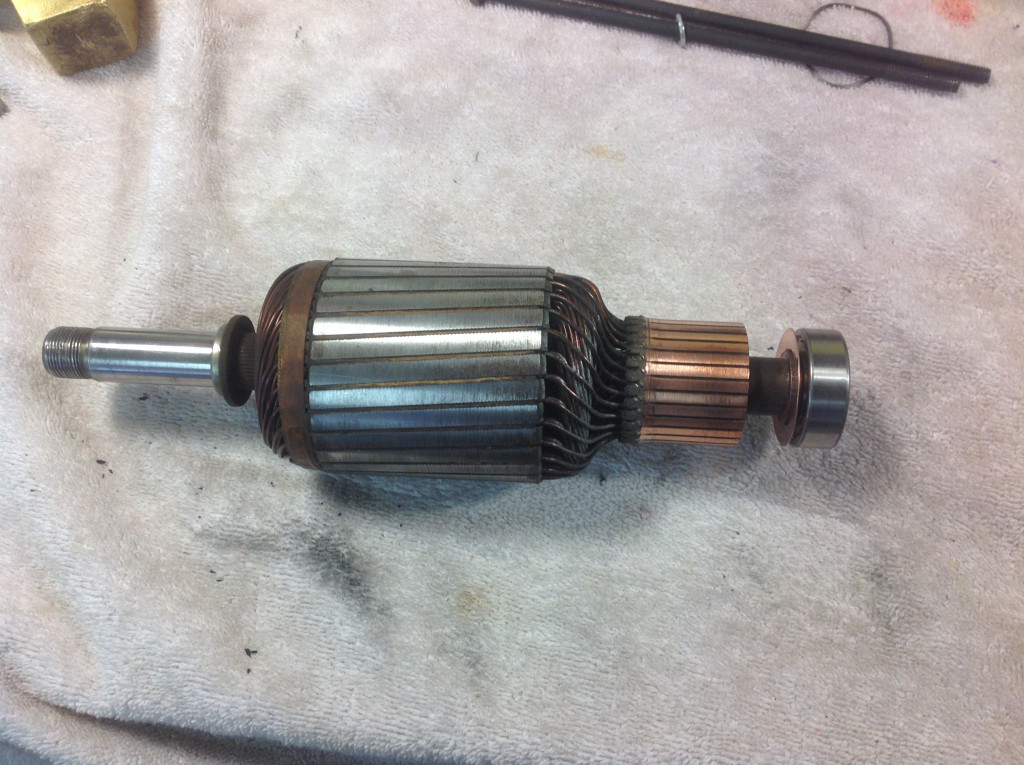
Photo courtesy of Dan Eberhardt.
Now it's time to assemble the pulley side bearing housing assembly and the pulley. Insert the stainless steel grease shield into the pulley housing assembly with the concave side facing down (it will accept the collar on the outside of the housing). Slip in the shielded
bearing type 6203-ZZC3. I like to coat the outside of the bearing and the inside of the housing with a very light coating of grease to protect against any oxidation that might want to occur. Install the bearing retaining plate with the 2 slotted head 4 mm screws and new
4 mm lock washers and blue
thread locker. After 40 plus years of being compressed those old 4 mm lock washers don't have much lock
left in them.
The picture below shows the bearing housing parts laid out for assembly.
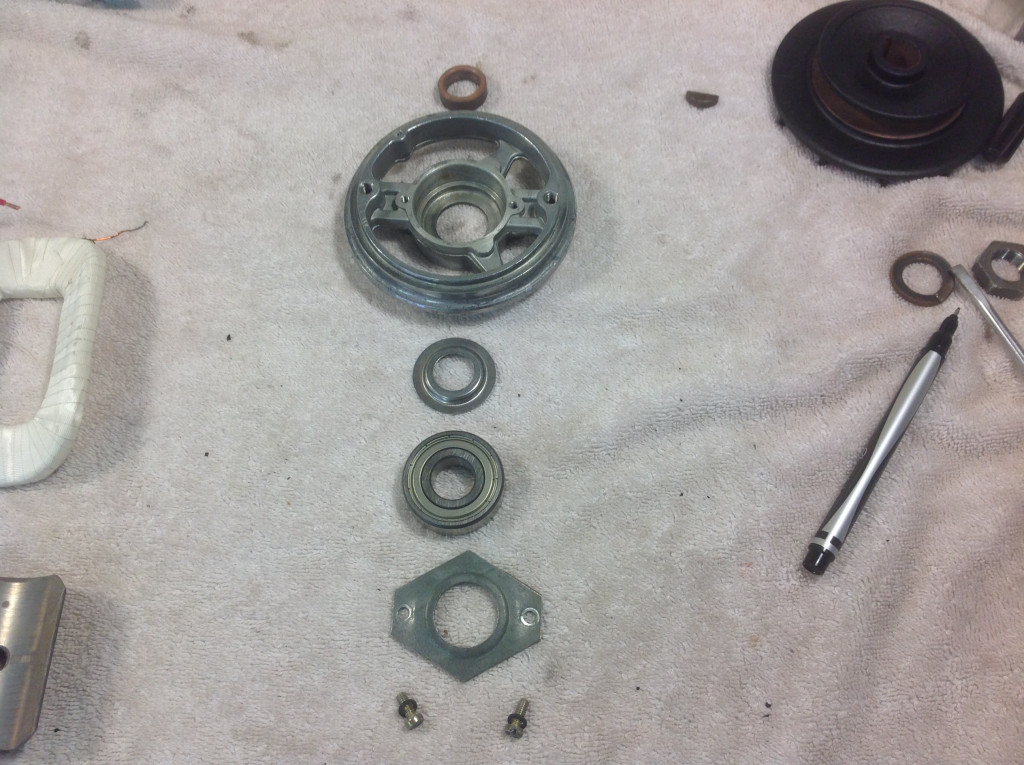
Photo courtesy of Dan Eberhardt.
Put a very light coat of grease on the armature shaft at the pulley side and slip the assembled housing onto the shaft and tap it onto the shaft using a 7⁄8 inch or equivalent socket until it is past the threaded portion and a bit of the smooth portion of the shaft is showing. Now slip the the bronze collar onto the shaft making sure to face the beveled side of the collar towards the housing assembly. Using a 3⁄4 inch deep set socket or equivalent tap the collar into the housing assembly and continue to drive this assembly on until it is completely seated. Put a light coat of grease on the woodruff key and slip it into the slot provided for it on the shaft. Slip the pulley onto the shaft and align the slot in the pulley with the woodruff key. As you slide the pulley over the woodruff key watch the back of the key and if it starts to rise up tap it back down with a flat tip screw driver and plastic mallet/hammer. Clamp the assembly in a vice with soft jaws and then put on the lock washer and nut and tighten the nut down snug using blue thread blocker. I like to use thread locker rather than too much torque here since those fine threads are easily damaged. Sometimes when this fine threaded nut is removed during disassembly the threads on the armature shaft get trashed
. When that happens I find someone who has a lathe and I have them turn down this threaded portion to 14 mm with some taper on the end for ease of starting my die and then I re-thread the turned down section using a 14 mm × 1.5 mm die. 14 mm × 1.5 mm jam nuts are readily available.
The picture below shows the completely assembled armature assembly.
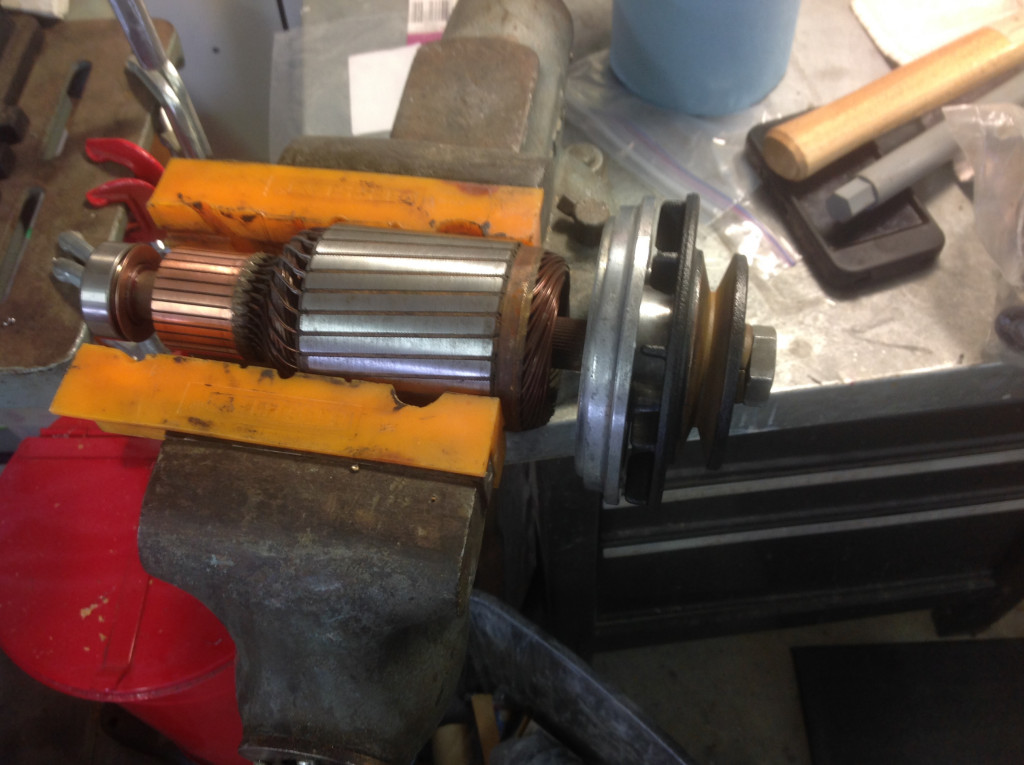
Photo courtesy of Dan Eberhardt.
Step 8: Final Assembly
For the final assembly grease up the thin squiggly
washer and lay it into the recess of the brush assembly housing. The grease will hold the washer in the the brush assembly while you fasten this assembly to the generator housing. There is only one way the brush assembly will go into the generator housing as a result of a small hole in the brush housing that matches up with a crimp
in the generator housing. Once these two items are aligned, the brush housing will seat itself to the generator housing and you will then fasten the two housings together with the 4 mm slotted head screw and lock washer (remember to use a new lock washer). Now that these two assemblies are together shine a light down the generator housing to verify the squiggly washer is still in place in the brush housing. Now insert the completed armature assembly into the generator housing being careful as you lower it in that you don't damage or come in contact with the field windings. Once the armature assembly makes contact with the generator housing rotate the pulley bearing assembly until you feel it drop
into the generator housing, (there is a hole and a crimp just like at the bushing assembly end so you can't get it wrong). Now fasten everything together with the two long 6 mm slotted head screws with new lock washers. Sometimes the field wire leads get in the way and you have to gently move them so they are out of the way of the long screws. Just don't let these leads get pinched between the long screws and the generator housing, but make sure the field wire leads are out of the way of the rotating armature as well. Now install your new brushes, (12 volt VW generator brushes only cost about USD $5.00 for both of them and they work great) by pulling the spring back far enough to allow you to insert the brush into the brush holder noting that there is a bevel on one side of the back of the brush that the spring rides against. Once each brush is in, connect the leads with the 4 mm slotted head screw and new lock washer. Lastly, install the sheet metal piece over the brush openings and you are finally done. Take a Victory
lap around your friends and family to remind them that you are the Man
because you just rebuilt your generator!!! Oh yeah!!!
Be sure to polarize the completed generator prior to putting it back in your Dream Machine
(see testing at the very beginning of this write up for instructions).
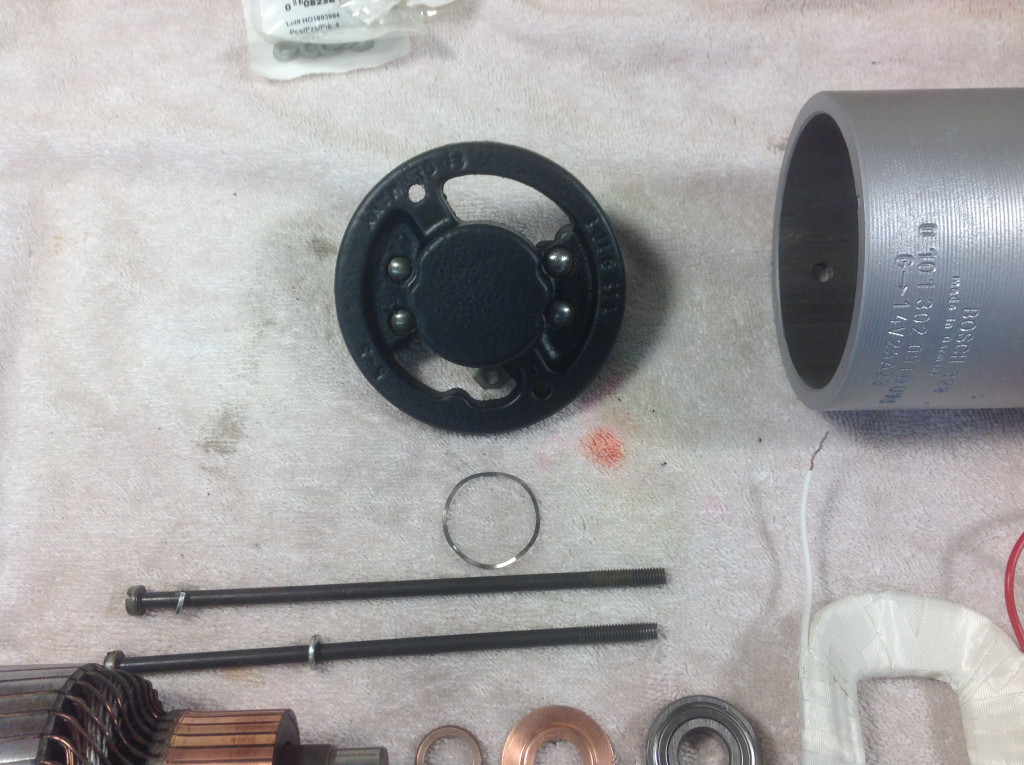
Photo courtesy of Dan Eberhardt.
Completed generator!!!
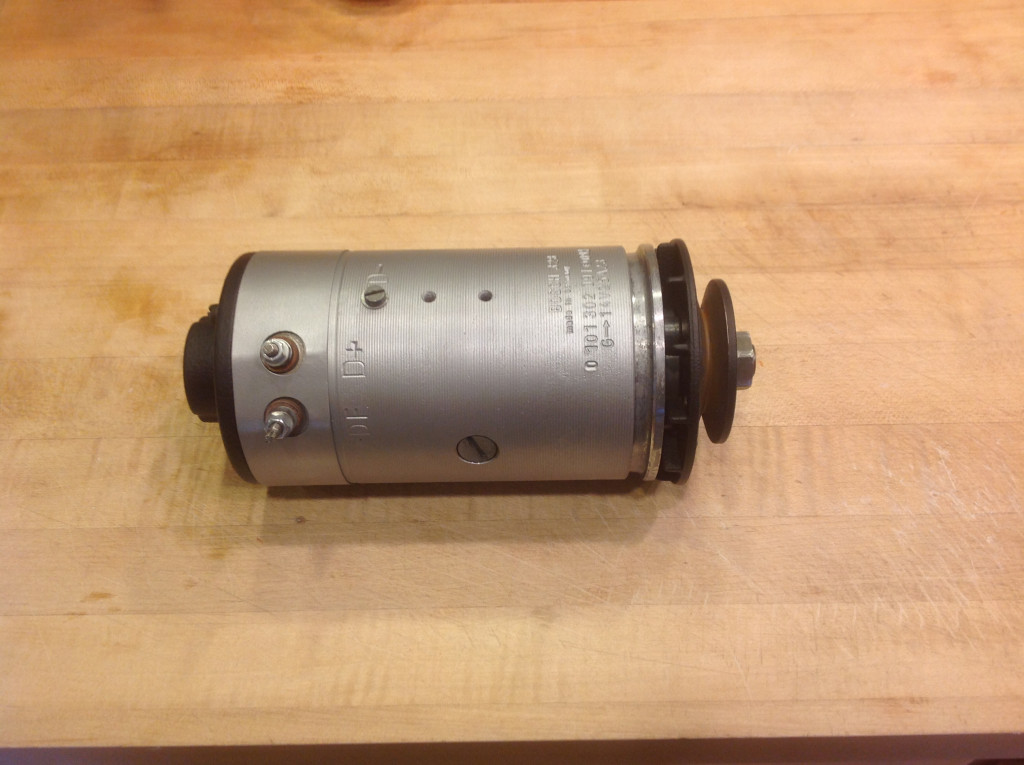
Photo courtesy of Dan Eberhardt.