Ignition switch rebuild
Moto Guzzi V700, V7 Special, Ambassador, 850 GT, 850 GT California, Eldorado, and 850 California Police models
Created:
Updated:
I could not locate any information on how to rebuild the stock Magneti Marelli ignition switch. So, I tackled the job blindly and discovered it wasn't very hard at all. I did not have to replace any parts, just a thorough cleaning and lubrication was all that was needed. Here is the step-by-step:
- Remove the ignition switch from the dash (or bracket on police models). Do take the time to label your wires...one minute now will save you five minutes later looking the data up on a wiring diagram.
- Wrap masking tape around the metal body and label near each tab the terminal to which the tab points. This isn't absolutely necessary because the body and rear plastic cover only mate one way, but it does make life a bit easier.
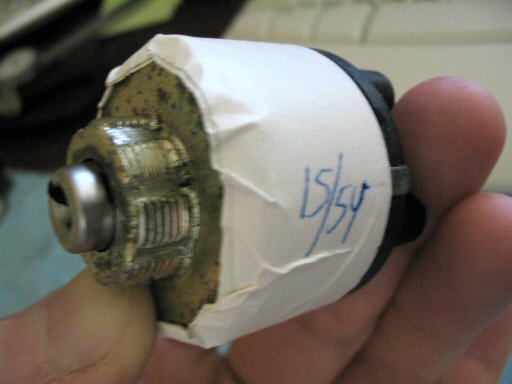
Photo courtesy of Gregory Bender.
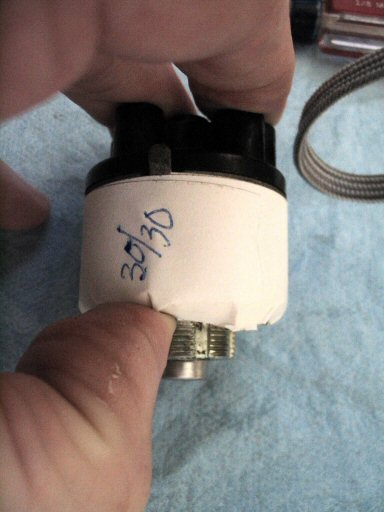
Photo courtesy of Gregory Bender.
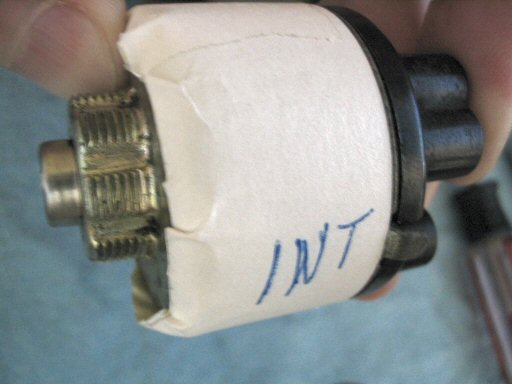
Photo courtesy of Gregory Bender.
- Using a small flat-tipped screwdriver, gently pry each tab up and away from the plastic body.
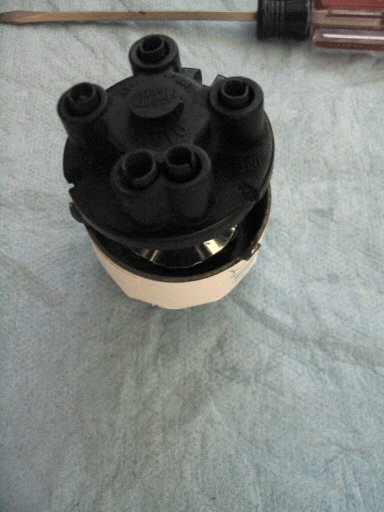
Photo courtesy of Gregory Bender.
- Carefully remove the black plastic cover...it is spring loaded so watch to make sure that you don't jettison parts all over the place.
- Grasp the pointed end of inner key switch mechanism and withdraw the entire mechanism from the metal body. Nothing holds it in place, so it should come right out.
- Remove the small washer-like piece with the tab on it. Note that the tab is directed toward the black plastic cover. Also note that the slot in the washer is wider on one side than on the other. It only fits on one way, so it should not be a problem getting it back together.
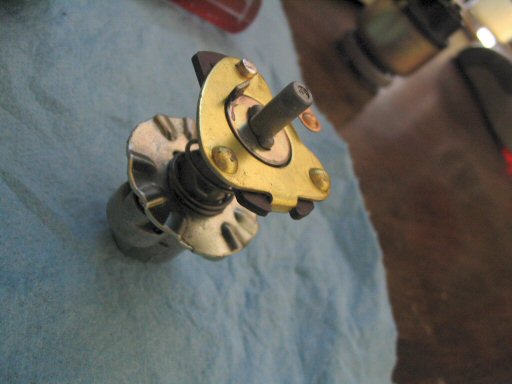
Photo courtesy of Gregory Bender.

Photo courtesy of Gregory Bender.
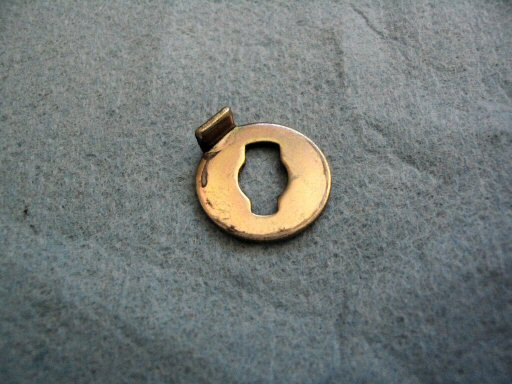
Photo courtesy of Gregory Bender.
- Remove the contact plate. Note that the contacts face toward the black plastic cover. Also note that the slot in middle of the contact plate is wider on one side than on the other. It only fits on one way, so it should not be a problem getting it back together.
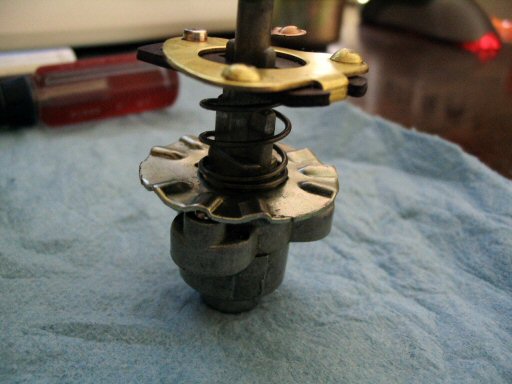
Photo courtesy of Gregory Bender.
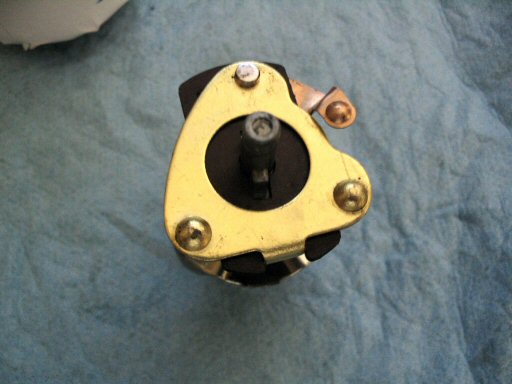
Photo courtesy of Gregory Bender.
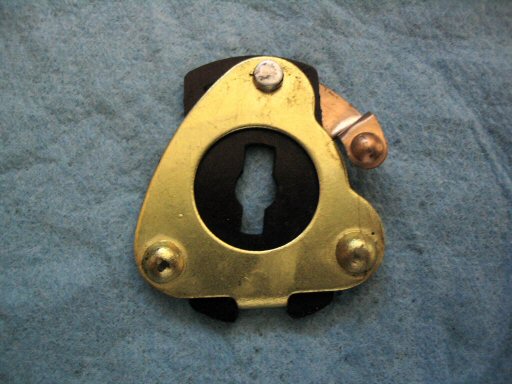
Photo courtesy of Gregory Bender.
- Remove the spring.

Photo courtesy of Gregory Bender.
- Remove the indexing plate. Be careful not to lose the three ball bearings that are beneath the indexing plate. Note that the indexes line up with the ball bearings beneath and that the concave side of the index is what faces the ball bearings. Also note that the rectangle slot in the indexing plate only permits the plate to be installed in one position and still allow for proper indexing of all three ball bearings.
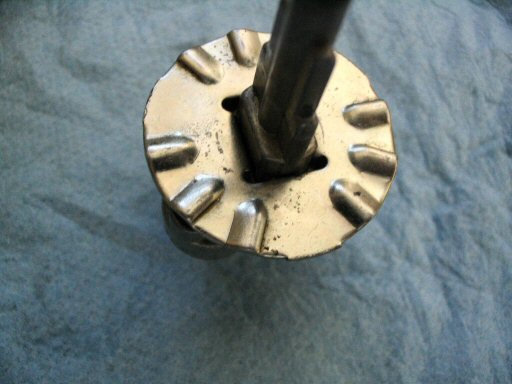
Photo courtesy of Gregory Bender.
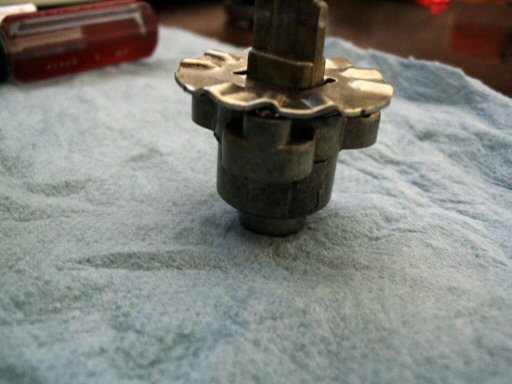
Photo courtesy of Gregory Bender.
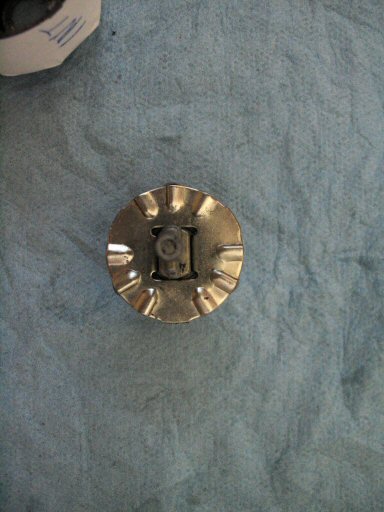
Photo courtesy of Gregory Bender.
- Remove the ball bearings. Note that if they appear stuck, it is only because they are stuck...there is no mechanical means by which they are retained. Just squirt a little lubricant in there and they should fall right out.
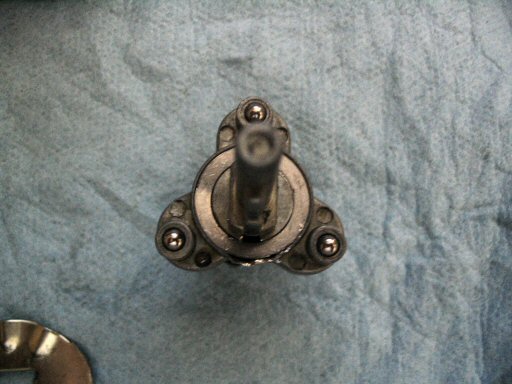
Photo courtesy of Gregory Bender.
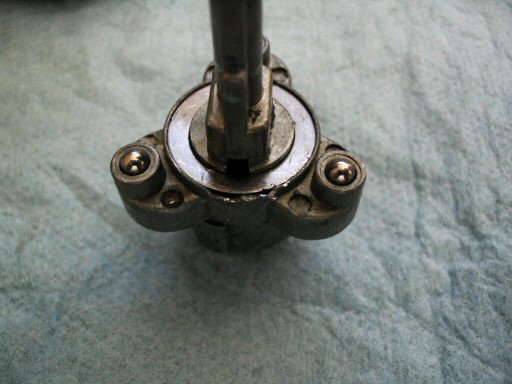
Photo courtesy of Gregory Bender.
- You are now left with only the core lock mechanism. In order to get to the tumblers and springs, you'll need to pry out the retaining washer. I accomplished this by placing a 7⁄16 inch, 1⁄4 inch drive deep well socket over the shaft. Then, using the side of the socket as a leverage point, I pried on the retaining edge on only a small part of the circumference. Then, I tapped the end of a tiny screwdriver into opening with a hammer, and pried the retaining washer up and out. If I needed to do this again, I would try using just the tiny screwdriver first, then resorting to prying the retaining edge if necessary. Upon reassembly, the retaining washer can be popped back into place. Be sure to crimp the rim back in place over the washer or you risk pushing the retaining washer out of place when you insert the key into the ignition.
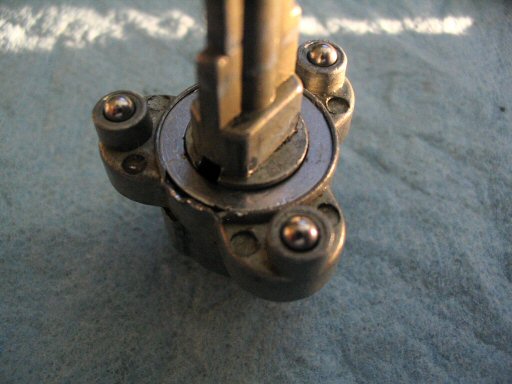
Photo courtesy of Gregory Bender.

Photo courtesy of Gregory Bender.
- Now you can withdraw the core lock mechanism, complete with tumblers and springs, from it's housing. I didn't have any trouble with the springs trying to fling tumblers across the garage, but be careful none the less. Take note that the housing has a wider slot and a narrower slot. It should be obvious that the wide part of the tumblers fits into the wide slot in the housing.
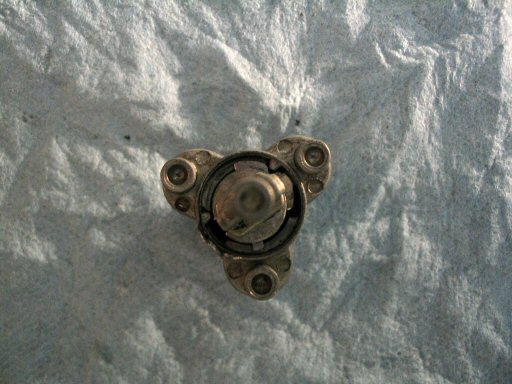
Photo courtesy of Gregory Bender.
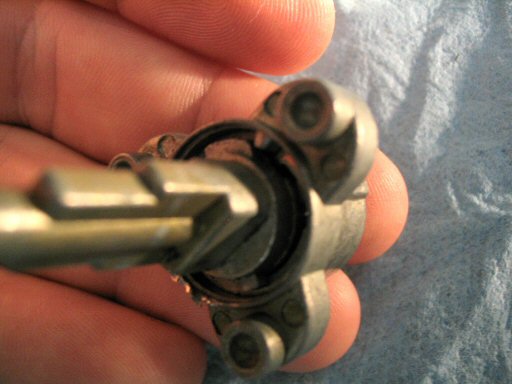
Photo courtesy of Gregory Bender.
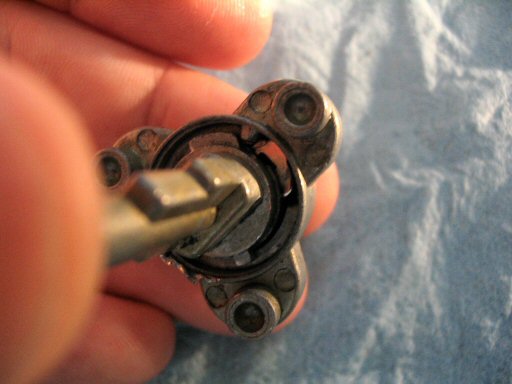
Photo courtesy of Gregory Bender.
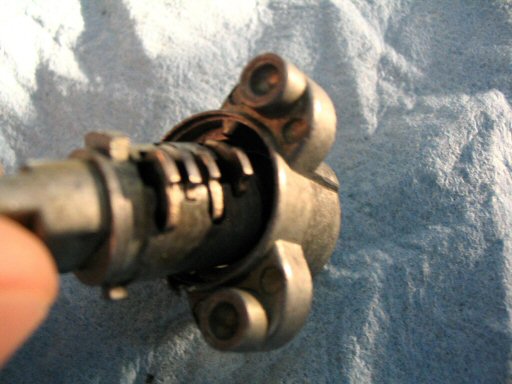
Photo courtesy of Gregory Bender.

Photo courtesy of Gregory Bender.
- You are now down to the core, four tumblers, and four springs. The tumblers and springs can be removed for cleaning and lubrication, but be very careful to keep track of which tumbler goes into which slot. If you get that wrong, your key won't work. In fact, you can insert your key to be sure all of the tumblers are of the right height. If they are not, you can file on the tumblers to make them so...or get a new key cut. Each tumbler has a little arm at the end. This arm is what comes into contact with the spring. When removing the springs, take extra care. They may be a little fussy, but don't force them.
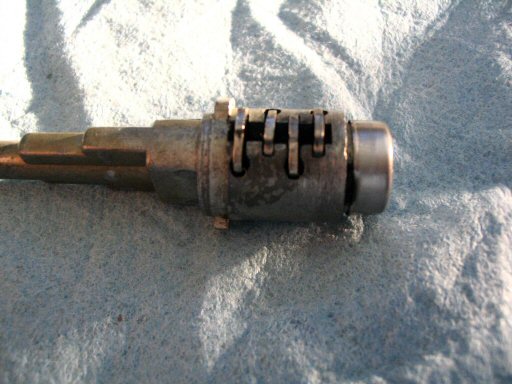
Photo courtesy of Gregory Bender.

Photo courtesy of Gregory Bender.
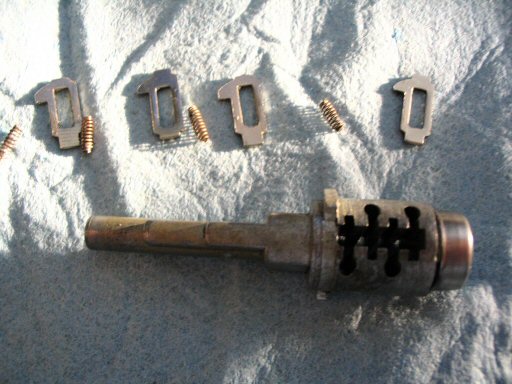
Photo courtesy of Gregory Bender.
- At this point, you are ready to clean, lubricate, and reassemble. Reassembly is the opposite of disassembly and is very straightforward. Do note, though, that the key mechanism must be properly aligned with both the metal housing and the black plastic cover. To do so, ensure that the portion of the key slot that is nearest the edge of the chrome cover (look at the chrome cover where the key is inserted) must be aligned with the double terminal on the black plastic cover.
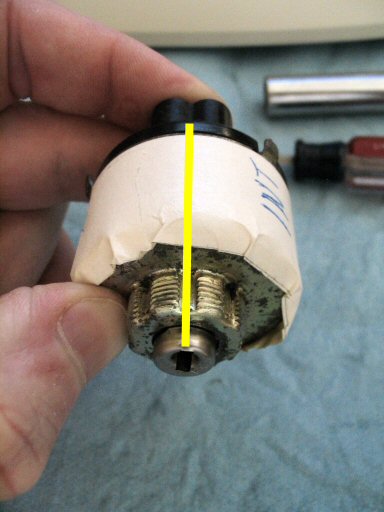
Photo courtesy of Gregory Bender.
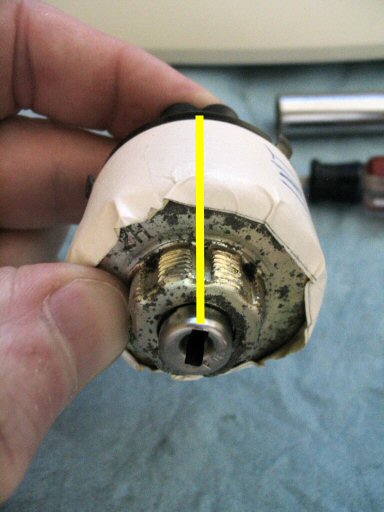
Photo courtesy of Gregory Bender.
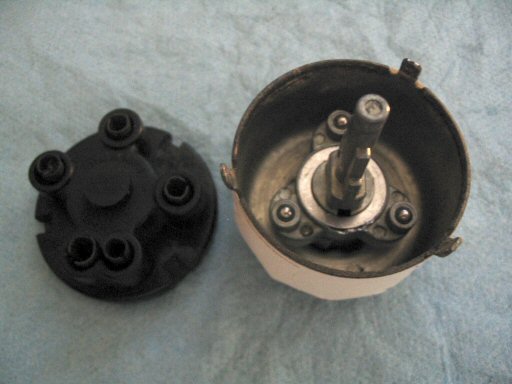
Photo courtesy of Gregory Bender.