Moto Guzzi V700, V7 Special, Ambassador, 850 GT, 850 GT California, Eldorado, and 850 California Police models
Created:
Updated:
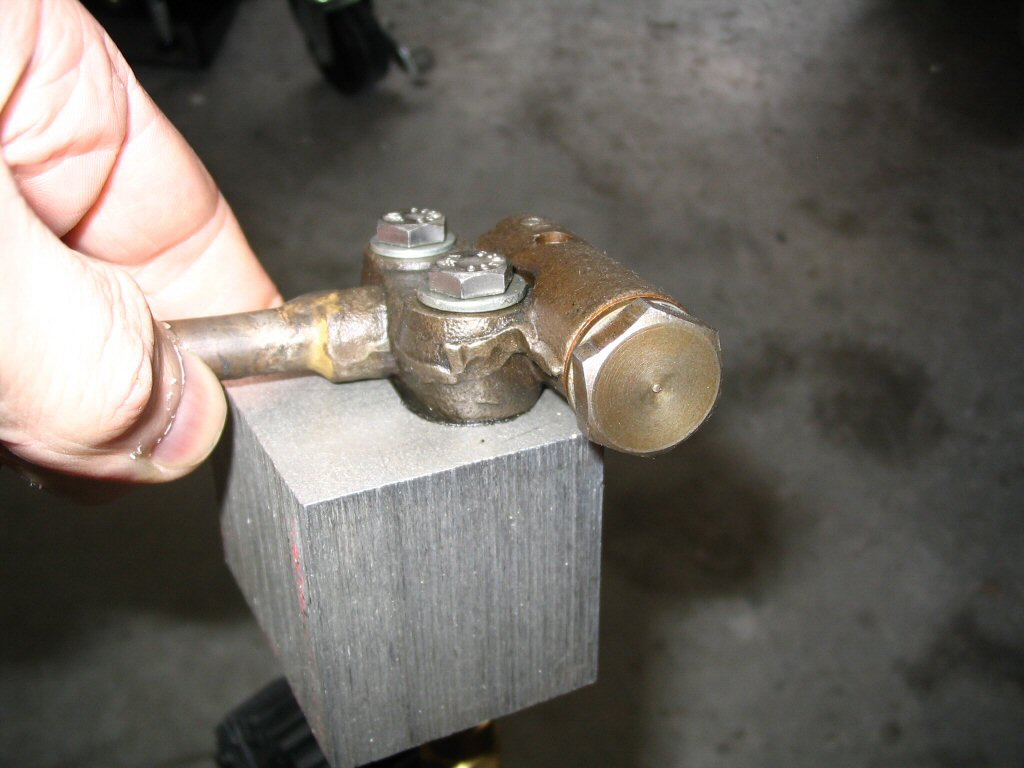
The oil pressure relief valve is located inside the engine, bolted to the bottom of the crankcase. The purpose of the valve is bleed off any pressure that is in excess of the official specifications (typcially 3.8 - 4.2 kg/cm2 or 54 - 60 PSI). When the oil pressure is higher than this amount, this valve opens to bring it down to the specified limits.
Unfortunately, these valves are notorious for leaking off pressure long before the factory specs. The problem is that the valve does not make a good seal against its seat. Oil then leaks past before the valve opens. This is not a great situation. Every time I rebuild an engine, I check this valve and, if needed, I clean up the mating surface between the valve and its seat.
To clean up the mating surface, I apply valve grinding paste to the mating surface. Then, I rotate the valve using a flat tipped driver attachment fit to my cordless drill.
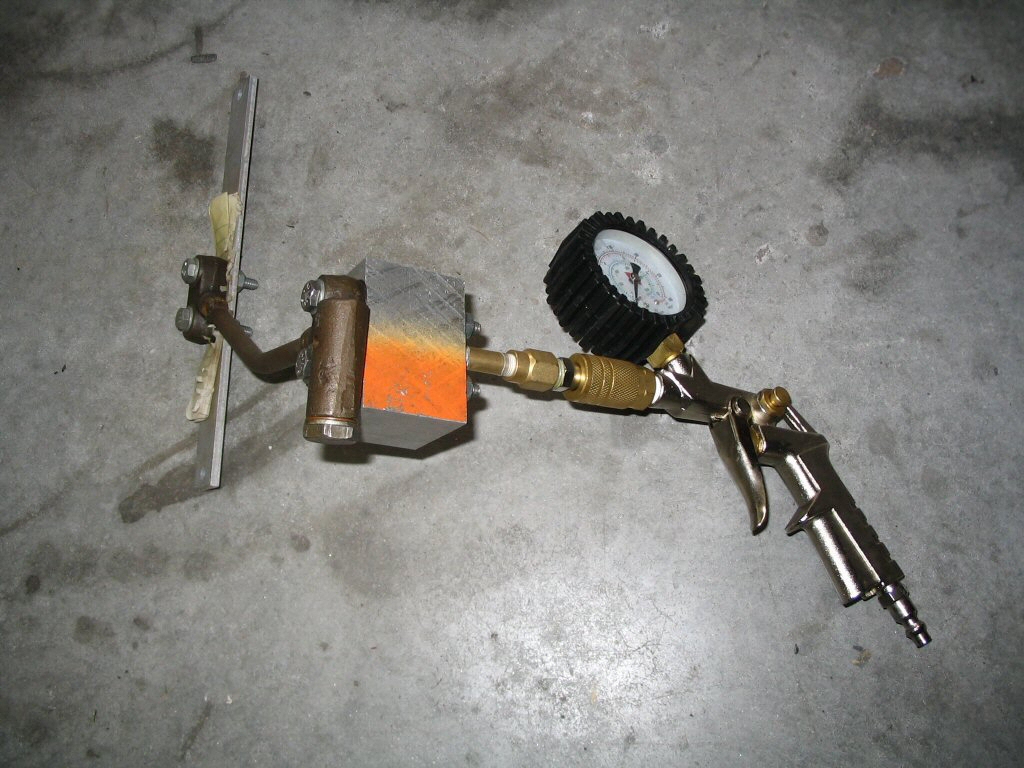
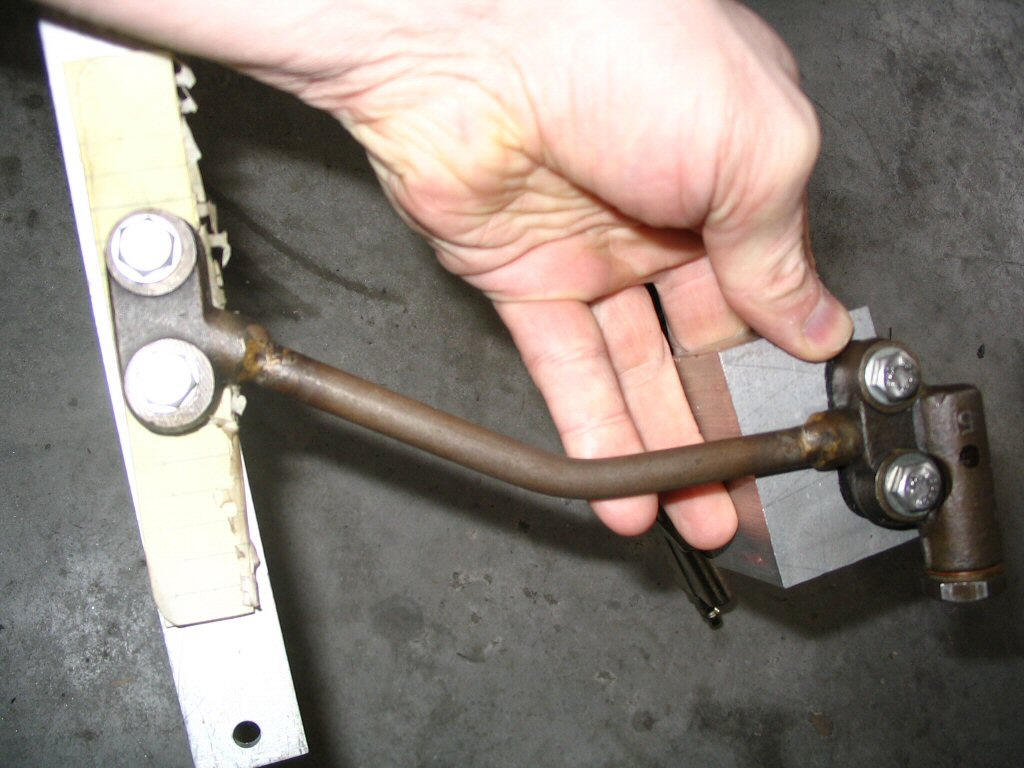
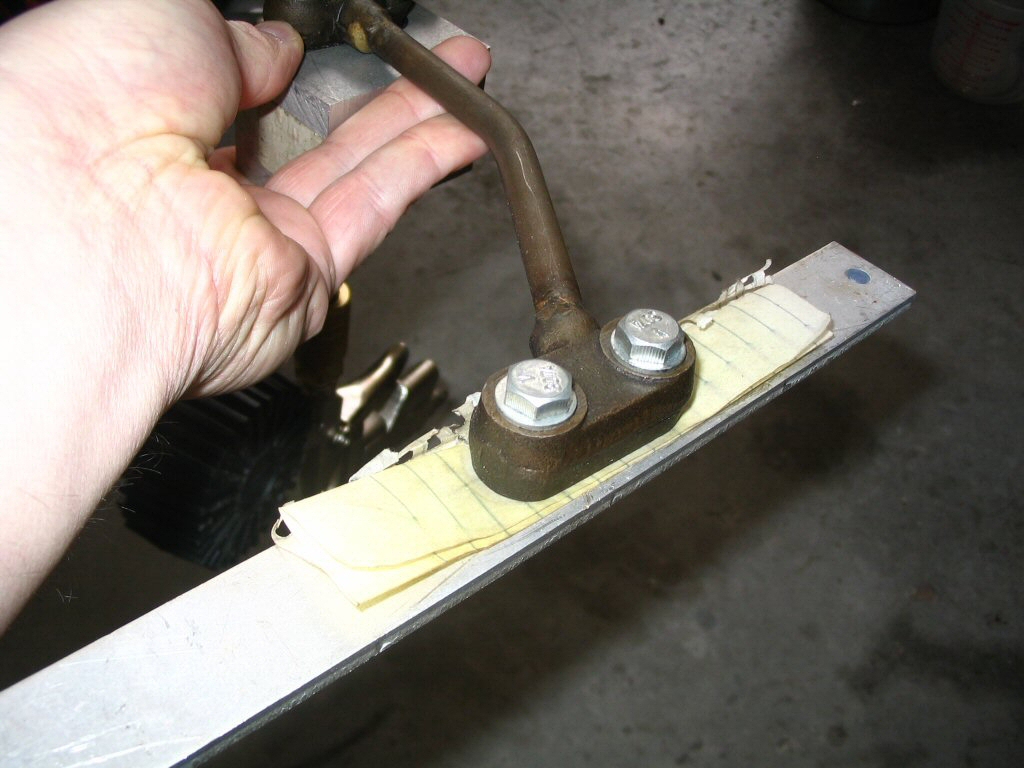
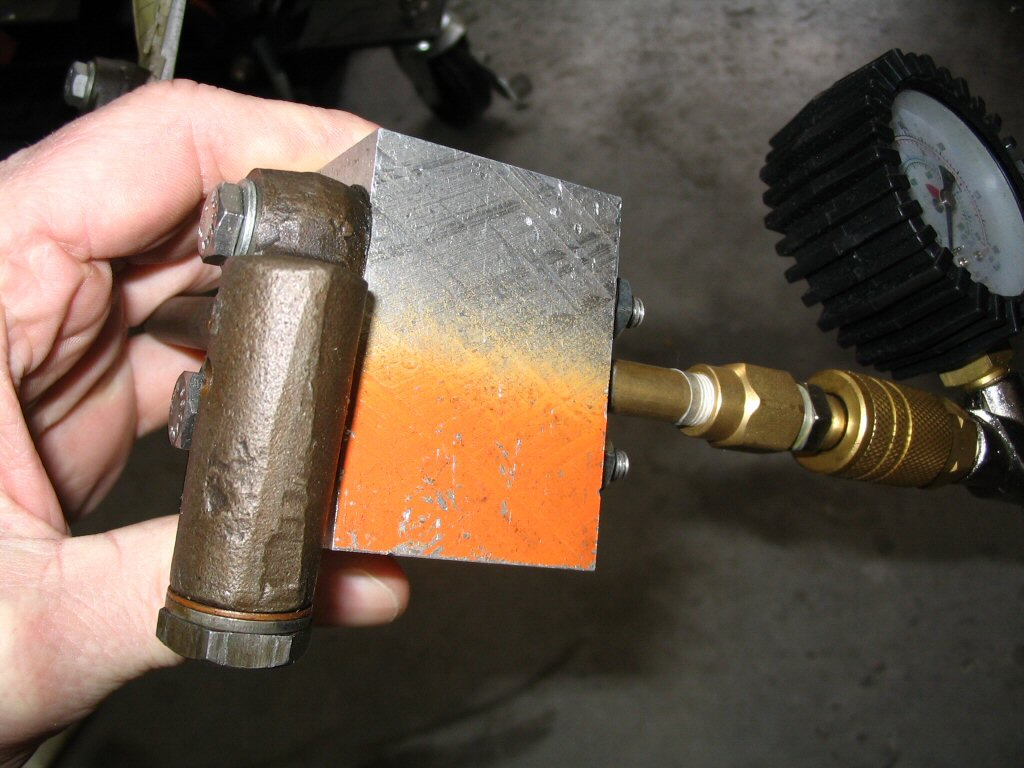
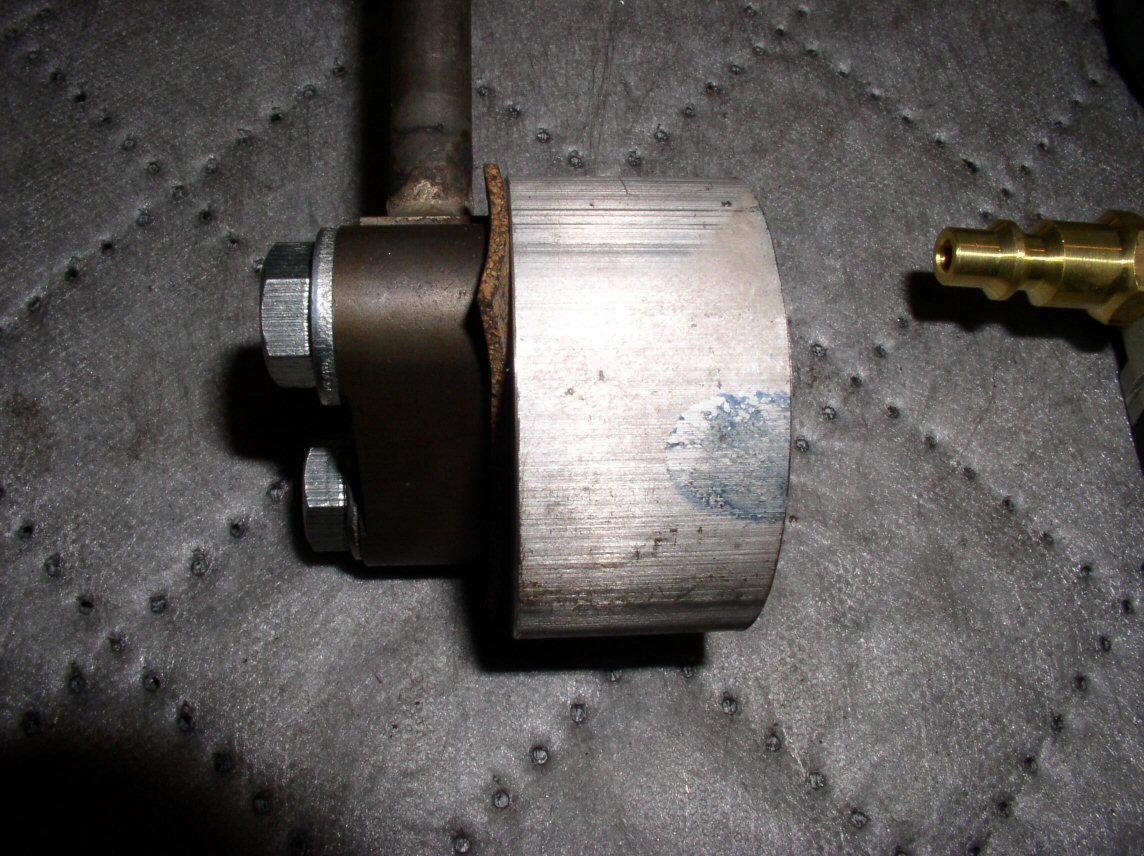
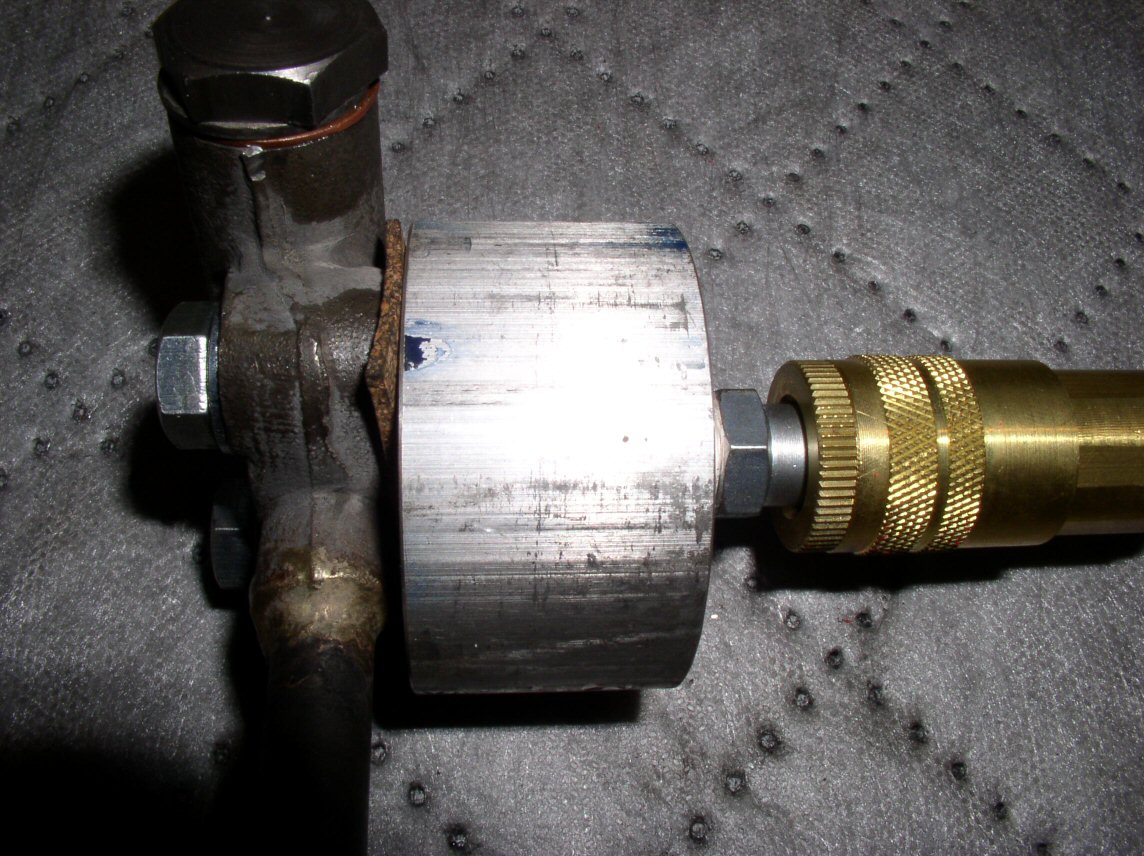
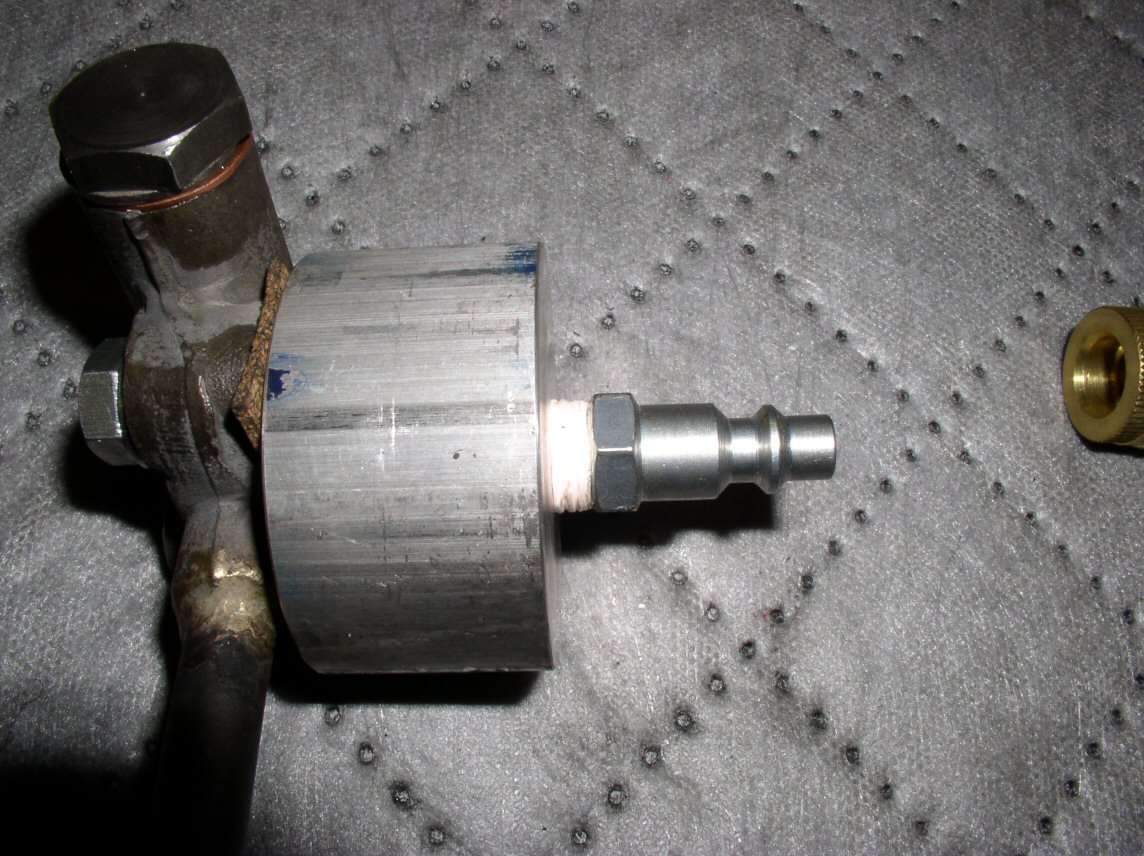
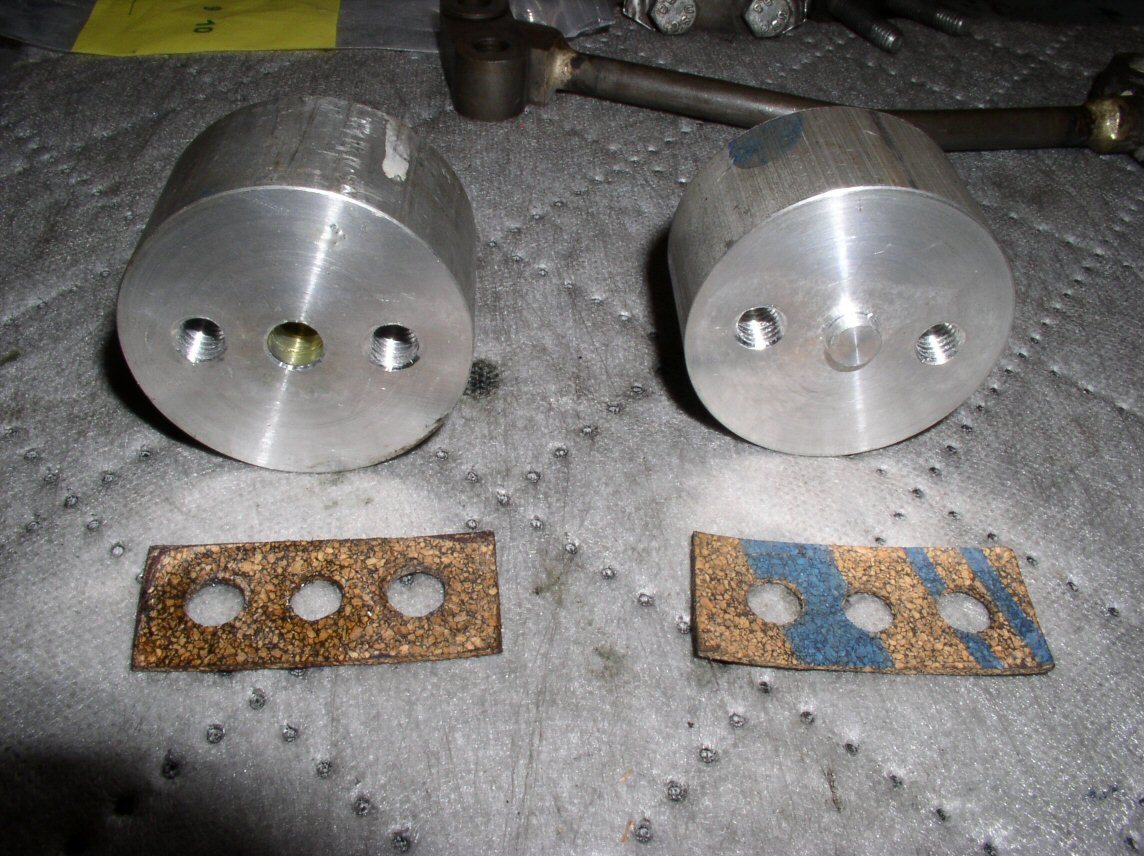
Gregory Bender's tool for testing the oil pressure relief valve
Here is some information I wrote in reply to a question asked by Mike Jones on the old Yahoo! MGconvert news group (which has now moved to Groups.io). Mike was inquiring as to how I grind the seat and adjust the blow off pressure on the oil pressure relief valve.
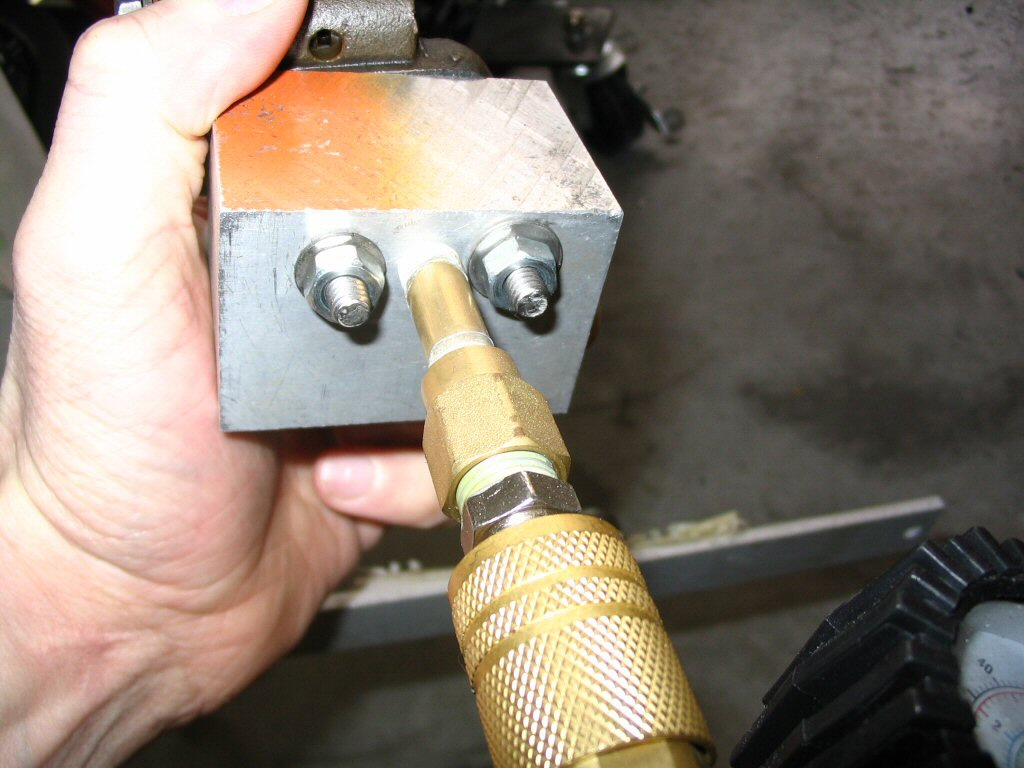
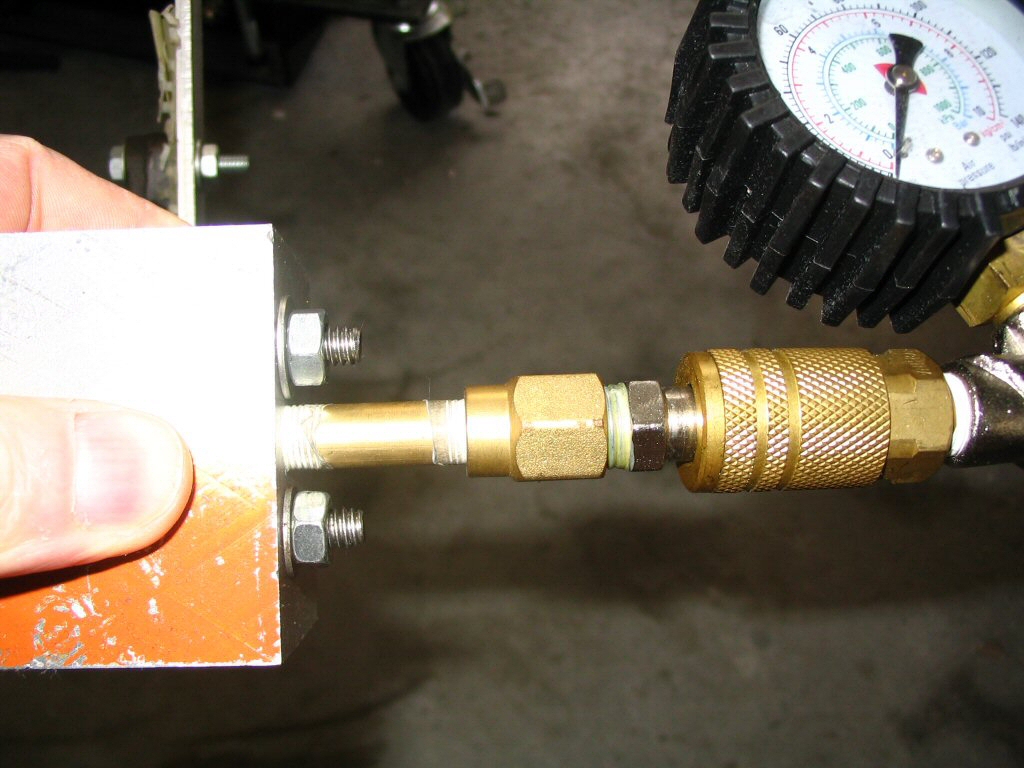
It isn't technically difficult to do, but you must have some way of testing what you are doing to make sure you know where you are at. I just uploaded a bunch of photos I took a couple years ago of the tool I made from a chunk of aluminum and some cheap air fittings and air inflater tool/gauge from Harbor Freight (surprising accurate when checked against my better quality tools). Certainly not a factory quality tool, but it gets the job done and has proved both accurate and reliable (yep, the simple paper gasket that I have on hand doesn't leak...though I've never gone so far as to fit one on a actual engine!). This is a set up for a loop frame, but I'm sure you can extrapolate to Tonti requirements. I've since modified the setup so that I can pressurize an entire sump (off the bike, of course) or just the relief valve by itself.
Pressure tester for an oil pressure relief valve.
Photo courtesy of Gregory Bender.
Pressure tester for an oil pressure relief valve.
Photo courtesy of Gregory Bender.
Pressure tester for an oil pressure relief valve.
Photo courtesy of Gregory Bender.
Pressure tester for an oil pressure relief valve.
Photo courtesy of Gregory Bender.
Pressure tester for an oil pressure relief valve.
Photo courtesy of Gregory Bender.
Pressure tester for an oil pressure relief valve.
Photo courtesy of Gregory Bender.
Pressure tester for an oil pressure relief valve.
Photo courtesy of Gregory Bender.
Pressure tester for an oil pressure relief valve.
Photo courtesy of Gregory Bender.
As for grinding the seats, one end of the relief valve is slotted (the end that the spring fits on). I add valve grinding compound to the other (seat) end. Then, with a flat tipped bit fitted in the slot, I use my cordless drill to spin away and grind things smooth. A couple notes:
As much as possible avoid getting valve grinding compound on the sides...use just a little and try to keep it only on the seating surfaces. The sides are really the valve guides for the oil pressure relief valve, and - like with your intake and exhaust valves - you want as little play as possible.
The drill is my fast way of doing it. An appropriately sized flat-tipped screwdriver spun by hand would work just fine, too. When I use the drill, I do not turn it on and leave it on as I am not trying to drill a hole or heat anything up to umpteen hundred degrees. Instead, I'll run it for 10-15 seconds and then remove the drill, clean everything off, fit it to my tester again and see where I am at. Before testing, I do coat the surfaces with a very light coating of oil (massive amounts will only get blown all over the place) when you apply pressure.
Grinding the seats won't change the blow off pressure all that much (that is primarily done using washers of different thicknesses under the bolt that holds the spring in place). Instead, what you are really trying to do is get the seats to fit really well so that you don't bleed/leak pressure before you hit the blow off point. This is where the trigger operated air inflater I show in the photo really comes in handy. You can gently and slowly build up the pressure with it and listen for when air begins to escape. I've seen some that start leaking very early on, whereas others will hold rock solid to a much higher PSI value. We are talking about a metal-to-metal seal here with far greater guide tolerances than with your intake and exhaust valves, so perfection (zero leakage until the blow-off point is reached) is not a reasonable goal. Rather, you want to improve things and minimize the bleed off as much as possible.
One final note of most importance (really a disclaimer of sorts): The oil pressure relief valve is not considered a regular maintenance item and some people will tell you never to touch it. Certainly it is more than possible to get it all wrong and trash an engine (jam it in so it will never open or set it so low that it bleeds pressure off at way too low a value). So, just make sure you are confident in what you are doing...and double check your results with your external oil pressure gauge when you are all done.
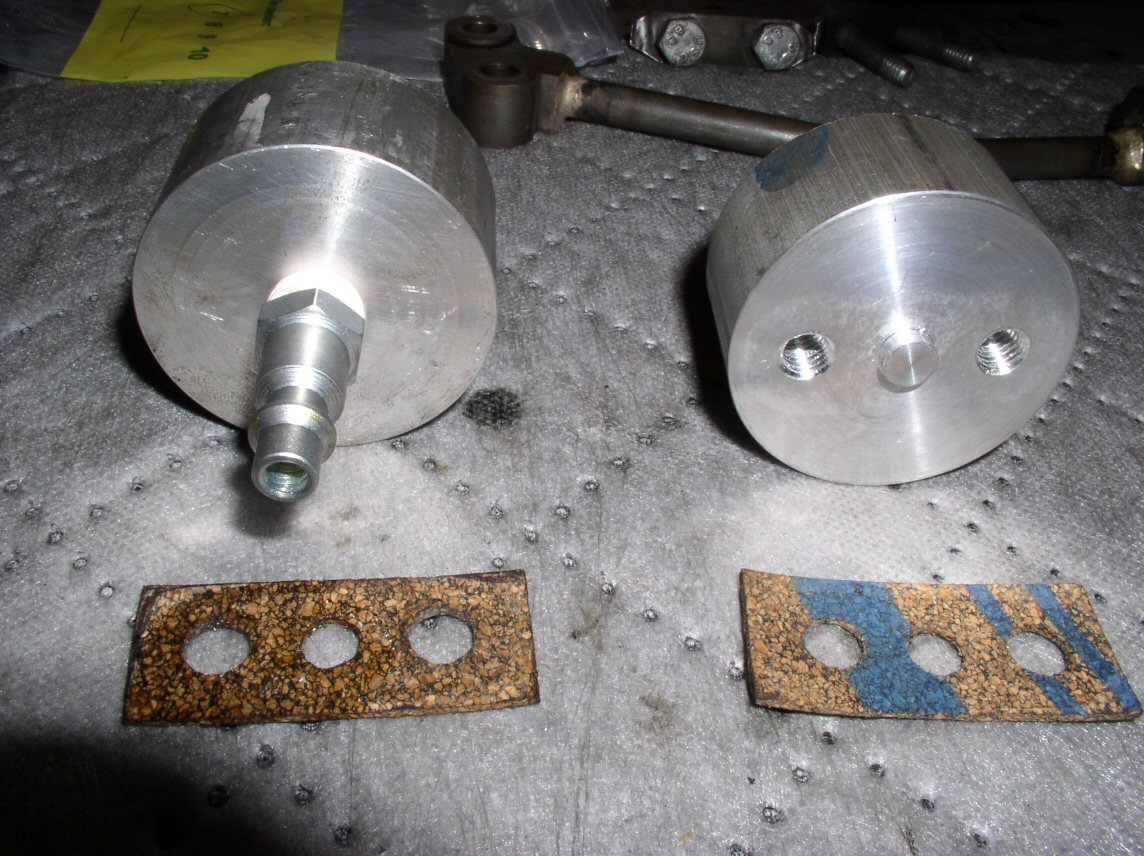
Charlie Mullendore's tool for testing the oil pressure relief valve
Thanks to Charlie Mullendore of Antietam Classic Cycle for sending me photos of the tool he made (much nicer than my tool). In Charlie's own words:
Thought I'd send this to you for use on your website if you'd like. Inspired by yours, I finally broke down and remade my test rig yesterday, the old one was a real bodge-job and prone to leaks. This one is sturdy, simple and works flawlessly.
I have one of the Harbor Freight inflators like yours, but use it all the time for it's intended purpose, so decided to use my Harbor Freight leak-down tester instead. Two chunks of aluminum: McMaster-Carr part number 8974K1: 2 Each Multipurpose Aluminum (alloy 6061), 2 inch Diameter × 1 inch Long Sample Size, USD $5.34 each, a quick-disconnect hose coupling I had laying around and an hours worth of time on the lathe and drill press resulted in a professional looking test rig. I'll eventually modify it to accept Tonti oil pressure relief valves as well when the need arises.
Tested Cam's Eldo valve last night and initially it leaked off progressively worse from 30 PSI on up. Lapped the piston/seat interface a bit and now it starts hissing very slightly at 50 PSI and increases sharply at 60 PSI. That's about as good as it gets I guess.
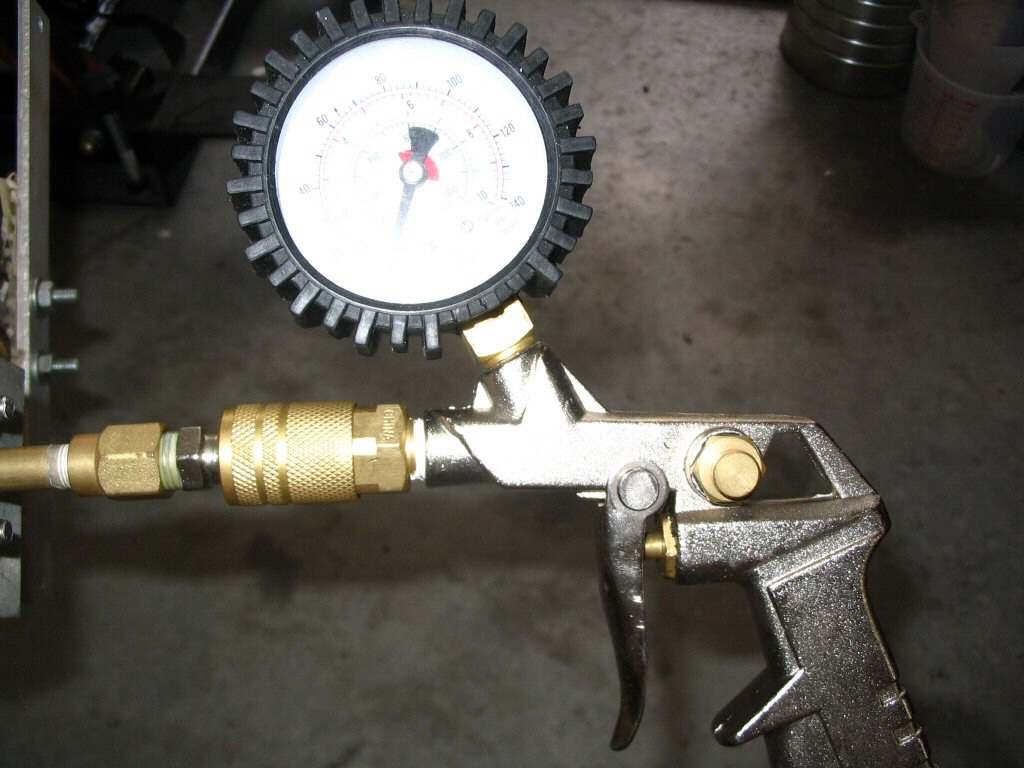
Pressure tester for an oil pressure relief valve. Ready to use. Just hook it to the air supply and dial up the regulator.