Moto Guzzi V700, V7 Special, Ambassador, 850 GT, 850 GT California, Eldorado, and 850 California Police models
Created:
Updated:
DISCLAIMER: DO NOT ATTEMPT THIS MODIFICATION. DESCRIPTION IS PROVIDED HERE FOR ENTERTAINMENT PURPOSES ONLY.
Gregory Bender's conversion
Inspired by Greg Field's write-up in the Moto Guzzi National Owners Club (MGNOC) newsletter about his tubeless conversion on his Eldorado, I decided to make the same modification to my Ambassador. Here is what I did:
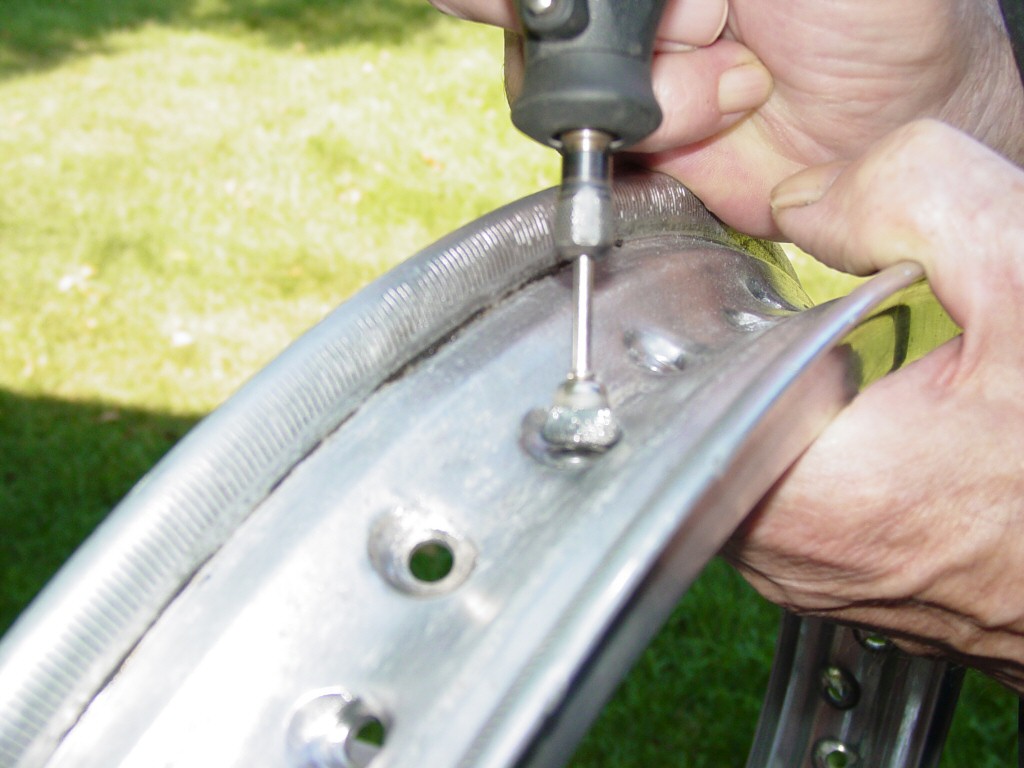
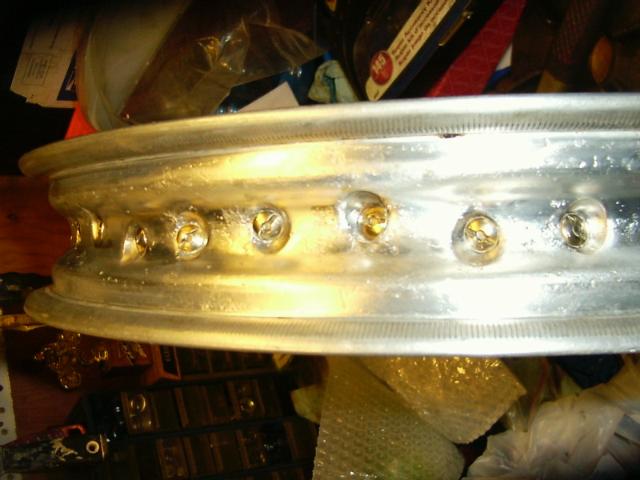
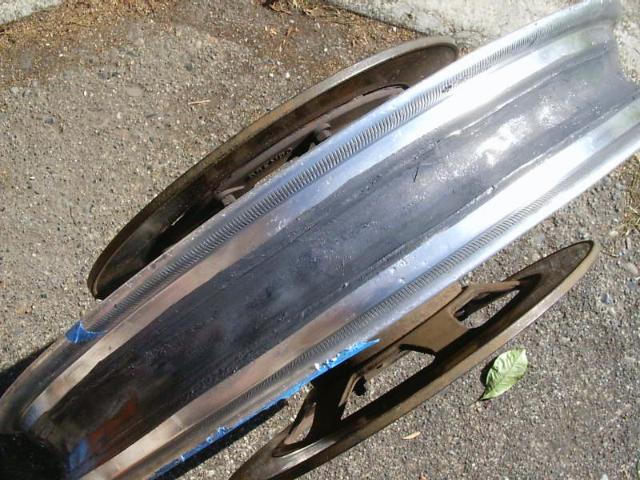
Used a hand file to dress any gouges in the rim...particularly where the tire bead will seal.
Cleaned the rim with a heavy duty wire wheel on my high horse power bench grinder. This did the lion's share of the work.
Cleaned the rim with a light duty wire wheel on my low horse power bench grinder. This got in a little better around each spoke.
Used a cup-style wire wheel on my dremel tool to clean around each spoke nipple. This finished up the clean up.
Scrubbed down the entire rim with rubbing alcohol.
Let the rim dry.
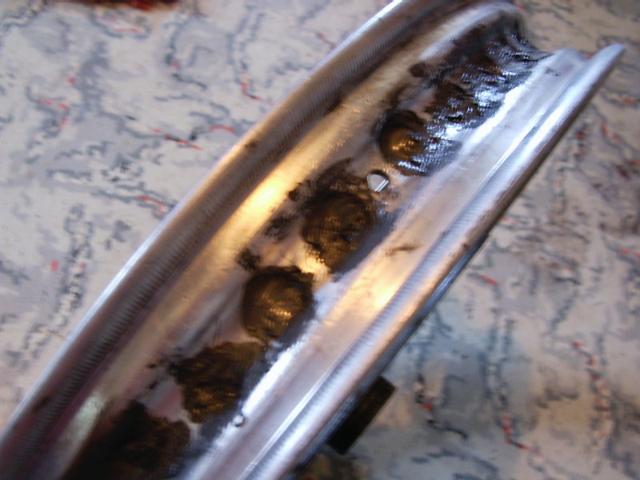
Applied standard, normal, everyday silicone to each nipple hole...a light first coating. (I used General Electric Silicone II Aluminum & Metal 100% Silicone Sealant; stock number GE5050; P-1285)
Let dry for 24 hours.
Applied the silicone to each nipple hole...a second finish coating.
Let dry for 24 hours.
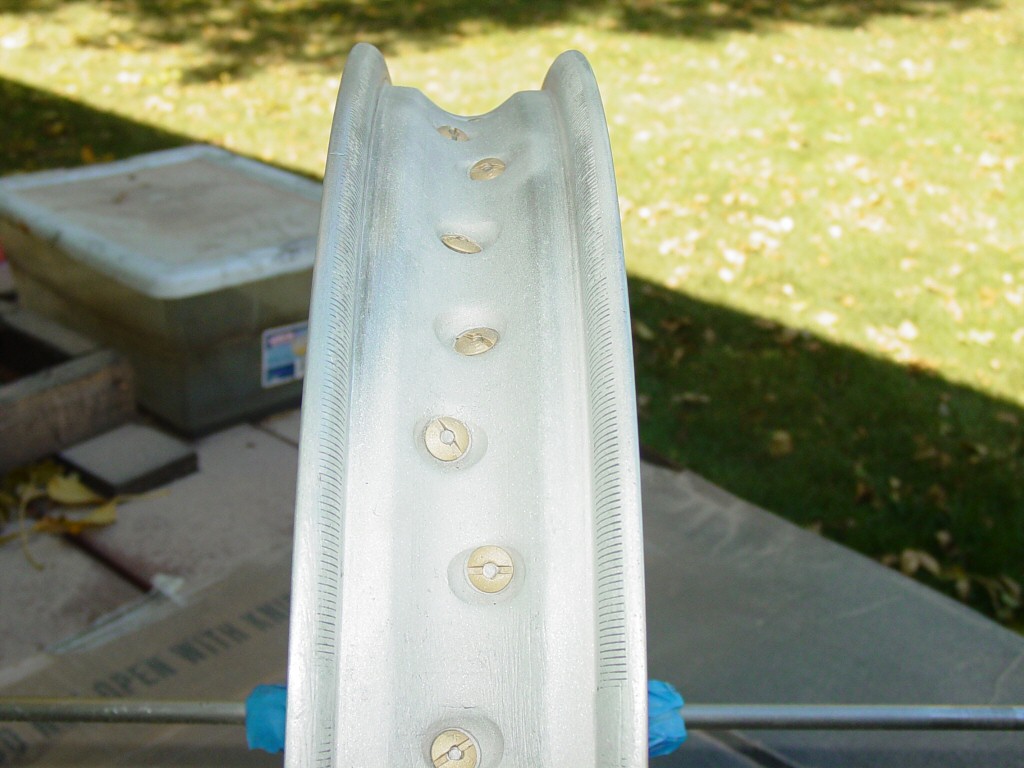
Applied the silicone to the entire well area where the spokes are located.
Let dry for 24 hours.
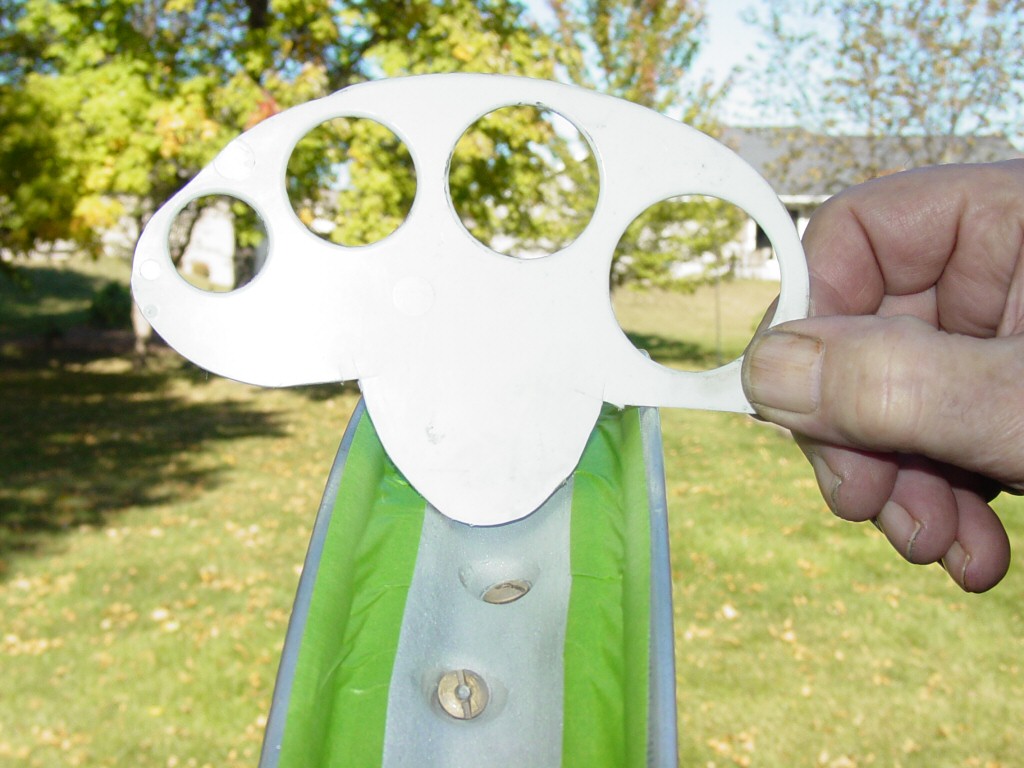
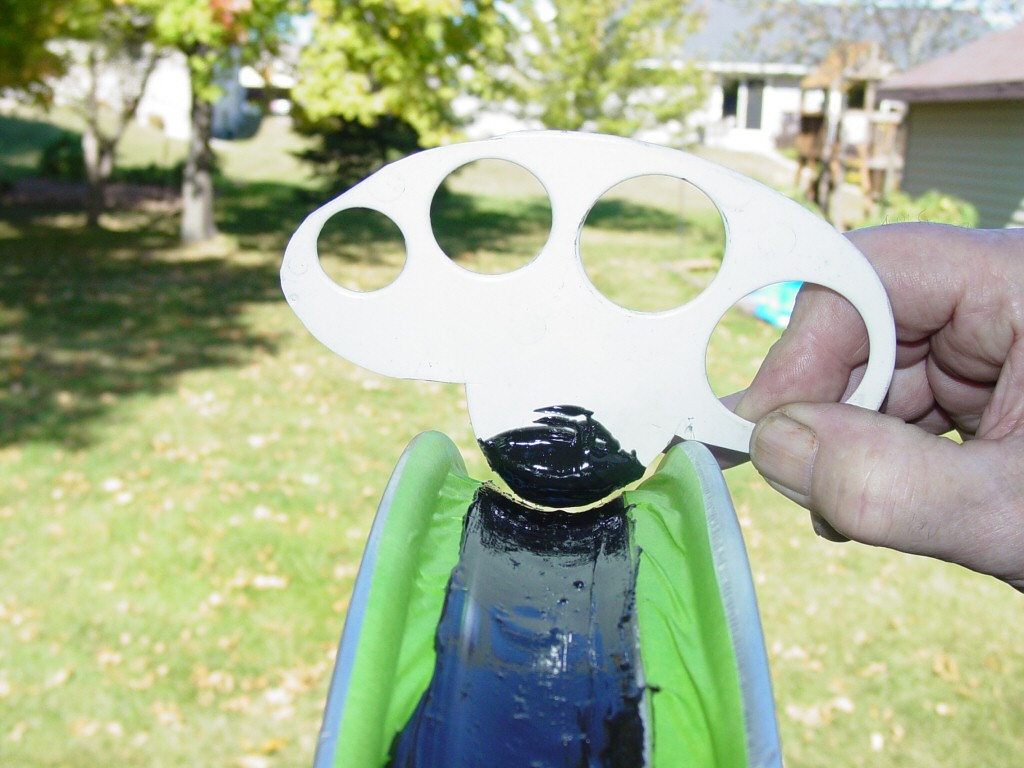
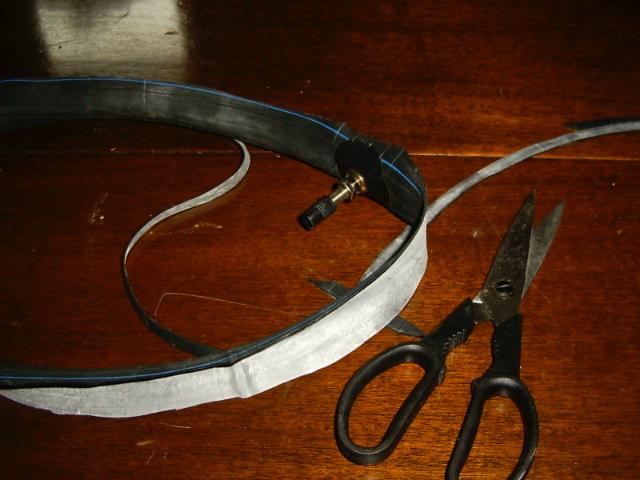
Temporarily fit two rim strip on top of the silicone. The purpose of the rim strips is to protect the sealed silicone area from accidental contact with the tire or tire irons.
Fit a valve stem from Drag Specialities, part number VS-1218R. The nice thing about this valve stem is that it does not require enlargement of the hole in the rim. The price for the Drag Specialities part has gone way up over the years. As an alternative, part number NTH 90426 from Napa Auto Parts is much cheaper.
Fit tire.
Remove both protective rim strips. I (and others) have found that the rim strips can migrate and cover the valve stem. When this happens, the rim strip acts as a one-way valve, permitting air in, but not allowing any air to escape. This makes checking tire pressure a fruitless experience.
Inflate and check for leaks.
Ride.
Kim Schick's conversion
Kim Schick sent me the following tip in a private email. In Kim's own words:
You may find this of some interest regarding Going Tubeless. A modified flexible spaghetti measuring device was used to easily spread silicone around the rim in one pass whilst using a home-built wheel balancer. There have been no issues with the first wheel done like this and it actually looks professional too (compared to my earlier double pass methods).
Dremel clean up
Photo courtesy of Kim Schick.
Rim on wheel balancer sandblasted and rinsed with isopropyl alcohol for good Silicone adhesion
Photo courtesy of Kim Schick.
Taped rim with modified spaghetti unitizer
Photo courtesy of Kim Schick.
Rim with Silicone. Silicone each nipple and quickly add more to ensure full coverage. A quick spin of the wheel on the balancer completes the job. Final result is much better if you use a new tube of Silicone (no bumps).
Photo courtesy of Kim Schick.
Here is another wheel using fresh Silicone. Much smoother finish, Also used 1⁄2 inch masking tape around the two edges vs trying to cover the bead seat. Experienced no Silicone mess.
Photo courtesy of Kim Schick.
Greg Field's conversion
Thanks to Greg Field for posting this information on the Wildgoose Chase forum. In Greg's own words:
For those who want to try it, here's an easier way to make your Borrani wheels tubeless
The key is surface prep. Wire wheel the drop center to get all scmutz and corrosion off of the metal. Then take a conical dremel wire wheel and thoroughly clean each spoke dimple. Blow out all dirt with compressed air. Then clean the drop center and dimples with solvent. Blow thoroughly around the nipples with compressed air.
Photo courtesy of Greg Field.
First sealing step is to smoosh a little RTV thoroughly into each dimple. Let this cure overnight, and then repeat. This is the heart of the seal, so do it like your life depends on it.
Photo courtesy of Greg Field.
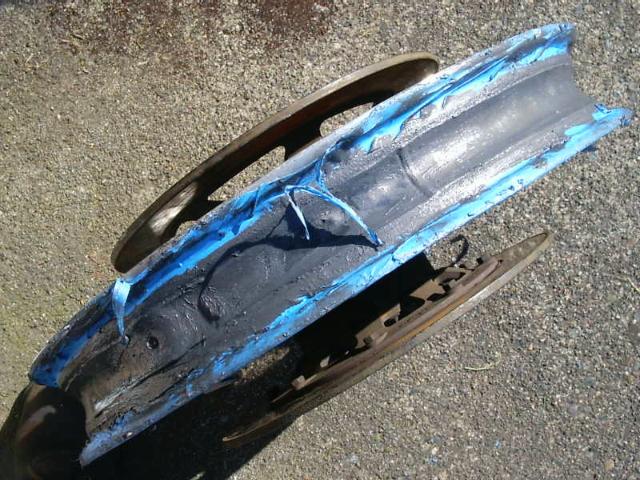
Then fit a 16 inch scooter tube, and note how much rubber you need to leave in the center to fill to the edges of the drop shoulder. Cut the tube to this width, leaving in the valve stem. Mask off all but the drop center, and then thoroughly clean both sides of the tube with soapy water and then solvent. Get off all the wax and powder, so the RTV will stick well. Then scuff the rubber with sandpaper. When the tube is ready and dry, smear on a light layer of RTV all the way around the drop center. Squeeze out a bunch of extra RTV around the valve stem because this area will be held proud of the drop center by the valve-stem reinforcements in the tube. You want to fill in entirely that area with RTV. Then fit the tube, and use you finger to work out all the bubbles. When this is done the tube will look like a shrink fit into the drop center and will conform even down inside the spoke dimples.
Photo courtesy of Greg Field.
Then, fair in RTV around the edges of the tube, and let it cure.
Photo courtesy of Greg Field.
Remove the masking and fit a tire. Test for leakage. If no leaks, then you're done. It usually takes less than one 3 oz tube of silicone. If you are using more, it's likely too much.
Photo courtesy of Greg Field.
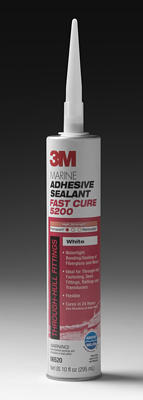
A better sealant
I extracted this information from Rick Duarte off of the old Yahoo! Loopframe_Guzzi news group (which has now moved to Groups.io). In Rick's own words:
My concern with my cali was adhesion between the sealant, and the rim, also adhesion between the layers of the sealant with itself. I used 3MMarine Fast Cure 5200 Adhesive Sealant. It sticks to itself real good, even to cured sealant. Its a marine product, and a bit pricey at 20 some dollars a tube, but worth it, in my opinion. I took a piece of scrap bike inner tube, didn't even clean it off, applied a glob of the 5200 to it, and pressed it to a piece of aluminum, I had laying around, never cleaning it at all. The next day, I couldn't pull the two apart, after much trying, I was able to get the adhesive itself to tear, but the bond to the dirty dusty inner tube, and aluminum did not come apart! It may be overkill, but this is some tenacious stuff, I don't think tire irons will do much to it, especially if covered by a rim strip, which I embedded into the last layer of the 5200.