Moto Guzzi V7 Sport, 750 S, 750 S3, 850 T, 850 T3, 850 T3 California, V1000 I-Convert, V1000 G5, 1000 SP, Le Mans, Le Mans II, Le Mans CX 100, Le Mans III, Le Mans 1000, 1000 SP III, 1000 S, California II, California III, California 1100, California Jackal, California EV, California EV Touring, California Aluminium, California Titanium, California Special, California Special Sport, California Stone-Metal, California Stone-Touring, California Classic, California Touring, and California Vintage models
Created:
Updated:
Thanks to Marty Ray for sending me this information via email. In Marty's own words and photos:
Hi Greg,
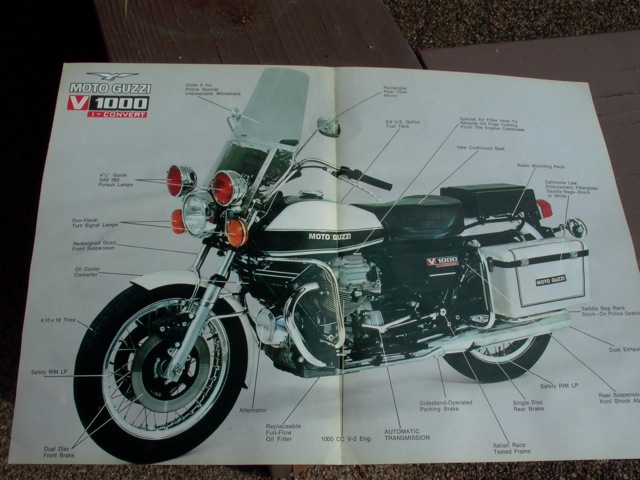
I have a '75 850 T3 police, which came with most of the police equipment, so I got interested in having more of that kind of equipment, maybe even putting this thing in some shows of some sort for cop or emergency vehicles. This equipment is illustrated in a contemporary brochure for the V1000 I-Convert police model, as shown below. In case people don't know this, you cannot ride around with the front red and rear blue lights, or anything that overtly makes you look like a cop. If you have these features, they have to be covered up. So for some features, I have the item, but it is not installed unless I were in a show. Out of my 6 Guzzi bikes this 850 T3 is arguably the best riding and most comfortable.
What I cannot find, and need help with, is any idea of how this model (850 T3 or V1000 I-Convert) was marked up (department logo etc.) for police use.
Cheers
Marty
Moto Guzzi police brochure.
Photo courtesy of Marty Ray.
Here is info on radio and box mounting.
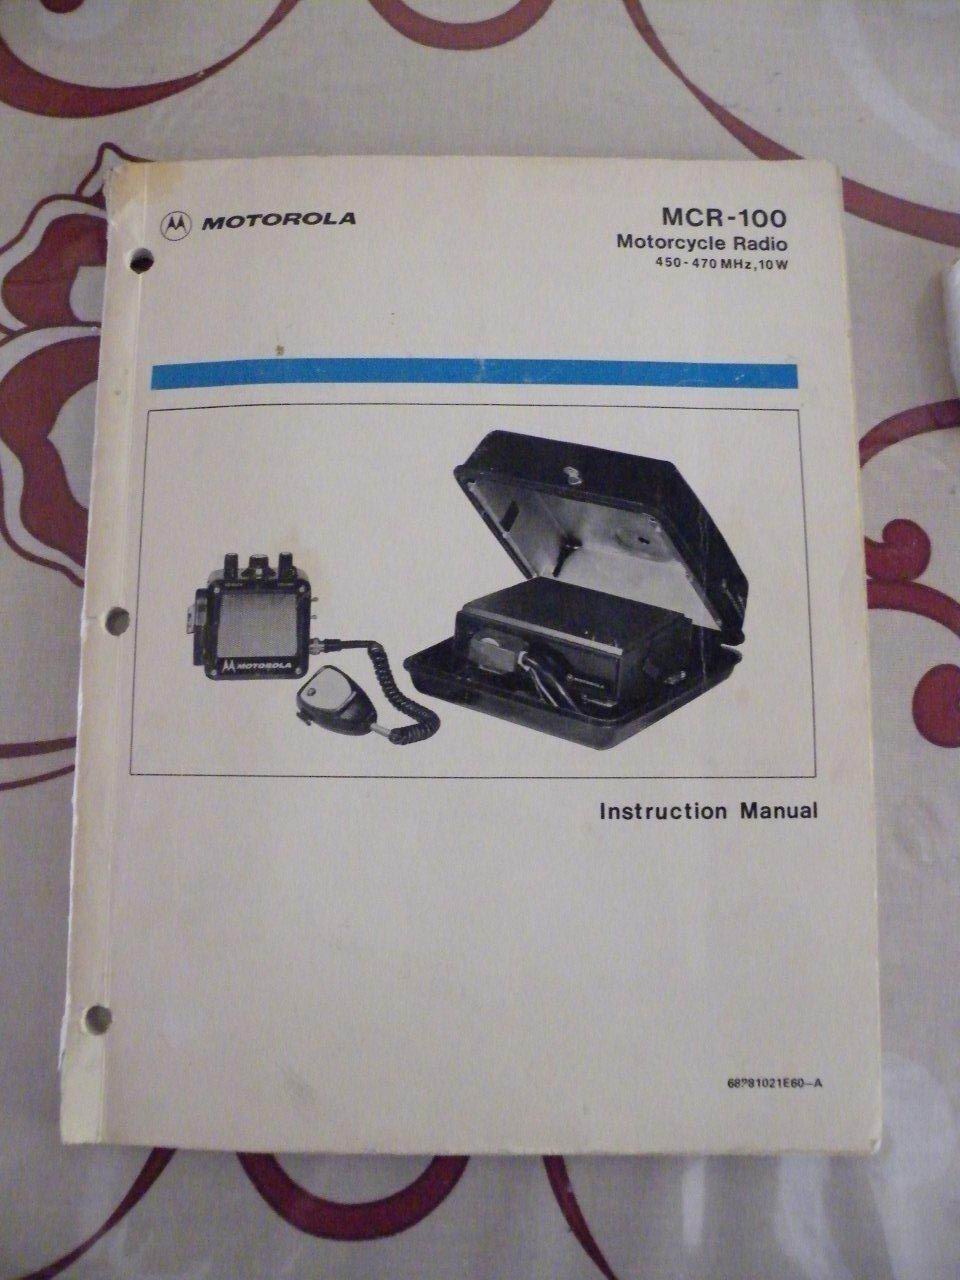
I wanted to have a radio set up on there, at least in a visual sense. So I got hold of a Motorola MCR-100 head unit and the rear fiberglass box that goes with it to hold the radio drawer unit (as they call it) on the back of the bike. (see photo of that and of radio instruction book below, head unit on L and box, open, with drawer inside, on R) I do not have the radio drawer unit yet. I might install a scanner to kind of fake the police radio sound, or, I might just use the box for additional storage.
Instruction book showing radio drawer in box.
Photo courtesy of Marty Ray.
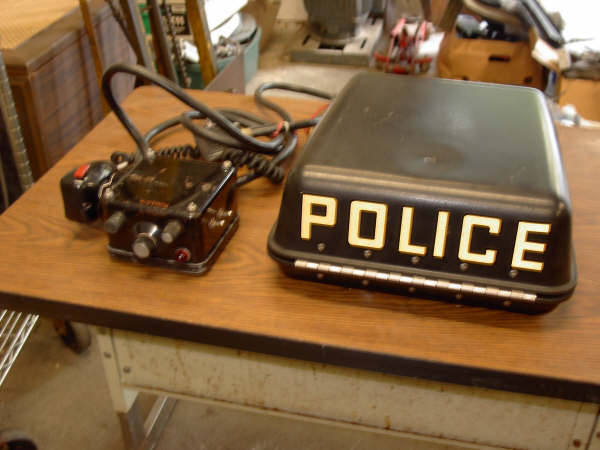
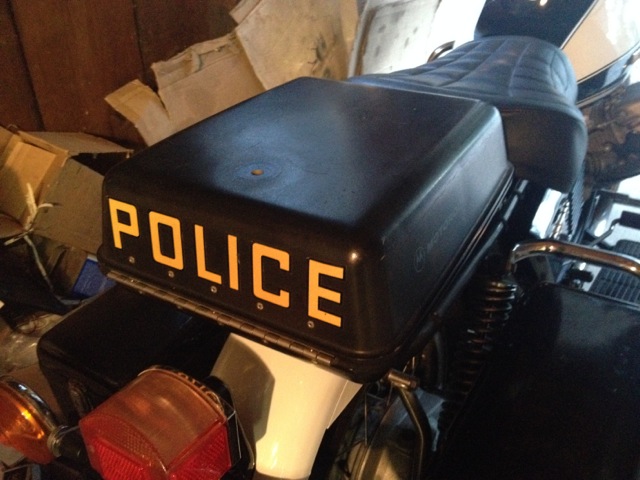
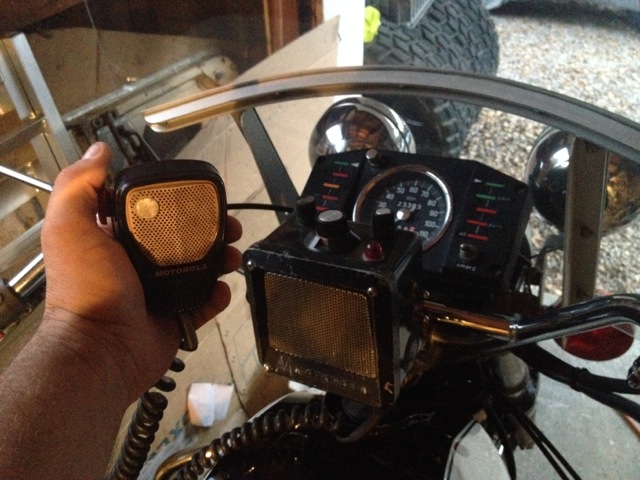
MCR-100 head unit, microphone, cables, and fiberglass box. The police marking has to be removed or covered up. I've heard of some people using the marking POLITE but I think that's risky.
Photo courtesy of Marty Ray.
I have the stock cop solo seat and stock radio rack, which is part of the seat mounting set up. (All this is shown in the 850 T3 cop bike parts book pages) See picture below. By the way, if you find an original solo seat for this bike, and you want it reupholstered, don't throw away (or let the upholstery shop throw away) the original seat cover. This item is irreplaceable, it is embossed vinyl fabric. Mine was a good pattern cover even though damaged, but they threw it away. I have not yet determined a method of reproducing the embossing on the vinyl, I ended up finding a good condition seat for a lot of money. I use the reupholstered seat for every day use.
I discovered that the MCR-100 type (also found on later types of radios) radio box, does not conveniently fit the rack's mounting holes. The box has some large bosses on the inside that interfere with where you would want to drill holes to mount to the stock Guzzi radio rack. The box has 4 large holes near the 4 corners, which are about 5⁄8 inch diam., and a larger hole for cabling on the front L corner.
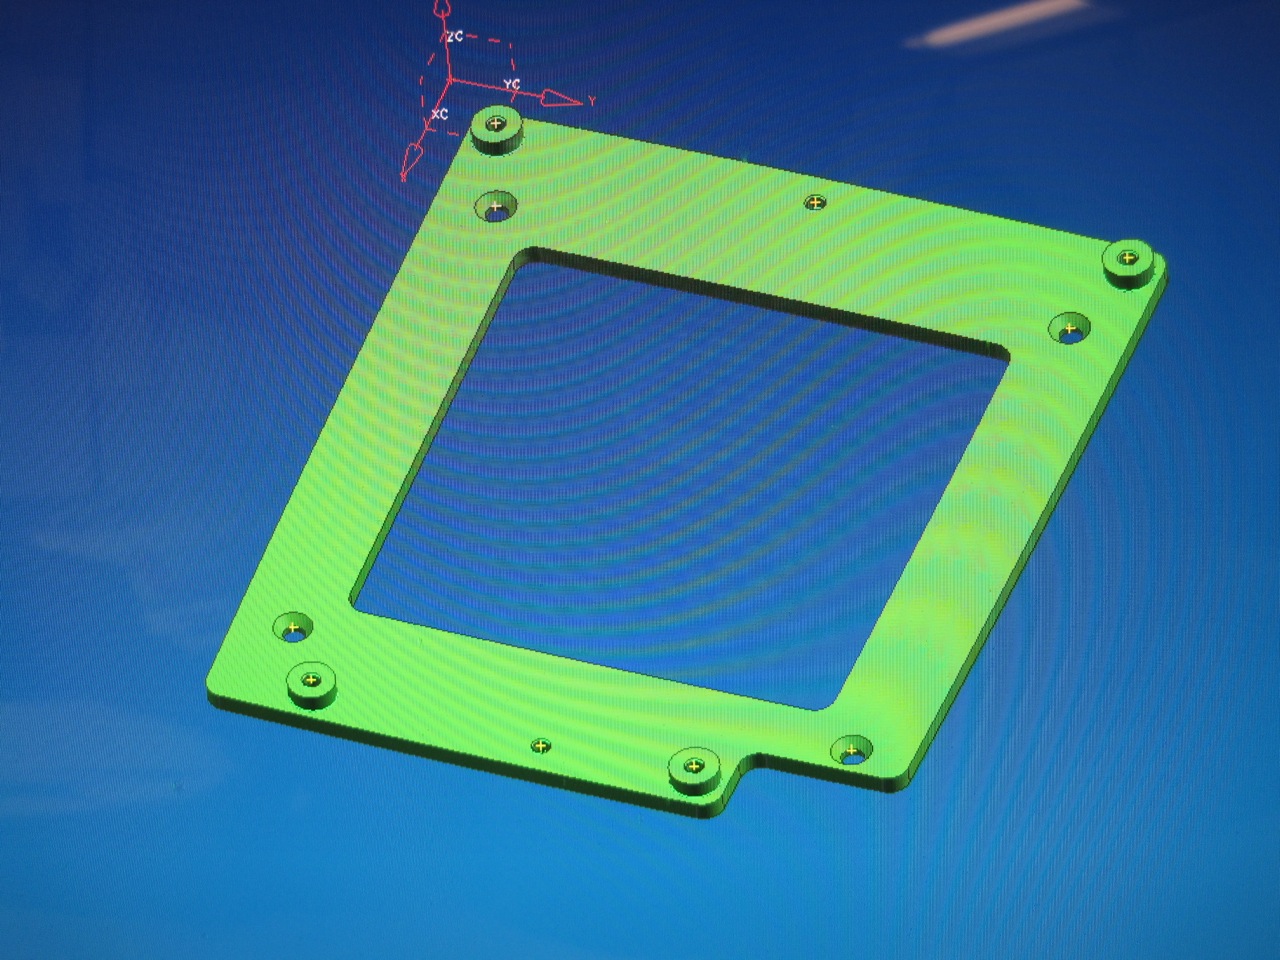
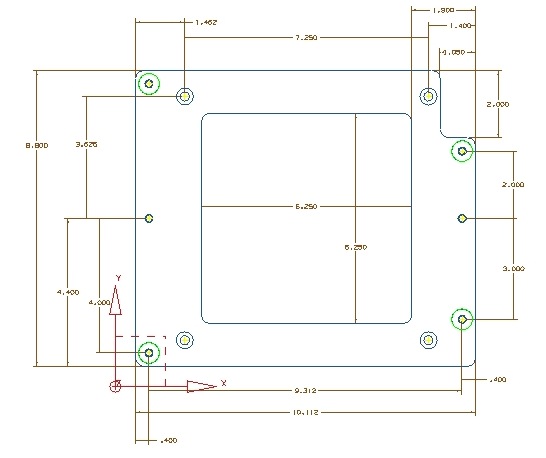
I decided to produce an adapter plate to mount this box on my rack. To get the dimensions right, and to be able to make this as light as possible, I made a CAD for the plate first. The plate was made with bosses to fit into the large holes on the radio box, and 2 holes to allow bolting down via 2 other centered holes in the box. It has 4 other holes, countersunk, to fit to the bike's radio rack. The center of the plate is cut away, for lightness and to clear the rear fender.
Below is shown a CAD of the adapter plate I made; first a 3D view and then a 2D CAD with dimensions (some dimensions hard to read). I actually cut away more of the center part on the one I made, the only thing that really matters is the dimensions of the hole positions for the rack and the box, and relation between them. If you attempt this project, make sure that the mounting holes for your particular radio box are the same, because my guess is, other radio boxes that look the same externally, might have different holes etc. on the bottom. You may need to use different dimensions. For my project, the adapter plate worked perfectly and it all bolted up just fine. The adapter plate has 4 countersunk 1⁄4 inch holes, for mounting to the stock radio rack. Then it has 6 through holes 1⁄4 inch-20 threaded, which are used with 1⁄4 inch-20 bolts to mount the radio box. For the 2 center line holes I just used bolts. For the 4 boss positions, I used a rubber O-ring (5⁄8 inch diam) below the box and a rubber washer above the boss area, with a fender washer, to provide some anti-vibration function.
I also have info about mounting the head unit on the handle bar area.
Screen shot of 3d cad of what the plate looks like. Plate was made up in aluminum (6061 T-6 or similar) and blasted and painted black. Bosses on the plate, extend up through existing holes in the MCR-100 fiberglass radio box. Plate bolts to stock radio rack (which is part of solo seat mounting) and allows radio box to be installed with no drilling or mods to box or stock rack.
Photo courtesy of Marty Ray.
2D cad with dimensions.
Photo courtesy of Marty Ray.
I can also supply additional radio information, there were basically 2 types of motorola radio that would potentially be suitable. The earlier one is the Solid State Dispatcher (1966-74) which is (kind of- I think the box is a fake) shown in the V1000 I-Convert police brochure; the later one is the MCR-100 (1975-80). The link below has info. All these radios are pretty hard to find.
In this email are pics of my bike with radio box and radio's control head installed.
In this case, radio is not functional because I do not have the portion that goes inside the box. but you cannot actually use such a radio although you could do recieve only. I might install a cop type scanner radio inside the box and hook it up to the speaker on the control head for a more realistic set up.
Bike does not currently have all its cop equipment installed, there should be a plate at the back with blue lamps, and red lamps in front for pursuit. Lettering POLICE on radio box is going to have to be either removed or covered up, you cannot ride around with that on there visible. This is also why the blue and red lamps are not installed, same reason. I have all that stuff. There should be a siren, and some other stuff.
I am very interested if anyone has any info on the 850 T3 or V1000 I-Convert in a in police service and/or marked up (that's cop lingo for having the dept. logo and other markings on the vehicle) because currently I have not been able to find any pictures or info on examples of what these bikes looked like in use.
Radio box needs an antenna, has a hole for that. I'll get to it. To install the control head I decided to cut off most of the long thick cable, rather than route it all the way back to the radio box. I stuffed the cable stub down under the tank. I am keeping the rest of the cable, but I do not have the radio drawer that the big connector plugs into. Later on if I want to run a scanner or PA or something, I will have to do some wiring. For now it's all for looks, one might argue it's useless ballast!
The plan for my bike, is to put it together like a distributor brochure I found. This brochure is for the V1000 I-Convert, which is basically the same bike. Brochure shows a different radio box, which is more similar to one for an earlier radio called the Motorola Solid State Dispatcher - but in fact not the same and so fake.
Some LAPD spec bikes (850 T3/ V1000 I-Convert) used different metal saddle bags, different light arrangements, and some other stuff, I don't know much about all that. I think this equipment was carried over from LAPD Eldo/ Ambo bikes.
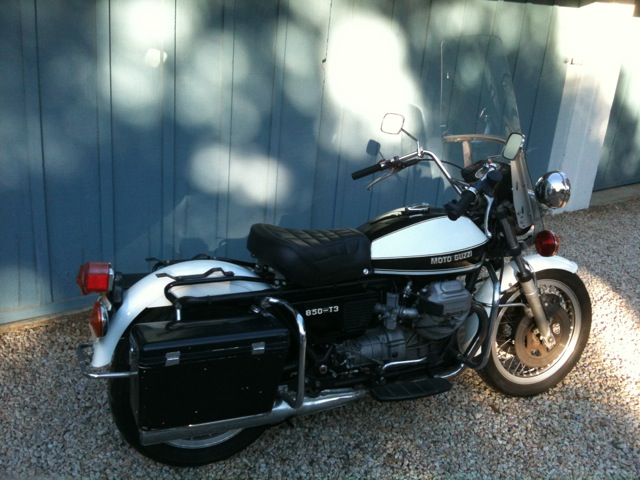
850 T3 overview, before radio installation.
Photo courtesy of Marty Ray.
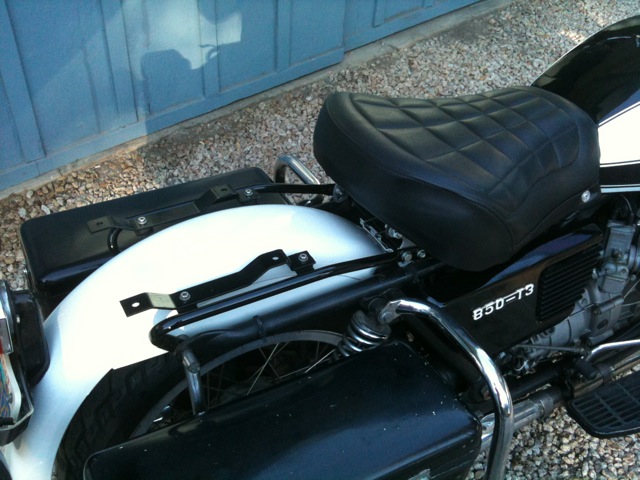
Stock seat and stock radio rack before radio box installation.
Photo courtesy of Marty Ray.
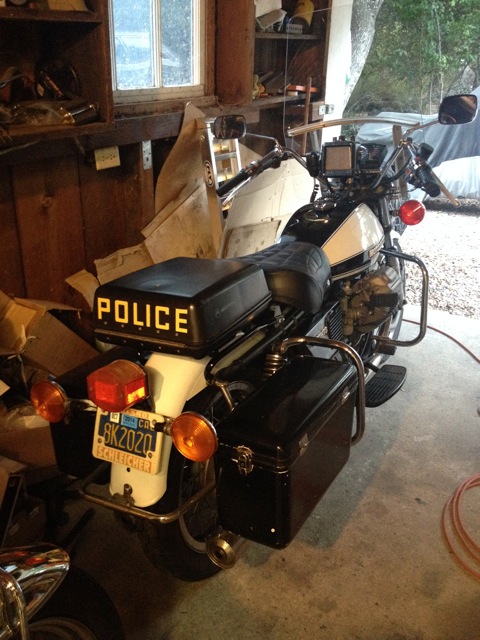
850 T3 with radio box and radio's control head on handlebars - overview from rear.
Photo courtesy of Marty Ray.
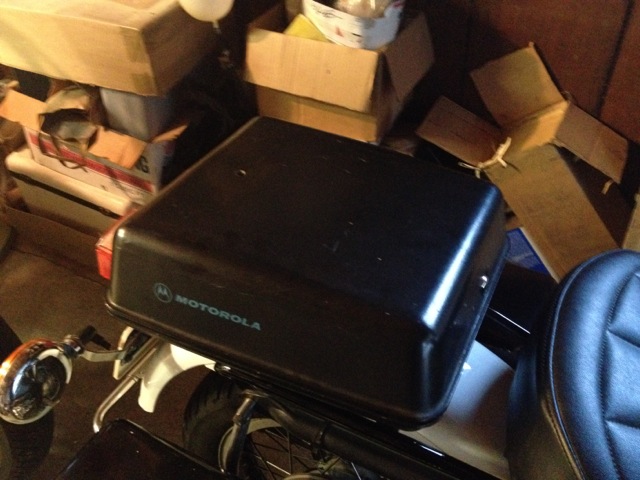
Motorola MCR-100 (etc.) fiberglass radio box installed behind seat, using adapter plate. Side view.
Photo courtesy of Marty Ray.
Radio box rear view.
Photo courtesy of Marty Ray.
MCR-100 control head has brackets on the back, which fit to clamps around the upper cross bar of handlebar. I can supply details of this if anyone is interested. These parts are also shown in the Guzzi 850 T3 police parts book pages.