Constant velocity (CV) joint/axle replacement
DIY and how-to
articles on repairing the Saab 9-5 SE.
Updated:
At 130,000 miles (), the boots on my constant velocity (CV) joints/axles were showing some surface cracks. By the time I started working on them, the right side inner boot had actually split in one small location and was flinging a bit of grease around the inside of the wheel well. Not terribly bad, but definitely time to fix. I suppose I could have simply replaced the boots and grease after cleaning up the existing tripod and universal joint, etc. But, I found brand new (not remanufactured) complete CV axles (not including the inner tripod housing) for USD $61.35 each plus shipping from Car Parts Discount. I found that price to be quite inexpensive and certainly easier than disassembling, cleaning, and reassembling the original parts. So, I ordered the axles with the intention of heading in that direction.
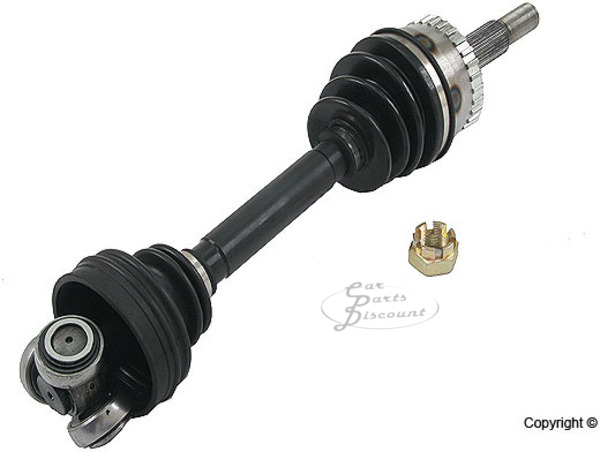
Photo courtesy of Car Parts Discount.
After speaking with my brother, I became a bit concerned that I wasn't also getting the inner tripod housing (the splined part the fits into the transmission and into which the tripod fits). He works on many automobiles and said he usually purchases the entire unit, plucks the existing one from the transmission, inserts the new one, and is done in no time at all. Sounded better to me. I found some complete axles locally and I had decided to return the ones I had purchased from Car Parts Discount.
However, when I went to pull the inner splined tripod housing from the transmission, I could not get it to come out for the life of me. I pried on things with more force than I wanted to, used steady prying, sharp sudden prying, yanked on, yelled at, made calls for advice, tried everything again, and then gave up. I was going to break something expensive and time consuming if I kept after it.
The inside of my tripod housing looked fantastic and showed very little wear (in the location where the tripod rollers make contact). I reverted to the original plan and fit the shafts from Car Parts Discount. Although not pictured, the shafts come with a tube of grease and a clamp for the rubber gaiter. The axles are new (no core charge) and appear to be of good quality (though I'm no constant velocity axle expert).
Installation was straightforward as I followed the procedure outlined in the Saab Workshop Information System (WIS) software. There were a couple of small stumbling blocks:
- With the large end of the inner boot removed, the tripod should simply pull out of the tripod housing. But it doesn't. The WIS makes reference to a plate edge stating
Remove the plate edge and lift off the tripod housing. The plate does not need to be refitted (only for production purposes)
. But, there is no diagram illustrating this plate edge. Not wanting to destroy anything, it took me a while to finally figure out that the plate edge is what is preventing the tripod from being removed. So, I used my sheet metal shears to cut the plate edge (up to the main part of the tripod housing) and then popped off the entire plate edge with a small screwdriver. With that plate edge removed, the tripod came right out of the tripod housing. Therefore, if your joints have never been replaced, expect to cut off the entire plate edge and discard it. - Fitting the new boot in place is easy. But, the little cheap clamp that is provided with the axle doesn't work so well. I think part of the problem is that once the plate edge is removed, there isn't as much of a grooved recess for the cheap clamp to fit into. The result is that the clamp wants to roll off the boot. Not good. I fiddled with the cheap clamps for a while, but couldn't fit them in any sort of satisfactory manner. Instead, I used large hose clamps and they worked much better. The hose clamp is much wider and I positioned it such that half of it was covering the edge of the boot, while the other half was overlapping the tripod housing. This provided a very firm clamp that isn't going to roll off.
All in all, this job is not bad at all and requires very little in the way of special tools. The car drives just as it always had (which it should because the original axles were not destroyed from running dry or dirty).