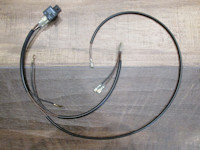
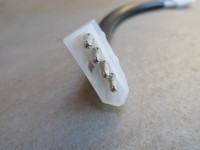
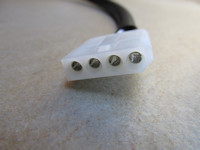
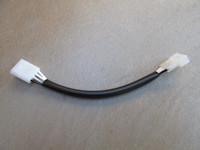
Gregory Bender

Wiring harnesses for the Moto Guzzi 1000 SP

To order, e-mail: greg@thisoldtractor.com

Installation is eased with my instructions for the major electrical components.

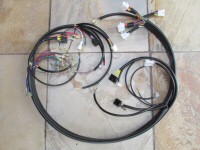
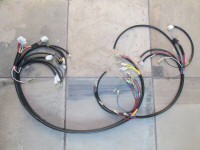
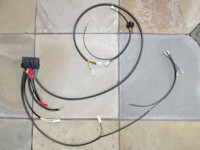
Main harness for the 1000 SP

Part Number Description Photo Price
MG# 14747155

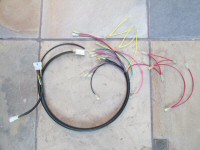
Main harness for the 1000 SP (PRINTED CIRCUIT INSTRUMENT PANEL)

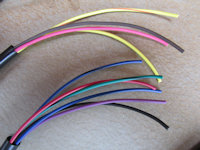
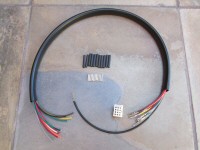
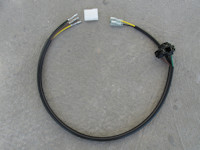
I duplicated an original main harness. In construction, I use the same gauge of wire, the same colors and tracers (stripes), the same length and sheathing, the same terminals, etc. All terminals are of the double crimp, strain relief variety.

The wires routed to the alternator are constructed of heat resistant materials.
  • Note: Main harnesses comprise the main - or primary - wiring harness. Each motorcycle also uses ancillary sub-harnesses. The individual sub-harnesses are sold separately.
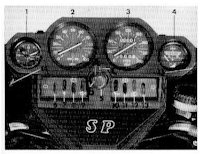
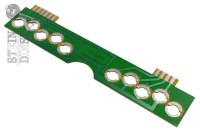
Instead of routing a pair of wires to each bulb, the printed circuit instrument panel uses this printed circuit board to distribute power to the dash indicator bulbs (MG# 14765355). Printed circuit board not included.

Photo courtesy of Stein-Dinse.
Instead of routing a pair of wires to each bulb, the printed circuit instrument panel uses this printed circuit board to distribute power to the dash indicator bulbs (MG# 14765355). Printed circuit board not included.

Photo courtesy of Stein-Dinse.
Direct link to image

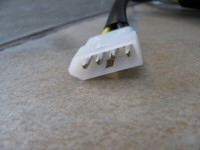
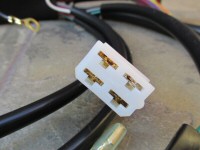
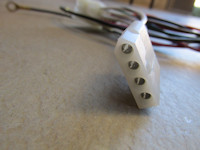
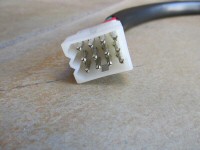
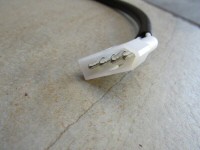
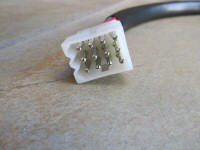
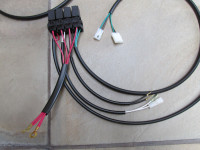
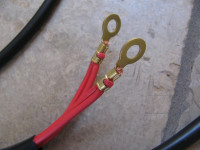
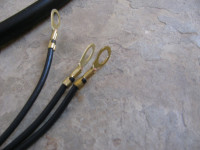
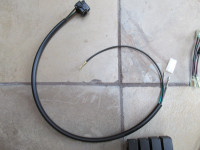
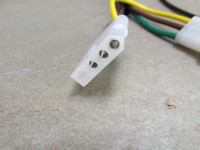
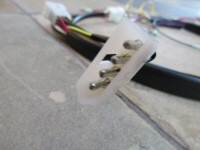
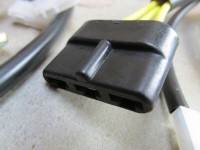
4 terminal connection, free hanging.

Direct link to image

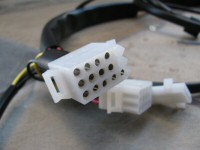
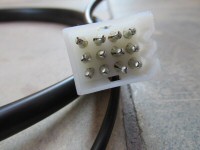
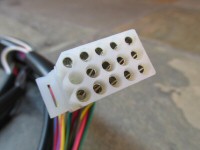
15 terminal connection at the mounting plate beneath the dash.

Direct link to image

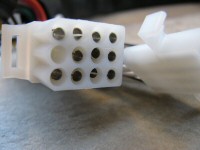
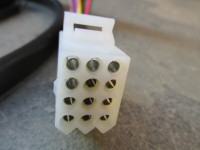
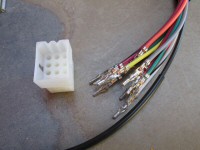
12 terminal connection at the mounting plate beneath the dash.

Direct link to image

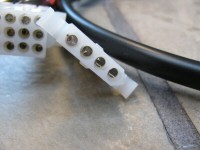
4 terminal connection at the mounting plate beneath the dash.

Direct link to image

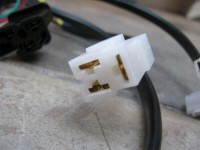
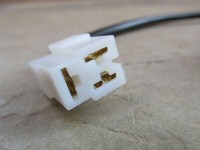
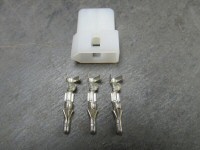
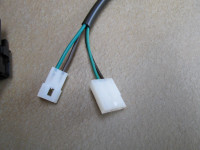
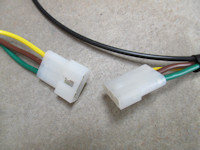
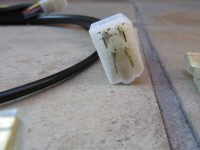
3 terminal connection for the voltage regulator.

Direct link to image

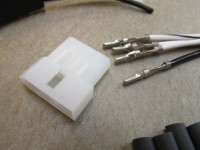
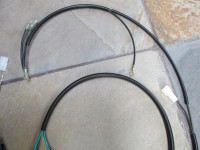
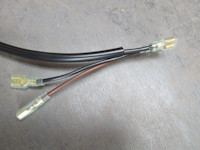
3 terminal connection for the wires that connect to the tail light sub-harness.

Direct link to image

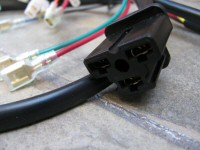
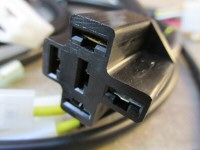
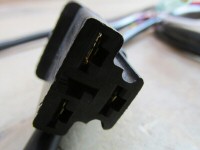
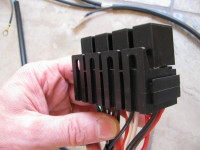
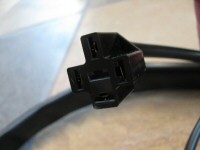
Relay connection.
Relay connection.
Relay connection.

Direct link to image

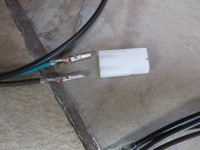
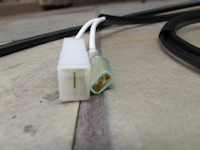
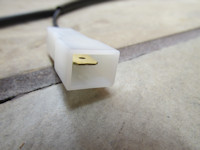
Flat 3 terminal connection for the alternator and for the voltage rectifier. The flat connector pictured is no longer available. You may reuse your original connector, or fit the individual insulators provided.

Direct link to image

At the alternator: Original additional/special sheathing (MG# 14710200) exiting the alternator cover is not included because it does not accept the larger diameter heat resistant wire; regular sheathing is used instead and it fits nicely through the alternator cover.

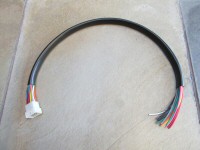
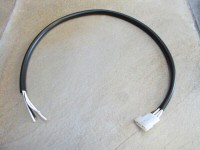
Main harness for the 1000 SP (PRINTED CIRCUIT INSTRUMENT PANEL).
14747155: Main harness for the 1000 SP (PRINTED CIRCUIT INSTRUMENT PANEL).

Direct link to image

USD $220.00

How to order

Testimonials and reviews

MG# 17747160

Main harness for the 1000 SP (NON-PRINTED CIRCUIT INSTRUMENT PANEL)

I duplicated an original main harness. In construction, I use the same gauge of wire, the same colors and tracers (stripes), the same length and sheathing, the same terminals, etc. All terminals are of the double crimp, strain relief variety.

The wires routed to the alternator are constructed of heat resistant materials.
  • Note: Main harnesses comprise the main - or primary - wiring harness. Each motorcycle also uses ancillary sub-harnesses. The individual sub-harnesses are sold separately.
15 terminal connection at the mounting plate beneath the dash.

Direct link to image

12 terminal connection at the mounting plate beneath the dash.

Direct link to image

4 terminal connection, free hanging.

Direct link to image

Relay connection.
Relay connection.
Relay connection.

Direct link to image

3 terminal connection for the voltage regulator.

Direct link to image

3 terminal connection for the wires that connect to the tail light sub-harness.

Direct link to image

At the alternator: Original additional/special sheathing (MG# 14710200) exiting the alternator cover is not included because it does not accept the larger diameter heat resistant wire; regular sheathing is used instead and it fits nicely through the alternator cover.

Main harness for the 1000 SP (NON-PRINTED CIRCUIT INSTRUMENT PANEL).
17747160: Main harness for the 1000 SP (NON-PRINTED CIRCUIT INSTRUMENT PANEL).

Direct link to image

USD $220.00

How to order

Testimonials and reviews

Sub-harnesses for the 1000 SP (BOTH NON-PRINTED AND PRINTED CIRCUIT INSTRUMENT PANELS)

Part Number Description Photo Price
MG# 14715424 (ALT)

Distributor to main harness - left side

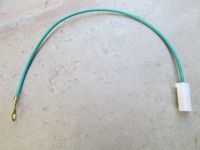
Connects the ignition points inside the distributor to the main harness (further connects to the negative terminal on the coil serving the left cylinder). A ring terminal is used for a more secure fitment inside the distributor. The green wire exits the distributor toward the rear of the motorcycle.

Distributor to main harness - left side.
14715424: Distributor to main harness - left side.

Direct link to image

USD $2.75

How to order

Testimonials and reviews

MG# 14715425 (ALT)

Distributor to main harness - right side

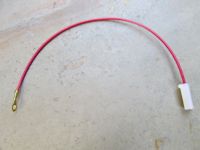
Connects the ignition points inside the distributor to the main harness (further connects to the negative terminal on the coil serving the right cylinder). A ring terminal is used for a more secure fitment inside the distributor. The red wire exits the distributor toward the front of the motorcycle.

Distributor to main harness - right side.
14715425: Distributor to main harness - right side.

Direct link to image

USD $2.75

How to order

Testimonials and reviews

MG# 14747700

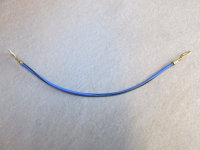
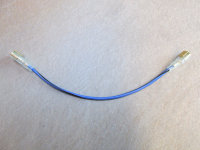
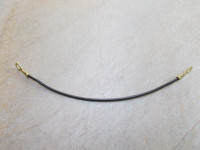
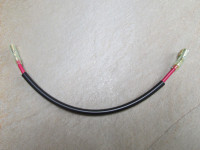
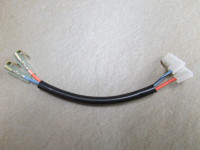
Coil to coil interconnect

Connects the positive terminal on one coil to the positive terminal on the other coil.

Coil to coil interconnect.
14747700: Coil to coil interconnect.

Direct link to image

USD $2.00

How to order

Testimonials and reviews

MG# 14747700 (DYNA)

Coil to coil interconnect for DYNA coils

Connects the positive terminal on one Dyna coil to the positive terminal on the other Dyna coil.

Coil to coil interconnect for DYNA coils.
14747700: Coil to coil interconnect for DYNA coils.

Direct link to image

USD $2.00

How to order

Testimonials and reviews

MG# 14747700 (DYNA MINI)

Coil to coil interconnect for DYNA Miniature coils

Connects the positive terminal on one Dyna Miniature coil to the positive terminal on the other Dyna coil. Uses piggyback terminals to ease connection of other terminals.

Coil to coil interconnect for DYNA Miniature coils.
14747700: Coil to coil interconnect for DYNA Miniature coils.

Direct link to image

USD $2.50

How to order

Testimonials and reviews

MG# 14748450

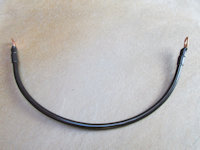
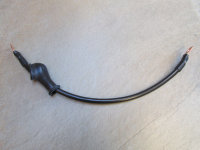
Battery cable - negative

Connects the negative terminal on the battery to the ground point on the frame. Cable is 6 AWG and is 400 mm (~15 34 inch in) in total length. If you require something different, please let me know. Replaces MG# 14748400.

Battery cable - negative.
14748450: Battery cable - negative.

Direct link to image

USD $12.25

How to order

Testimonials and reviews

MG# 17748500

Rectifier ground

Used to connect the body of the rectifier to the motorcycle frame (ground or earth).

Rectifier ground.
17748500: Rectifier ground.

Direct link to image

USD $2.00

How to order

Testimonials and reviews

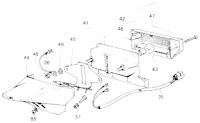
MG# 17747360 (EARLY)

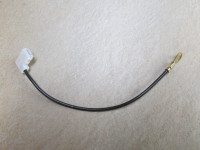
Main harness to tail light

Connects the main harness to the tail light (uses a separate ground).

Applicable to this tail light assembly (not included).

Direct link to image

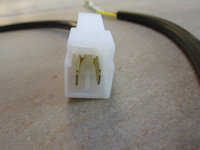
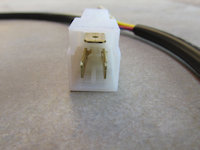
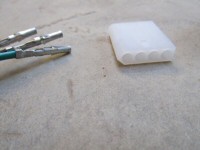
3 terminal connection to the main harness.

Direct link to image

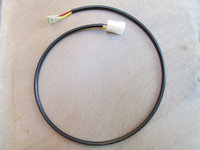
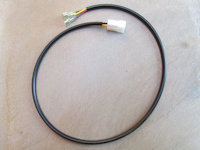
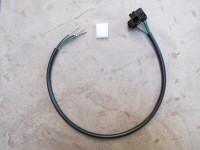
Cable assembly for the tail light.
17747360: Cable assembly for the tail light.

Direct link to image

USD $12.00

How to order

Testimonials and reviews

MG# 14748100

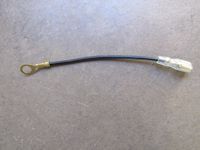
Tail light ground

Connects the tail light to ground.

Applicable to this tail light assembly (not included).

Direct link to image

Tail light ground.
14748100: Tail light ground.

Direct link to image

USD $2.00

How to order

Testimonials and reviews

MG# 17747360 (LATE)

Main harness to tail light

Connects the main harness to the tail light (ground wire is integrated).

Applicable to this tail light assembly (not included).

Direct link to image

3 terminal connection to the main harness.

Direct link to image

Cable assembly for the tail light.
17747360: Cable assembly for the tail light.

Direct link to image

USD $14.25

How to order

Testimonials and reviews

MG# 17747950

Battery cable - positive

Connects the positive terminal on the battery to the starter solenoid. Cable is 6 AWG and is 350 mm (~13 34 inch in) in total length. If you require something different, please let me know.

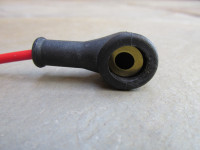
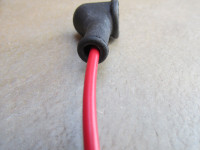
Includes rubber cover for the terminal located at the starter solenoid (MG# 12703000).

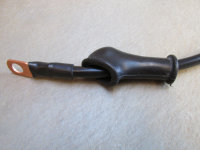
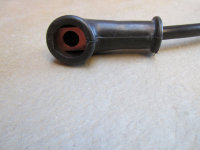
Detail of rubber cover for the terminal located at the starter solenoid (MG# 12703000).

Direct link to image

Detail of rubber cover for the terminal located at the starter solenoid (MG# 12703000).

Direct link to image

Battery cable - positive.
17747950: Battery cable - positive.

Direct link to image

USD $15.75

How to order

Testimonials and reviews

MG# 17757240

Rectifier to fuse number 5

Connects the rectifier to fuse number 5. Uses the correct original piggyback terminal (same as MG# 17767240).

Rectifier to fuse number 5.
17757240: Rectifier to fuse number 5.

Direct link to image

USD $3.50

How to order

Testimonials and reviews

MG# 18720150

Flasher to flasher

Connects one flasher to the other flasher (behind the right side cover). Uses the correct original piggyback terminals.

Flasher to flasher.
18720150: Flasher to flasher.

Direct link to image

USD $5.50

How to order

Testimonials and reviews

MG# 18759550

Brake fluid indicator to ground

Connects the rear brake master cylinder to ground.

Ground wire for rear brake master cylinder.
18759550: Ground wire for rear brake master cylinder.

Direct link to image

USD $2.25

How to order

Testimonials and reviews

MG# 28727200

Rectifier to fuse panel

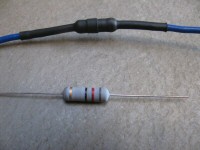
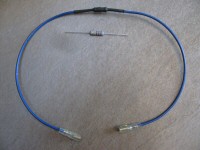
Connects the rectifier to the fuse panel to bootstrap the charging system. Comes complete with 2 watt, 82 ohm resistor soldered in place (as original). Extra resistor not included.

This harness was not installed with the original Moto Guzzi factory harness. However, Moto Guzzi fit it to later models and I consider it a good idea to include it as well.

2 watt, 82 ohm resistor (extra not included).

Direct link to image

Rectifier to fuse panel.
28727200: Rectifier to fuse panel.

Direct link to image

USD $13.25

How to order

Testimonials and reviews

Sub-harnesses for the 1000 SP (NON-PRINTED CIRCUIT INSTRUMENT PANEL)

Part Number Description Photo Price
MG# 17740560

Dash harness to headlight (NON-PRINTED CIRCUIT INSTRUMENT PANEL)

Connects the dash sub-harness to the headlight.

Connects the dash sub-harness to the headlight bulb. 4 terminal plug is left uninstalled so that the wires may be fit through the small opening in the headlight bucket. Once the wires are in place, the plug is installed as follows:

  • Position 1: Yellow (not used on USA models - city light)
  • Position 2: Brown
  • Position 3: Green
  • Position 4: Black
4 terminal connection to the dash sub-harness.

Direct link to image

Applicable to this dash console (not included).

Direct link to image

Dash harness to headlight
17740560: Dash harness to headlight

Direct link to image

USD $11.50

How to order

Testimonials and reviews

MG# 17740560-EURO

Dash harness to headlight (NON-PRINTED CIRCUIT INSTRUMENT PANEL)

Connects the dash sub-harness to the headlight.

Connects the dash sub-harness to the headlight bulb. 4 terminal plug is left uninstalled so that the wires may be fit through the small opening in the headlight bucket. Once the wires are in place, the plug is installed as follows:

  • Position 1: Yellow (city light)
  • Position 2: Brown
  • Position 3: Green
  • Position 4: Black
4 terminal connection to the dash sub-harness.

Direct link to image

Applicable to this dash console (not included).

Direct link to image

Dash harness to headlight
17740560: Dash harness to headlight

Direct link to image

USD $18.25

How to order

Testimonials and reviews

MG# 17747260

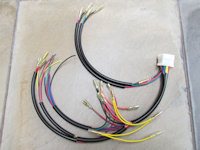
Main harness to dash (NON-PRINTED CIRCUIT INSTRUMENT PANEL)

Connects the main harness to the dash.

12 terminal connection to the main harness.

Direct link to image

4 terminal connection to the headlight.

Direct link to image

4 terminal connection to the main harness.

Direct link to image

Dash (NON-PRINTED CIRCUIT INSTRUMENT PANEL).
17747260: Dash (NON-PRINTED CIRCUIT INSTRUMENT PANEL).

Direct link to image

USD $85.00

How to order

Testimonials and reviews

MG# 17748160

Dash bulb interconnect (NON-PRINTED CIRCUIT INSTRUMENT PANEL)

Connects multiple dash bulbs to ground inside the dash. Includes original piggyback terminal and 5 mm post to 6.3 mm male spade adapters.

Dash bulb interconnect (NON-PRINTED CIRCUIT INSTRUMENT PANEL).
17748160: Dash bulb interconnect (NON-PRINTED CIRCUIT INSTRUMENT PANEL).

Direct link to image

USD $9.75

How to order

Testimonials and reviews

MG# 17753060

Dash harness to front turn signals (NON-PRINTED CIRCUIT INSTRUMENT PANEL)

Two are required.

Front turn signal extensions
17753060: Front turn signal extensions

Direct link to image

USD $7.00

How to order

Testimonials and reviews

MG# 17753160

Flasher to toggle switch

Connects the turn signal flasher to the toggle switch to provide power for 4-way flashing hazard lights.

Flasher to toggle switch.
17753160: Flasher to toggle switch.

Direct link to image

USD $12.25

How to order

Testimonials and reviews

MG# 14093051

Clutch cable (NON-PRINTED CIRCUIT INSTRUMENT PANEL)

WANTED: I very much want to reproduce this harness for the 1000 SP. Should you have this 1000 SP wire sub-harness suitable for duplication, I would like to speak with you. For more information, e-mail: greg@thisoldtractor.com

USD $0.00

How to order

Testimonials and reviews

MG# 17754660

Flashing lights ground (NON-PRINTED CIRCUIT INSTRUMENT PANEL)

Flashing lights ground
17754660: Flashing lights ground

Direct link to image

USD $2.00

How to order

Testimonials and reviews

Sub-harnesses for the 1000 SP (PRINTED CIRCUIT INSTRUMENT PANEL)

Part Number Description Photo Price
MG# 14747255

Main harness to dash (PRINTED CIRCUIT INSTRUMENT PANEL)

Connects the main harness to the dash.

Instead of routing a pair of wires to each bulb, the printed circuit instrument panel uses this printed circuit board to distribute power to the dash indicator bulbs (MG# 14765355). Printed circuit board not included.

Photo courtesy of Stein-Dinse.

Instead of routing a pair of wires to each bulb, the printed circuit instrument panel uses this printed circuit board to distribute power to the dash indicator bulbs (MG# 14765355). Printed circuit board not included.

Photo courtesy of Stein-Dinse.

Direct link to image

PLEASE NOTE: This harness is not 100% complete. Try as I might, I have been unable to source the original printed circuit board flag terminals (AMP 280252). Likewise, I have been unable to source the two different flag terminal connection housings (AMP 280297 and AMP 280352). You will need to re-use your existing terminals and housings and mate them to the pigtails provided with this harness. I have intentionally left the pigtails 100 mm longer than original for this purpose.
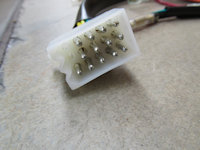
15 terminal connection that connects to the main harness.

Direct link to image

Pigtails that will have to be connected to your existing terminals and housings.

Direct link to image

Applicable to this dash console (not included).

Direct link to image

Dash (PRINTED CIRCUIT INSTRUMENT PANEL).
14747255: Dash (PRINTED CIRCUIT INSTRUMENT PANEL).

Direct link to image

USD $70.00

How to order

Testimonials and reviews

MG# 14747485

Main harness to headlight (PRINTED CIRCUIT INSTRUMENT PANEL)

Connects the main harness to the headlight.

Connects the main harness to the headlight bulb. 4 terminal plug is left uninstalled so that the wires may be fit through the small opening in the headlight bucket. Once the wires are in place, the plug is installed as follows:
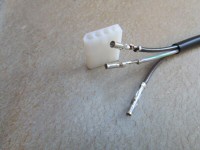
  • Position 1: Yellow (not used on USA models - city light)
  • Position 2: Brown
  • Position 3: Gray with green tracer
  • Position 4: Black
4 terminal connection to the main harness.

Direct link to image

Instead of routing a pair of wires to each bulb, the printed circuit instrument panel uses this printed circuit board to distribute power to the dash indicator bulbs (MG# 14765355). Printed circuit board not included.

Photo courtesy of Stein-Dinse.

Instead of routing a pair of wires to each bulb, the printed circuit instrument panel uses this printed circuit board to distribute power to the dash indicator bulbs (MG# 14765355). Printed circuit board not included.

Photo courtesy of Stein-Dinse.

Direct link to image

Main harness to headlight.
14747485: Main harness to headlight.

Direct link to image

USD $7.75

How to order

Testimonials and reviews

MG# 14748000

Horn interconnect (PRINTED CIRCUIT INSTRUMENT PANEL)

Connects one horn to the other horn.

Instead of routing a pair of wires to each bulb, the printed circuit instrument panel uses this printed circuit board to distribute power to the dash indicator bulbs (MG# 14765355). Printed circuit board not included.

Photo courtesy of Stein-Dinse.

Instead of routing a pair of wires to each bulb, the printed circuit instrument panel uses this printed circuit board to distribute power to the dash indicator bulbs (MG# 14765355). Printed circuit board not included.

Photo courtesy of Stein-Dinse.

Direct link to image

Horn interconnect.
14748000: Horn interconnect.

Direct link to image

USD $4.00

How to order

Testimonials and reviews

MG# 14748155

Dash bulb interconnect (PRINTED CIRCUIT INSTRUMENT PANEL)

Connects multiple ground points in the dash. Includes original piggyback terminal and 5 mm post to 6.3 mm male spade adapters.

Instead of routing a pair of wires to each bulb, the printed circuit instrument panel uses this printed circuit board to distribute power to the dash indicator bulbs (MG# 14765355). Printed circuit board not included.

Photo courtesy of Stein-Dinse.

Instead of routing a pair of wires to each bulb, the printed circuit instrument panel uses this printed circuit board to distribute power to the dash indicator bulbs (MG# 14765355). Printed circuit board not included.

Photo courtesy of Stein-Dinse.

Direct link to image

Dash bulb interconnect (PRINTED CIRCUIT INSTRUMENT PANEL).
14748155: Dash bulb interconnect (PRINTED CIRCUIT INSTRUMENT PANEL).

Direct link to image

USD $5.00

How to order

Testimonials and reviews

Custom Sub-Harnesses

Part Number Description Photo Price
SWITCH-TONTI

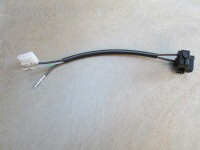
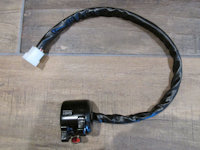
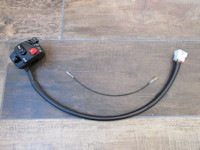
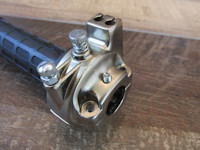
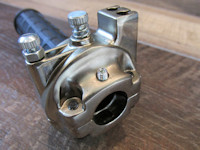
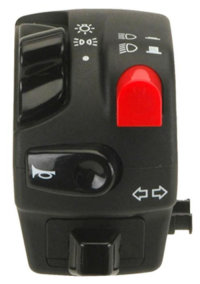
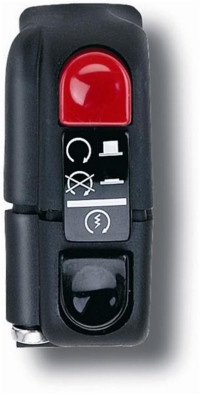
Multifunction handlebar switch pre-wired for Moto Guzzi Tonti models

After 10 years of building Moto Guzzi harnesses and supporting my customers, I have learned that people experience the most frustration and challenges when attempting to wire the left handlebar switch (by far). To help alleviate these issues, I am now offering this brand new switch with period appearance. The switch features a metal body and fits 22 mm (78 inch) handlebars. It is pre-wired so that you can mount it on your handlebar and plug in the wires quickly and easily.

I chose this switch because of its functionality, size, and appearance. While it does not boast all of the features and functions of a modern switch, it is a good basic switch that is appropriate to the Tonti frames. I use a switch like this on my personal Ambassador and I find it easy to use and my thumb operates all of the controls with ease. As with all handlebar switches, I strongly recommend the use of relays for the headlight circuit. I have an excellent relay solution available for purchase.
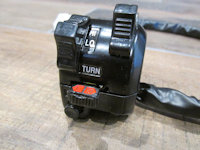
  • Has a true off position where both the running lights and headlight are off.
  • Headlight switch has the standard low beam and high beam selector.
  • Turn signal switch functions as you would expect: move the switch left to actuate the left turn signals; move the switch right to actuate the right turn signals; move the switch to the middle position to turn off turn signals.
  • Simple push-button horn.
  • Can be fit between the handlebar grip and the clutch perch (this is my recommended location for ease of use).
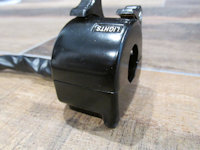
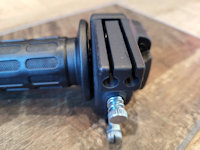
Close-up of high/low, on/off, turn signal switches; and horn button.

Direct link to image

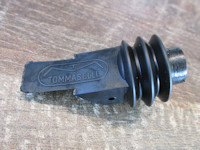
Forward-facing side of the switch.

Direct link to image

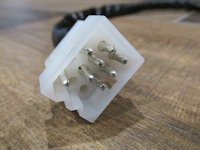
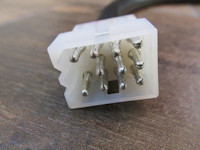
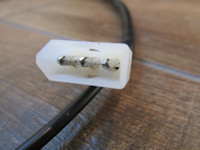
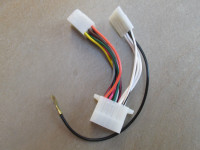
Molex plug ready to plug into your harness (this end will be customized for your specific model).

Direct link to image

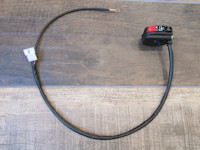
Multifunction handlebar switch pre-wired for Moto Guzzi Tonti models

Direct link to image

USD $85.00

How to order

Testimonials and reviews

RELAY-HARNESS-TONTI

Relay solution for the horns, coils, headlight high beam, and headlight low beam

No more excuses! Relays greatly improve the performance of the horns, coils, and headlight. Your horns will be louder, your coils will get all the amperage they require, and your headlights will burn brighter when you use relays. Relays also dramatically extend the life of your handlebar switches.

This relay kit is a well thought-out and solid solution that is in line with what I believe Lino Tonti might have designed. A few points I'll mention:

  • Complete solution - includes all needed components.
  • Works with your original wiring harness.
  • The bank of four relay sockets is intended to be mounted between the battery and the rear plastic inner fender. This affords ease of installation as well as later access. This keeps the headlight bucket largely uncluttered and doesn't hide anything under the gas tank were it is difficult to access.
  • Wiring is color coded to original specifications.
  • Relay sockets are used to make installation easy and trouble free.
  • Each relay is wired independently from each other: horns, coils, headlight high beam, and headlight low beam. This slight redundancy permits one relay to fail without affecting the functionality of any other relay.
  • Includes all four needed relays.
  • Relays are of a standard size and easily replaced at any time (they simply plug into the socket).
  • Simple installation - See installation instructions.
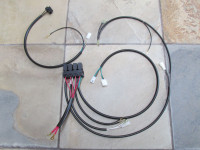
The bank of 4 relays.

Direct link to image

These wires connect to battery positive terminal.

Direct link to image

These wires are grounded to the frame where the rear fender is secured to the frame.

Direct link to image

This wire is connected to the battery negative terminal.

Direct link to image

Connections to main harness and headlight.

Direct link to image

Headlight plug.
Headlight plug.
Headlight plug.

Direct link to image

Fit Molex plug after routing wires through hole in headlight bucket.

Direct link to image

These wires connect to both horns.

Direct link to image

The relay brackets have mounting holes which you can use to mount to your plastic inner fender.

Direct link to image

Installation instructions

The complete relay solution you will receive.

Direct link to image

USD $100.00

How to order

Testimonials and reviews

KS-TO-MOLEX

Easy plug in solution for connecting K&S switches on Tonti models originally equipped with Molex plugs.

K&S makes a variety of good quality, affordable handlebar switches that are popular replacements for the original switch gear. The K&S 12-0030 is one popular model.

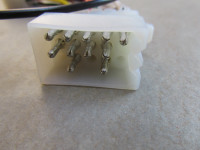
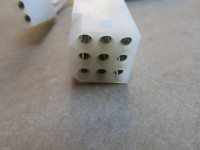
No more need to fiddle with butt connectors, soldering, or heat shrink. Just plug the 9-pin connector into the plug that came with your K&S switch, and the other end into the 12-pin connector on the back of your headlight shell. Made specifically to support the 850 T, 850 T3, V1000 I-Convert, V1000 G5, 1000 SP, Le Mans, Le Mans III, and other such models. If in doubt as to whether it will work with your model, just ask. I am happy to build to suit your Guzzi.

Please note: Some original handlebar switches were grounded through the handlebar. Other original switches were grounded through the Molex 12-pin connector. If needed for your application, a separate ground wire will be provided for use inside the headlight shell. Simply fit it in position 3 of the 12-pin Molex plug inside the headlight shell (position 1 has a red/black wire). Connect the other end with the piggyback terminal to the ground location inside the headlight shell.

When ordering: Please specify specific K&S switch you are using and the total length needed.
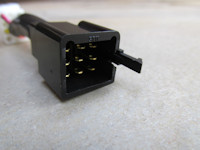
This end plugs into the connector from the K&S switch.

Direct link to image

This end plugs into the Moto Guzzi harness.

Direct link to image

K&S to Molex adapter for Moto Guzzi motorcycles.

Direct link to image

USD $20.00

How to order

Testimonials and reviews

MOLEX-TO-MOLEX-LEFT

Easy plug in solution for connecting aftermarket left-side handlebar switches on Tonti models originally equipped with Molex plugs.

Aftermarket switches sometimes use Molex plugs. Generally, the plugs used do not match the Guzzi size or pin configuration. Tomaselli and Domino switches sometimes fall into this category.

No more need to fiddle with butt connectors, soldering, or heat shrink. Just plug the Molex connector into the plug that came with your aftermarket switch, and the other end into the 12-pin connector on the back of your headlight shell. Made specifically to support the 850 T, 850 T3, V1000 I-Convert, V1000 G5, 1000 SP, Le Mans, Le Mans III, and other such models. If in doubt as to whether it will work with your model, just ask. I am happy to build to suit your Guzzi.

Please note: Some original handlebar switches were grounded through the handlebar. Other original switches were grounded through the Molex 12-pin connector. If needed for your application, a separate ground wire will be provided for use inside the headlight shell. Simply fit it in position 3 of the 12-pin Molex plug inside the headlight shell (position 1 has a red/black wire). Connect the other end with the piggyback terminal to the ground location inside the headlight shell.

When ordering: Please specify the aftermarket switch you are using and the total length needed.
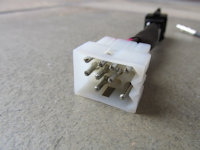
This end plugs into the Moto Guzzi harness.

Direct link to image

This end plugs into the Domino harness.

Direct link to image

Example Domino switch.

Direct link to image

Molex to Molex adapter

Direct link to image

USD $20.00

How to order

Testimonials and reviews

DOMINO-HORN-RELAY-PLUG

Relay and needed wiring to operate the horns using positive current (instead of the original Guzzi handlebar switch that provided the ground for the horns).

The Domino handlebar switch actuates the horns using positive current whereas the original Guzzi switch actuated the horn by providing a ground. This sub-harness replaces the relay under the fuel tank with a new relay and provides the necessary wiring to actuate the horns.

Installation instructions:

  1. Remove the fuel tank to gain access to the wiring.
  2. Disconnect the existing black and brown wires from the horns.
  3. Connect the existing black wire that you just disconnected to terminal 86 on the new relay.
  4. Connect the new black and brown wires to the horns.
  5. Connect both black wires with ring terminals to ground.
  6. Route the new long brown wire to the fuse panel. Connect this brown wire to the fused side of the fuse panel.
Horn relay and wiring for use with Domino handlebar switches.

Direct link to image

USD $26.00

How to order

Testimonials and reviews

MOLEX-TO-MOLEX-RIGHT

Easy plug in solution for connecting aftermarket right-side handlebar switches on Tonti models originally equipped with Molex plugs.

Aftermarket switches sometimes use Molex plugs. Generally, the plugs used do not match the Guzzi size or pin configuration. Tomaselli and Domino switches sometimes fall into this category.

No more need to fiddle with butt connectors, soldering, or heat shrink. Just plug the Molex connector into the plug that came with your aftermarket switch, and the other end into the 12-pin connector on the back of your headlight shell. Made specifically to support the 850 T, 850 T3, V1000 I-Convert, V1000 G5, 1000 SP, Le Mans, Le Mans III, and other such models. If in doubt as to whether it will work with your model, just ask. I am happy to build to suit your Guzzi.

Please note: Some original handlebar switches were grounded through the handlebar. Other original switches were grounded through the Molex 4-pin connector. A separate ground wire is provided if needed for your application.

When ordering: Please specify the aftermarket switch you are using and the total length needed.
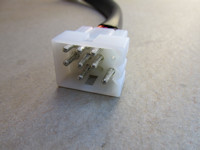
This end plugs into the Moto Guzzi harness.

Direct link to image

This end plugs into the Domino harness.

Direct link to image

Example Domino switch.

Direct link to image

Molex to Molex adapter

Direct link to image

USD $8.00

How to order

Testimonials and reviews

MOLEX-3

3 terminal Molex plug and 3 male terminals

Useful for installing on a universal right handlebar switch.

Molex terminals and connector.

Direct link to image

USD $1.75

How to order

Testimonials and reviews

MOLEX-4

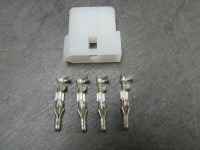
4 terminal Molex plug and 4 male terminals

Useful for installing on a universal right handlebar switch.

Molex terminals and connector.

Direct link to image

USD $2.50

How to order

Testimonials and reviews

MOLEX-12

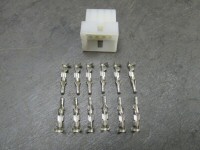
12 terminal Molex plug and 12 male terminals

Useful for installing on a universal left handlebar switch.

Molex terminals and connector.

Direct link to image

USD $6.25

How to order

Testimonials and reviews

HANDLEBAR-LEFT-12-UNIVERSAL

Wiring for universal left handlebar switches (headlight, parking lights, horn, turn signals)

Works great with the multitude of universal switches available. Butt connectors and heat shrink are included to splice the sub-harness directly to the wires from the switch. Wire connections should be staggered to yield a smaller overall finished diameter. Larger diameter sheathing is provided to aid routing the spliced wires through the sheathing after all of the connections have been made. Wires to the headlight plug are 800 mm in length. Wire to ground is 1000 mm in length. Wires are intentionally left separate from the 12 terminal plug - so that the wires may be more easily spliced and routed through the sheathing or inside the handlebar.

  • IMPORTANT NOTE: As with all switches actuating higher amperage components, I consider a relay for the headlight and horns a good idea.

Plug information:

  • Position 1: red/black (power in for headlights)
  • Position 2: empty
  • Position 3: empty
  • Position 4: red (power in for parking lights - almost never needed with non-original switches)
  • Position 5: green (power out to headlight low beam)
  • Position 6: brown (power out to headlight high beam)
  • Position 7: yellow (power out to parking lights)
  • Position 8: green/black (power out to left turn signals)
  • Position 9: pink (power out to right turn signals)
  • Position 10: gray (ground for headlight high beam flash relay - almost never needed with non-original switches)
  • Position 11: white/black (ground to horn)
  • Position 12: orange (power in for turn signals)
  • Ring terminal: black (ground in for horn)
12 terminal plug and wires.

Direct link to image

Wiring for universal left handlebar switches (headlight, parking lights, horn, turn signals).

Direct link to image

USD $36.75

How to order

Testimonials and reviews

HANDLEBAR-RIGHT-4-UNIVERSAL

Wiring for universal right handlebar switches (starter button and kill switch)

Works great with the K&S 12-0203 available from an online retailer such as MG Cycle (would also work equally well with many other generic switches). Butt connectors and heat shrink are included to splice the sub-harness directly to the wires from the switch. Wire connections should be staggered to yield a smaller overall finished diameter. Larger diameter sheathing is provided to aid routing the spliced wires through the sheathing after all of the connections have been made. Wires to the headlight plug are 800 mm in length. Wires are intentionally left separate from the 4 terminal plug - so that the wires may be more easily spliced and routed through the sheathing or inside the handlebar.

  • IMPORTANT NOTE: As with all switches actuating higher amperage components, I consider a relay for the coils a good idea and a relay for the starter a necessity.

Plug information:

  • Position 1: white/black (starter button / ground out to starter relay)
  • Position 2: white (kill switch / power out to coils)
  • Position 3: white (kill switch / power in for coils)
  • Position 4: black (starter button / ground in for starter relay)
4 terminal plug and wires.

Direct link to image

Wiring for universal right handlebar switches (starter button and kill switch).

Direct link to image

USD $15.25

How to order

Testimonials and reviews

HANDLEBAR-RIGHT-3-UNIVERSAL

Wiring for universal right handlebar switches (starter button and kill switch)

Works great with the K&S 12-0203 available from an online retailer such as MG Cycle (would also work equally well with many other generic switches). Butt connectors and heat shrink are included to splice the sub-harness directly to the wires from the switch. Wire connections should be staggered to yield a smaller overall finished diameter. Larger diameter sheathing is provided to aid routing the spliced wires through the sheathing after all of the connections have been made. Wires to the headlight plug are 800 mm in length. Wire to ground is 1000 mm in length. Wires are intentionally left separate from the 3 terminal plug - so that the wires may be more easily spliced and routed through the sheathing or inside the handlebar.

  • IMPORTANT NOTE: As with all switches actuating higher amperage components, I consider a relay for the coils a good idea and a relay for the starter a necessity.

Plug information:

  • Position 1: white/black (starter button / ground out to starter relay)
  • Position 2: white (kill switch / power out to coils)
  • Position 3: white (kill switch / power in for coils)
  • Ring terminal: black (starter button / ground in for starter relay)
3 terminal plug and wires.

Direct link to image

Wiring for universal right handlebar switches (starter button and kill switch).

Direct link to image

USD $16.25

How to order

Testimonials and reviews

MG# 14738055

Replacement wiring for the left handlebar switch (PRINTED CIRCUIT INSTRUMENT PANEL)

Ready for your switch.

Wires are 800 mm in length. Upon request, the wires may be left separate from the 12 terminal plug - so that the wires may be more easily routed inside to the handlebar.

  • IMPORTANT NOTE: As with all switches actuating higher amperage components, I consider a relay for the horns a good idea and relays for the headlight low and high beam circuits a necessity.

Plug information:

  • Position 1: red/black (power in for headlights)
  • Position 2: blue/black (two wires joined and routed back to switch)
  • Position 3: black (ground in for horn)
  • Position 4: red (power in for parking lights )
  • Position 5: green (power out to headlight low beam)
  • Position 6: brown (power out to headlight high beam)
  • Position 7: yellow (power out to parking lights)
  • Position 8: green/black (power out to left turn signals)
  • Position 9: pink (power out to right turn signals)
  • Position 10: gray (ground for headlight high beam flash relay)
  • Position 11: white/black (ground to horn)
  • Position 12: orange (power in for turn signals)

Direct link to image

Instead of routing a pair of wires to each bulb, the printed circuit instrument panel uses this printed circuit board to distribute power to the dash indicator bulbs (MG# 14765355). Printed circuit board not included.

Photo courtesy of Stein-Dinse.

Instead of routing a pair of wires to each bulb, the printed circuit instrument panel uses this printed circuit board to distribute power to the dash indicator bulbs (MG# 14765355). Printed circuit board not included.

Photo courtesy of Stein-Dinse.

Direct link to image

Replacement wiring for the left handlebar switch (PRINTED CIRCUIT INSTRUMENT PANEL).
14738055: Replacement wiring for the left handlebar switch (PRINTED CIRCUIT INSTRUMENT PANEL).

Direct link to image

USD $30.75

How to order

Testimonials and reviews

MG# 14603455

Replacement wiring for the right handlebar switch (PRINTED CIRCUIT INSTRUMENT PANEL)

Ready for your switch.

Wires are 800 mm in length. Upon request, the wires may be left separate from the 4 terminal plug - so that the wires may be more easily routed inside to the handlebar.

  • IMPORTANT NOTE: As with all switches actuating higher amperage components, I consider a relay for the coils a good idea and a relay for the starter a necessity.

Plug information:

  • Position 1: white/black (starter button / ground out to starter relay)
  • Position 2: white (kill switch / power out to coils)
  • Position 3: white (kill switch / power in for coils)
  • Position 4: black (starter button / ground in for starter relay)

Direct link to image

Instead of routing a pair of wires to each bulb, the printed circuit instrument panel uses this printed circuit board to distribute power to the dash indicator bulbs (MG# 14765355). Printed circuit board not included.

Photo courtesy of Stein-Dinse.

Instead of routing a pair of wires to each bulb, the printed circuit instrument panel uses this printed circuit board to distribute power to the dash indicator bulbs (MG# 14765355). Printed circuit board not included.

Photo courtesy of Stein-Dinse.

Direct link to image

Replacement wiring for the right handlebar switch (PRINTED CIRCUIT INSTRUMENT PANEL).
14603455: Replacement wiring for the right handlebar switch (PRINTED CIRCUIT INSTRUMENT PANEL).

Direct link to image

USD $12.50

How to order

Testimonials and reviews

MG# 17738061

Replacement wiring for left handlebar switches (NON-PRINTED CIRCUIT INSTRUMENT PANEL)

Ready for your switch.

Wires are 640 mm in length. Upon request, the wires may be left separate from the 12 terminal plug - so that the wires may be more easily routed inside to the handlebar.

  • IMPORTANT NOTE: As with all switches actuating higher amperage components, I consider a relay for the horns a good idea and relays for the headlight low and high beam circuits a necessity.

Plug information:

  • Position 1: red/black (power in for headlights)
  • Position 2: blue/black (two wires joined and routed back to switch)
  • Position 3: black (ground in for horn)
  • Position 4: red (power in for parking lights )
  • Position 5: green (power out to headlight low beam)
  • Position 6: brown (power out to headlight high beam)
  • Position 7: yellow (power out to parking lights)
  • Position 8: green/black (power out to left turn signals)
  • Position 9: pink (power out to right turn signals)
  • Position 10: gray (ground for headlight high beam flash relay)
  • Position 11: white/black (ground to horn)
  • Position 12: orange (power in for turn signals)
12 terminal connection to the main harness.

Direct link to image

Replacement wiring for left handlebar switches.
17738061: Replacement wiring for left handlebar switches.

Direct link to image

USD $26.75

How to order

Testimonials and reviews

MG# 17603461

Replacement wiring for the right handlebar switch (NON-PRINTED CIRCUIT INSTRUMENT PANEL)

WANTED: I very much want to reproduce this harness for the 1000 SP. Should you have this 1000 SP wire sub-harness suitable for duplication, I would like to speak with you. For more information, e-mail: greg@thisoldtractor.com

USD $0.00

How to order

Testimonials and reviews

Components

Part Number Description Photo Price
MG# 12702900

Rubber boot/cover for small wire terminals.

Intended to cover smaller wires with ring terminals. Sold each.
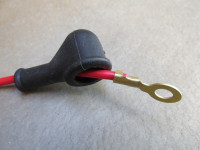
Rubber boot/cover shown in use with a 12 AWG wire and a 6 mm ring terminal. (MG# 12702900).

Direct link to image

Rubber boot/cover shown in use with a 12 AWG wire and a 6 mm ring terminal. (MG# 12702900).

Direct link to image

Rubber boot/cover shown in use with a 12 AWG wire and a 6 mm ring terminal. (MG# 12702900).

Direct link to image

Rubber boot/cover for small wire terminals (MG# 12702900).
12702900: Rubber boot/cover for small wire terminals (MG# 12702900).

Direct link to image

USD $2.50

How to order

Testimonials and reviews

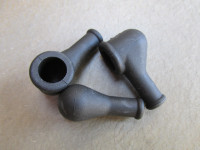
MG# 12703000

Rubber boot/cover for battery cables.

Intended to cover the terminal located at the starter solenoid. Not suitable for fitment at battery terminals. Sold each.
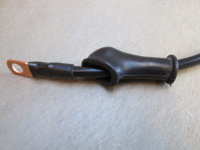
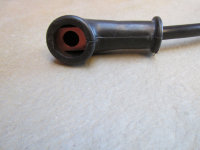
Rubber boot/cover shown in use with a 6 AWG battery cable (MG# 12703000).

Direct link to image

Rubber boot/cover shown in use with a 6 AWG battery cable (MG# 12703000).

Direct link to image

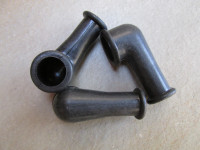
Rubber boot/cover for battery cables (MG# 12703000).
12703000: Rubber boot/cover for battery cables (MG# 12703000).

Direct link to image

USD $2.50

How to order

Testimonials and reviews

MG# 12735100

Rubber boot/cover for starter button and disc brake light switches.

Intended to cover the starter button used on the V7 Sport and 750 S. Also applicable to the front and rear brake light switches on disc brake models. Sold each.

Rubber boot/cover shown in use with a starter button. (MG# 12735100).

Direct link to image

Rubber boot/cover shown in use with a starter button.

Direct link to image

  • V7 Sport and 750 S models with drum front brakes require 1.
  • V7 Sport and 750 S models with disc front brakes require 2.
  • 850 T models require 1.
  • 750 S3 models require 2.
  • 850 T3 models require 2.
  • 850 T3 California models require 2.
  • 850 T5 models require 2.
  • V1000 I-Convert require 2.
  • V1000 G5 models require 2.
  • Le Mans models require 2.
  • Le Mans II models require 2.
  • Le Mans CX 100 models require 2.
  • Le Mans III models require 2.
  • Le Mans 1000 models require 2.
  • 1000 SP models require 2.
  • California II models require 2.
  • California III models require 2.
  • 1000 S models require 2.
Rubber boot/cover for starter buttons and disc brake light switches (MG# 12735100).
12735100: Rubber boot/cover for starter buttons and disc brake light switches (MG# 12735100).

Direct link to image

USD $2.50

How to order

Testimonials and reviews

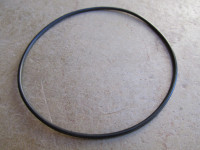
MG# 90706765

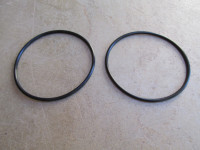
O-ring to seal the large, 100 mm speedometer to the dash.

This O-ring seals the speedometer to the dash.

O-ring to seal the large, 100 mm speedometer to the single gauge civilian or police dash.
90706765: O-ring to seal the large, 100 mm speedometer to the single gauge civilian or police dash.

Direct link to image

USD $2.00

How to order

Testimonials and reviews

MG# 90706746

Set of two O-rings to seal the smaller, 80 mm speedometer and tachometer to the dash.

These O-rings seal each gauge to the dash.

Set of two O-rings to seal the smaller, 80 mm speedometer and tachometer to the dual gauge civilian dash.
90706746: Set of two O-rings to seal the smaller, 80 mm speedometer and tachometer to the dual gauge civilian dash.

Direct link to image

USD $4.00

How to order

Testimonials and reviews

MG# 93400964

4 connection female spade connector

A great way to connect four wires without the need for male spade terminals (Moto Guzzi typically did not use male spade terminals on wiring harnesses). Accepts 6.3 mm (14 inch) terminals. Sold each.

Best to use a needle-nosed pair of pliers to insert and remove terminals.

4 connection female spade connector.
93400964: 4 connection female spade connector.

Direct link to image

USD $8.00

How to order

Testimonials and reviews

MG# 93400863 MG# 93400963

3 connection female spade connector

A great way to split power to two devices such as driving lights, front and rear turn signals, etc. (Faston or Mamut number 405). Accepts 6.3 mm (14 inch) terminals. Sold each.

Best to use a needle-nosed pair of pliers to insert and remove terminals.

  • V7 Sport models require two of these connectors, one each to connect the right and left turn signal circuits.
  • 750 S models require two of these connectors, one each to connect the right and left turn signal circuits.
3 connection female spade connector.
93400863: 3 connection female spade connector.

Direct link to image

USD $6.00

How to order

Testimonials and reviews

MG# 93400962

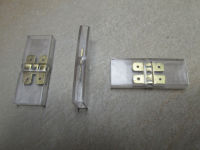
2 connection female spade connector

A great way to connect two wires without the need for male spade terminals (Moto Guzzi typically did not use male spade terminals on wiring harnesses). These are used on the Tonti framed models (Faston or FasBlok) and could be used in custom applications on the loop frame models. Accepts 6.3 mm (14 inch) terminals. Sold each.

2 connection female spade connector.
93400962: 2 connection female spade connector.

Direct link to image

USD $3.00

How to order

Testimonials and reviews

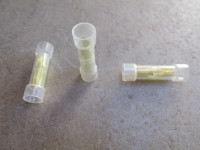
BULLET-CONNECTOR

2 connection bullet connector

A great way to connect two male bullet terminals (double bullet connector). Accepts 4 mm (0.157 inch) terminals. Sold each.

2 connection bullet connector.

Direct link to image

USD $0.50

How to order

Testimonials and reviews

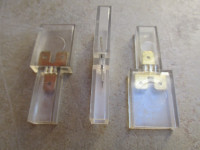
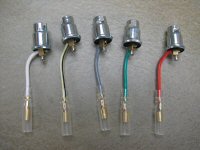
BULB-HOLDER-SINGLE

Single terminal bulb holder

A very nice single terminal bulb holder with excellent fitment within the tube that is secured to the dash. Includes color-coded short jumper wire with a 4 mm female bullet terminal to mate perfectly with the original wiring harness. Accepts standard sized OEM bulbs. ~12 mm OD. Sold each.

  • V7 Sport models require two of these bulb holders, one to illuminate each gauge on the dash.
  • 750 S models require two of these bulb holders, one to illuminate each gauge on the dash.

When ordering: Please specify wire color and terminal.

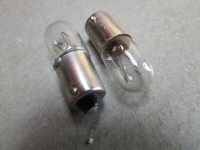
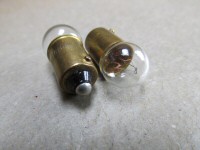
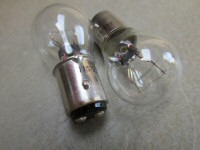
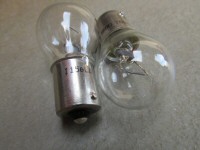
Accepts this style of bayonet bulb.

Photo courtesy of McMaster-Carr.

Accepts this style of bayonet bulb.

Photo courtesy of McMaster-Carr.

Single terminal bulb holder.

Direct link to image

USD $7.50

How to order

Testimonials and reviews

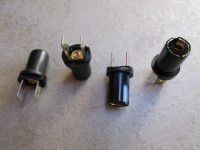
BULB-HOLDER-DUAL

Dual terminal bulb holder

A great replacement dual terminal bulb holder and very close to the original in design. Accepts two 6.35 mm female spade terminals, just like the original. Excellent fitment within the tube that is secured to the dash. Accepts standard sized OEM bulbs. ~12 mm OD. Sold each.

  • V7 Sport models require four of these bulb holders, one to illuminate each indicator light on the dash.
  • 750 S models require four of these bulb holders, one to illuminate each indicator light on the dash.
  • 850 T models require two of these bulb holders, one to illuminate each gauge.
Accepts this style of bayonet bulb.

Photo courtesy of McMaster-Carr.

Accepts this style of bayonet bulb.

Photo courtesy of McMaster-Carr.

Dual terminal bulb holder.

Direct link to image

USD $5.00

How to order

Testimonials and reviews

MG# 17760650 MG# 14768650 MG# 10754905

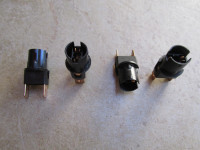
Dual terminal bulb holder

A great replacement dual terminal bulb holder and very close to the original in design. Accepts two 6.35 mm female spade terminals, just like the original. Excellent fitment within the tube that is secured to the dash. Accepts standard sized OEM bulbs. ~12 mm OD. Sold each.

  • 750 S3 models require two of these bulb holders, one to illuminate each gauge.
  • 850 T3 models require two of these bulb holders, one to illuminate each gauge.
  • Le Mans models require two of these bulb holders, one to illuminate each gauge.
  • Le Mans 1000 models require two of these bulb holders, one to illuminate each gauge.
  • California III models require two of these bulb holders, one to illuminate each gauge.
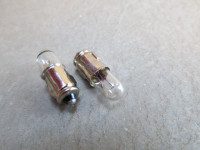
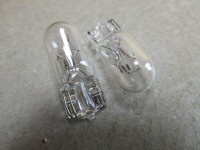
Accepts this style of wedge bulb.

Photo courtesy of McMaster-Carr.

Dual terminal bulb holder.
17760650: Dual terminal bulb holder.

Direct link to image

USD $5.00

How to order

Testimonials and reviews

MG# 93450322 MG# 93450122

Light bulb for gauge and indicator lights

3.36 watt lamp, bayonet base, 500 hour average life, approximately 10 mm (0.41 inch) in diameter. Sold each.

Note: The MG# 93450322 bulbs are longer in overall length, but brighter than MG# 10744910. In general, I recommend MG# 93450322 because they are brighter and easier to see. If you know that your dash requires a shorter bulb, please order MG# 10744910.

  • V7 Sport models require 2 of these light bulbs, for gauge light illumination.
  • 750 S models require 2 of these light bulbs, for gauge light illumination.
  • 850 T models require 3 of these light bulbs, two for gauge illumination and one for the city light.
  • 750 S3 models require 1 of these light bulbs, for the city light.
  • 850 T3 models require 1 of these light bulbs, for the city light.
  • 850 T3 California models require 2 of these light bulbs, one for gauge illumination and one for the city light.
  • 850 T5 models require 1 of these light bulbs, for the city light.
  • V1000 I-Convert models require 2 of these light bulbs, one for gauge illumination and one for the city light.
  • V1000 G5 models require 2 of these light bulbs, one for gauge illumination and one for the city light.
  • 1000 SP models require 1 of these light bulbs, for the city light.
  • Le Mans models require 1 of these light bulbs, for the city light.
  • Le Mans II models require 1 of these light bulbs, for the city light.
  • Le Mans CX 100 models require 1 of these light bulbs, for the city light.
  • Le Mans III models require 1 of these light bulbs, for the city light.
  • Le Mans 1000 models require 1 of these light bulbs, for the city light.
  • California II models require 4 of these light bulbs, three for gauge illumination and one for the city light.
  • California III models require 1 of these light bulbs, for the city light.

This bulb may also be used as a city light or pilot light.

Light bulb for gauge and indicator lights.
93450322: Light bulb for gauge and indicator lights.

Direct link to image

USD $0.75

How to order

Testimonials and reviews

MG# 10744910

Light bulb for gauge and indicator lights

1.728 watt lamp, bayonet base, 1000 hour average life, approximately 10 mm (0.41 inch) in diameter. Sold each.

Note: The MG# 93450322 bulbs are longer in overall length, but brighter than MG# 10744910. In general, I recommend MG# 93450322 because they are brighter and easier to see. If you know that your dash requires a shorter bulb, please order MG# 10744910.

  • V7 Sport models require 2 of these light bulbs, for gauge light illumination.
  • 750 S models require 2 of these light bulbs, for gauge light illumination.
  • 850 T models require 3 of these light bulbs, two for gauge illumination and one for the city light.
  • 750 S3 models require 1 of these light bulbs, for the city light.
  • 850 T3 models require 1 of these light bulbs, for the city light.
  • 850 T3 California models require 2 of these light bulbs, one for gauge illumination and one for the city light.
  • 850 T5 models require 1 of these light bulbs, for the city light.
  • V1000 I-Convert models require 2 of these light bulbs, one for gauge illumination and one for the city light.
  • V1000 G5 models require 2 of these light bulbs, one for gauge illumination and one for the city light.
  • 1000 SP models require 1 of these light bulbs, for the city light.
  • Le Mans models require 1 of these light bulbs, for the city light.
  • Le Mans II models require 1 of these light bulbs, for the city light.
  • Le Mans CX 100 models require 1 of these light bulbs, for the city light.
  • Le Mans III models require 1 of these light bulbs, for the city light.
  • Le Mans 1000 models require 1 of these light bulbs, for the city light.
  • California II models require 4 of these light bulbs, three for gauge illumination and one for the city light.
  • California III models require 1 of these light bulbs, for the city light.
Light bulb for gauge and indicator lights.
10744910: Light bulb for gauge and indicator lights.

Direct link to image

USD $0.75

How to order

Testimonials and reviews

MG# 14744910

Light bulb for indicator lights

2 watt lamp, bayonet base, 1000 hour average life, approximately 7 mm (0.28 inch) in diameter. Sold each.

  • V7 Sport models require 4 of these light bulbs, for indicator light illumination.
  • 750 S models require 4 of these light bulbs, for indicator light illumination.
  • 850 T models require 4 of these light bulbs, for indicator light illumination.
Light bulb for indicator lights.
14744910: Light bulb for indicator lights.

Direct link to image

USD $1.50

How to order

Testimonials and reviews

MG# 93450224

Light bulb for tail light

Long life bulb to help prevent failure due to vibration (1157LL), dual element, 26.88 / 8.26 watt lamp, bayonet base, 2400 / 10000 hour average life. Sold each.

  • V7 Sport models require 1 of these light bulbs.
  • 750 S models require 1 of these light bulbs.
  • 850 T models require 1 of these light bulbs.
  • 750 S3 models require 1 of these light bulbs.
  • 850 T3 models require 1 of these light bulbs.
  • 850 T3 California models require 1 of these light bulbs.
  • 850 T5 models require 2 of these light bulbs.
  • V1000 I-Convert models require 2 of these light bulbs.
  • V1000 G5 models require 2 of these light bulbs.
  • 1000 SP models require 2 of these light bulbs.
  • 1000 SP II models require 2 of these light bulbs.
  • Le Mans series 1 models require 1 of these light bulbs.
  • Le Mans series 2 models require 2 of these light bulbs.
  • Le Mans II models require 2 of these light bulbs.
  • Le Mans CX 100 models require 2 of these light bulbs.
  • Le Mans III models require 2 of these light bulbs.
  • Le Mans 1000 models require 2 of these light bulbs.
  • California II models require 1 of these light bulbs.
  • California III models require 1 of these light bulbs.
  • 1000 S models require 1 of these light bulbs.
Light bulb for tail light.
93450224: Light bulb for tail light.

Direct link to image

USD $1.50

How to order

Testimonials and reviews

MG# 93450129

Light bulb for turn signals and parking lights

Long life bulb to help prevent failure due to vibration (1156LL), single element, 26.88 watt lamp, bayonet base, 2400 hour average life. Sold each.

  • V7 Sport models require 4 of these light bulbs.
  • 750 S models require 4 of these light bulbs.
  • 850 T models require 4 of these light bulbs.
  • 750 S3 models require 4 of these light bulbs.
  • 850 T3 models require 4 of these light bulbs.
  • 850 T3 California models require 4 of these light bulbs.
  • 850 T5 models require 4 of these light bulbs.
  • V1000 I-Convert models require 4 of these light bulbs.
  • V1000 G5 models require 4 of these light bulbs.
  • 1000 SP models require 4 of these light bulbs.
  • 1000 SP II models require 4 of these light bulbs.
  • Le Mans models require 4 of these light bulbs.
  • Le Mans II models require 4 of these light bulbs.
  • Le Mans CX 100 models require 4 of these light bulbs.
  • Le Mans III models require 4 of these light bulbs.
  • Le Mans 1000 models require 4 of these light bulbs.
  • California II models require 4 of these light bulbs.
  • California III models require 4 of these light bulbs.
Light bulb for turn signals and parking lights.
93450129: Light bulb for turn signals and parking lights.

Direct link to image

USD $1.50

How to order

Testimonials and reviews

MG# 17762150MG# 93450120

Light bulb for gauge and indicator lights

3.78 watt lamp, wedge base, 2500 hour average life, approximately 10 mm (0.41 inch) in diameter. Sold each.

  • V7 Sport models require none of these light bulbs.
  • 750 S models require none of these light bulbs.
  • 850 T models require none of these light bulbs.
  • 750 S3 models require 2 of these light bulbs.
  • 850 T3 models require 2 of these light bulbs.
  • 850 T3 California models require 2 of these light bulbs.
  • 850 T5 models require 2 of these light bulbs.
  • V1000 I-Convert models require none of these light bulbs.
  • V1000 G5 models require none of these light bulbs.
  • 1000 SP models require 4 of these light bulbs.
  • 1000 SP II models require 4 of these light bulbs.
  • Le Mans models require 2 of these light bulbs.
  • Le Mans II models require 4 of these light bulbs.
  • Le Mans CX 100 models require 4 of these light bulbs.
  • Le Mans III models require 4 of these light bulbs.
  • Le Mans 1000 series 1 models require 6 of these light bulbs.
  • Le Mans 1000 series 2 models require 5 of these light bulbs.
  • California II models require 2 of these light bulbs.
  • California III models require 2 of these light bulbs.
  • 1000 S models require 2 of these light bulbs.
Light bulb for gauge and indicator lights.
17762150: Light bulb for gauge and indicator lights.

Direct link to image

USD $0.75

How to order

Testimonials and reviews

MG# 93450140

Light bulb for indicator lights

1.40 watt lamp, wedge base, 500 hour average life, approximately 5 mm (0.23 inch) in diameter. Sold each.

  • V7 Sport models require none of these light bulbs.
  • 750 S models require none of these light bulbs.
  • 850 T models require none of these light bulbs.
  • 750 S3 models require 5 of these light bulbs.
  • 850 T3 models require 5 of these light bulbs.
  • 850 T3 California models require 10 of these light bulbs.
  • 850 T5 models require 6 of these light bulbs.
  • V1000 I-Convert models require 10 of these light bulbs.
  • V1000 G5 models require 10 of these light bulbs.
  • 1000 SP models require 8 of these light bulbs.
  • 1000 SP II models require 8 of these light bulbs.
  • Le Mans models require 6 of these light bulbs.
  • Le Mans II models require 8 of these light bulbs.
  • Le Mans CX 100 models require 8 of these light bulbs.
  • Le Mans III models require 6 of these light bulbs.
  • Le Mans 1000 models require 6 of these light bulbs.
  • California II models require 5 of these light bulbs.
  • California III models require 8 of these light bulbs.
  • 1000 S models with an early dash require 8 of these light bulbs.
  • 1000 S models with a late dash require 5 of these light bulbs.
Light bulb for indicator lights.
93450140: Light bulb for indicator lights.

Direct link to image

USD $0.75

How to order

Testimonials and reviews

MG# 12734900

Starter button bracket

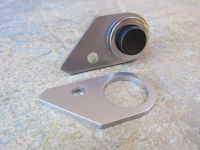
Bracket to fit the original starter button (22 mm diameter mounting hole). Stainless steel. Very nice. Starter button sold separately. Sold each.

Starter button bracket.
12734900: Starter button bracket.

Direct link to image

USD $15.50

How to order

Testimonials and reviews

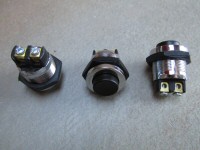
MG# 26735001

Starter button

Momentary push button switch to actuate the starter. Fits the original bracket perfectly (22 mm diameter mounting hole) and comes complete with set screw terminals just like the original. Sturdy metal housing and nice quality black plastic securing nut. Sold each.

  • V7 Sport models require this switch.
  • 750 S models require this switch.
Starter button.
26735001: Starter button.

Direct link to image

USD $20.00

How to order

Testimonials and reviews

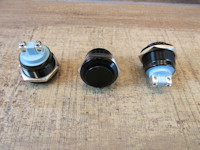
MG# 26735001-BLACK

Starter button

Momentary push button switch to actuate the starter. Fits the original bracket perfectly (22 mm diameter mounting hole) and comes complete with set screw terminals just like the original. Nice quality black plastic housing and securing nut. Sold each.

  • V7 Sport models require this switch.
  • 750 S models require this switch.
Starter button.
26735001: Starter button.

Direct link to image

USD $14.00

How to order

Testimonials and reviews

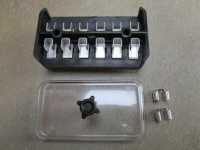
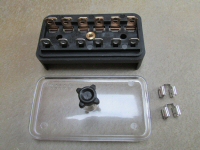
MG# 17743000

Original fuse block

New production, very good quality fuse box. Accepts six fuses (MG# 17742550 or MG# 12742500). Comes with clear cover and two jumpers. Additional jumpers available. Sold each.
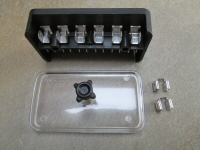
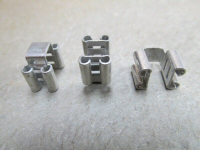
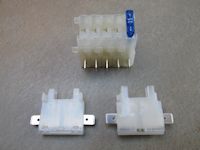
Fuse box
Fuse box
Fuse box

Direct link to image

Fuse box
Fuse box
Fuse box

Direct link to image

  • V7 Sport models do not use this style of fuse block.
  • 750 S models do not use this style of fuse block.
  • 850 T models use this fuse block; require 2 jumpers.
  • 750 S3 models use this fuse block; require 3 jumpers.
  • 850 T3 models use this fuse block; require 3 jumpers.
  • V1000 I-Convert models use this fuse block; require 3 jumpers.
  • V1000 G5 models use this fuse block; require 3 jumpers.
  • 1000 SP models use this fuse block; require 3 jumpers.
  • 1000 SP II models use this fuse block; require 3 jumpers.
  • California II models use this fuse block; require 3 jumpers.
  • California III models do not use this style of fuse block.
  • Le Mans models use this fuse block; require 2 jumpers.
  • Le Mans II models use this fuse block; require 3 jumpers.
  • Le Mans CX 100 models use this fuse block; require 3 jumpers.
  • Le Mans III models use use fuse block; require 3 jumpers.
  • Le Mans 1000 models do not use this style of fuse block.
  • 1000 S models do not use this style of fuse block.
Fuse box
17743000: Fuse box
17743000: Fuse box

Direct link to image

USD $42.00

How to order

Testimonials and reviews

MG# 17743000-JUMPER

Jumper for original fuse block

Jumper connection used to join multiple fuse circuits. Fits the original fuse box. Sold each.

  • V7 Sport models do not use any of these jumpers.
  • 750 S models do not use any of these jumpers.
  • 850 T models use 2 of these jumpers.
  • 750 S3 models use 3 of these jumpers.
  • 850 T3 models use 3 of these jumpers.
  • V1000 I-Convert models use 3 of these jumpers.
  • V1000 G5 models use 3 of these jumpers.
  • 1000 SP models use 3 of these jumpers.
  • 1000 SP II models use 3 of these jumpers.
  • California II models use 3 of these jumpers.
  • California III models do not use any of these jumpers.
  • Le Mans models use 2 of these jumpers.
  • Le Mans II models use 3 of these jumpers.
  • Le Mans CX 100 models use 3 of these jumpers.
  • Le Mans III models use 3 of these jumpers.
  • Le Mans 1000 models do not use any of these jumpers.
  • 1000 S models do not use any of these jumpers.
Jumper for original fuse block
17743000: Jumper for original fuse block

Direct link to image

USD $1.50

How to order

Testimonials and reviews

MG# 12742500

25 amp fuse

Original style fuse to fit the original fuse block. Sold each.

  • V7 Sport models require 1 of these fuses.
  • 750 S models require 1 of these fuses.
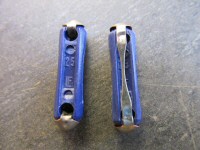
25 amp fuse.
12742500: 25 amp fuse.

Direct link to image

USD $0.50

How to order

Testimonials and reviews

MG# 17742550

16 amp fuse

Original style fuse to fit the original fuse block. Sold each.

  • V7 Sport models require 8 of these fuses.
  • 750 S models require 8 of these fuses.
  • 850 T models require 6 of these fuses.
  • 750 S3 models require 6 of these fuses.
  • 850 T3 models require 6 of these fuses.
  • V1000 I-Convert models require 6 of these fuses.
  • V1000 G5 models require 6 of these fuses.
  • 1000 SP models require 6 of these fuses.
  • 1000 SP II models require 6 of these fuses.
  • California II models require 6 of these fuses.
  • Le Mans models require 6 of these fuses.
  • Le Mans II models require 6 of these fuses.
  • Le Mans CX 100 models require 6 of these fuses.
  • Le Mans III models require 6 of these fuses.
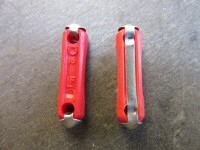
16 amp fuse.
17742550: 16 amp fuse.

Direct link to image

USD $0.50

How to order

Testimonials and reviews

MG# 28743060

Fuse holder

Single fuse holder that may be connected to other single fuse holders to form a row. Sold each. Fuses sold separately.

  • Le Mans 1000 models require 5 of these fuse holders.
Fuse holder.
28743060: Fuse holder.

Direct link to image

USD $2.50

How to order

Testimonials and reviews

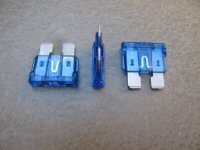
MG# 28742560

15 amp ATO / ATC fuse

As used on many modern Guzzis accepting blade style fuses. Sold each.

  • Le Mans 1000 models require 5 of these fuses.
  • 1000 S models require 4 of these fuses.
  • California III models require 4 of these fuses.
15 amp ATO / ATC fuse.
28742560: 15 amp ATO / ATC fuse.

Direct link to image

USD $0.25

How to order

Testimonials and reviews

POST-TO-SPADE-ADAPTER

5 mm post to 6.3 mm male spade adapter

~5 mm diameter hole permits fitment to the neutral switch and dash grounding points (as original). One required per neutral switch. Dash usage varies by model. Sold each.

  • V7 Sport models require none of these adapters.
  • 750 S models MAY require 1 of these adapters, for the neutral switch. Only needed if not fitting MG# 14748605.
  • 850 T models require 1 of these adapters, for the neutral switch.
  • 750 S3 models require 1 of these adapters, for the neutral switch.
  • 850 T3 models require 1 of these adapters, for the neutral switch.
  • 850 T3 California models require 1 of these adapters, for the neutral switch.
  • 850 T5 models require 1 of these adapters, for the neutral switch.
  • V1000 I-Convert models require 1 of these adapters, for the neutral switch.
  • V1000 G5 models require 1 of these adapters, for the neutral switch.
  • 1000 SP models require 1 of these adapters, for the neutral switch.
  • 1000 SP II models require 1 of these adapters, for the neutral switch.
  • Le Mans models require 1 of these adapters, for the neutral switch.
  • Le Mans II models require 1 of these adapters, for the neutral switch.
  • Le Mans CX 100 models require 1 of these adapters, for the neutral switch.
  • Le Mans III models require 1 of these adapters, for the neutral switch.
  • Le Mans 1000 models require 1 of these adapters, for the neutral switch.
  • California II models require 1 of these adapters, for the neutral switch.
  • California III models require 1 of these adapters, for the neutral switch.
  • 1000 S models require 1 of these adapters, for the neutral switch.
5 mm post to 6.3 mm male spade adapter.

Direct link to image

USD $0.50

How to order

Testimonials and reviews

MG# 13741640-LED

Bracket for mounting LED turn signal flashers

Designed specifically for LED flashers that are rubber mounted. Mounting hole is 7 mm in diameter. Sold each.
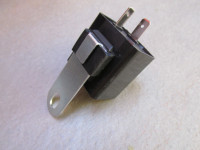
Bracket for mounting LED turn signal flashers. Flasher not included.

Direct link to image

Bracket for mounting LED turn signal flashers.
13741640: Bracket for mounting LED turn signal flashers.

Direct link to image

USD $3.00

How to order

Testimonials and reviews

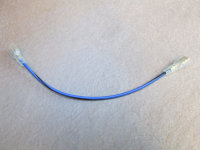
MG# 13741640

Bracket for mounting turn signal flashers

Fits standard sized round thermal and electronic flashers. Mounting hole is 6 mm in diameter. Sold each.

Bracket for mounting turn signal flashers.
13741640: Bracket for mounting turn signal flashers.

Direct link to image

USD $3.00

How to order

Testimonials and reviews

MG# 12745760

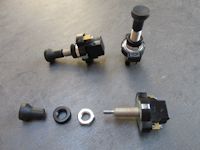
Push-pull switch

Good quality switch with screw-type terminals. 25 amp capacity. 8 mm × 1 mm threads. Knob unscrews for fitment. Sold each.

Push-pull switch.
12745760: Push-pull switch.

Direct link to image

USD $5.00

How to order

Testimonials and reviews

MG# 12734900ALT

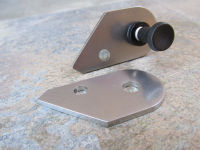
Bracket for push-pull switch

This bracket is identical to the starter button bracket, except the hole is ~8 mm in diameter. The intent is to mount this bracket on the left clutch perch, mirroring the starter button bracket. Then, a push-pull switch may be fit to the bracket and used to conveniently actuate spot lights or other electrical components. Stainless steel. Very nice. Push-pull switch sold separately. Sold each.

Bracket for push pull switch.
12734900: Bracket for push pull switch.

Direct link to image

USD $15.50

How to order

Testimonials and reviews

MG# 13745740 MG# 17745760 MG# 18745701

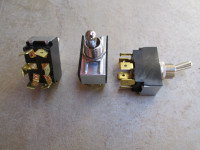
Toggle switch

Excellent quality SEALED switch with six quick connect terminals (as original). 15 amp capacity, on-on double pole double throw, comes complete with mounting hardware (as shown). Sold each.

  • V7 Sport models require none of these switches.
  • 750 S models require none of these switches.
  • 850 T models require none of these switches.
  • 750 S3 models require none of these switches.
  • 850 T3 models require none of these switches.
  • 850 T3 California models require 2 of these switches.
  • V1000 I-Convert models require 2 of these switches.
  • V1000 G5 models require 2 of these switches.
  • 1000 SP models require 1 of these switches.
  • 1000 SP II models require 1 of these switches.
  • California II models require 1 of these switches.
  • California III models require none of these switches.
  • Le Mans models require none of these switches.
  • Le Mans II models require 1 of these switches.
  • Le Mans CX 100 models require 1 of these switches.
  • Le Mans III models require 1 of these switches.
  • Le Mans 1000 models require none of these switches.
  • 1000 S models require none of these switches.
  • California III models require none of these switches.
Toggle switch.
13745740: Toggle switch.

Direct link to image

USD $18.50

How to order

Testimonials and reviews

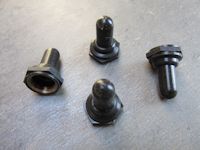
TOGGLE-BOOT

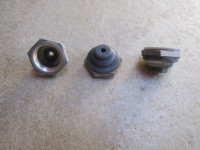
Half height toggle switch boot

Half-height boot for the toggle switch. Uses standard 1532-32 inch threads. Be sure to rotate the toggle with the boot when fitting the boot to the switch. Sold each.

  • V7 Sport models require none of these boots.
  • 750 S models require none of these boots.
  • 850 T models require none of these boots.
  • 750 S3 models require none of these boots.
  • 850 T3 models require none of these boots.
  • V1000 I-Convert models require 2 of these boots.
  • V1000 G5 models require 2 of these boots.
  • 1000 SP models require 1 of these boots.
  • 1000 SP II models require 1 of these boots.
  • California II models require 1 of these boots.
  • California III models require none of these boots.
  • Le Mans models require none of these boots.
  • Le Mans II models require 1 of these boots.
  • Le Mans CX 100 models require 1 of these relays.
  • Le Mans III models require 1 of these boots.
  • Le Mans 1000 models require none of these boots.
  • 1000 S models require none of these boots.
  • California III models require none of these boots.
Half height toggle switch boot.

Direct link to image

USD $4.50

How to order

Testimonials and reviews

TOGGLE-BOOT-FULL

Full height toggle switch boot

Full-height boot for the toggle switch. Uses standard 1532-32 inch threads. Be sure to rotate the toggle with the boot when fitting the boot to the switch. Sold each.

  • V7 Sport models require none of these boots.
  • 750 S models require none of these boots.
  • 850 T models require none of these boots.
  • 750 S3 models require none of these boots.
  • 850 T3 models require none of these boots.
  • V1000 I-Convert models require 2 of these boots.
  • V1000 G5 models require 2 of these boots.
  • 1000 SP models require 1 of these boots.
  • 1000 SP II models require 1 of these boots.
  • California II models require 1 of these boots.
  • California III models require none of these boots.
  • Le Mans models require none of these boots.
  • Le Mans II models require 1 of these boots.
  • Le Mans CX 100 models require 1 of these relays.
  • Le Mans III models require 1 of these boots.
  • Le Mans 1000 models require none of these boots.
  • 1000 S models require none of these boots.
  • California III models require none of these boots.
Full height toggle switch boot.

Direct link to image

USD $4.00

How to order

Testimonials and reviews

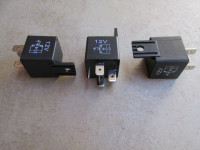
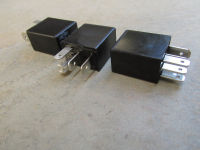
MG# 12732500

5 pin mini relay (SPDT) with mounting bracket.

40 amp rating.

Sealed construction. Resistor is used across the coil terminals for long life and reliable service. 40 amp maximum continuous current rating on the normally open circuit. 30 amp maximum continuous current rating on the normally closed circuit.

Great replacement for the starter relay or for use with custom functions. Mounting bracket has a 5.5 mm diameter hole. Sold each.

  • V7 Sport models require 1 of these relays (with the later starter).
  • 750 S models require 1 of these relays (with the later starter).
  • 850 T models require 2 of these relays.
  • 750 S3 models require 2 of these relays.
  • 850 T3 models require 2 of these relays.
  • V1000 I-Convert models require 2 of these relays.
  • V1000 G5 models require 2 of these relays.
  • 1000 SP models require 2 of these relays.
  • 1000 SP II models require 2 of these relays.
  • California II models require 2 of these relays.
  • California III models require none of these relays.
  • Le Mans models require 2 of these relays.
  • Le Mans II models require 2 of these relays.
  • Le Mans CX 100 models require 2 of these relays.
  • Le Mans III models require 2 of these relays.
  • Le Mans 1000 models require none of these relays.
  • 1000 S models require none of these relays.
  • California III models require none of these relays.
40 amp, 5 pin mini relay (SPDT) with mounting bracket.
12732500: 40 amp, 5 pin mini relay (SPDT) with mounting bracket.

Direct link to image

USD $5.00

How to order

Testimonials and reviews

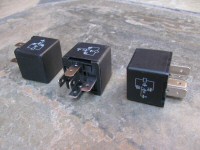
MG# 28732560

5 pin mini relay (SPDT) without mounting bracket.

40 amp rating.

Great replacement for the starter relay or for use with custom functions. Sold each.

  • Le Mans 1000 models require 2 of these relays.
  • 1000 S series 1 models require 3 of these relays.
  • 1000 S series 2 models require 2 of these relays.
  • California III models require 3 of these relays.
40 amp, 5 pin mini relay (SPDT) without mounting bracket.
28732560: 40 amp, 5 pin mini relay (SPDT) without mounting bracket.

Direct link to image

USD $5.00

How to order

Testimonials and reviews

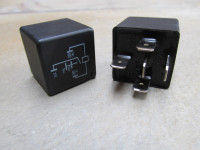
MG# 30732510

5 pin mini relay (SPST) without mounting bracket.

Sealed construction. 40 amp maximum continuous current rating.

So far, the only Guzzi I know of that requires this relay is the 1000 S series 2 with the later Digiplex ignition module. As far as I know, all other applications should use MG# 28732560. Sold each.

  • Le Mans 1000 models require none of these relays.
  • 1000 S series 1 models require none of these relays.
  • 1000 S series 2 models require 1 of these relays.
  • California III models require none of these relays.
40 amp, 5 pin mini relay (SPST) without mounting bracket.
30732510: 40 amp, 5 pin mini relay (SPST) without mounting bracket.

Direct link to image

USD $7.50

How to order

Testimonials and reviews

MG# 30732560

5 pin micro relay (SPDT) without mounting bracket.

30 amp rating.

Sealed construction. Resistor is used across the coil terminals for long life and reliable service. 30 amp maximum continuous current rating on the normally open circuit. 20 amp maximum continuous current rating on the normally closed circuit.

Used on many later Guzzis. Fits my custom relay solution. Great for use with custom functions. Sold each.

35 amp / 25 amp, 5 pin micro relay (SPDT) without mounting bracket.
30732560: 35 amp / 25 amp, 5 pin micro relay (SPDT) without mounting bracket.

Direct link to image

USD $5.00

How to order

Testimonials and reviews