Moto Guzzi V700, V7 Special, Ambassador, 850 GT, 850 GT California, Eldorado, and 850 California Police models
Created:
Updated:
I extracted this information from Greg Field, Bruce Giller, and Paul Linn on the old Yahoo! Loopframe_Guzzi news group (which has now moved to Groups.io). Hayden also sent me his tip via email.
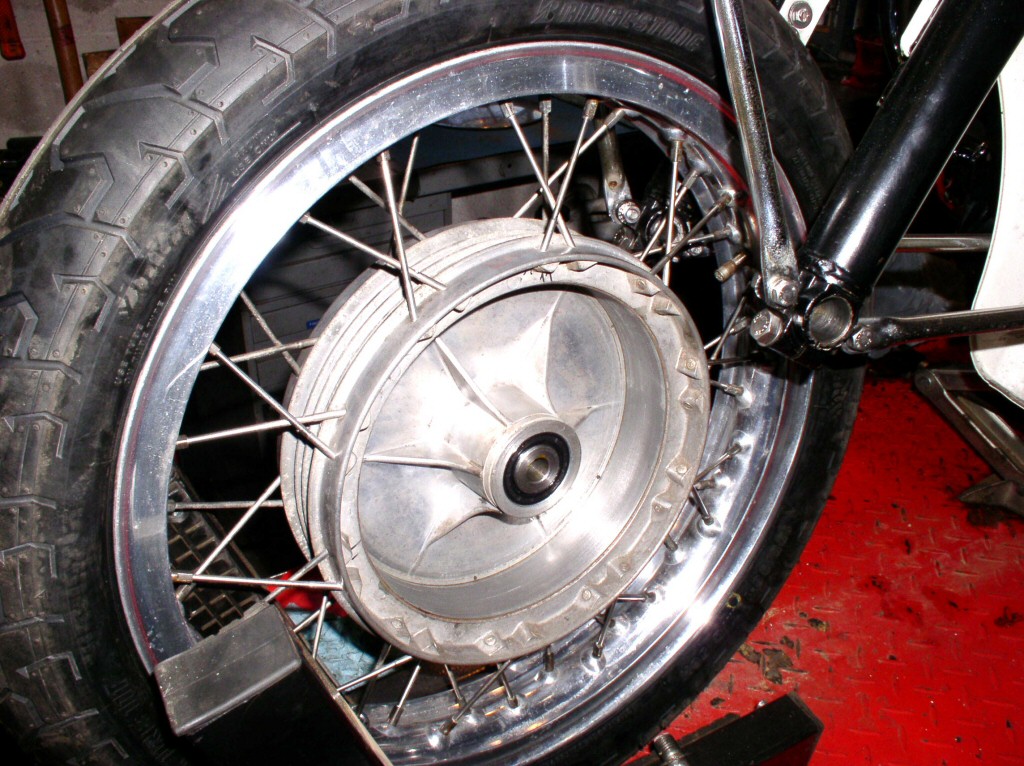
Drum brake adjustment with wheel still on bike
by Paul Linn
Disconnect cable and tie rod.
Move one lever so that shoe just barely comes into contact with drum surface. (Check this by spinning wheel and listening for the tell tale scrape of the shoes on the drum surface)
Mark this position with an upright mark on splined part only.
Repeat step 3 for other lever.
Place levers on splined parts so that the tops of the levers are now lined up with the marks made in step 3.
Rotate front lever to its upright position and connect tie rod.
Rotate rear lever to its upright position and check length of tie rod. If it,s to short or to long, adjust tie rod now so it can connect to the rear lever.
You will have to fine tune the tie rod so that both shoes contact the drum at the same time.
Connect cable, adjust free play and test brake action.
This same procedure can be used for the rear drum also. Your drum brakes will now be just a good as a disc setup. After following this simple adjustment procedure you will no longer have that mushy feeling most people find with the front brake switch style cable and you will be able to STOP on a dime.
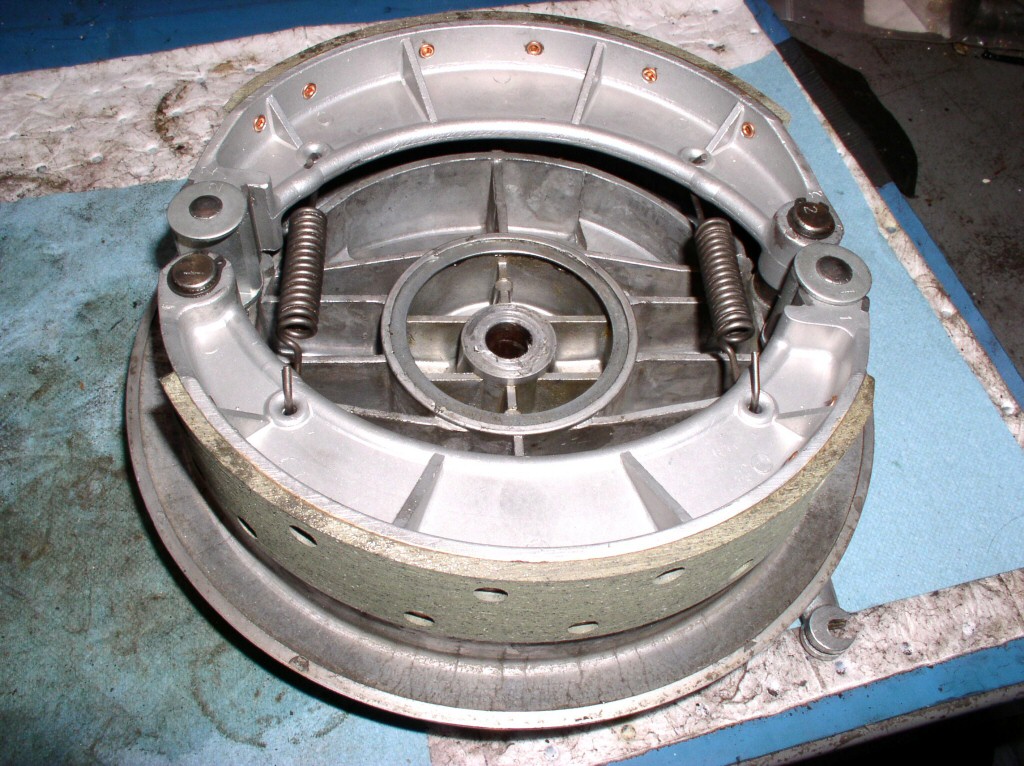
Synchronizing four leading shoe brakes
by Greg Field
Center the hub by spinning the wheel and locking the brake and retightening the axle bolts.
Get all linkages to optimum position. This means that when the shoes contact the drum, the actuating arm and pull rod are as near a right angle as possible, for best mechanical transfer of force. Rotate the actuating arms on the shaft until this is so.
Pull off the right cable
Remove the pin for the back shoe on the left side.
Adjust slack out of the left brake cable until there is significant brake drag (light scraping is not enough).
Manually actuate the rear shoe until the brake drag doubles. Then, adjust the link rod until the pin can be re-inserted. Fine-tune adjustment if necessary to keep drag equal between the two shoes. Hopefully, the angle between rod and arm will still be near 90°.
Slacken left cable till all brake drag goes away.
Repeat steps 3 through 6 for right side.
Then adjust slack out of left cable till brake drag from the left side doubles what was already there from the right.
Adjust out slack at the hand lever, which preserves left-right synchronization.
Then, for gnat's-ass perfection, re-center the hub, and fine-tune the left-right adjustment.
When done thusly, most folks I've done this for want them de-adjusted so they're not so grabby and sudden, but this is the place to start because if your shoes aren't 100 percent perfect, this will make them the best they can be.
More information from Greg Field on setting up four leading shoe front brakes:
I'm not a big fan of the 4LS brakes, either, but for a different reason than Charlie cites.
I don't like them because when everything is gnat's-ass perfect—round hubs and fitted with stock cables, good linings (especially Ferodo Greens) that are properly arced, when timed so that both shoes on both sides touch the drums at the same instant, and all the actuating levers are optimized for the best-possible leverage ratios (i.e. as close to 90 degrees as possible)—the 4LS brakes self-servo too much, such that they are scary-twitchy and far too easy to lock up, especially in the wet conditions that are so common here in Seattle.
Here's what has always worked best for me. Doubtless, there are other ways, but this one has always worked for me:
Adjusting the actuating levers is the key to making 4LS brakes work (assuming all the other aspects such as arcing and shoe compound are acceptable).
Most important of these is the angle between the cable and the master arm. If you do not obtain max leverage ratio here, and on both sides simultaneously, it is usually difficult or impossible to gain it back by optimizing the rest of the adjustments.
Working on one side at a time, disconnect the rod, and pull the brake lever such that the shoes are in firm contact with the drum and are both applying about the same amount of pressure. Look at the angle you've got, and then use a combination of re-postitioning the arm on the splines and upper and lower cable adjustments to make the angle between the cable and arm as close to 90 degrees, but still less than 90 degrees, as possible. Do this to both sides and then ensure that the master shoes on each side are applying about the same amount of force to the drum. (I can supply more detail if you don't know how to do this.) After adjusting for equal force on both sides, recheck the angle and adjust it if necessary.
Then, at the hand lever, adjust out all slack in the cable so that the master shoes on each side are firmly in contact with the drums, but so that you can still rotate the wheel with effort. Re-check the angle between arms and cable. Now, you need to optimize the angle between the rod and the slave arm. You want it to be as close to 90 degrees as possible while not exceeding 90 degrees. (I can give more detail if you don't know how to do this.)
Finally, center the hubs by loosening the axle nut with the wheel off the ground, spinning the wheel hard, and locking the brake. Tighten the axle nut while holding the brake lever. Re-check everything to make sure the adjustments have not shifted noticably.
If you do all this as close to perfectly as you can, you will have really powerful brakes (for drums) that are also sometimes and unfortunately prone to self-servoing. Many of the ones I have adjusted thusly became two-finger brakes. Sometimes, they became borderline dangerous because they would self-servo to varying degrees. I had a few friends and customers express dissatisfaction because they could lock them in even mildly-exciting situations and sometimes would crash or nearly. I experienced the same on the V7 Sport I used to own. The brakes on that were positively frightening in the rain.
After those incidences, on the bikes that were really prone to sudden locking, I settled on a very slight mis-timing of the shoes that resulted in a pretty damn good brake but one that would not self-servo. Unfortunately, keeping 4LS brakes in that state required non-stop maintenance. Yes, really hella-stout cables are absolutely necessary and can be super hard-to-find. NOS cables are IME, much preferable to willowy repro cables.
I like brakes, too. I rode my Eldo in all conditions and often daily for many years, so I well understand why you might want to sell your V7 Special if you cannot get the brakes sorted because I went through the same process myself.
At first, I fitted a disc front end. With a stock m/c, that set-up was a sick joke that was even less powerful than the 4LS brakes (as Charlie said, because of a horribly wrong leverage ratio between m/c and caliper), so I added a second disc with the stock m/c. That was much better, because of the better leverage ratio. Then, I swapped in a 13 mm m/c, and that made it into a really good stopper, because of an even better leverage ratio.
I like suspension, too, so I wanted something better than the disc-type forks. At first, I figured out how to fit FAC dampers to Eldo disc-type forks. That worked better, but still not well enough, so I looked around for a few years for a better solution.
Finally, I just grafted on the upside-down forks from a V11 Ballabio and the tubeless wire front wheel from a 2004 EV, which got me better forks, much-improved trail numbers, larger-diameter floating discs, and final-generation non-radial four-pot Brembo calipers. That was an absolute shit-ton of work to effect, though, and I had to make many adaptive pieces to get it to work properly and look right, with the stock fender and braces.
And, I still have my FAC-equipped disc-type forks should I want to fit them to another Loop in the future.
Moral of this long-winded story is that if your 4LS brakes are leaving you underwhelmed with their power, something is amiss that is sucking away much of their potential—but the potential is there to make them into very capable drums. Don't give up yet. The members of this list can't likely do it for you but we can likely tell you how.
Here are the Steps to a Great Front Brake
by Bruce Giller
get new shoes with modern material. If your shoes are original, recycle them at a brake recliner or put them on the wall as Guzzi Art. Mark Etheridge of Moto Guzzi Classics sells them
arc the shoes to the drum. (see instructions below)
adjust the front brakes so that both leading shoes contact the drum at the same time (see instructions below)
as the shoes wear, re-position the front drum's brake levers to compensate. Adjusting the brake cable is useful over a short range - plus the cable itself tends to lengthen. (I'm still writing this one up...it is Paul Linn's tip)
For those who want to do arc the brake shoes to the drum:
Obtain some 80 grit sandpaper with a sticky back (you can find strips of sandpaper at your local auto paint store)
Line the inside of the brake drum with one layer of the sandpaper (you will have to cut the paper to the width of the drum)
Pencil on hatch marks over the entire width and length of each shoe
Assemble wheel back on the bike.
To center the wheel, use the front brake lever several times while spinning the front tire, then hold the brake lever down while tightening the front wheel nut
Spin wheel and apply brakes a few times to sand down shoes
Remove wheel and inspect pencil marks. If some of the marks are still there, repeat Steps 3-6 until the pencil marks have completely disappeared
Remove paper from the drum and clean out the drum. This procedure will leave a pile of shoe particles inside the drum, especially if the shoes are new
You want to make sure that the two leading shoes are contacting the drum at the same time when braking. The procedure works better if you have 3 arms but can be done by one person.
make sure that your front wheel is centered on the axle. To center the wheel, use the front brake lever several times while spinning the front tire, then hold the brake lever down while tightening the front axle nut
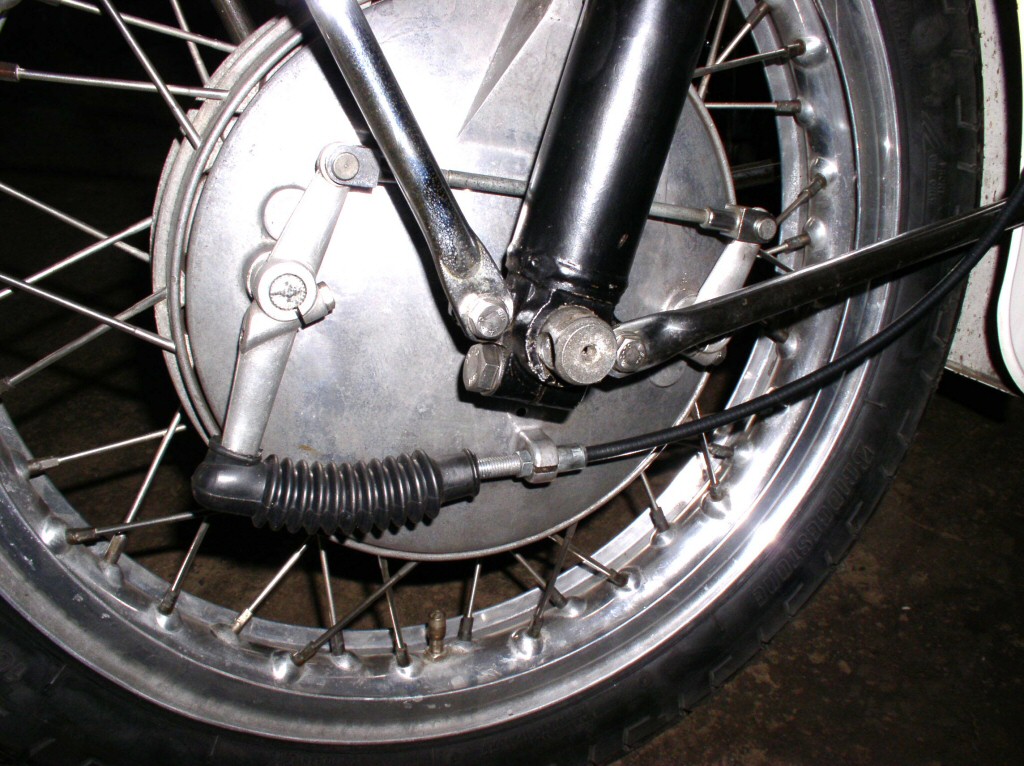
Disconnect the metal rod connecting the two splined levers for each shoe from the front lever. It has forked end pieces which are held in place by a small pin with a cotter pin. The rod is welded to one end and screwed into the other.
Squeeze the brake lever to where the point where the front shoe is contacting the drum
At the same time, manually make the rear shoe contacts the drum by pulling back on the rear brake shoe splined lever
Adjust the length of the connecting rod for a tight fit between the two shoes. You probably won't get a perfect fit due to the large adjustment distance. You have to turn the forked end 180 for each adjustment. I made mine a bit tight to compensate for future shoe wear
Test the action of the front shoes. Put the cotter pin back in the front lever's pin. Now when you pull on the front brake lever, the two shoes will contact at the same time.
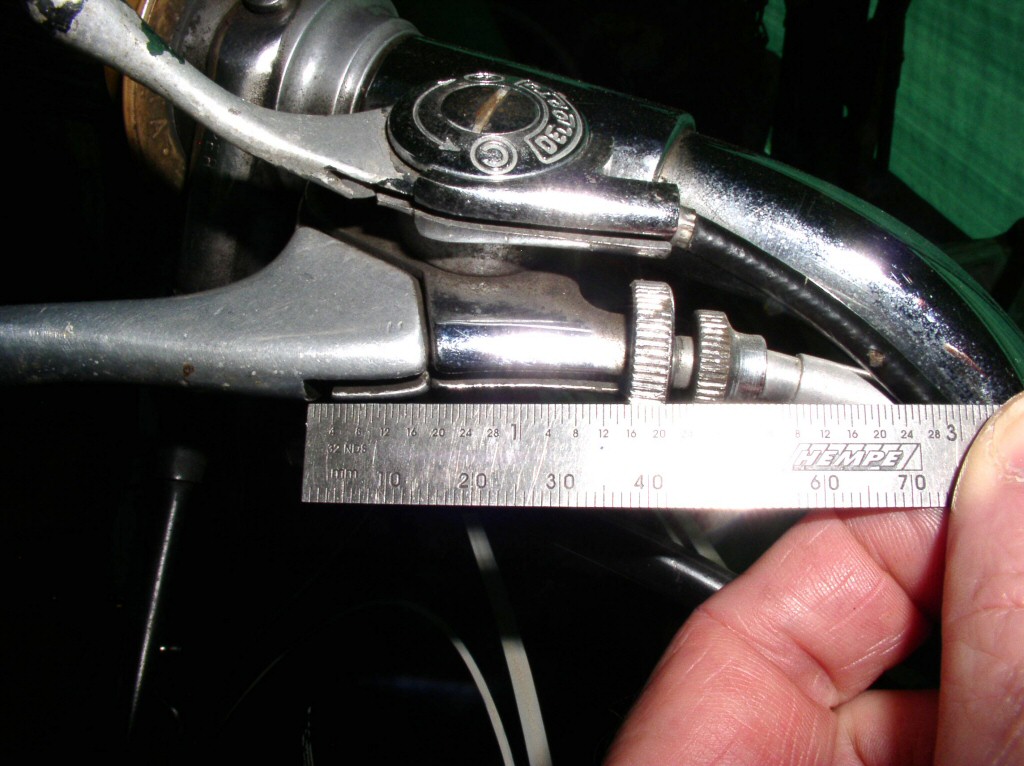
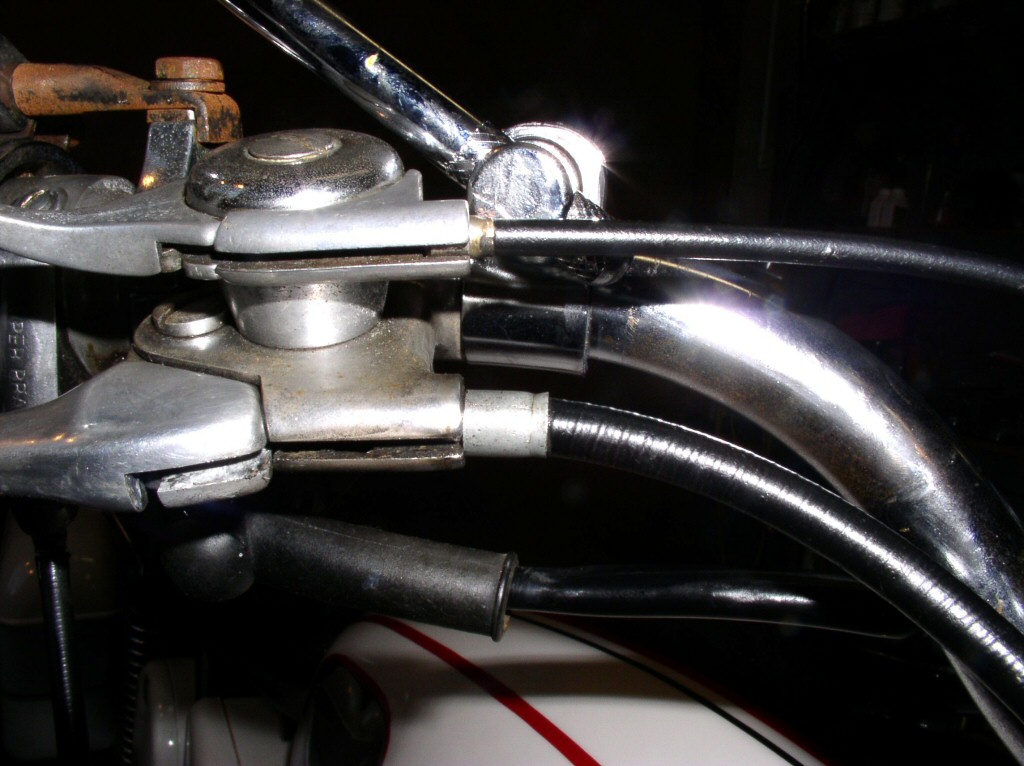
I spent a lot of time this week [ - ] trying to get Charlie Brawley's Eldo front brakes to work as expected. With relined shoes from Vintage Brake and new cable from MG Cycle, I expected great things. Initial results were very disappointing.
Charlie had Michael Mercury Morse of Vintage Brake reline the shoes with Ferodo VB3000 compound and arc them to match the drum. When the wheel and assembled backing plate arrived back here, the arms were at an acute angle in relation to the cable, approximately 75°.
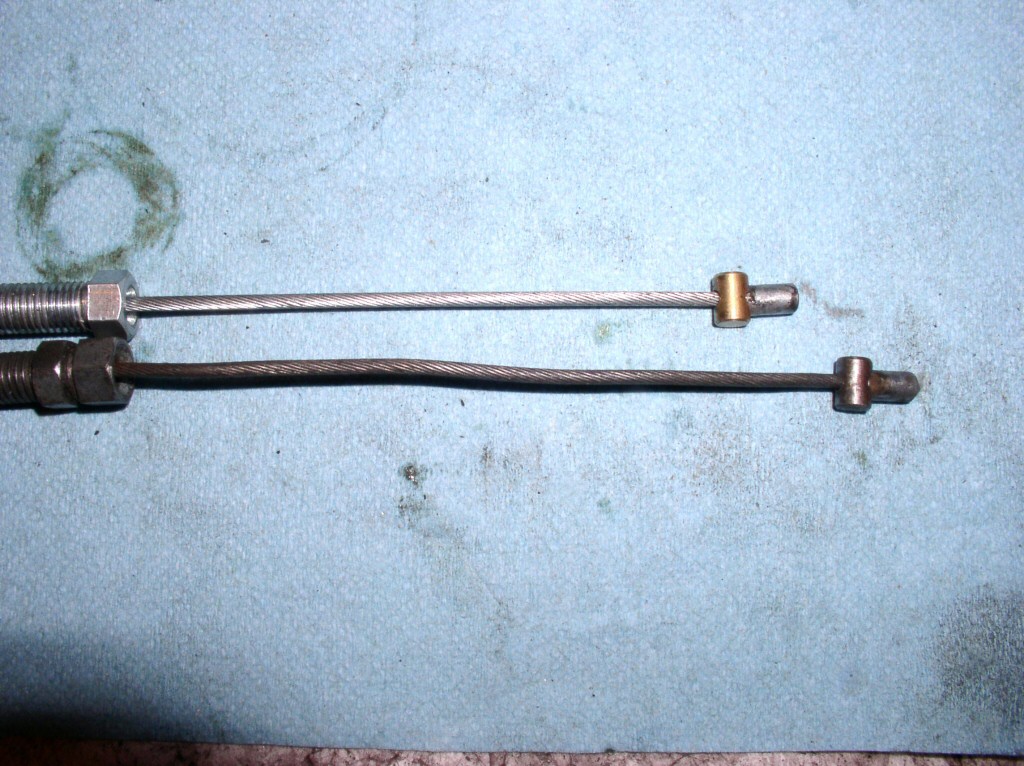
The new cable didn't have nearly enough free length to fit with them that way, so I rotated them back one spline to approx. 90°. It still wouldn't fit - the only way it would was if I rotated the arms back another spline to approximately 100°. Comparing it to a factory original cable showed that it was a full 1 inch shorter in free length. Compared to the previous version of cable from MG Cycle, it had exactly the same free length.
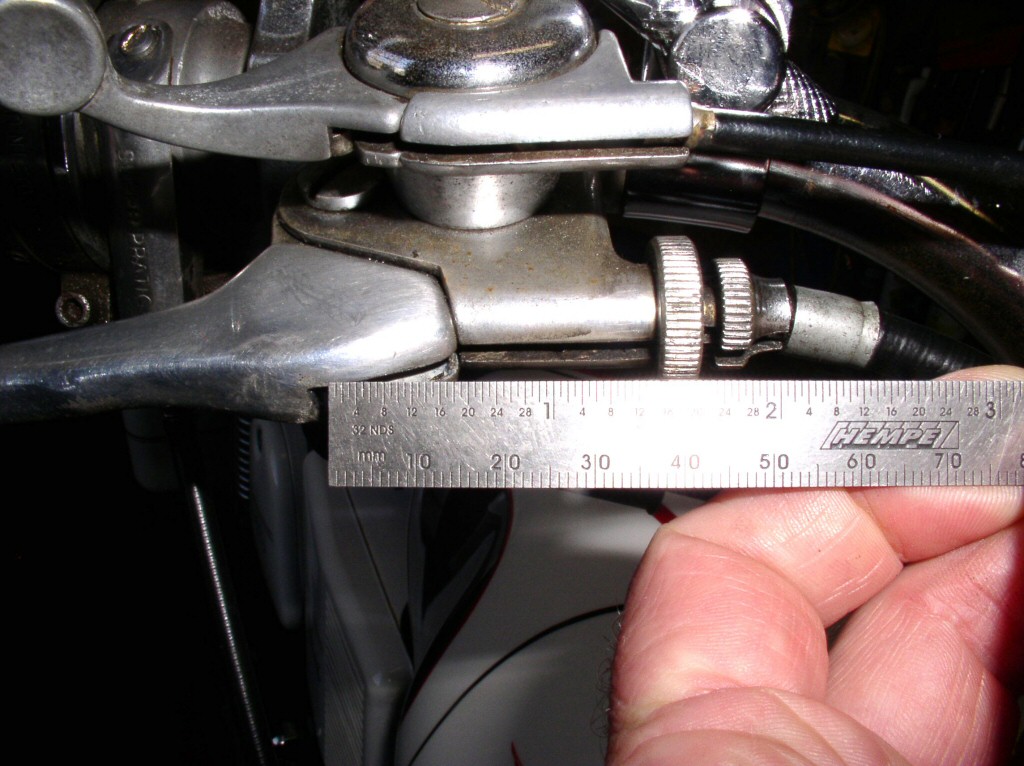
Even the old cable wouldn't fit with the arms at ~ 75° unless I removed the adjuster at the hand lever perch, so I set them at ~ 90°, fitted the old cable and proceeded to do several long test rides to get the brakes bedded in.
Braking power was just okay - little better than with the factory original brake shoes. It slowly got a bit better, but still lacked the grip I thought it should have. So, after pulling the wheel and seeing how well the shoes were contacting (all but a very small patch on the leading and trailing edges of the shoes were bedded in), I called Mercury and had a very nice chat with him about brake compounds and brake set up. His advice was simply to return the arm position to where it was as he sent it and modify the cable to fit. In his (vast) experience, the arms need to be at ~ 75° for maximum braking power.
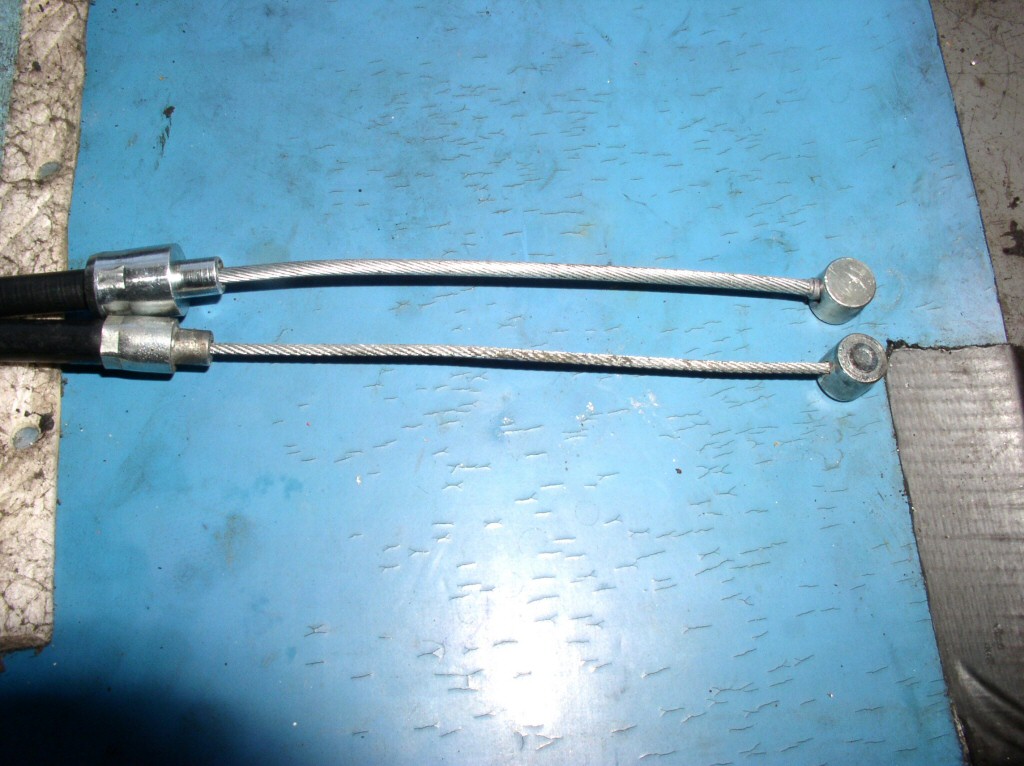
Since the new cable was already quite expensive, I was a bit hesitant to have it modified. But, in the interest of science, I fitted it up to the bike with the brake arms at ~ 75° and all adjusters set for maximum slack. I determined that it needed at least 1.5 inch more free length to fit, so had a local shop alter the cable accordingly. My first choice would have been to replace the inner wire with a new, longer one, but he didn't have the required 2.5 mm cable or end fittings. So, after making sure I had enough length to work with, we shortened the sheath (after unsoldering the fittings from one end and removing the inner wire).
Back at the shop it was quickly evident that I should have had 1.75 inch - 2 inch removed as I had to really fight to install the cable and the adjusters are at full slack. However, once installed, the lever seemed firmer than ever before.
The first road test proved Mercury right - the brakes now have very good power and as the shoes bed in the rest of the way, I expect they'll get even better. The new modified cable offers excellent feel and seems relatively free of flex - the brake light switch still imparts a bit of mushy feeling at first.
So, it appears my days of having brake cables made-to-order aren't over if I want to optimize drum brake performance.
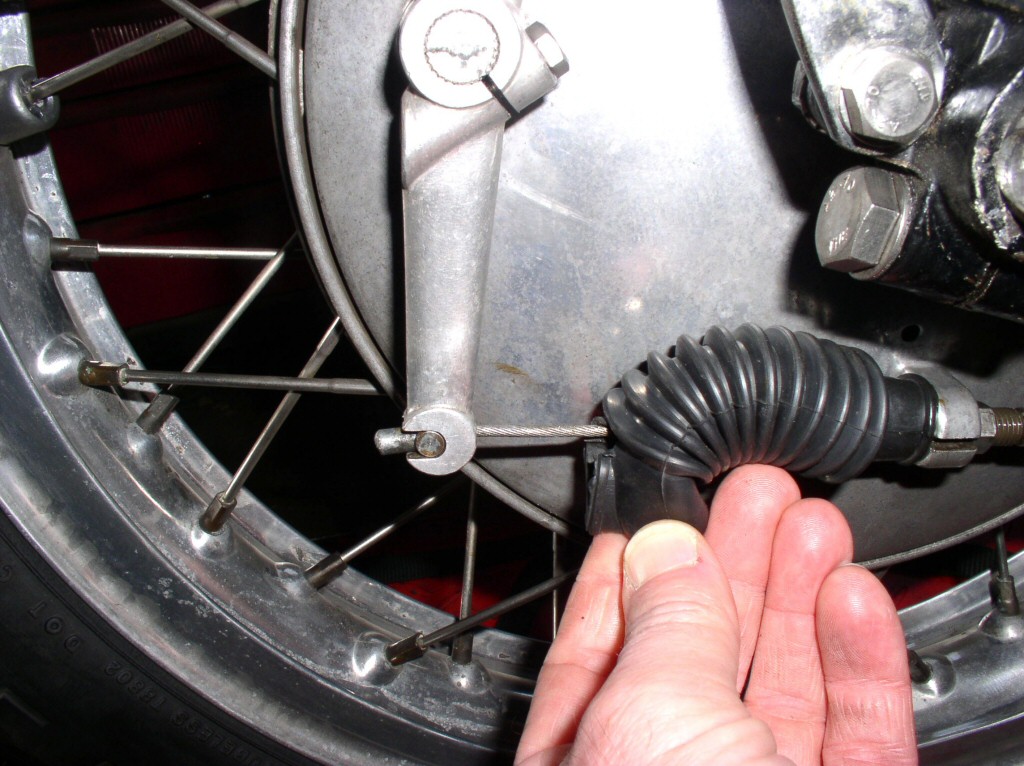
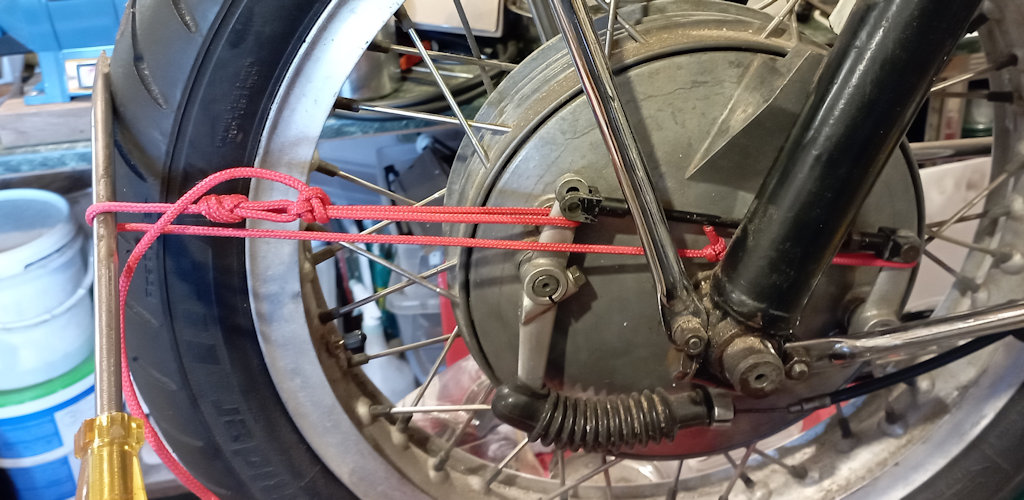
Found a very simple quick way to adjust twin leading shoes. Procedure takes less than 5 minutes and setup is perfect. no springs or complex stuff needed. Using cord equalises the force on each brake arm.
Disconnect one clevis pin. Slaken lock nut on adjuster. Tie cord around both arms. I did a trucker's hitch to ajust cord loop length. Put long lever screwdriver through cord and on front tyre. Keep the cord in line and apply lever. Adjust brake lever connecting rod length, replace clevis and split pins etc.
I see no reason why it would not work with 4 leading shoes. Will need one loop for each side then a third loop to join the 2 loops around the tyre. Use something like a Spanish windlass to apply tension to all 4 at the same time.
Hope this is helpful.
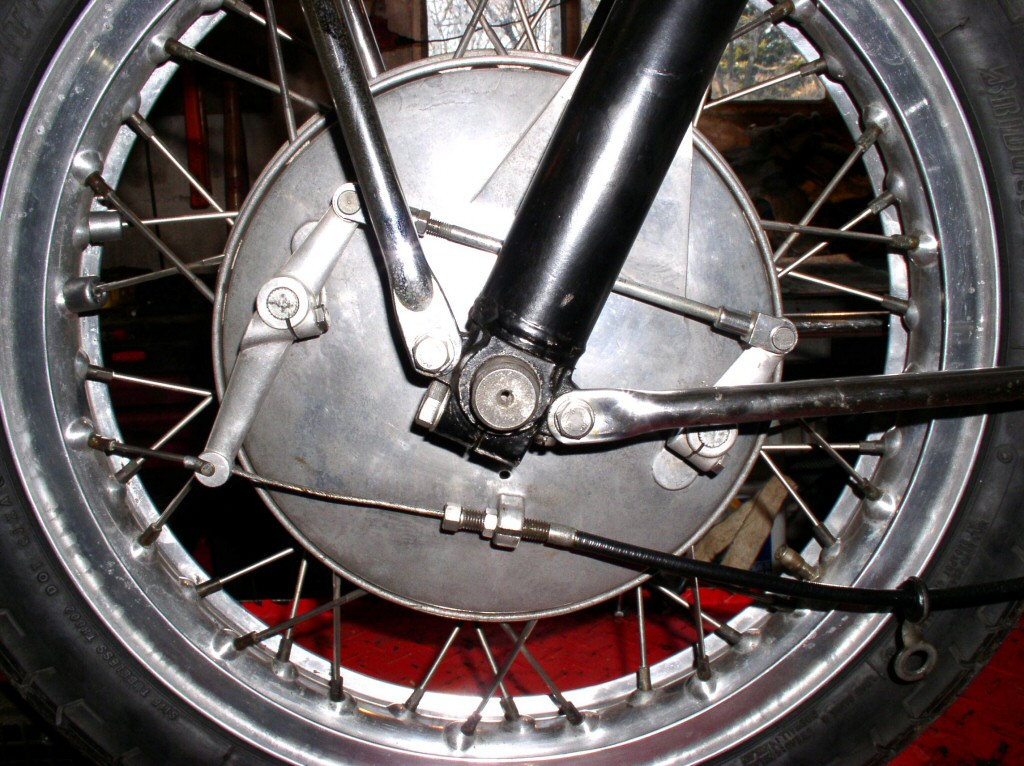
Using a cord tensioned by a lever to adjust the front brake.
Photo courtesy of Hayden.
Using a cord tensioned by a lever to adjust the front brake.