Moto Guzzi V700, V7 Special, Ambassador, 850 GT, 850 GT California, Eldorado, and 850 California Police models
Author: Kim Anderson
Created:
Updated:
Thanks to Kim Anderson for sending this artical on how to improve the braking power of drum brakes (sent via email). In Kim's own words and photos:
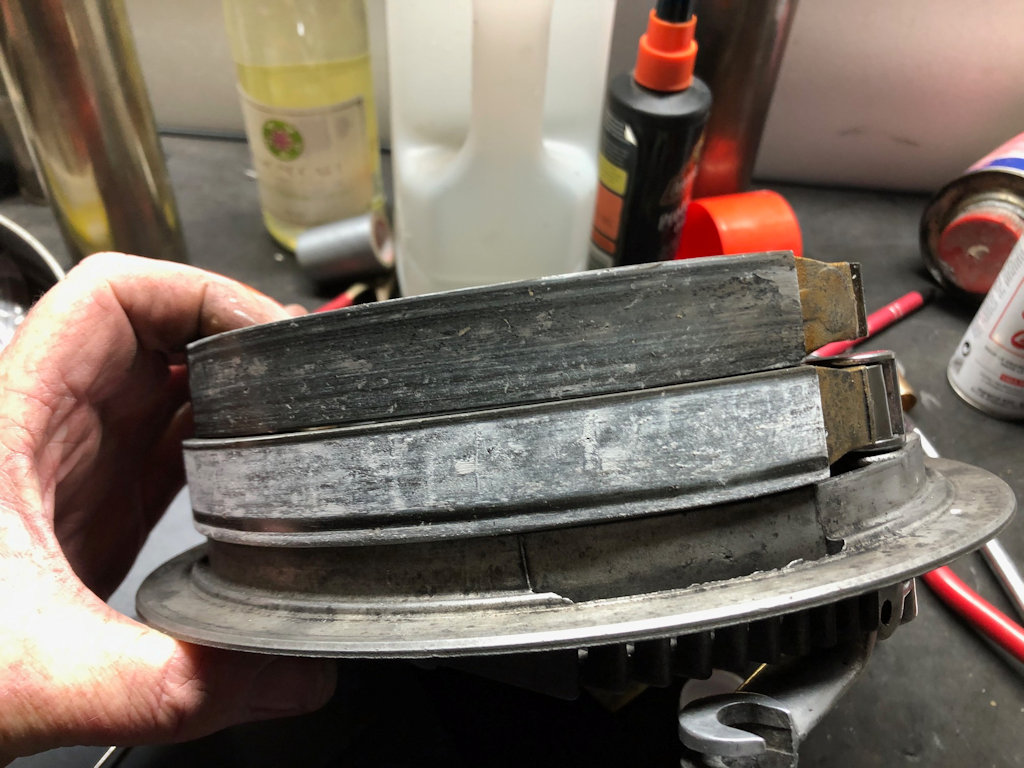
Moto Guzzi drum brakes offer numerous opportunities for poor and deteriorating performance: large gaps between the shoes and their drums, heavy springs, wear in the cam bushes and spindles, poor synchronisation of the individual actuating levers, wear in the holes in the actuating levers and their clevises and pins, damaged drums, dodgy cables and nipples, dust, water and so on. Because most issues are well-covered in This Old Tractor and elswhere, I'm only going to deal with the first three. The photos and words relate to a double-sided, twin leading shoe system because that's all I have to play with at the moment. TLS brakes have two, much wider shoes but the principles are the same.
Rejuvenate worn cam bushes
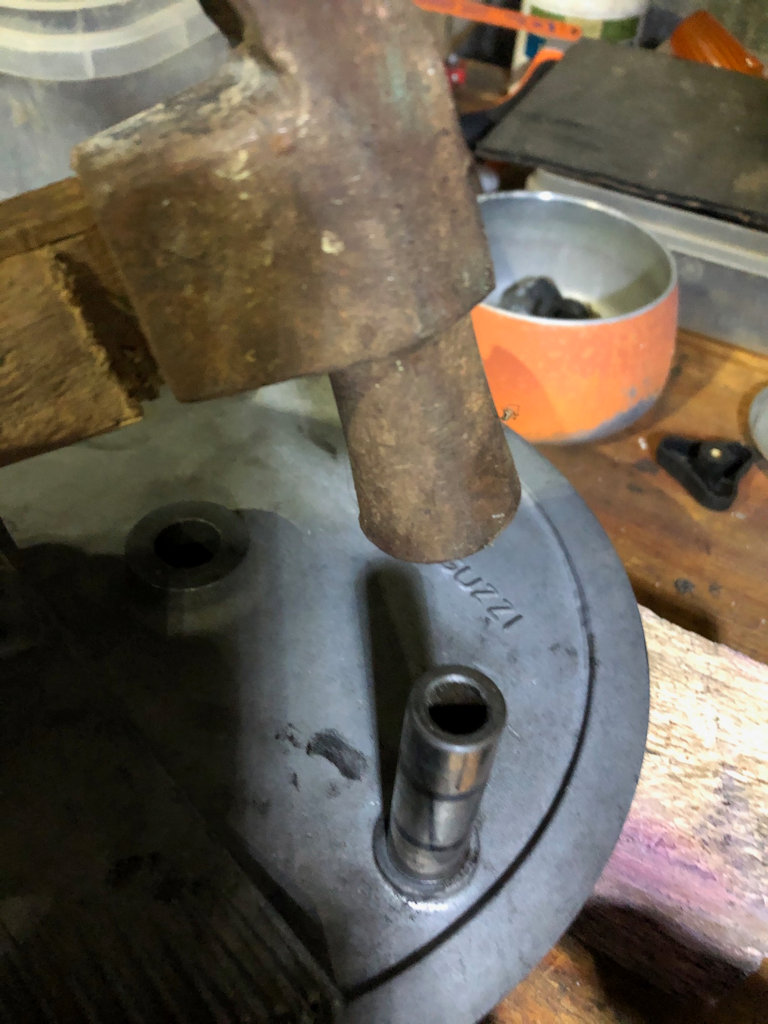
If you remove the backing plates from your wheel and take out the springs and shoes you can give the cam/s a wiggle to see how much slop there is. If it's appreciable, the bronze bushes are worn and even the steel cam spindle may be a little out of round. The bushes can easily be swapped out. Remove the shoes, actuating arms and cams and warm up the backing plate with your hairdryer, support the backing plate on a couple of matching pieces of wood and then tap through the bush with a light hammer. A perfect drift is an old rocker shaft.
A few sharp taps are all that's required. A hammer with a broken handle will reduce the amount of effort you can deliver and thus the carnage you can cause.
Photo courtesy of Kim Anderson.
A few sharp taps are all that's required. A hammer with a broken handle will reduce the amount of effort you can deliver and thus the carnage you can cause.
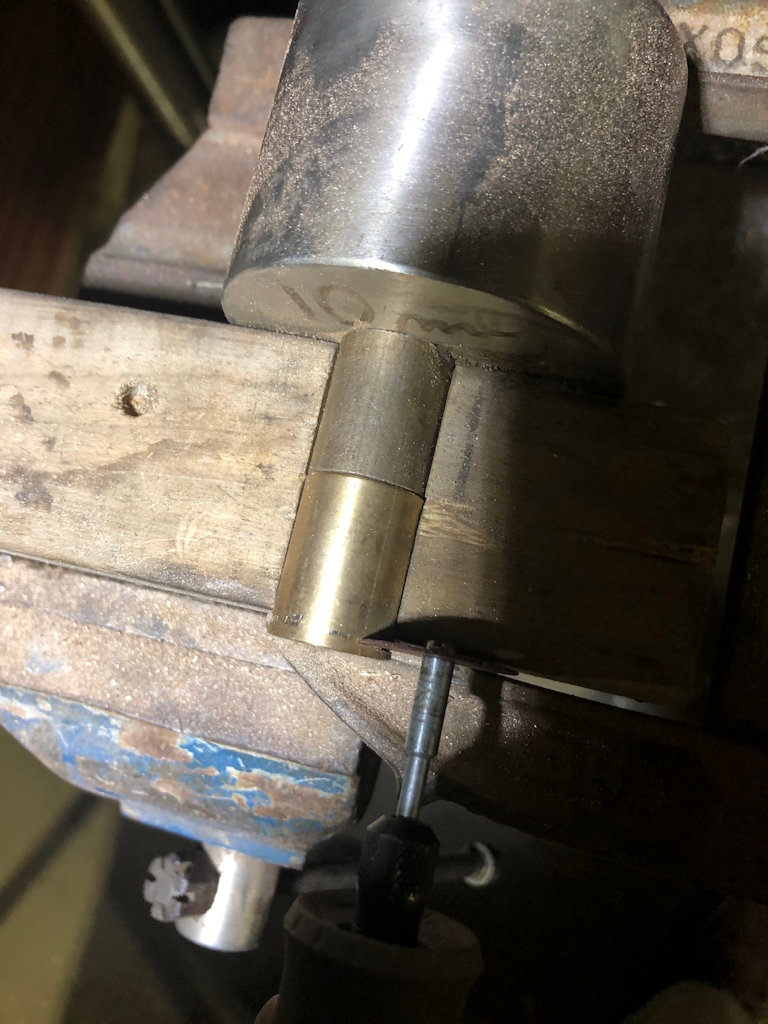
These cams have a 16 mm spindle, and the bushes are 23 mm long. You can get new bronze bushes from your bearing supply company for the price of a cup of coffee. Our favourite Guzzi dealer says that they aren't listed as a spare part. Imperious bushes of 5⁄8 inch × 3⁄4 inch will give you a reasonable result if your spindles aren't badly worn. They come in different lengths such as 1 inch, 1.5 inch and 2 inch, but if you get them as a two-inch item, just cut them with a hacksaw or Dremel to a length of 23 mm, clean off the burrs and put a taper on one end so they will slide into the backing plate more easily.
To make trimming the bush easy I found a piece of 45 mm wood with a 3⁄4 inch notch already cut in it. Perfect for holding the bushes while I cut them. I've secured the wood in a vise and clamped a flat piece of steel to the back of the wood to keep everything straight. The top bush is the old one, the bottom is the new one that I'm just trimming to 23 mm. Do the math: you'll have 1 mm overhang!
Photo courtesy of Kim Anderson.
To make trimming the bush easy I found a piece of 45 mm wood with a 3⁄4 inch notch already cut in it. Perfect for holding the bushes while I cut them. I've secured the wood in a vise and clamped a flat piece of steel to the back of the wood to keep everything straight. The top bush is the old one, the bottom is the new one that I'm just trimming to 23 mm. Do the math: you'll have 1 mm overhang!
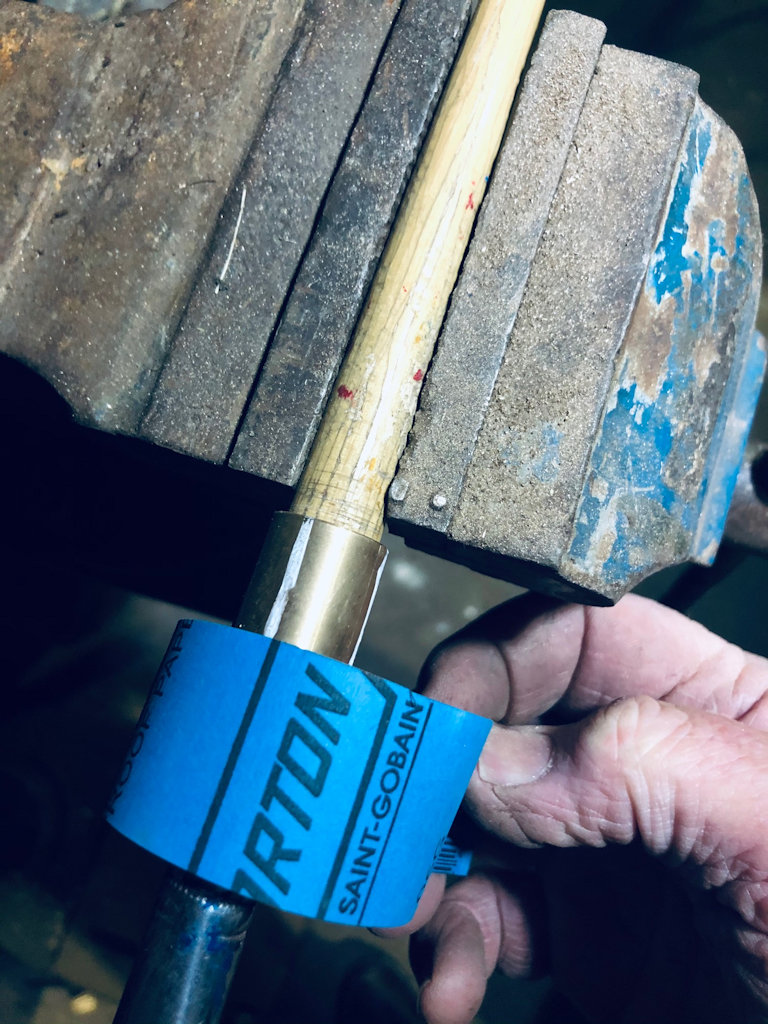
You will also have to turn down the external surface of your new bush to provide the right interference fit in the backing plate. If you haven't got a lathe, you can rub it back with sandpaper. Not so easy for an old coot like me to do by eye but I improved the result by putting four longitudinal scratches on the outside of each bush 90 degrees apart, mounted it on a paintbrush handle in a vise, and with a strip of sandpaper carefully and evenly rubbed a bit of metal off until the scratches just disappeared - turning the dowel 90 degrees each time.
The new bush mounted on a paintbrush handle. I've marked the scratches with a white pen. Wet 'n Dry sandpaper of 280 grit was OK.
Photo courtesy of Kim Anderson.
The new bush mounted on a paintbrush handle. I've marked the scratches with a white pen. Wet 'n Dry sandpaper of 280 grit was OK.
Once finished with the sandpapering, test the bush for fit: if you still have to use a lot of effort to get the bush in, there isn't enough clearance - the cam spindle will also have become a tight fit - so tap it out and do the scratches again, but don't rub them out completely. Once the bush feels like it'll go in without too much effort, lubricate the bush with grease, and use a press or similar to push in the bush. Make sure your backing plate is level and well-supported. If you don't have a press you can tap in the bush freehand - just keep everything central and at right angles to the backing plate. You can even insert the brake cam into the bush and tap it in that way.
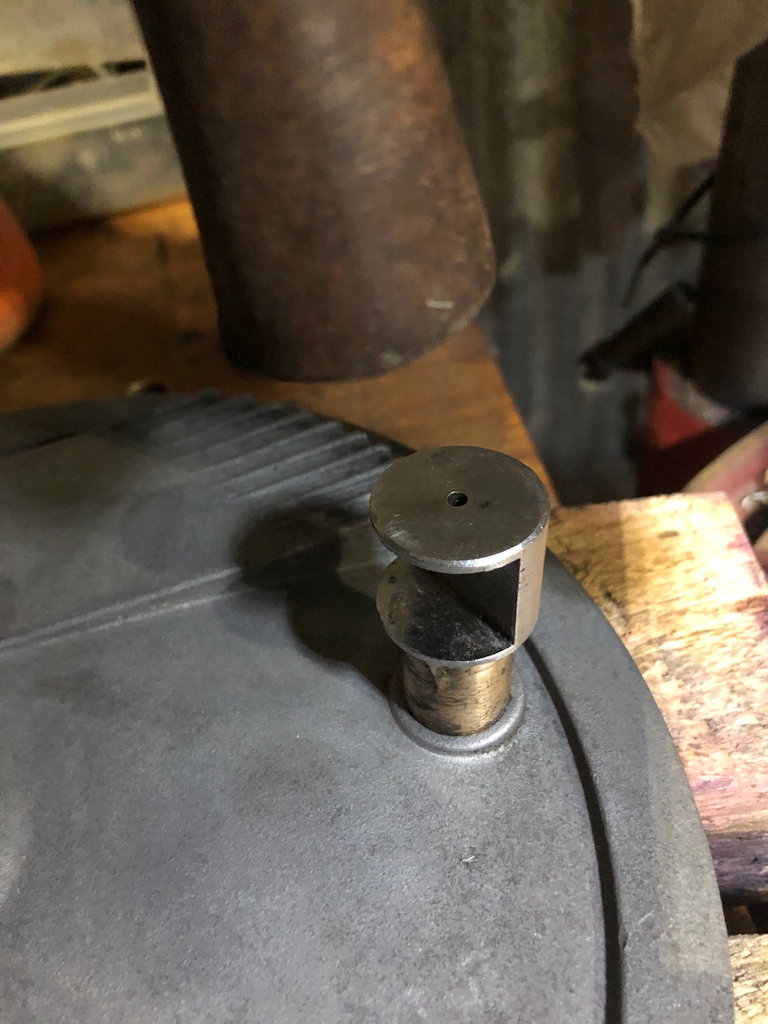
I've inserted the cam spindle into the bush and tapped it in gently.
Photo courtesy of Kim Anderson.
I've inserted the cam spindle into the bush and tapped it in gently.
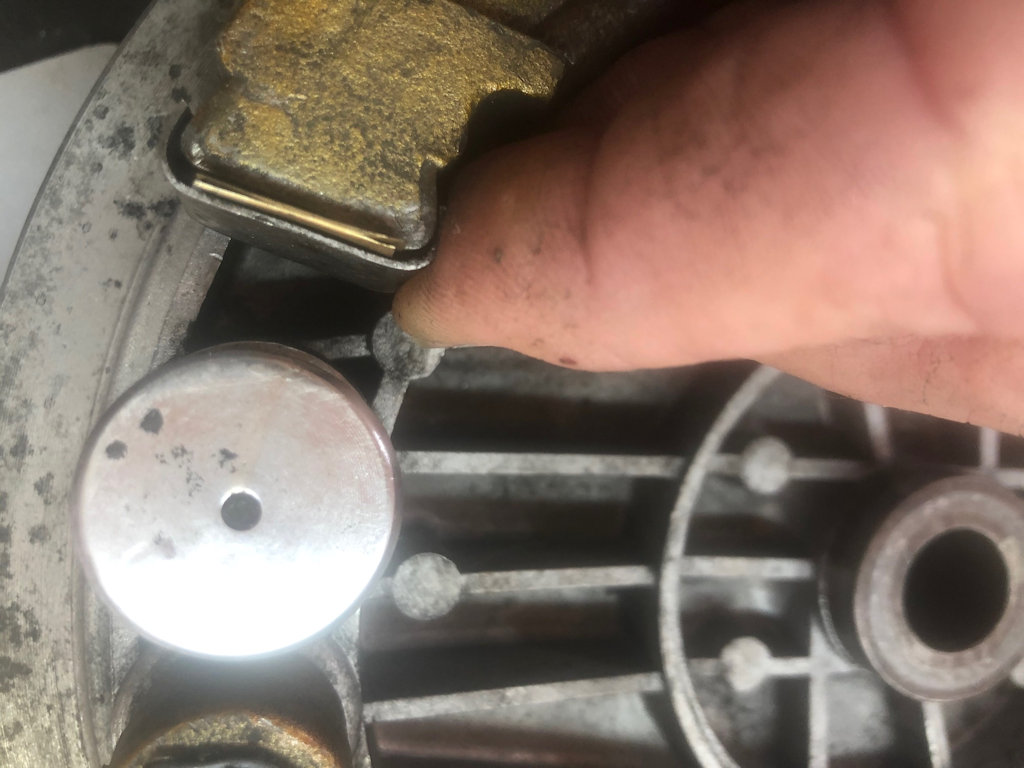
If the bush went in too easily, knock it out and apply some Loctite. If, on reassembly, the cam spindle is still sloppy (a bit unusual unless it's had a long hard life) you will have to get a thicker bush. If the cam spindle is out of round this is a good time to turn it down a little. Take the backing plate to your bearing supply company to get the right bush to start with or pay an engineer to do the lot. It may be hard to find new brake cams - our Guzzi dealer doesn't have these listed as a spare part either. On completion, reassemble the cams and connecting rods on the backing plates (without the shoes) and swing them to ensure that it is all moving very sweetly. Smooth out any notchiness with some sandpaper.
Lighten the springs
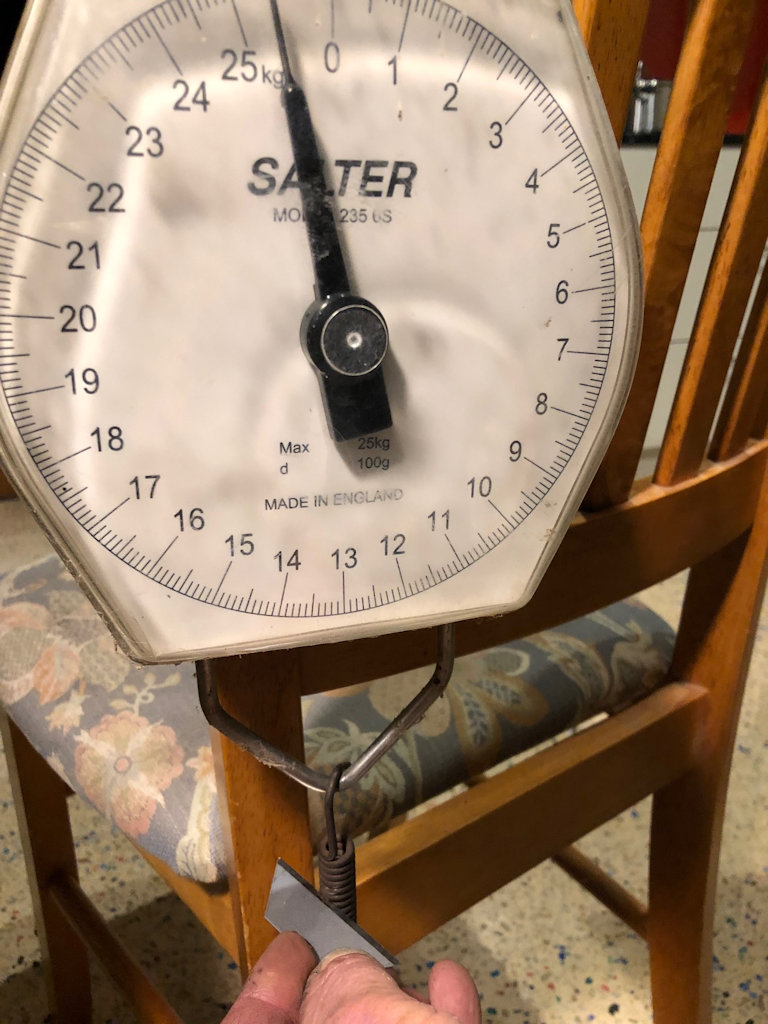
Guzzi brakes that I have pulled apart have massively heavy springs. The tension in standard springs is well over 25 kg (55 lbs) each. See my little test below.
I've hung a standard brake spring on a spring scale and although I am pulling over 25 kg of weight there is no chance of slipping a Stanley blade between the coils.
Photo courtesy of Kim Anderson.
I've hung a standard brake spring on a spring scale and although I am pulling over 25 kg of weight there is no chance of slipping a Stanley blade between the coils.
Over-extending the scale past 30 kg only opened the coils enough to get the tip in. This tension must be overcome before the brake cams can begin to move and bring the shoes into contact with the drum. With two or four springs in a brake assembly the combined resistance is very considerable despite the mechanical advantage afforded by the cams, the actuating levers and the handlebar lever itself. Much of your braking effort is taken up fighting the springs.
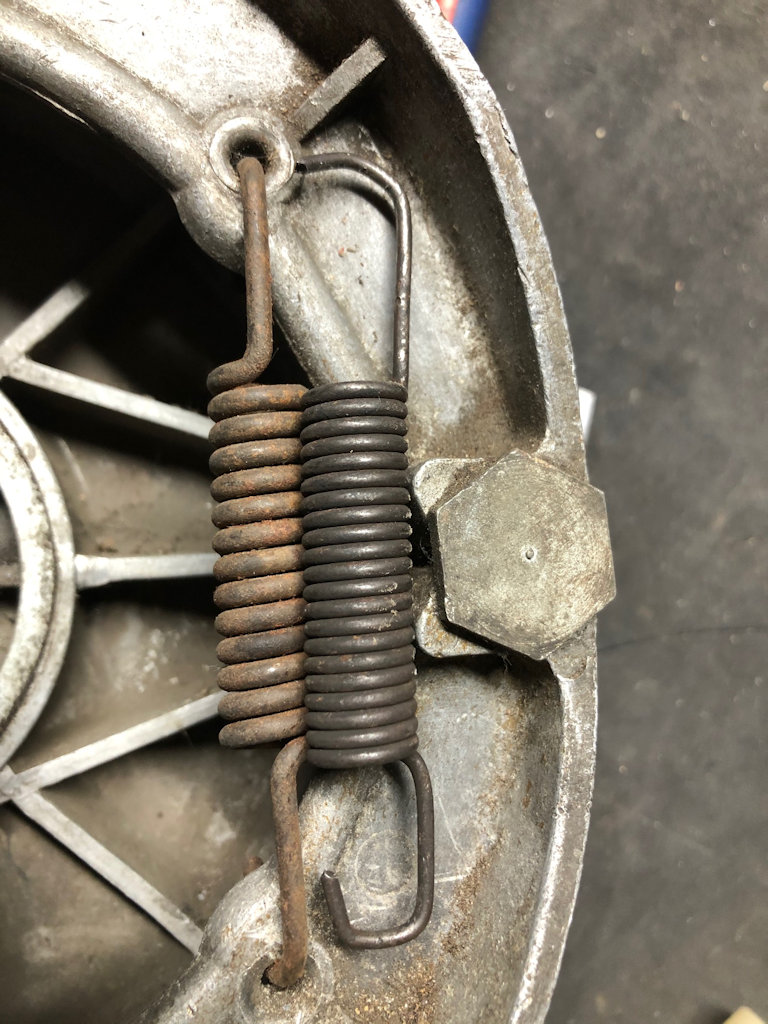
The standard springs are made from spring steel wire of 3 mm thickness, have two short legs with a hook at each end, a 45 mm body (the coil section) with 14 turns (count the two semi-circular coils at each end as one coil) and an external diameter of about 12 mm.
Spring resistance (or tension) can be reduced by making springs with thinner wire, adding more coils or winding the coils to a larger diameter if space permits. The simplest improvement for our Guzzi's is to find a spring with the same external dimensions as the standard spring, but just made with thinner wire. An auto wrecker may have something you can use or modify. That's where I got the finer dark spring in the picture below.
Old 3 mm spring in situ on left; modified 2 mm spring from a wrecker on right - the arms were shortened and re-bent ... and gave years of good service.
Photo courtesy of Kim Anderson.
Old 3 mm spring in situ on left; modified 2 mm spring from a wrecker on right - the arms were shortened and re-bent ... and gave years of good service.
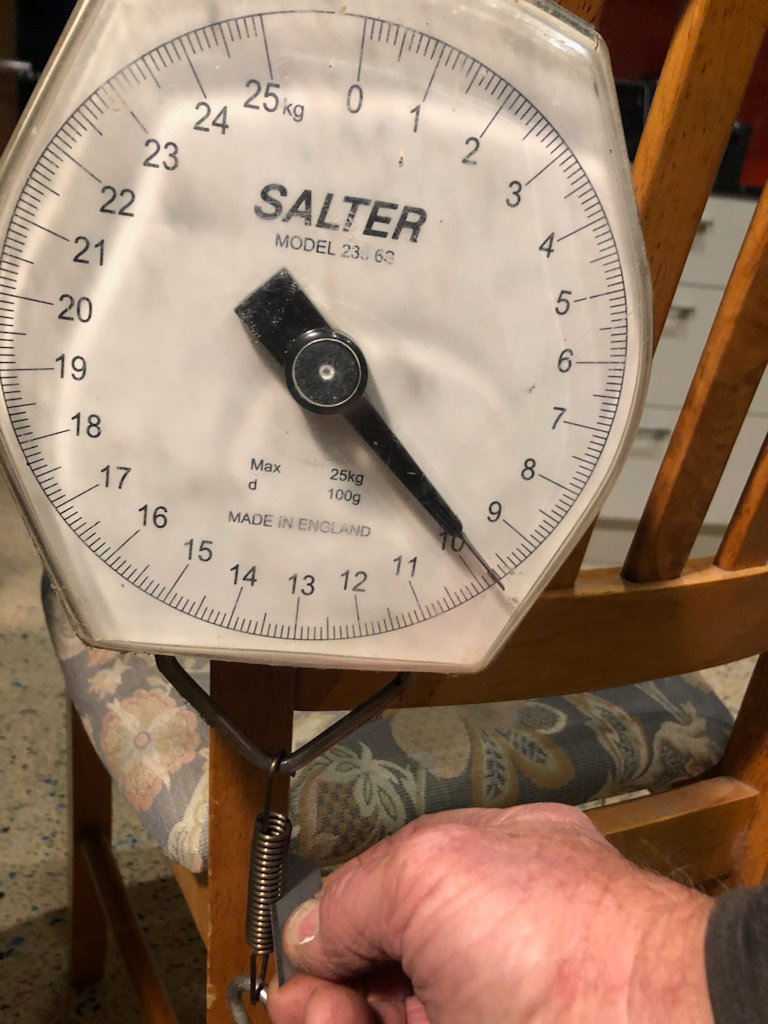
You can also get elegant new springs made up by a professional spring maker. I had a heap made with steel wire of 2 mm wound to the standard 12 mm diameter. I asked for 19 coils to give me a 40 mm body ... generating about 10% more tension than my old springs from the junkyard (just to be sure that I wouldn't have less tension than my previous set). Using my spring scales again I found that the new springs gave me a resistance of less than 10 kg to overcome before the cams would start to move the shoes into action.
New spring made by a local manufacturer. A Stanley blade slides in easily between the coils.
Photo courtesy of Kim Anderson.
New spring made by a local manufacturer. A Stanley blade slides in easily between the coils.
Of course, Guzzi had massive springs so that even with sticky cables, or pivots and cam spindles full of rust and grime, the brakes would still retreat when you released the brake lever. Or maybe the spring maker never got to see how little effort was really required to retract the shoes ... who knows. But if you ever did service your brakes, the effort of reinstalling these monsters back into the shoe holes required the strength of Hercules ... or a special tool that took days or a fortune to make. Some owners converted their bikes to disc brakes or just sold them in disgust.
When you convert to light springs, even your love bunny will be able to pull the hooks into the shoe holes with a pair of locking multigrips. However, you will now have to keep your pivots and cams better lubricated. Some people just use graphite powder on the basis that it doesn't hold grit. I've tried Loctite Anti-Seize and various types of grease but they went hard pretty quickly and the shoes wouldn't retract convincingly. Brake efficiency drops when the shoes don't retreat properly on release. This is because there's no air gap between shoe and drum to allow heat to be drawn away from these surfaces.
I stopped looking for the ultimate lubricant when I discovered lithium grease in a spray can. Being a vineyard owner with a lot of pruning to do I had Infaco Graisse au Lithium on the shelf. It's used to lubricate the pivots and jaws of powerful electric pruning secateurs. The spray can has a fine metal tip that makes it easy to spray into the cam spindle (from the outside) every now and again. Being whitish, it cleans up nicely and you'll want to spray it on, or up, everything that slides or rotates. You will even wish for the MotoGP to be red-flagged so you can dash out in the ad break and lubricate your beautiful supple machine. Soft servicing will become a source of endless joy.
Shim your brake shoes
Perhaps the most surprising improvement to braking power is gained by reducing the gap between the shoes and the drum. With brand new, close-fitting shoes, the brake actuating levers move only a fraction to turn the cams and bring the shoe hard up to the drum - less than 2 mm at their ends. Typically, freshly-lined brake shoes are arced in with a 10 thou shim placed between the nose (some call it the heel) of the shoe and the cam.
After some considerable mileage and ferocious braking duels with your mates, the friction material will have worn down and greater effort will be required to stop your magnificently maintained machine. This is because the brake cam is turning a lot more to bring the shoe into contact with the drum: as the cam turns, the point of contact with the nose of the shoe moves along the cam face and further from its pivot point - this reduces your mechanical advantage very considerably. You will also be running out of cable adjustment at the handlebar and the backing plate. To rectify this, you need to either replace the friction material, or make shims and slip these over the nose of each of the leading shoes. This is easy and you can repeat the operation for years.
The nose shims can be made by bending up strips of metal into a flattened C shape. When I discovered this mod I had plenty of stainless steel offcuts in different thicknesses to try out. Alloy is easier to work with but may be a bit too soft for the narrow contact patch involved. I'd stick with stainless even though thick sheet is hard to bend. For my front brake, which has narrow shoes, I cut flat strips of stainless, 38 mm long by 19 mm wide. Despite years of neglect, I found that a shim made from 0.75 mm sheet was perfect to restore the shoe-to-drum gap back to new. If you have large shoes (40 mm), you'll only need two shims, but they will have to be cut to 30 mm wide strips to fit neatly within their bigger cams. In both cases scratch a line 8 mm in from the end of each strip of metal and bend or hammer the ends over in a vise at these marks.
Bring each 8 mm end past 90 degrees so that the finished shape will resemble the hard insert in the nose of the above shoe. Please admire the cross-sectional and plan views of the two spare shims that I've left for you on my wife's cheese board (the port glass is out of shot).
Photo courtesy of Kim Anderson.
Bring each 8 mm end past 90 degrees so that the finished shape will resemble the hard insert in the nose of the above shoe. Please admire the cross-sectional and plan views of the two spare shims that I've left for you on my wife's cheese board (the port glass is out of shot).
The shim should fit snugly on the nose. Lubricate the pivots and cams, slide on the shoes then refit the circlips to each spindle and pivot, and reattach the springs, (this will be very easy now if you have the light ones). You can easily fit the shims after spring installation: lever back each shoe with a large screwdriver that you can dig into the webbing on the inside of the backing plate and slide on the new nose shim, which you also should have lightly greased. Wipe off excess grease. Lower the backing plate into the drum and with the axle in place turn it by hand to see if there is any drag or noise coming from the shoes contacting the drum. With the actuating arms in place and their pinch bolts tightened, you can then give these a light push to see how much movement is required to hear or feel the shoes make contact with the drum. If the tip of the actuating lever on the backing plate has to be moved more than a few millimetres you should consider making thicker shims. Adjusting this gap via the adjusters on the levers and cables is not the answer - it's the rotation of the cam that you must address. Keep making nose shims until you reach that beautiful place where only a small movement of the cam is required to bring the shoe into play.
Thousands of miles later ...
After perhaps years of happy stoppingness you will have to re-tweak the system. Pull the shoes out and rub back any ridges that have developed.
In this photo the ridges are marked with a dob of white paint - the ridge on the narrow shoe has been rubbed back, the ridge on the wide one hasn't been attacked yet.
Photo courtesy of Kim Anderson.
In this photo the ridges are marked with a dob of white paint - the ridge on the narrow shoe has been rubbed back, the ridge on the wide one hasn't been attacked yet.
If the friction material is rivetted on, consider how long it will be before the rivets are exposed and begin to damage the drums. It may be wise to change to new material earlier.
Now make a thicker nose shim if you can find material just a bit thicker. Around 0.5 mm may be OK for a first go. You can also be more scientific; insert some shim material between the nose and the nose shim. You can buy shim stock in many thicknesses from your local bearing company; a sheet of about 0.2 mm is a good start and obviously you can fold it.
The shim material above has been folded once, just for a tryout. If it works, reward yourself with a glass of port and a piece of cheese.
Photo courtesy of Kim Anderson.
The shim material above has been folded once, just for a tryout. If it works, reward yourself with a glass of port and a piece of cheese.
If the nose shims are too tight due to your faultless fabrication technique and you can't get shim material in behind them, just add bits of shim material in front, i.e., between the cam and the nose shim that is already in place, as above.
Photo courtesy of Kim Anderson.
If the nose shims are too tight due to your faultless fabrication technique and you can't get shim material in behind them, just add bits of shim material in front, i.e., between the cam and the nose shim that is already in place, as above.
Reassemble and try the fit. The total thickness of the added shim material and the old nose shim is how thick your new nose shim needs to be. If it's too hard to find material that is just slightly thicker, you may end up fitting an oversize shim and grinding the flat surface back to size. Insert the assembled backing plate into the drum and synchronise levers if necessary. You can check again after the front end is fully assembled. If the hand brake lever feels spongy the levers are out of synch, but if they are right, they will slam on like a brick - notwithstanding that some riders may prefer a softer and less aggressive brake feel. Rub the glaze off the shoes and drum and give them a clean with brake cleaner. Load the wheel back into the forks.
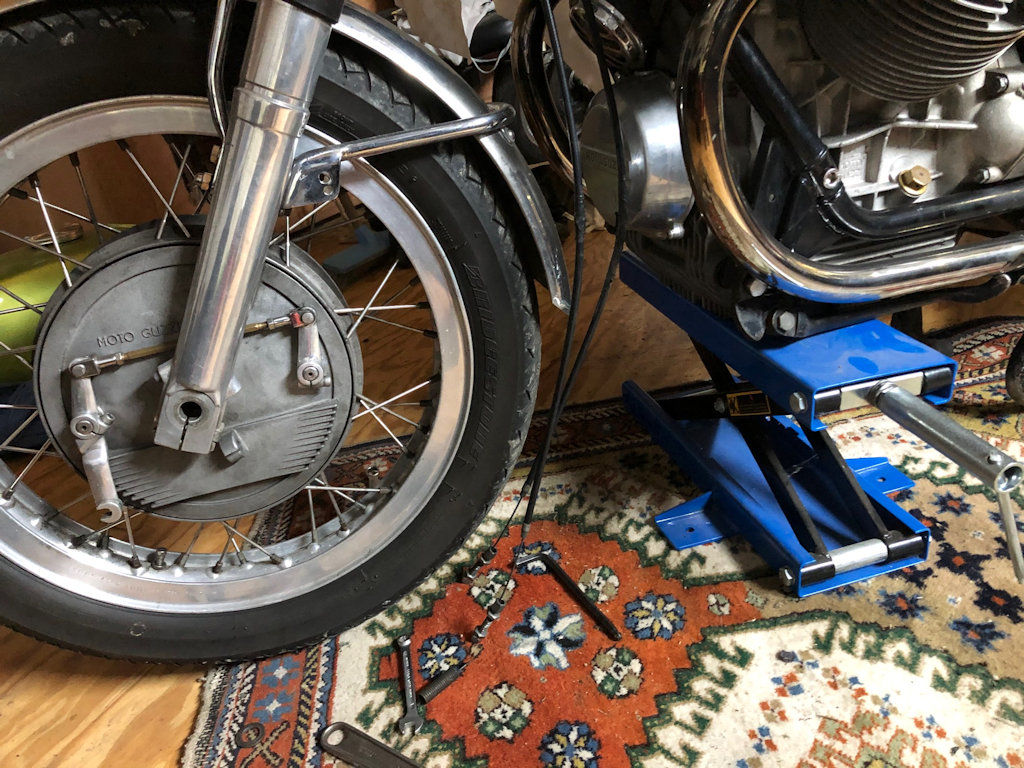
A flat scissor jack under the engine makes it very easy to do all this on your own. - USD $40.00-USD $55.00 on Fleabay. Always work in the warmth and comfort of your lounge room.
Photo courtesy of Kim Anderson.
A flat scissor jack under the engine makes it very easy to do all this on your own. - USD $40.00-USD $55.00 on Fleabay. Always work in the warmth and comfort of your lounge room.
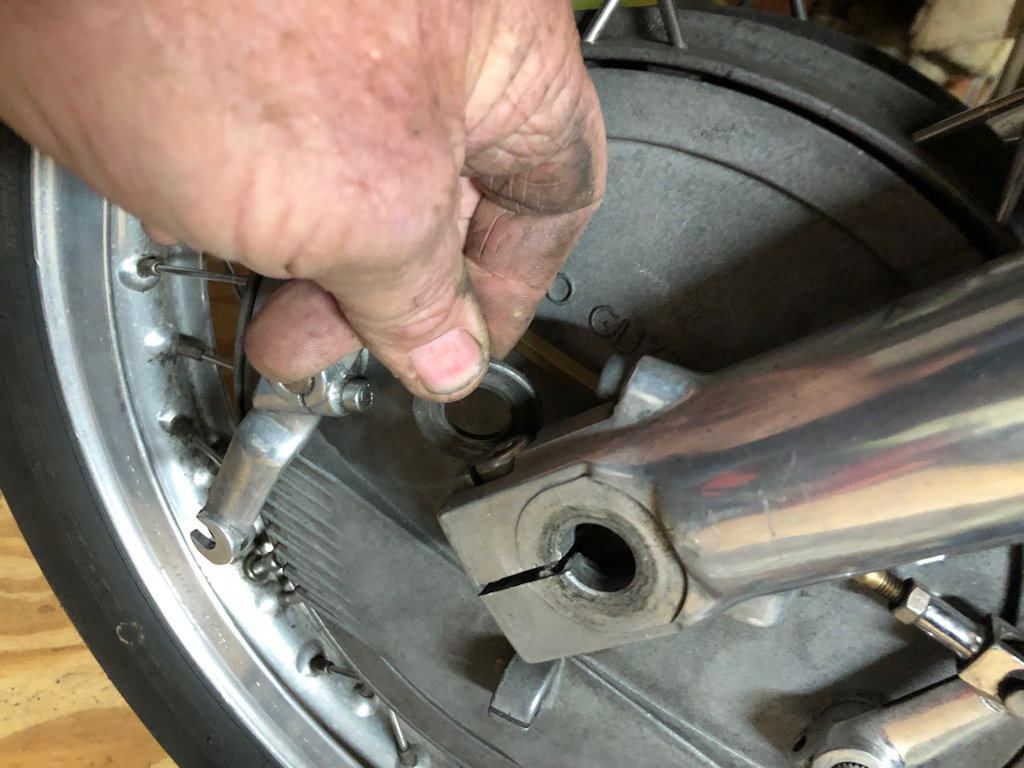
Before you slide the axle all the way through, don't forget to insert the washer / spacer between the outside of the backing plate and the inside of the fork leg. You probably didn't notice it fall out when you withdrew the axle. It will have rolled away under the whisky cabinet.
Photo courtesy of Kim Anderson.
Before you slide the axle all the way through, don't forget to insert the washer / spacer between the outside of the backing plate and the inside of the fork leg. You probably didn't notice it fall out when you withdrew the axle. It will have rolled away under the whisky cabinet.
Reattach the cables and equalise the play. Pull on the brake lever to centralise the hub and then tighten the axle nut. Don't forget to do up the pinch bolts. If all is well-adjusted you should have made a fabulous improvement to braking power. One finger braking is to be expected! If your brake lever feels spongy your synchronisation is probably not spot on. Read Paul Linn's article on brake synchronisation under Loop Frames. If you're still struggling for brake power put chalk on your linings, re-assemble and go for a short ride.
I chalked these and after a short braking run down our street I pulled them apart again. They are stacked like this so that the leading ends (cam ends) are on the righthand side - matched for better comparison. The bottom shoe has not contacted the drum at all, except during assembly. It was actually a good fit inside the drum (the shimming was correct) but its actuating lever was not in synch with its partner. One complete turn of its clevis made it a lot better.
Photo courtesy of Kim Anderson.
I chalked these and after a short braking run down our street I pulled them apart again. They are stacked like this so that the leading ends (cam ends) are on the righthand side - matched for better comparison. The bottom shoe has not contacted the drum at all, except during assembly. It was actually a good fit inside the drum (the shimming was correct) but its actuating lever was not in synch with its partner. One complete turn of its clevis made it a lot better.
The logic for this adjustment is: if the chalk-covered shoe is the one being moved by the front cam (the one with the cable attached) then unscrew the clevis on the rear arm - this makes it follow less closely; think of a dog on a leash.
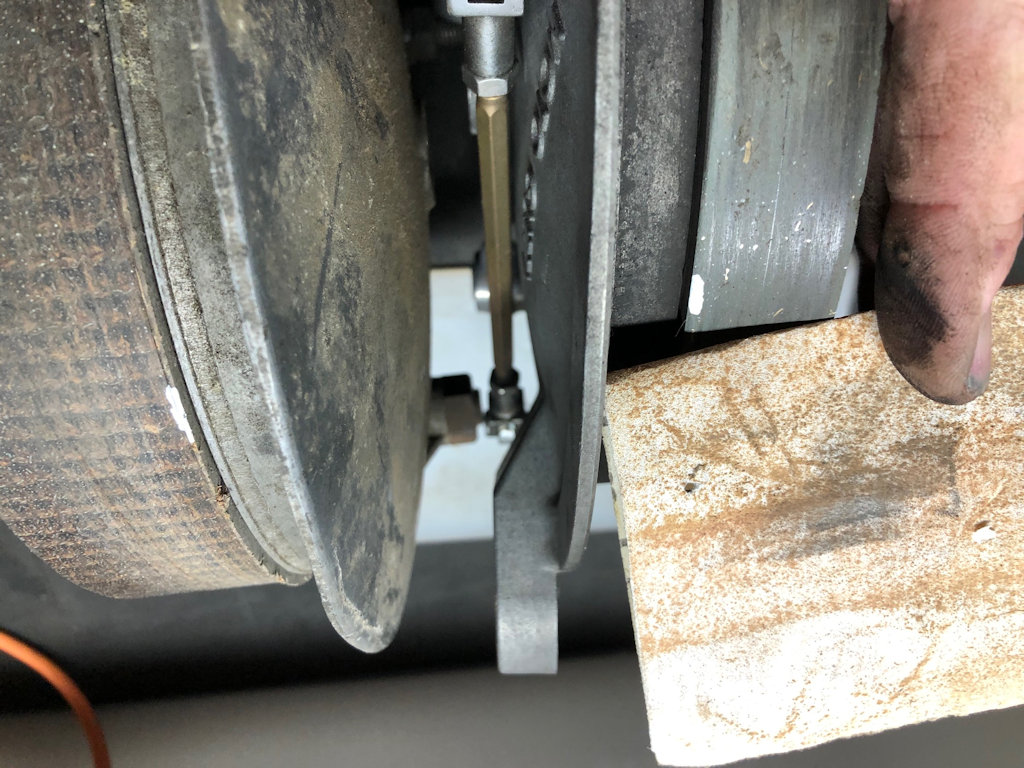
The clevis on the rear arm has been backed out one complete turn - note the gap between the locking nut and the clevis. This was enough to remove the chalk on the next braking run. Don't take any notice of the smart brass hex rod - it was easier to make than a round steel one covered in copper, nickel and chromium.
Photo courtesy of Kim Anderson.
The clevis on the rear arm has been backed out one complete turn - note the gap between the locking nut and the clevis. This was enough to remove the chalk on the next braking run. Don't take any notice of the smart brass hex rod - it was easier to make than a round steel one covered in copper, nickel and chromium.
If, however, the chalk was undisturbed on the shoe moved by the rear cam, tighten the clevis by a full turn, bringing that shoe into action more quickly - shorten the leash. If, however, there was just a small amount of chalk removed from the chalkiest shoe then maybe a half turn is all you need. Don't forget that adding shim material to the front or back cam will have a similar influence, but it may be hard to slide the backing plate into the drum again.
If you have two brake cables (double sided brake), synchronise these properly. Roll out the adjuster on the hand lever about 5 mm, then adjust the cable end at each backing plate until both cables are equally taut. This is easier than gauging equal amounts of slop! Roll back in the handlebar adjuster until the hand lever has some play and the actuating rods have allowed the cams to completely retract.
There may be a period following the above adjustments during which your brakes need to bed in a little before they achieve their full potential. You may also like to re-tweak the cam shims a little if their shoes seem to be dragging and not coming off. This may occur if your tolerances are too fine. Decreasing the thickness of the nose shim by 0.2 mm may be enough.
Review and adjust your emergency braking procedure now that you have vastly improved stopping power.