Gauge trim ring removal and installation: Applicable to speedometers and tachometers
Moto Guzzi V700, V7 Special, Ambassador, 850 GT, 850 GT California, Eldorado, and 850 California Police models
Created:
Updated:
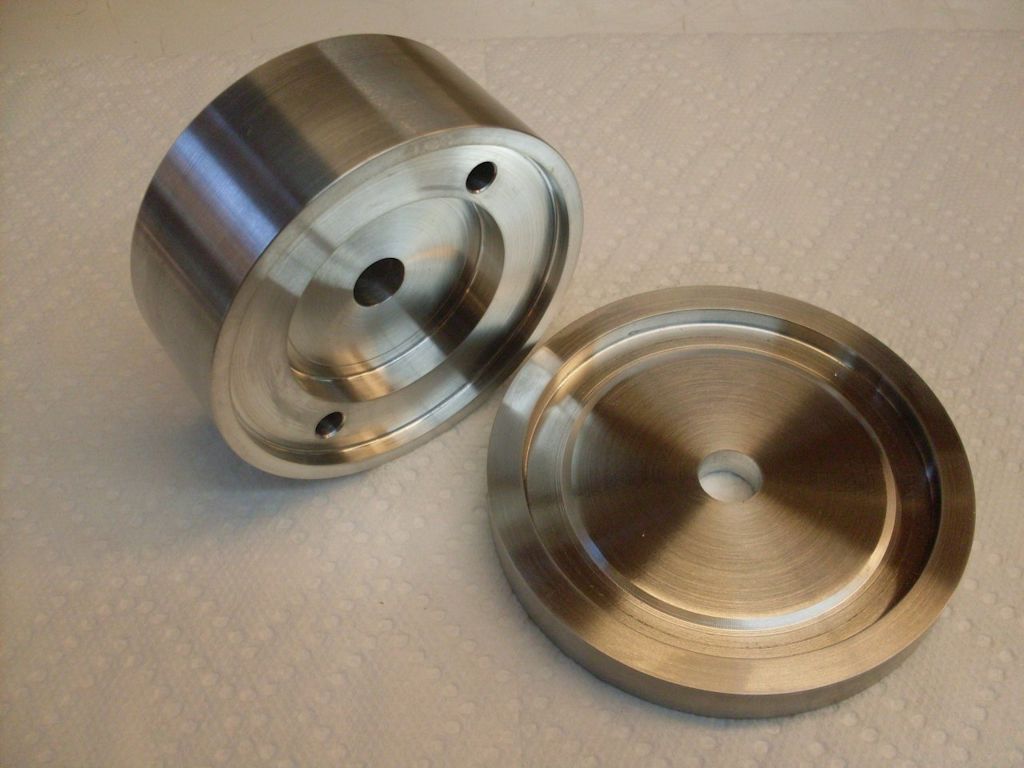
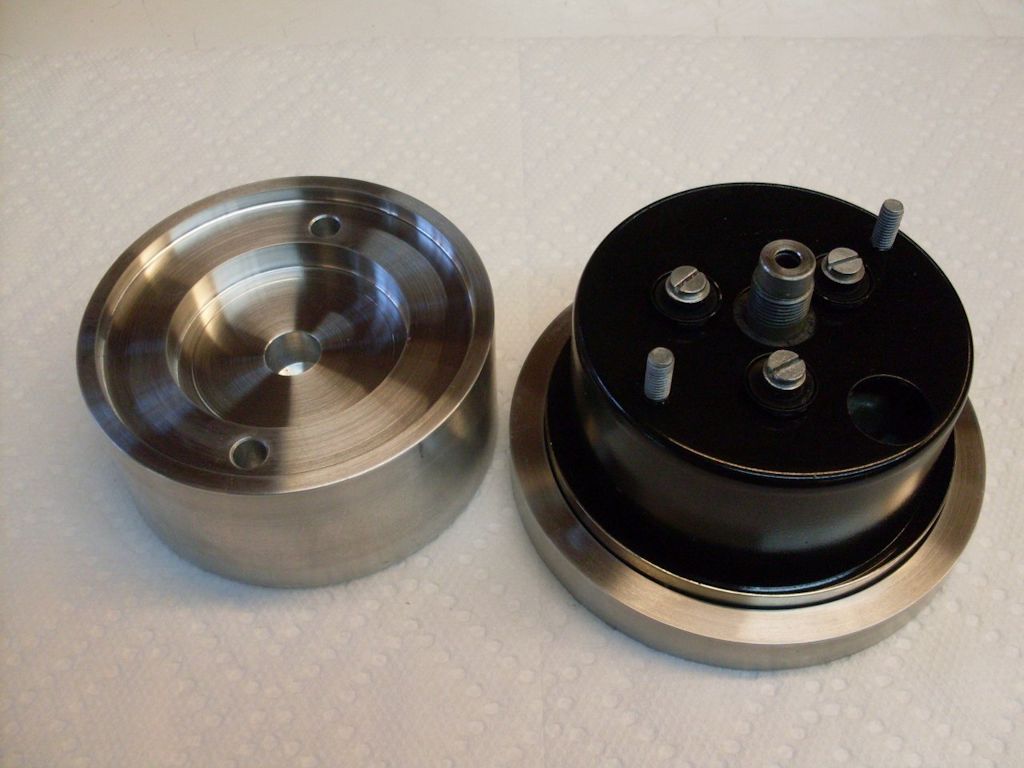
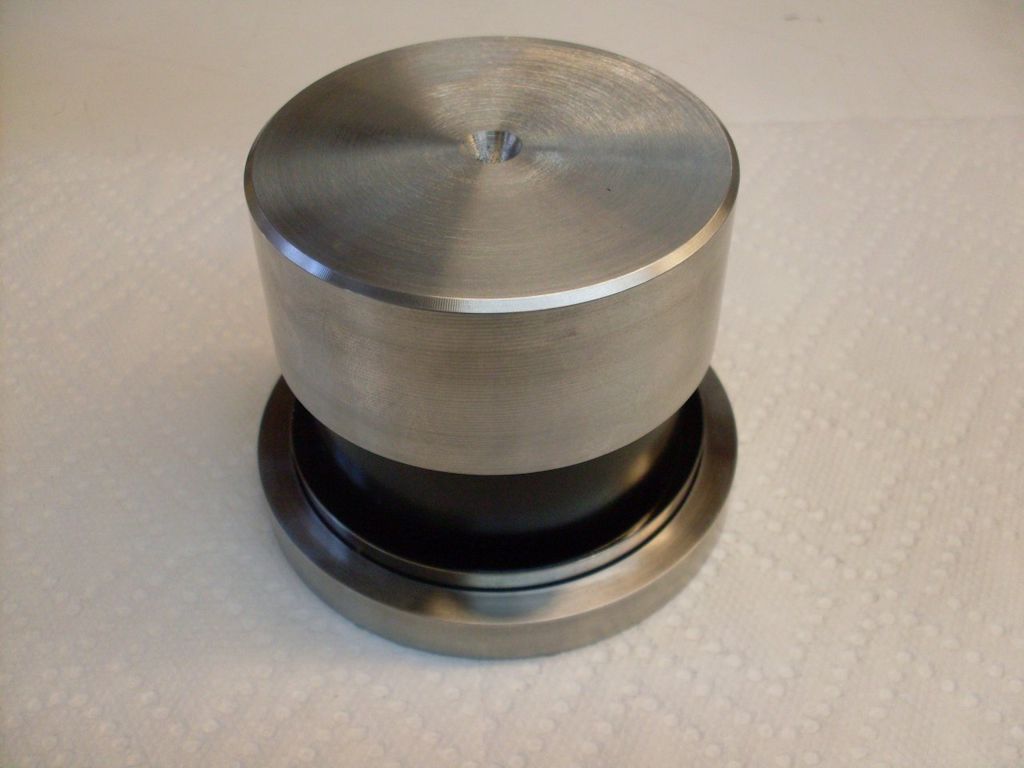
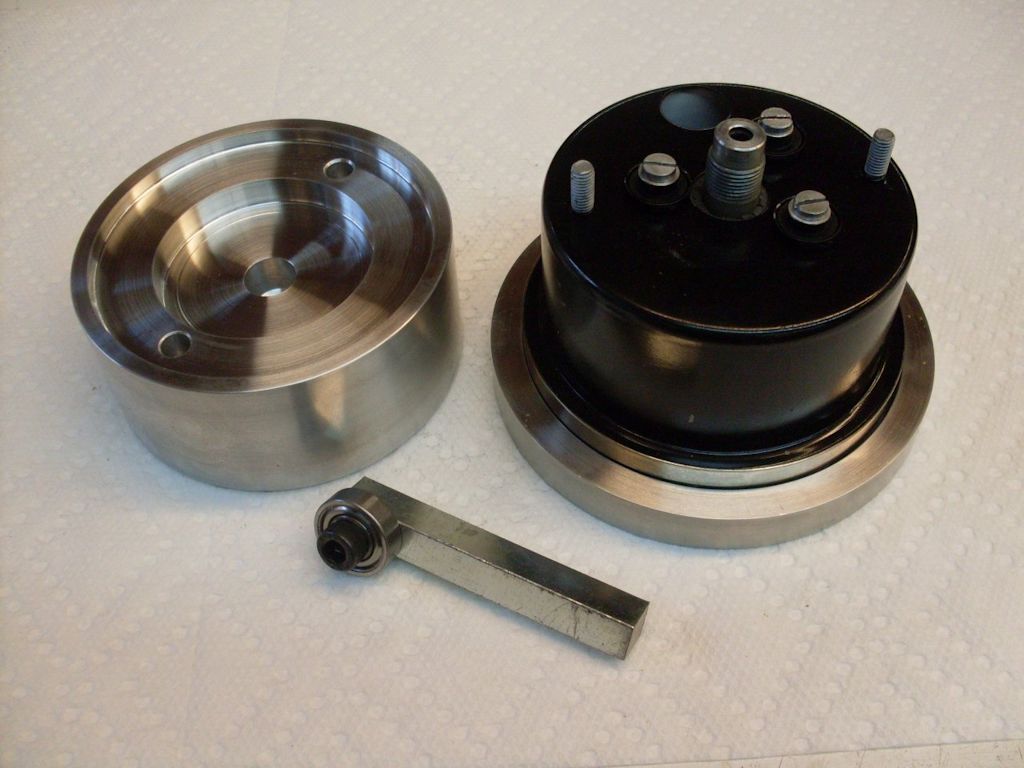
Purpose made gauge bezel installation tools and techniques
Thanks to Charlie Mullendore of Antietam Classic Cycle for sending me a link to one of these photos. I did a bit more searching and found some additional resources.
I extracted this information from Jim Carey off of the old Yahoo! Loopframe_Guzzi news group (which has now moved to Groups.io). In Jim's own words:
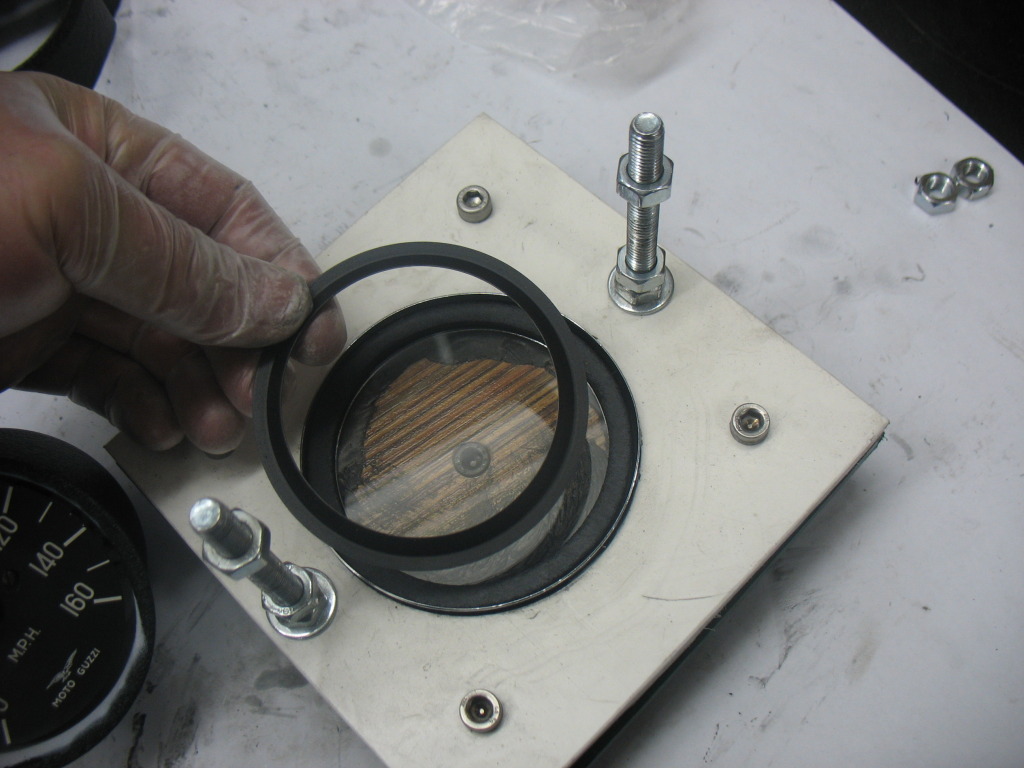
I tackled tearing down and rebuilding my rusty instruments, 1st sourcing reproduction chrome bezel rubber gaskets and glass lenses. I pried apart the old chrome bezel with a very fine flat blade screwdriver, then dismantled the instruments and had the bodies powder coated wrinkle black. The insides of the bodies where then sprayed flat white.
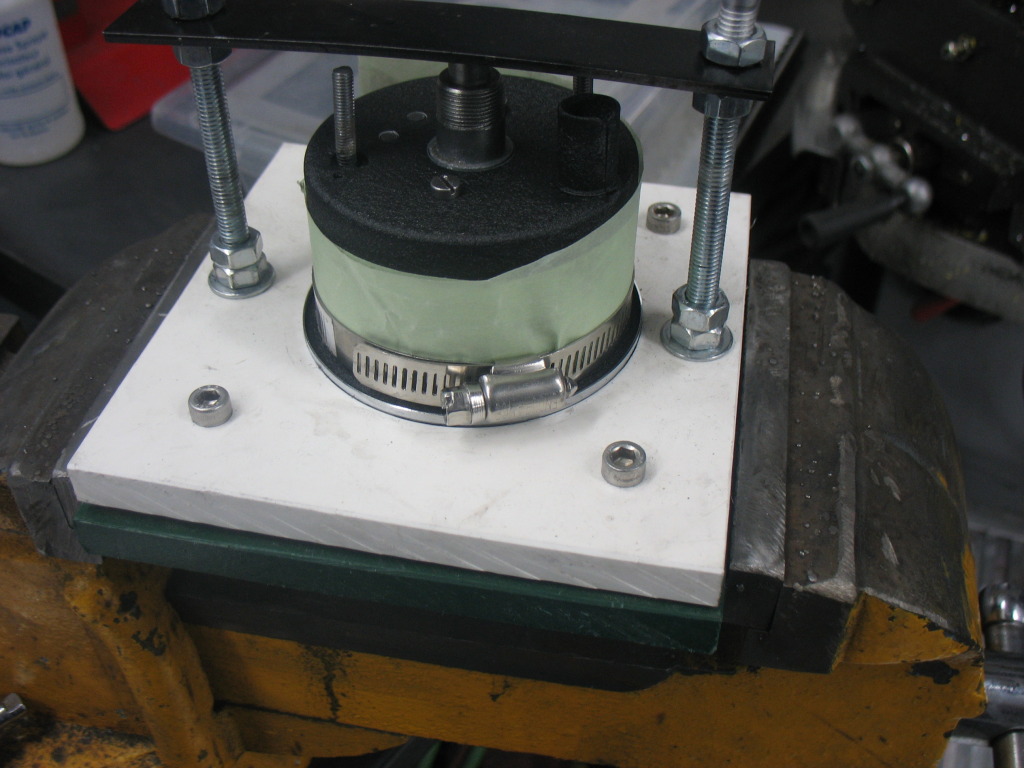
For attaching the bezels I took two small squares of 1⁄2 inch thick HPDE plastic (the stuff hockey boards are made of - you could use hardboard just as easy) and using a circle scribe cutter made a circle the same size as the OD of the chrome bezel. Then a circle insert from 1⁄2 inch masonite was dropped into the cut out plastic section and glued to the square base. I shimmed between the two squares of plastic to get the depth of the jig the exact thickness to fold the bezel over, used bolts to joint the two squares together. Then I placed a thick bead of black silicone rubber around the outer lip of the circle and placed a sheet of clear sandwich wrap over the wet silicone and pressed an old bezel into the silicone and let it set overnight. This makes an exact soft face for the chrome bezel to rest in. I made a compression clamp to press the gauge body in place. Wrapped the finished body in painter tape and set a hose clamp around the body to protect it while I tapped the chrome ring over. I am happy to say it works great!
I extracted this information from Danilo Gurovic off of the old Yahoo! Loopframe_Guzzi news group (which has now moved to Groups.io). In Danilo's own words:
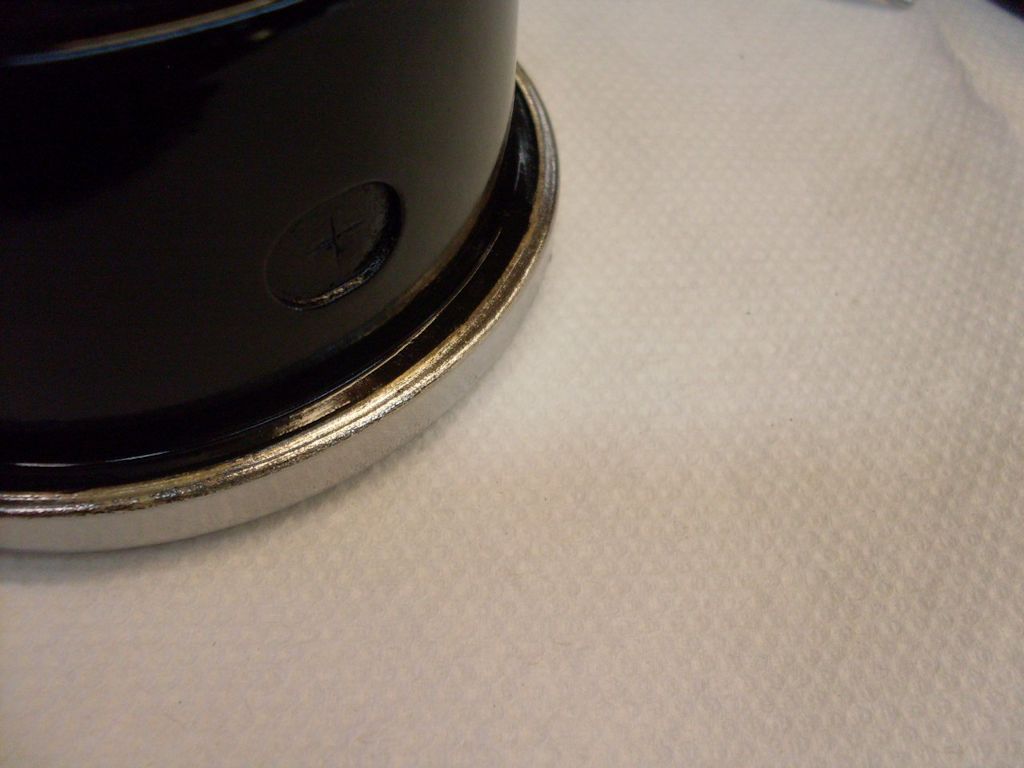
To get the chrome retaining rings off the Veglia instruments, just get a nice #00 screw driver and a small hammer or mallet. Find a soft work surface, and gently rap the screwdriver as it's resting flat along the chrome on the side of the ring. Gentle persuasion and about 15 minutes yields the ring, unmolested, in your hands.
To get the nice black face back, get some Black Chrome and a few Q-tips, and gently clean the face of the instrument with it. Looks like new in about 30 minutes. Make sure you wipe the excess. The rubber gasket holding the glass and items is probably shot -- I used black rubber goop. I also painted the outer retaining ring satin black, and had new glass made. Looks like new.
Rich Arimoto's technique
I extracted this information from Rich Arimoto off of the old Yahoo! Loopframe_Guzzi news group (which has now moved to Groups.io). In Rich's own words:
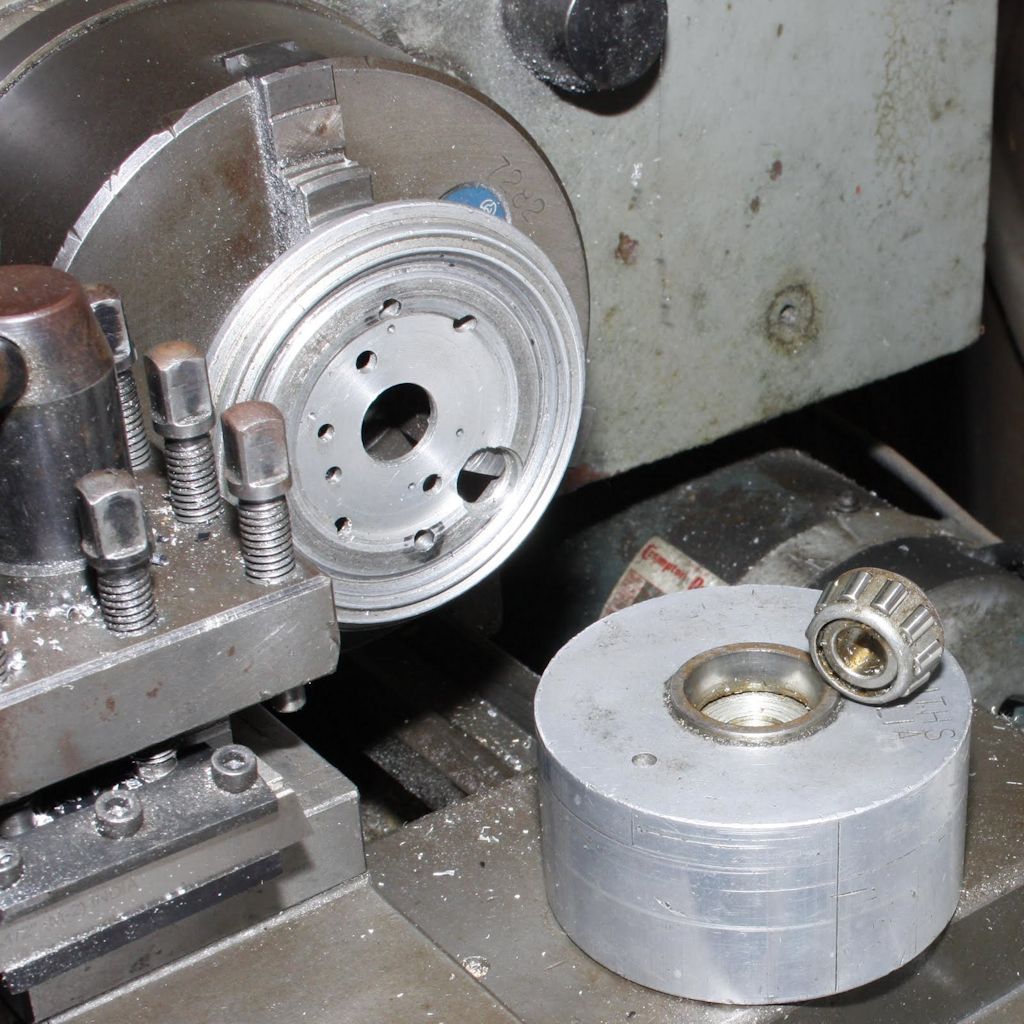
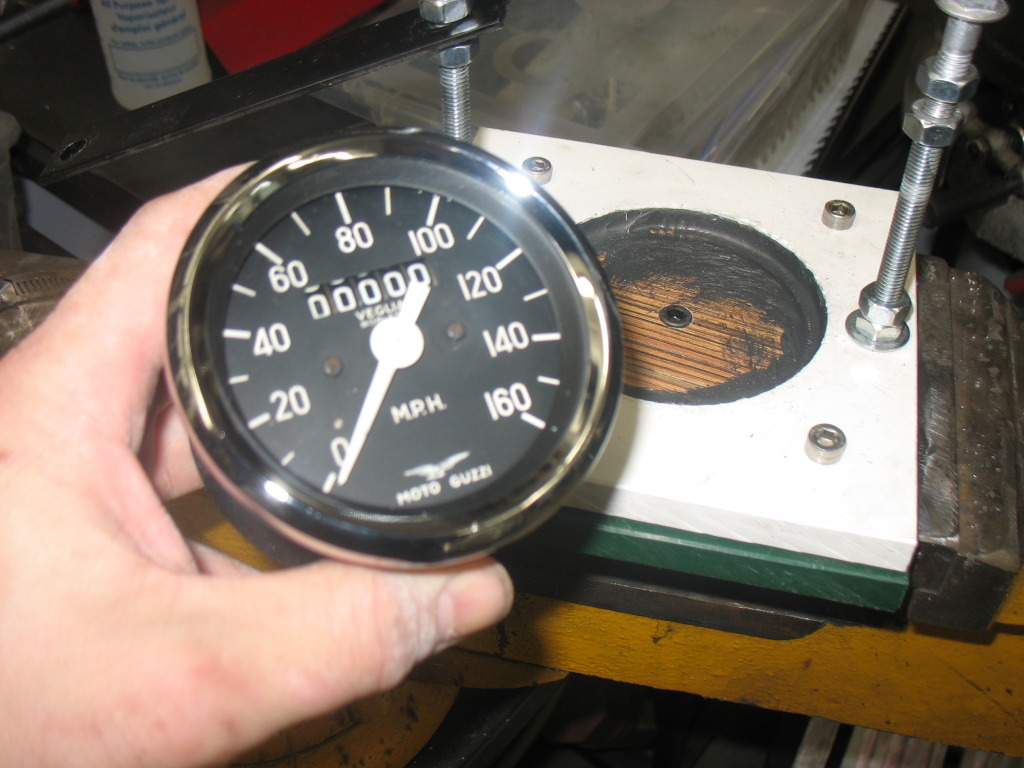
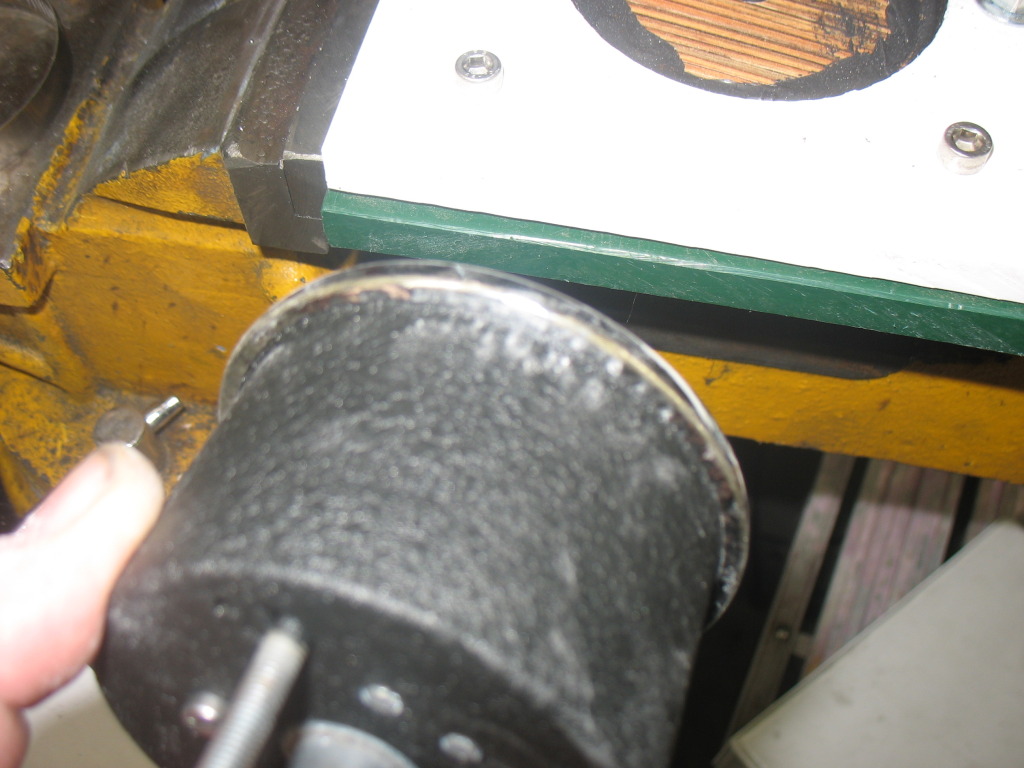
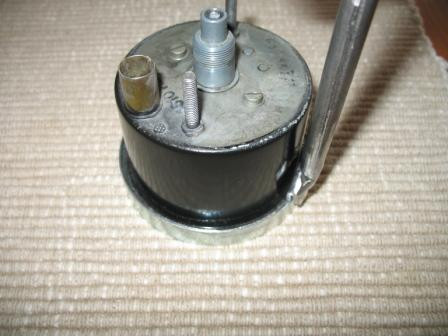
OK, I got the Ambobber's broken speedo's bezel off without damaging it too badly, then swapped out the guts and was faced with putting the bezel back on. How to do this?
I'd put a (3 inch) hose clamp around the bezel to keep it from splitting when I removed the bezel, so I'm thinking that I might be able to use a hose clamp to my advantage when putting it back on.
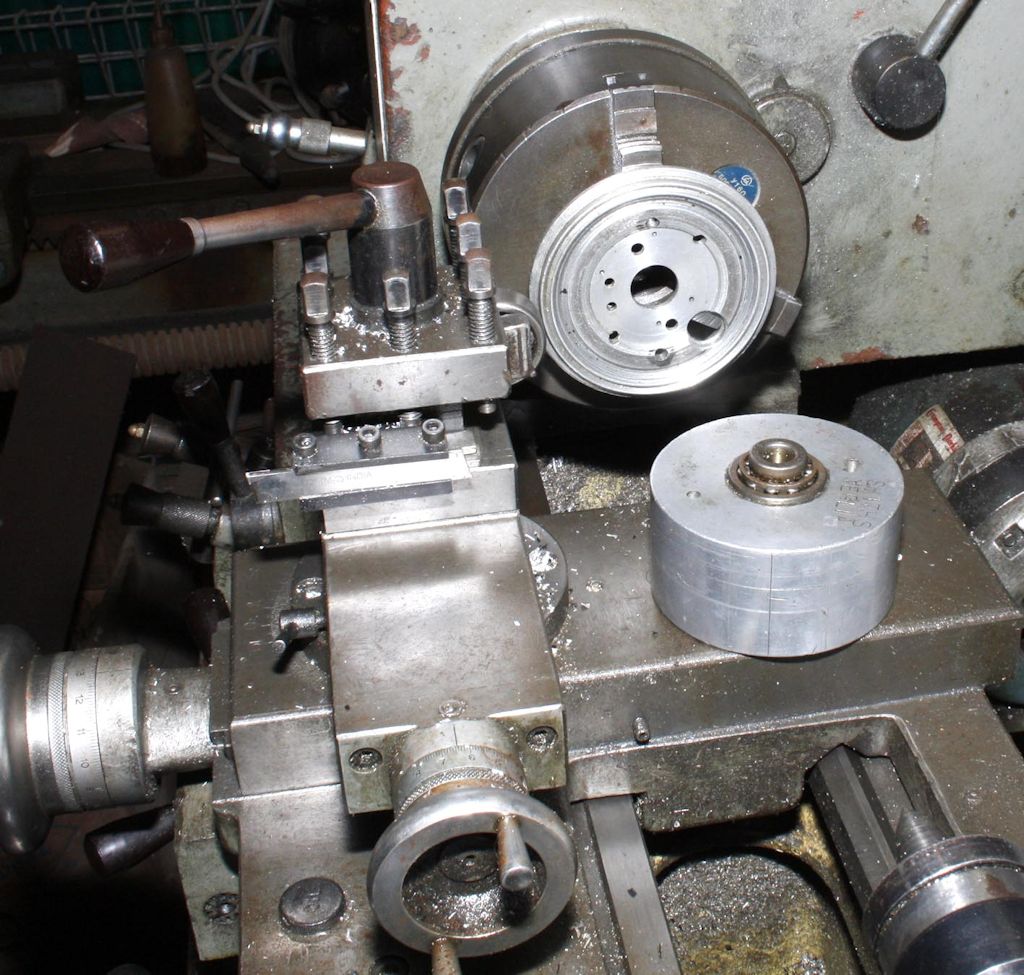
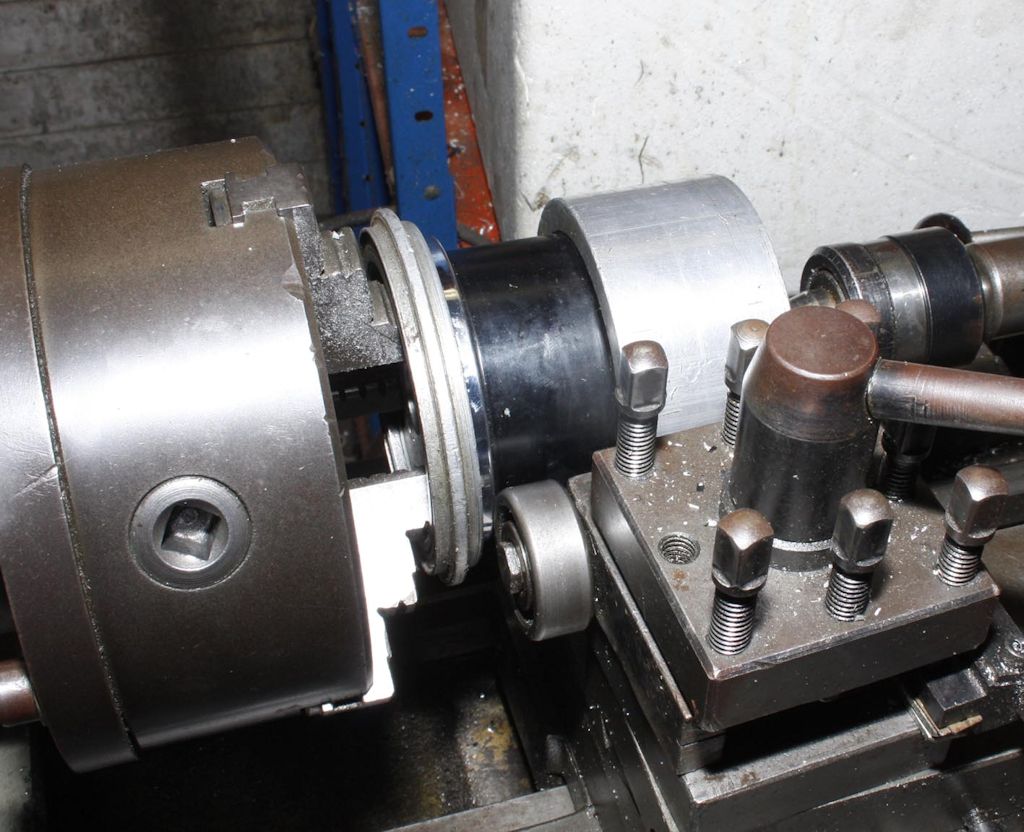
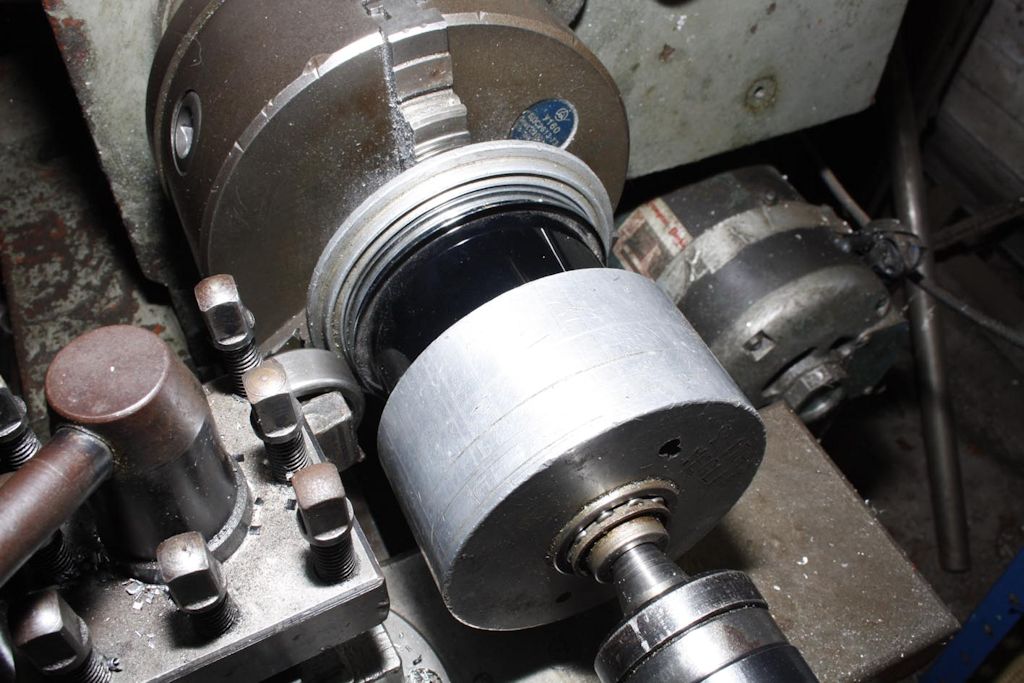
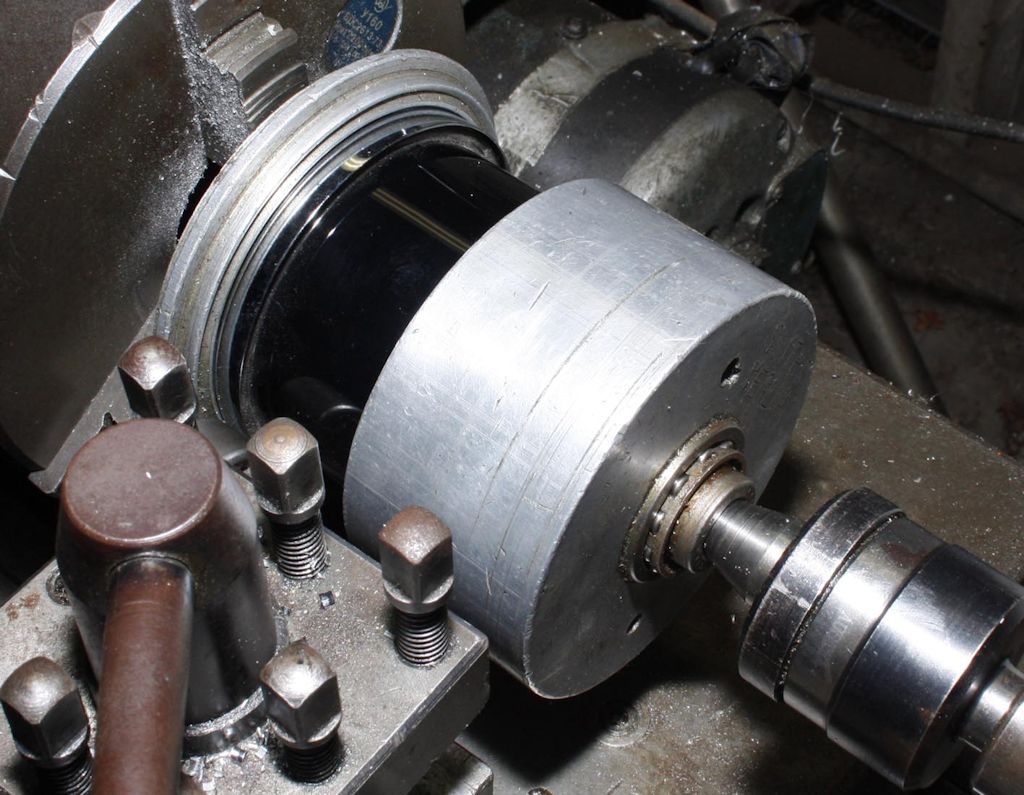
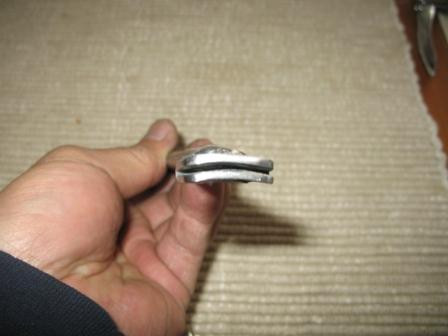
I decided to make a tool to re-attach the bezel. Yes, a screwdriver or something else would work, but a slip could scratch the paint and I thought it would be hard to get the edge even. To make the tool, I bent a large washer to roughly match the bend in the hose clamp, cut it in half and welded it to a short piece of rod-stock. Ground it to where I thought it would work. Took about a 1⁄2 hour to make the tool.
To crimp the bezel, you first put some masking tape around its edge and then attach the hose clamp. Slip the tool over the hose clamp and tap it with a hammer to bend the edge of the bezel down. The hose clamp keeps the working edge of the tool right on the part of the bezel you want to bend--it's just about impossible for the crimper to slip. It worked great, the edge comes out quite even (I repositioned the hose clamp several times). Not perfect, but I'm very satisfied with the way it all worked out.
While the speedo was out, I decided to re-finish the dash, which had some crappily applied wrinkle paint. I used some pickup truck bedliner spray (Mark Etheridge of Moto Guzzi Classics recommended this as a good finish), and that really improved the appearance of the dash.
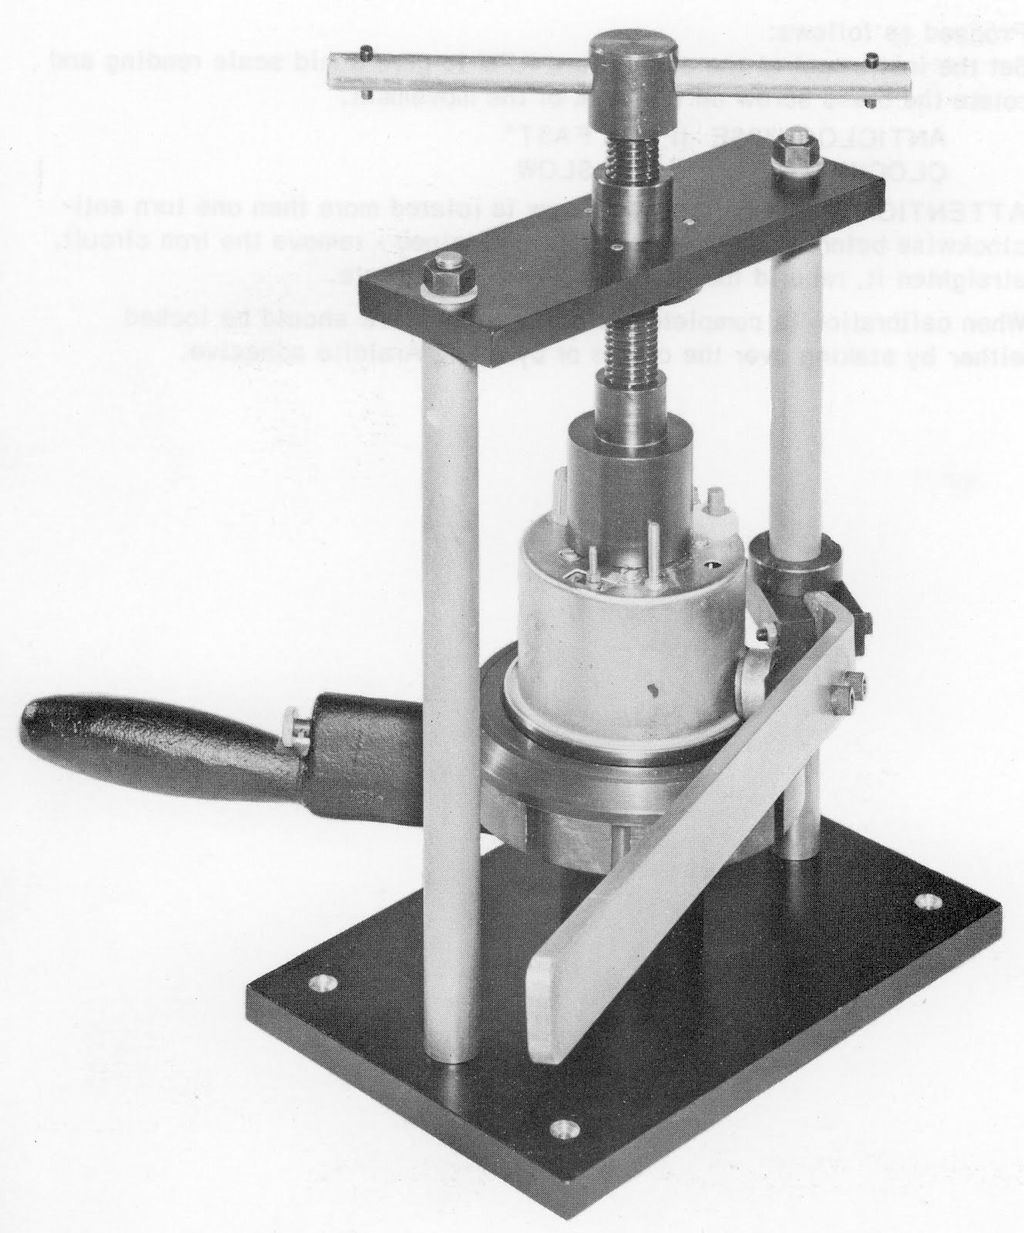
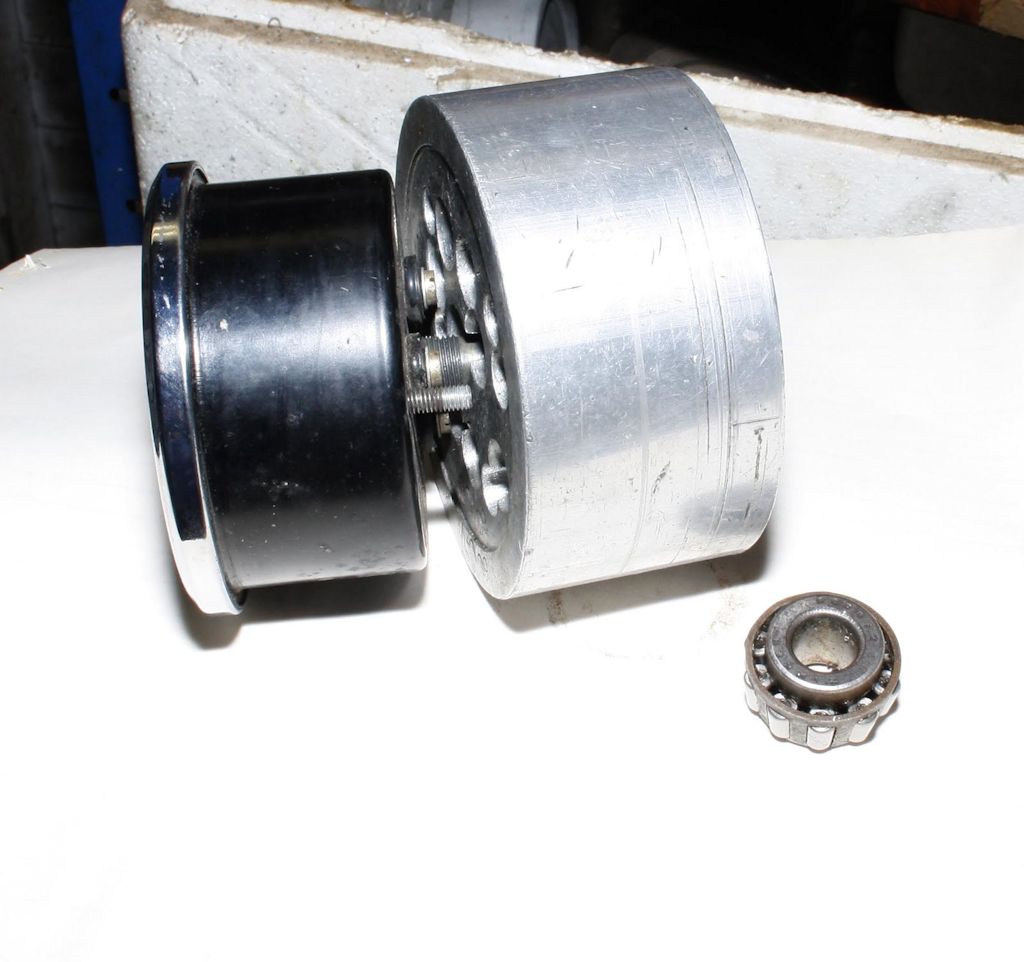
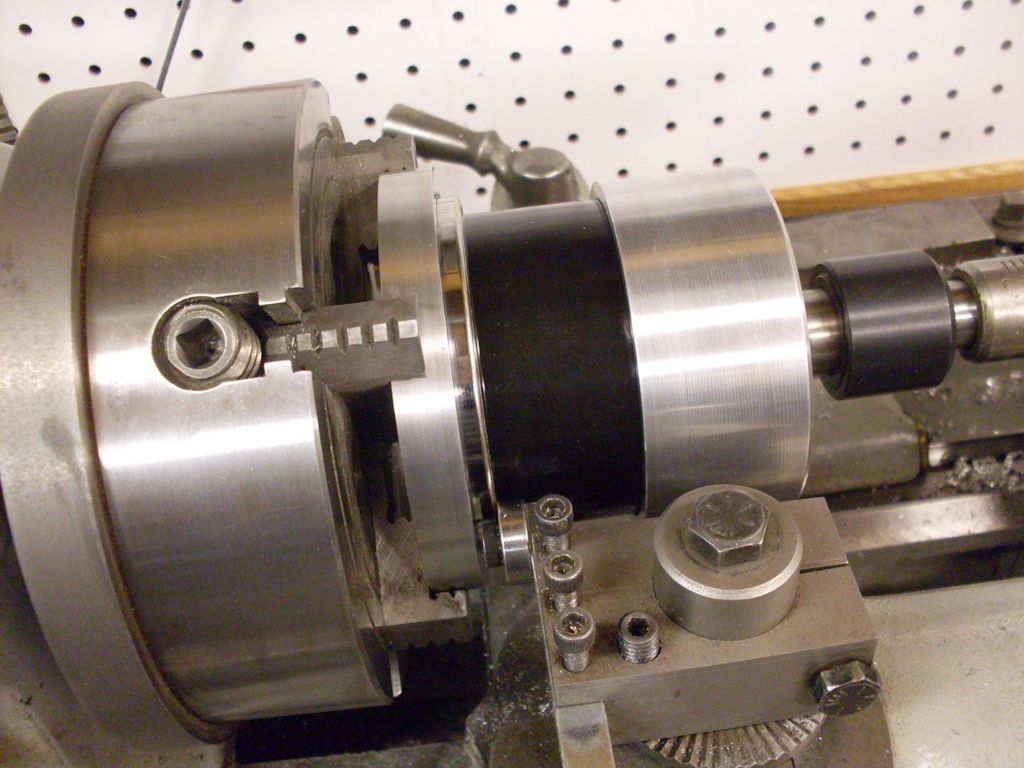
The special tool for crimping the ring back onto the gauge.
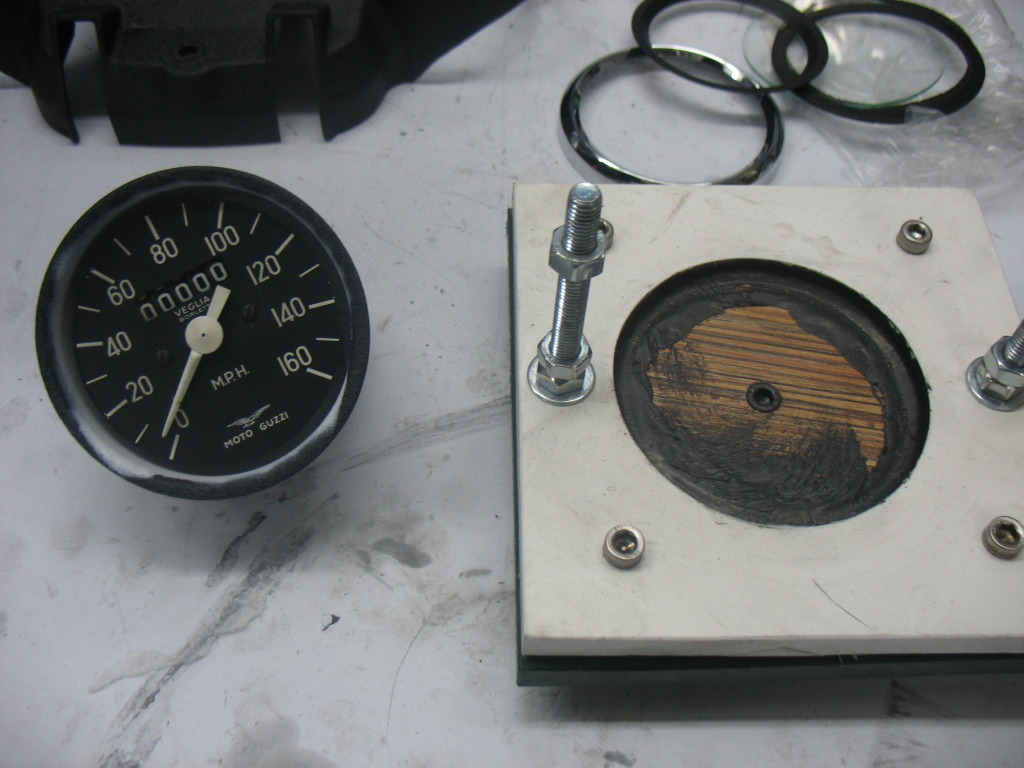
After seeing Brian's beveled glass lens, I asked him how he removed the trim ring. Brian sent me the following description. In Brian's own words:
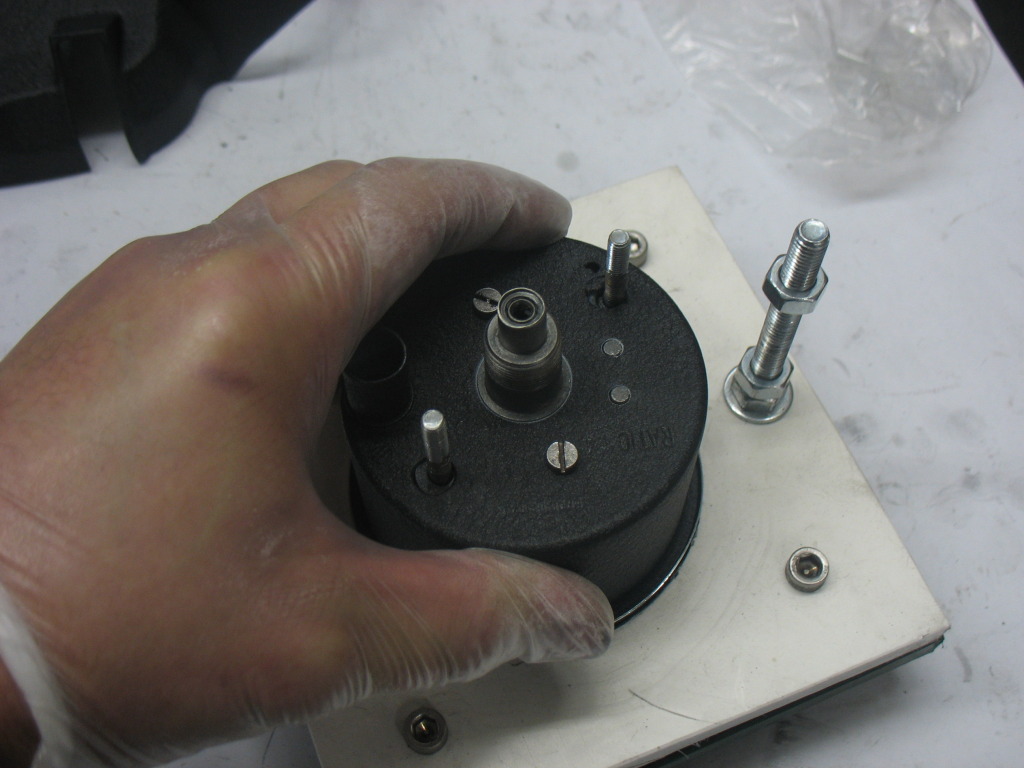
Remove speedometer glass; I did it such a long time ago , I forgot!. However, I just took the die-cast piece off that holds the glass so I could put it to a polishing wheel. OK, undo that part and then its the two little knurled nuts to remove the dial assembly (with the little angled hold-down pieces).
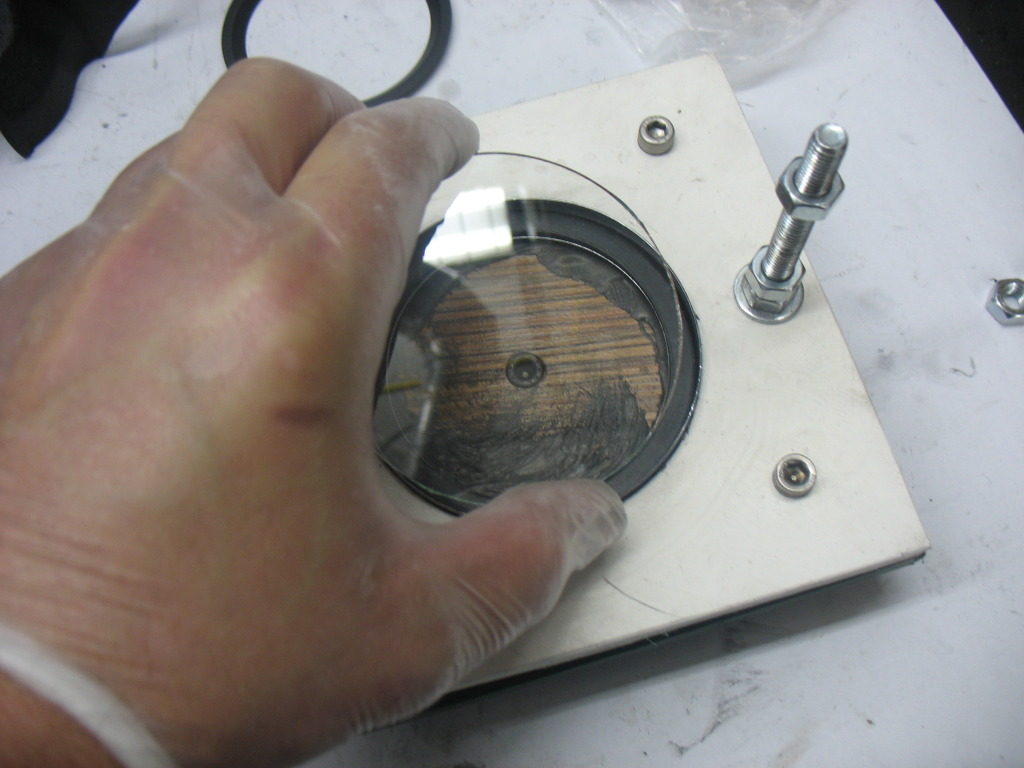
OK, it looks like I carefully lifted the bezel at the base where it is spun on, I believe. Little by little, all around then, it'll pop off. I installed the glass, then used a plastic lathkin to re-bend the bezel metal back into place. I dread this kind of stuff but it must have been easy because its not all butchered up and looks fine. .When beveling the glass, I was careful to match the thickness where the bezel would contact the glass. Important. I could have put some electrical tape around the area that is bent up to create pressure on the bottom of the bezel but, I didn't do that either. Its tight. Metal has memory.
When I moved into a shop long ago, it was occupied by none other than a metal spinner. So, I kinda got the concept of moving the metal with a spinning motion to basically, be gentile with it so it does not fatigue and break. Its not a job for Mongo. One could anneal the metal to insure more flexibility (when the bezel is out). I don't think I did.
Its really pretty easy and I suspect the distance that the bezel needed to be spun [bent] on was so small that the metal is still pretty loose--not crystaline or fatigued.
OK, that's the long version for glass removal The beveling, that's a whole different story. Many large tools required for that — a specialty for sure. I know nothing of other Guzzi models with tach/speedo. If someone gets an idea to get one at a regular glass shop, the edge dimension is important [mentioned above]. I used to operate the new style equipment and I don't think they will go down to such a small radius as the Guzzi requires [or the edge dimension, for that matter]. Ironically, many of those machines are made in Italy. The glass pictured was done by hand beveling which involves the beveler holding the glass against the wheel. If you want to know how its done, I will explain with pictures of the machines — until then I won't waste your time.
Oh, one thing I'm sure you know, disconnect that battery first!!.