Moto Guzzi V700, V7 Special, Ambassador, 850 GT, 850 GT California, Eldorado, and 850 California Police models
Created:
Updated:
I first purchased, bent upon first use, and returned this Craftsman valve spring compressor (part number 47627). Maybe it will work for you, but it didn't for me.
I finally decided to make my own, homemade valve spring compressor. I'm certainly not the first person to make my own, but I thought I'd share my experience.
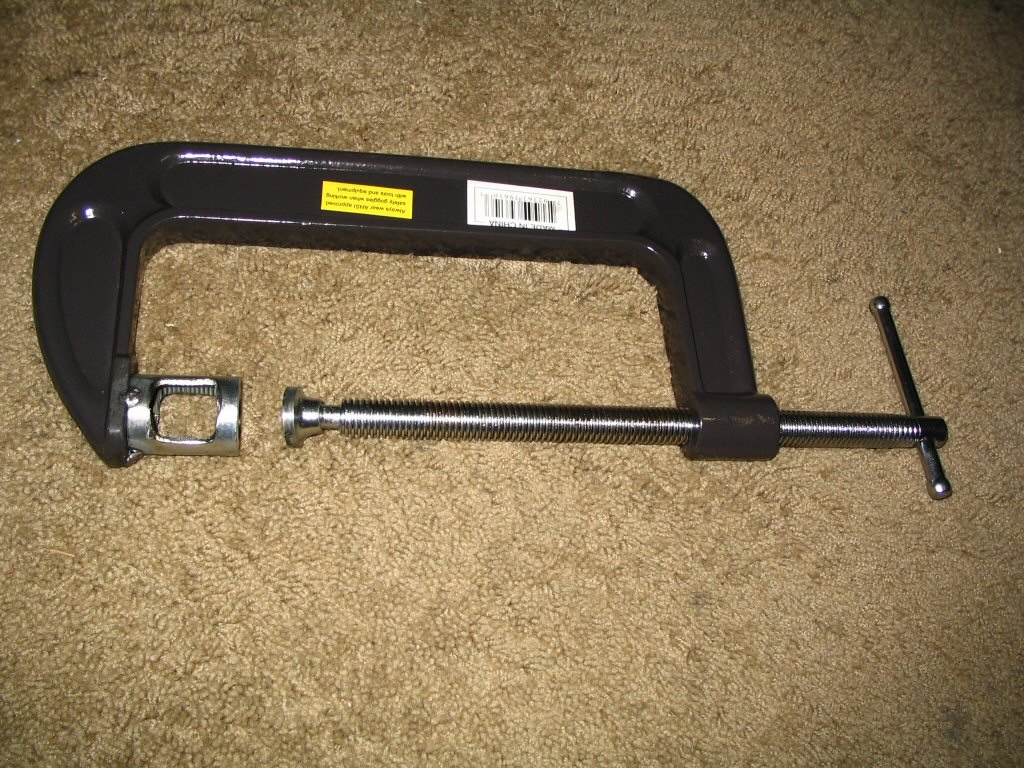
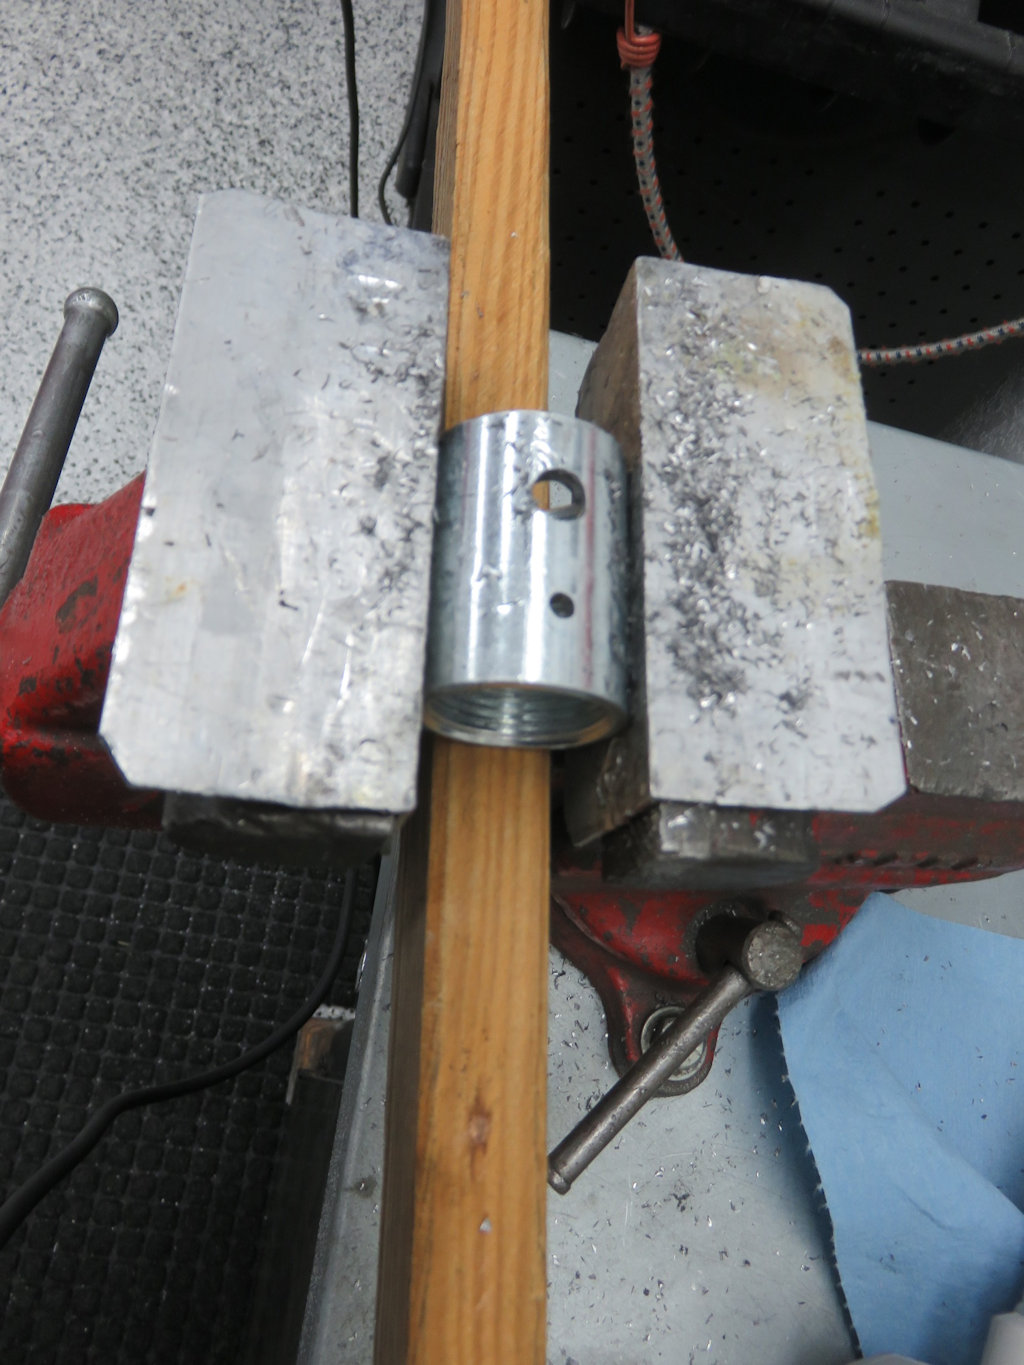
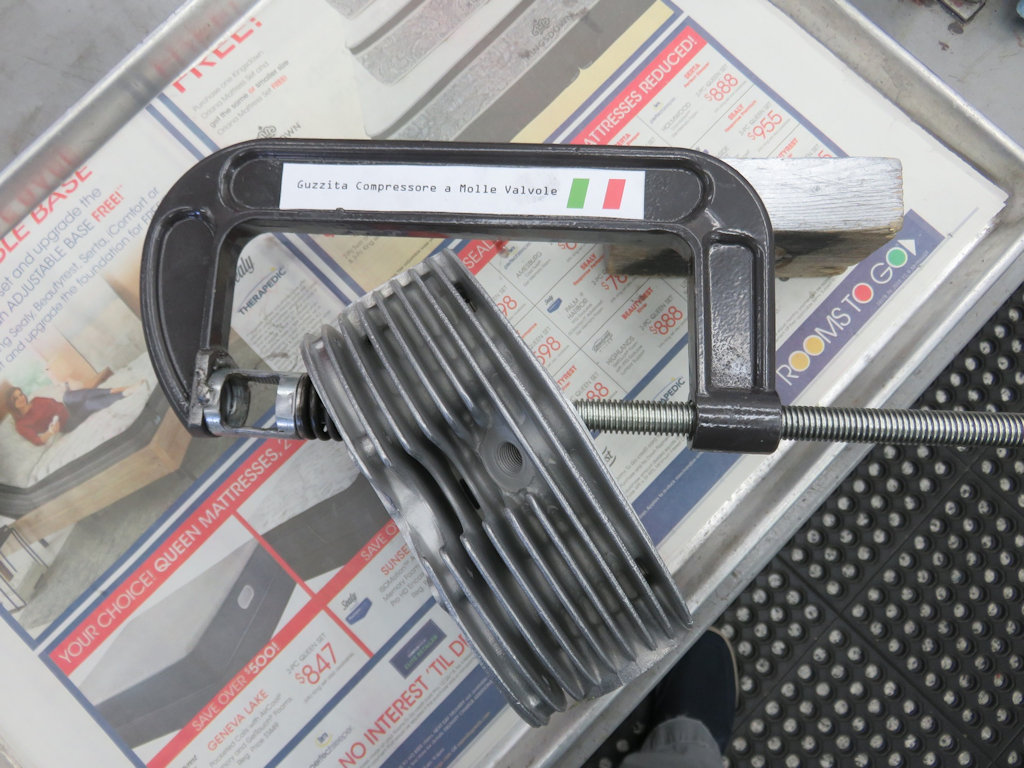
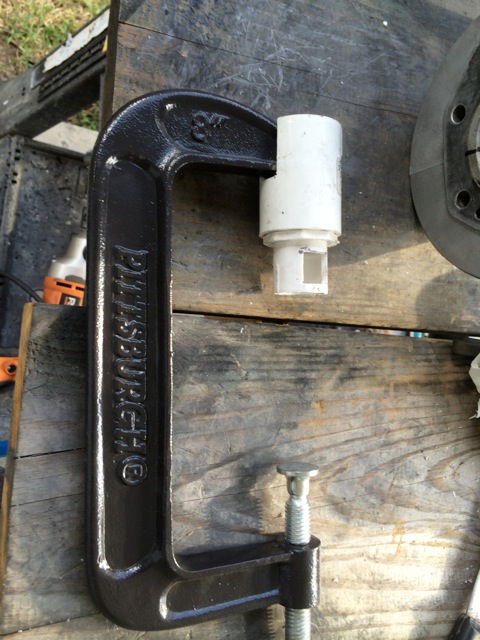
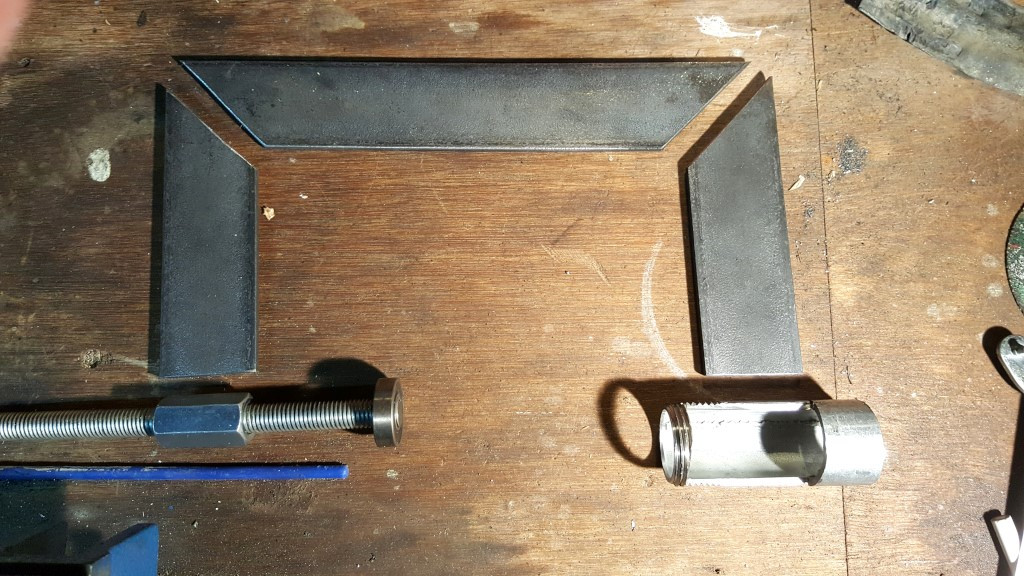
I first picked up an 8 inch C-Clamp from Harbor Freight for USD $8.55. A 6 inch C-Clamp is easier to find, but does not quite have the opening needed and the throat is too narrow to get to the exhaust valve (although it works for the intake valve). The C-Clamp I found has nice smooth, fine threads...which give a much better mechanical advantage over rougher, coarser threads. I already had an 8 inch Craftsman C-Clamp, but its threads were rough and coarse, so I decided on the Harbor Freight C-Clamp.
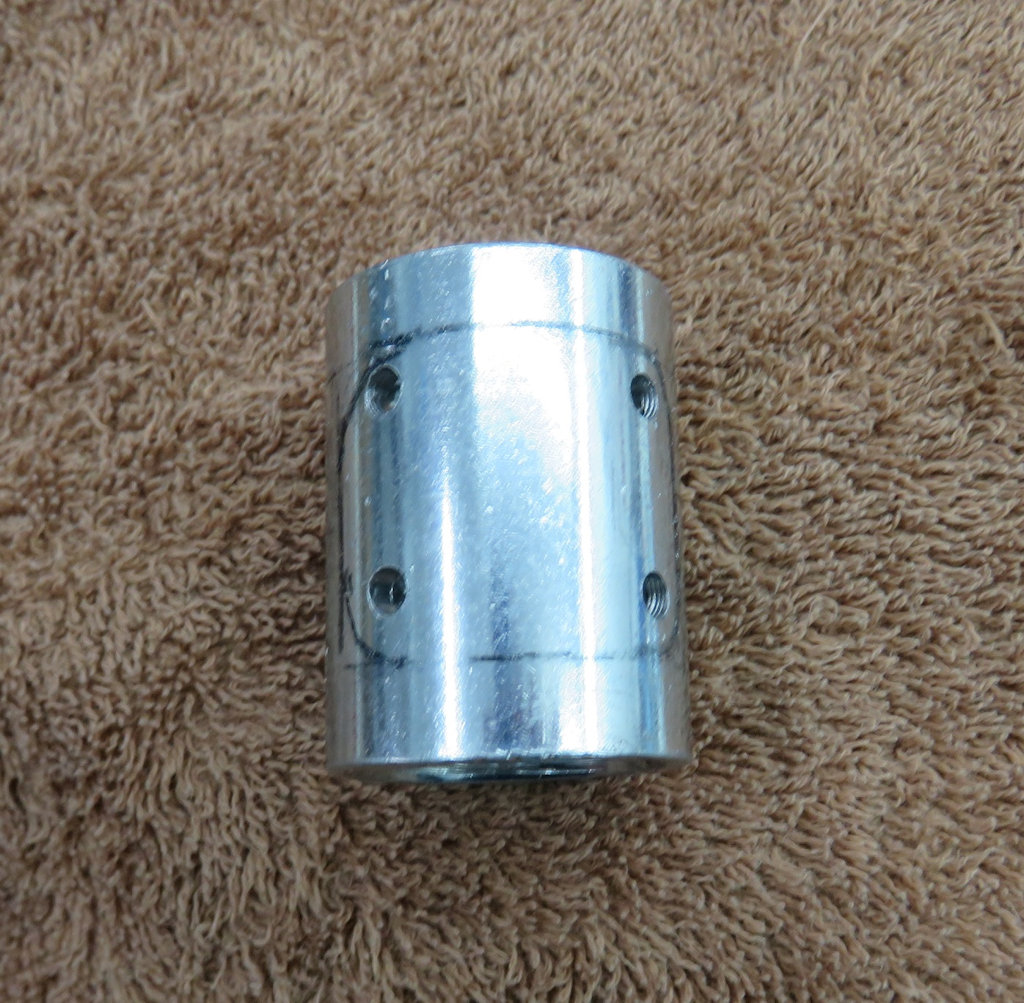
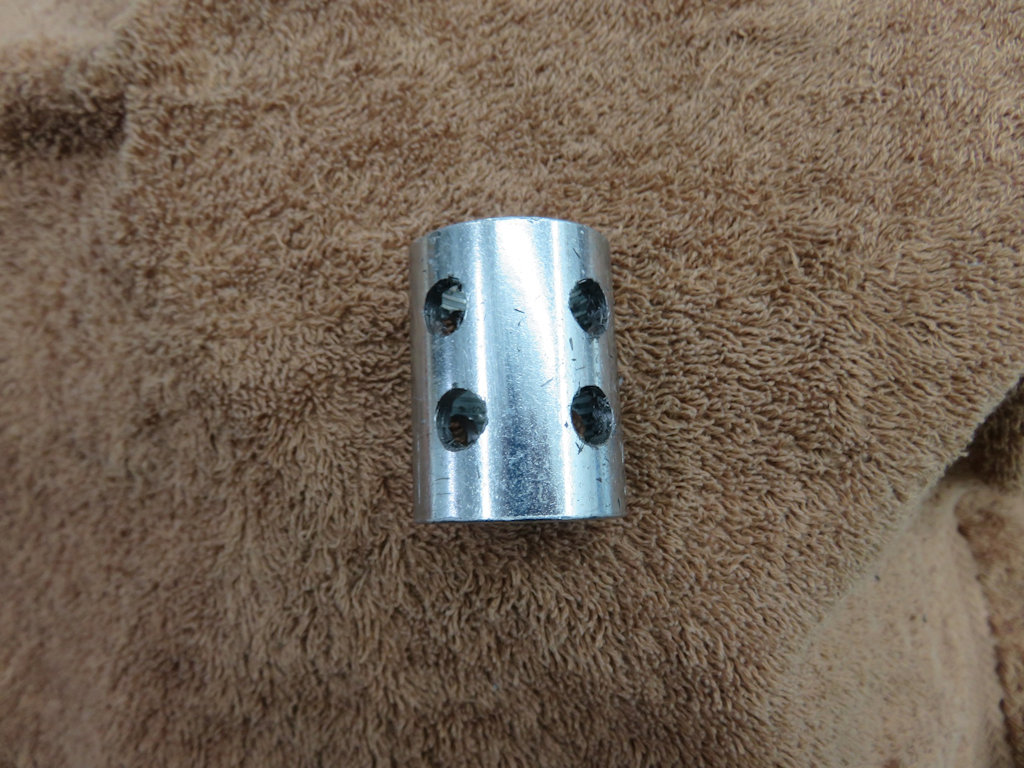
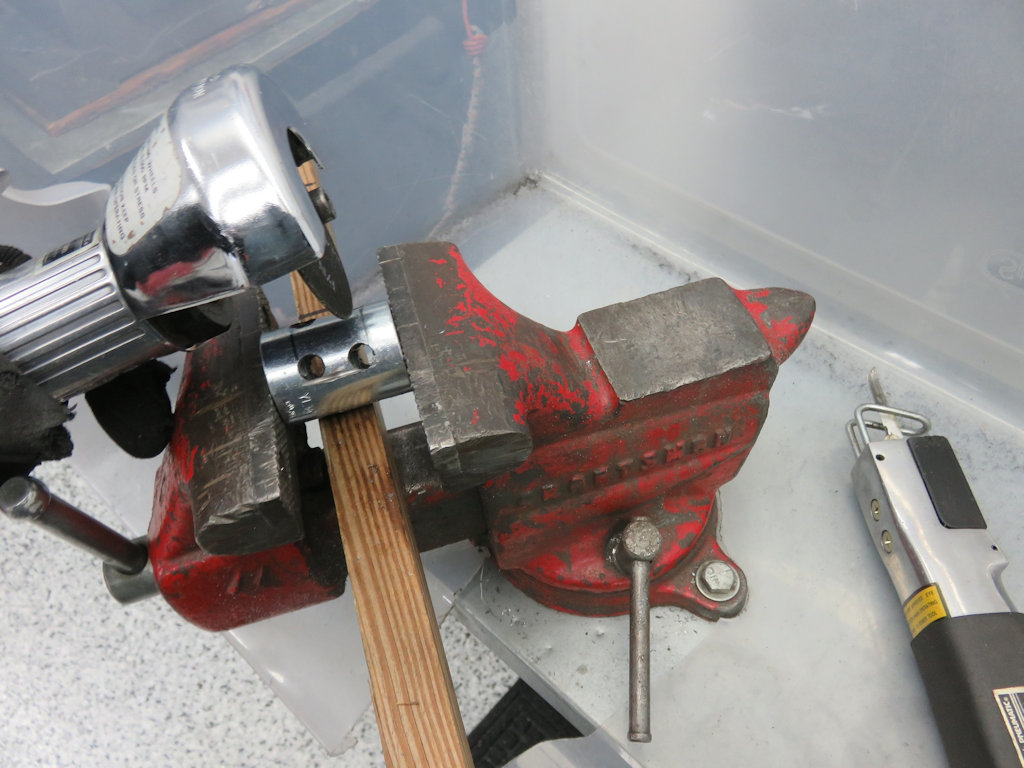
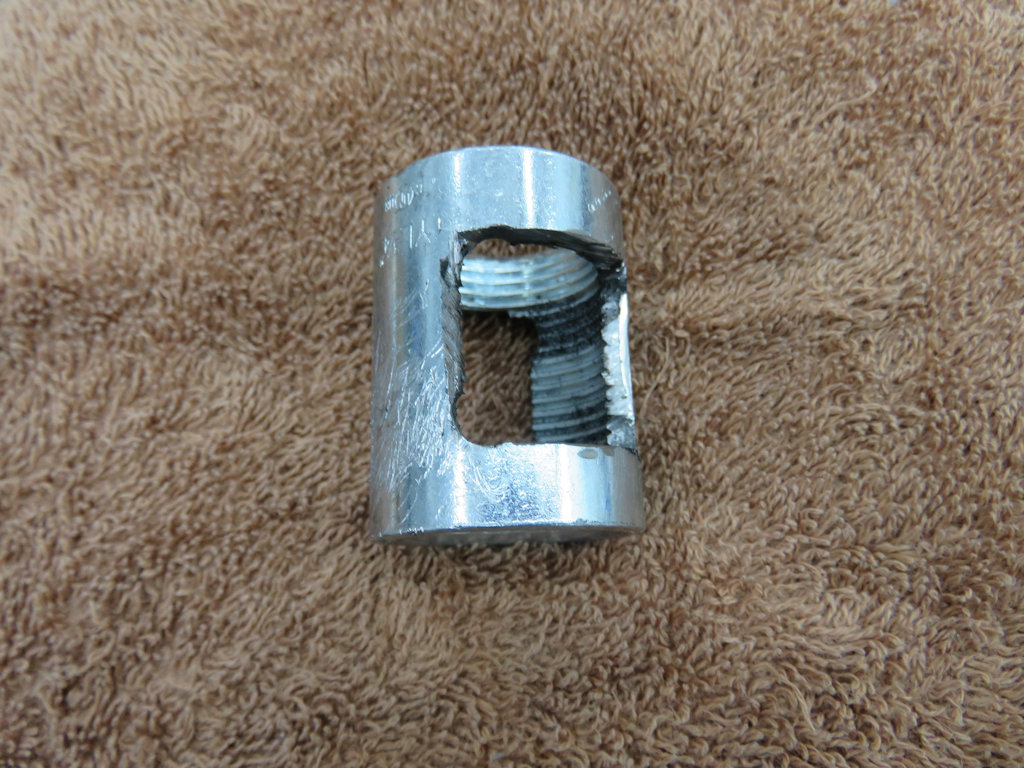
Next, I picked up a 3⁄4 inch electrical conduit coupler from my local Ace hardware store for less than USD $1.50. The diameter is just right for fitting over the collar. I then had to grind out large chunks on two sides to facilitate removal and installation of the split collets.
Finally, I welded the coupler to the C-Clamp.
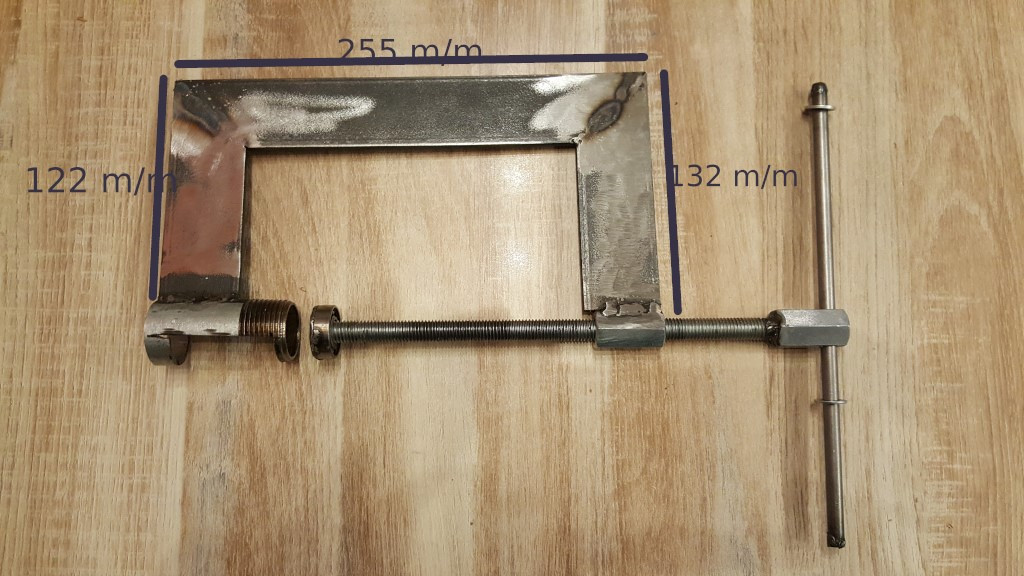
There you have it. About USD $10.00 for a specialized tool that works absolutely beautifully!
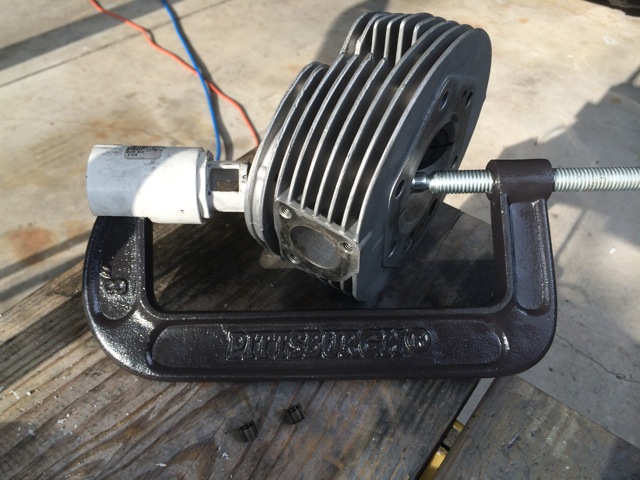
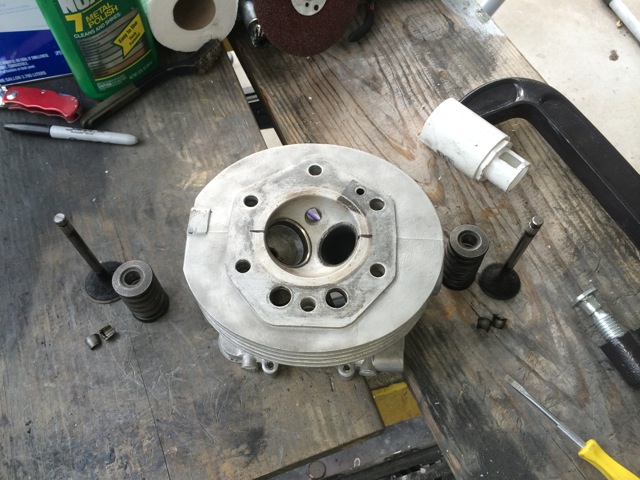
Homemade valve spring compressor tool for Moto Guzzi V700, V7 Special, Ambassador, 850 GT, 850 GT California, Eldorado, 850 California Police models.
Thanks to Darryn Webster for sending me this information about how he made his homemade valve compressor tool. In Darryn's own words:
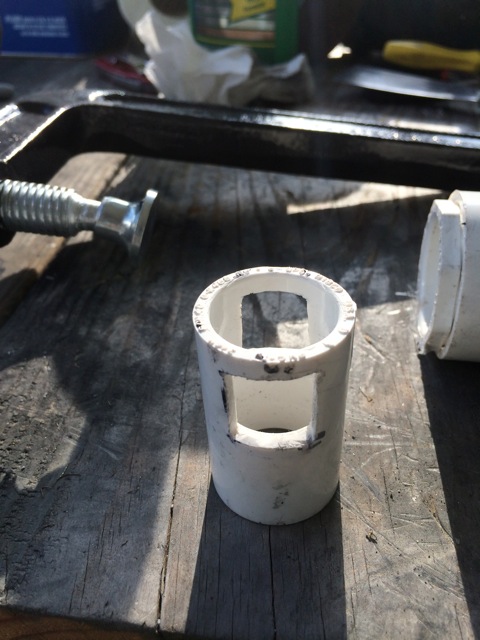
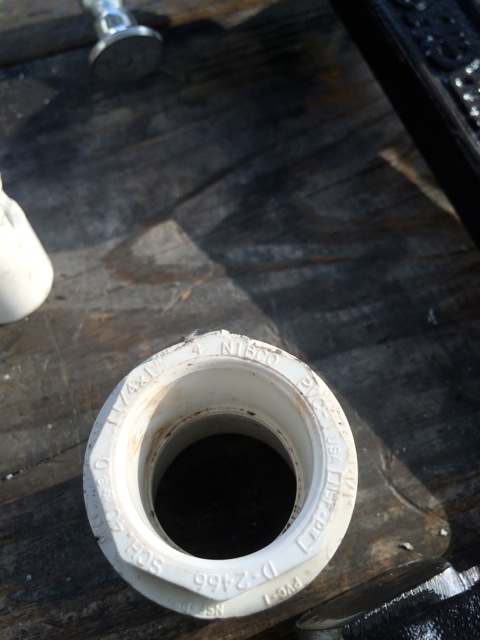
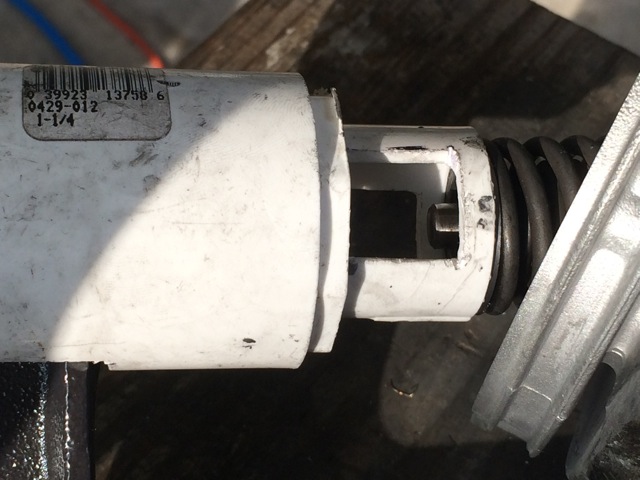
Here's an economical and effective way I came up with to get those Guzzi valve springs compressed! Worked like a champ! Around USD $10.00 for every thing (except your time), and you might have enough left over for a couple of stamps. Here are the parts needed: One 8 inch inch C clamp from Harbor Freight or the like. One 1 1⁄4 inch schedule 40 PVC coupler. One 1 1⁄4 inch × 1 inch schedule 40 PVC reduction bushing. One 3⁄4 inch schedule 40 PVC coupler. I used a Bosch vibratory saw to notch the large coupler and cut the two windows in the small coupler. I'm sure other methods could be used to cut the PVC, but would probably prove difficult.
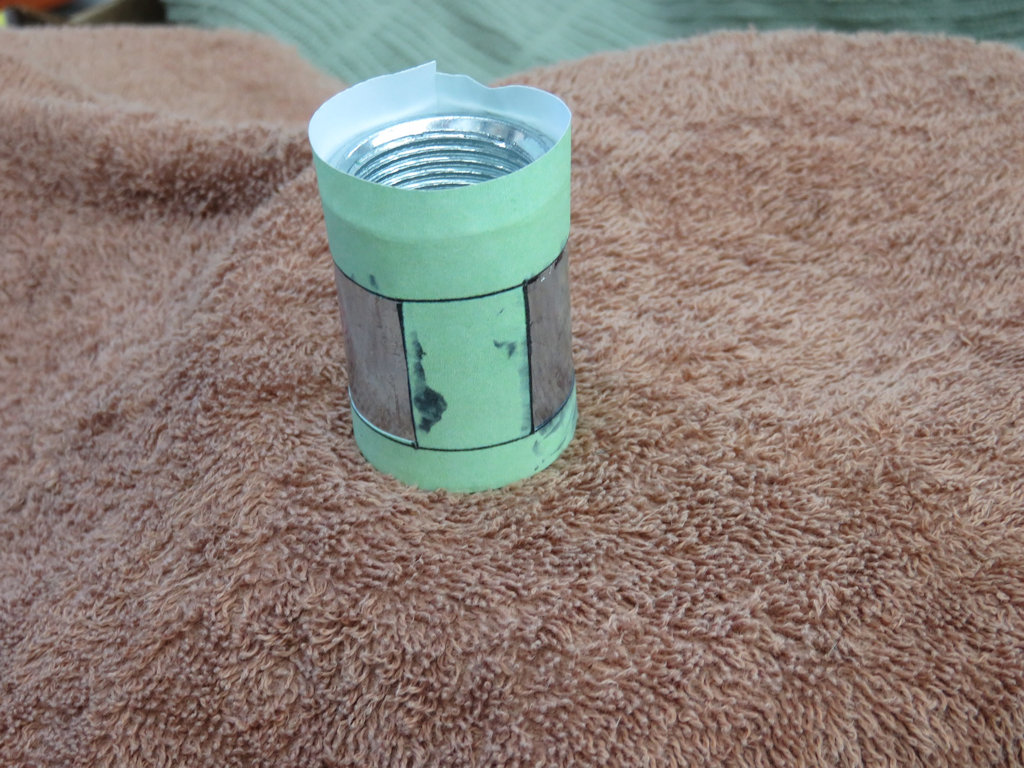
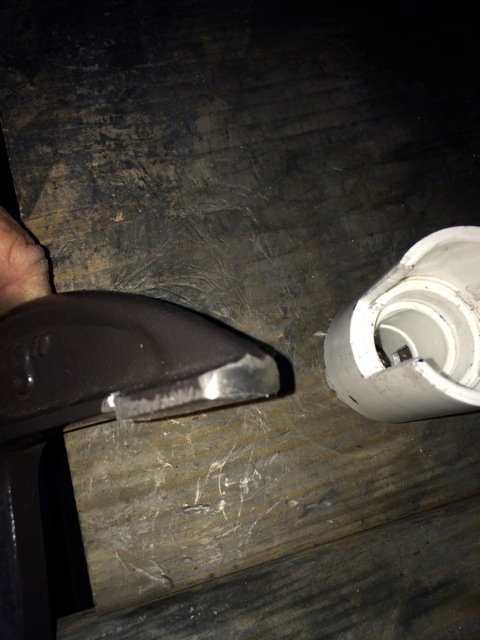
3⁄4 inch schedule 40 PVC coupler with window cut outs for accessing valve spring retainers. I used a Bosch vibratory saw to cut the window. Do not notch! Coupler will spread and fail.
Photo courtesy of Darryn Webster.
3⁄4 inch schedule 40 PVC coupler with window cut outs for accessing valve spring retainers. I used a Bosch vibratory saw to cut the window. Do not notch! Coupler will spread and fail.