Older Small Block Issues?
Moto Guzzi 250 TS, 350 NTX, 650 NTX, 750 NTX, 750 SP, 750 T, 750 XPA, Breva 750, Nevada 350, Nevada 750, STR V750 IE, Targa 750, V35, V35 Florida, V35 II, V35 Imola, V50, V50 II, V50 III, V50 Monza, V65, V65 C, V65 Florida, V65 SP, V7 Café Classic, V7 Classic, V7 II Racer, V7 II Special, V7 II Stone, V7 Racer, V7 Special, V7 Stone, V75, and V85 models
Rod Yeomans asked me to host his article on small block Moto Guzzis. It is excellent documentation and I am very happy to oblige. Enjoy!
So you are thinking about an older small block and want to know what to buy or what to look for. There is a lot of misinformation about the small block V-twin Guzzi. Time and vague memories have conjured demons and rumours from both truth and gossip. Many Guzzi big block owners are even sceptical. There are quite a number of texts already out there so this piece isn't designed to replace them, just supplement them with age related details. Despite the title much of what is written here is also relevant to the later 750's, the Nevada, Breva, and V7 series including the Classic, Café and Clubman. This piece is a compilation of personal experience and information that I have been given or read on various forums. Just remember, each one of these bikes is getting old and has had years under different owners. Who knows what history the bike really has and what faults lay hidden so inspect the bike carefully before parting with your money.
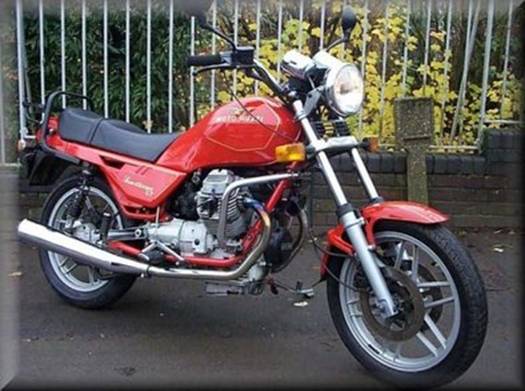
Photo courtesy of Rod Yeomans.
Firstly I'll deal with the twin valve models. I'll deal with them generally as I simply don't have the time to go into all the minute detail. I'm not going to differentiate every detail of difference between the 3 marks of V50's for example. Just those that I think may be relevant for an inspection or test ride. The rest are well documented already in the references listed at the end of this article.
Which small block do I want?
I've only owned V65's but I have ridden V50's. Both models are able to maintain road legal speeds all day long whilst carrying your self, a pillion and gear. The V35 was very popular in Europe due to registration and tax costs for bikes. All the big names had 350's including Ducati's famous 350 single and the less known but highly praised Morini 3 1⁄2. If registration isn't an issue for you then why would anyone pick a 350 when the 500's and 650's are the same weight, same frame and same handling? If one is for sale locally, at the right price and suits your needs then by all means consider it but if not my suggestion is to go for the larger capacity models. The power curve is very even on all of them and none of them could be described as over powered.
To substantiate this, where I live, even the V65's are classified as LAMS bikes. That basically means that due to their power/weight ratio and engine size are legally suitable for learner riders.

Photo courtesy of Rod Yeomans.
There are standard models, touring models, cruisers, off roaders and sport models to choose from too. The V35 and V50 came in a sport model, the Imola and Monza respectively. There are claimed horsepower advantages but in reality there isn't a lot. The style and seating is altered though and this style of bike may suit. One difference why a V50 can't just become a Monza look-alike are the rider's pegs. On the standard bikes the lower frame rails have the peg bracket welded to it. On the Imola and Monza the pegs come from behind the lever pivot, from their own peg position near the meeting of the frame members. Gearbox ratios can differ depending on the model and the intended purpose of the design along with corresponding differences in swing arm length and in early cases spline profiles on the shaft. The main references listed at the end of this article have all the details of these transmission differences. They are really only an issue if you intend to mix and match.
The V65 didn't have a sport model instead there was the V65SP, a fully faired touring model. This machine is vastly under rated as a tourer. The fairing works well as long as your legs aren't too long otherwise the lowers can be a bit encroaching.
The C or Custom range was in the cruiser style. V35's, V50's and also V65's. The later V65 was referred to as the Florida and it was replaced by the 750 Nevada. The early Nevada came with Dellorto's and linked brakes, the latter with fuel injection and the single front disc. I haven't ridden one of these models but basically it is just a styling exercise using all the standard base components. If this style suits your taste or physique then there is really no major difference from the standard models.
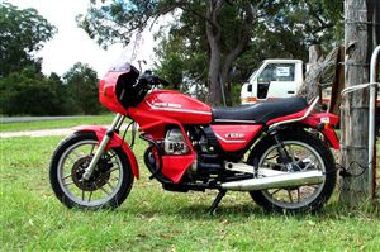
Photo courtesy of Rod Yeomans.
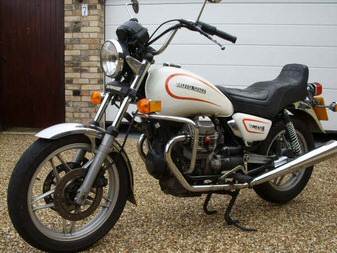
Photo courtesy of Rod Yeomans.
There are off road versions too. Both the V35 and V65 came as a TT or NTX road trail machine. The TT was lighter with little in the way of fairings but the NTX came virtually fully faired with a fuel capacity of over 30 litres. It was updated later to a 750 but as per the custom series there is little in the way of major differences to the standard models.
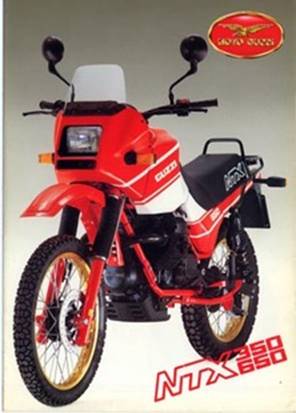
Photo courtesy of Rod Yeomans.
Finally in the late 80's the GT's came along. Again it was just the V35's and V65's that came in this form. They were produced at the same time as the Mille GT (1000). The Trentacinque GT (V35) and the Sessantacinque GT (V65) were released in either black or red with gold striping. The V35 was mainly for the European market and the V65 for export. There are some differences and you will find in a review of the Sessantacinque.
What are small block specific points that I need to check?
The small blocks are quite a reliable machine. Many of them are still rolling down the road over 30 years after they were produced but like all machines they have components that tend to wear or fail before others. The small blocks are about 50kg lighter than the big blocks of their day so that amount of metal and material has to come from somewhere. The original model V35's and V50's came with chrome bores. This lining has had a tendency to flake over time causing other internal issues so if you are looking at one of these it is a point to check. V50 II's had Nikasil bores and all later versions came with Guzzi's patented Nigusil coating.
Steering head bearings
These are similar to push bike technology, a ball race with loose ball bearings. If they are greased and tensioned properly then it is unlikely that there will be an issue. They do last for quite a while and I've never had an issue with mine but some owners insist on replacing them with a tapered bearing kit available from some suppliers. Modern small blocks come with tapered bearings so they are readily available. Just check for any notchy feel or uneven movement when the steering is moved from side to side.
Frame
The good news is there is absolutely nothing wrong with the frame and its basic design hasn't altered for decades. I am not aware of any chronic issue with the frame at all. The only reason I have mentioned it is to make you aware of a few minor differences that mean you just can't necessarily turn a V50 into a V50 Monza by clicking on a couple of body panels. Lugs and attachment points have altered depending on year and basic style. Later model frame rails bend upwards under the seat near the rear to suit the more modern styling and the sports versions like the Monza have their peg brackets welded to the frame behind the lever pivots where the V50's had the bracket welded to the lower frame rails. Many vehicle authorities have legislation and restrictions in regard to frame welding and modification that may hinder your ambitions so you have been warned.
Stand and tyres
The centre stand is generally rock solid and with normal profiles the rear tyre should clear the ground. Anything larger than standard would be difficult to fit past the swing arm and the drive due to the protrusions that extend into the cush drive fitted into the rear wheel. The bike handles well with recommended sizes and unless there is a reason, wider profiles will only slow the ability to change direction and higher profiles may cause instability if they don't allow the centre stand to take the full weight of the bike.
The side stand may be a different matter. There are a couple of different types. Some later bikes, like the GT, had the stand from big block Californias fitted. This is a very robust affair though aesthetically challenged. It is easily deployed from the saddle, protrudes far enough to be extremely stable and has a mechanism that when it settles locks it down so it can't retract if on an incline. I have one bike with this and absolutely love it but I'm not a café racer, form over function, type.
The Monza is a completely different affair. There is a small bracket welded onto the lower frame rail. It has a pivot hole, spring attachment and is shaped to stop the stand leg from going too far forward. The leg uses a pivot bolt through the hole and as can be expected wear is not far away. Not a big issue and a bit of grease every now and then will keep this to a minimum or it can have a sleeve introduced but that is really only for an extreme case. The real issue with this stand is that it is a self retracting type and quite short. If a gust of wind or a clumsy passer by moves the bike and removes the pressure the stand will retract and the rest can be imagined.
Due to its shape and location this style cannot be deployed easily from the saddle so a one legged balancing act is needed to dismount the bike. The length of it is even more of an issue depending where you live. The Italians ride down the right hand side of the road and I ride on the left, this means that when the bike is parked backed into the kerb my bike is falling down with the camber rather than up into it. This can cause an alarming angle of lean. I have extended the leg by 25 mm and welded on a small shaped protrusion so I can deploy it whilst seated. I still don't trust it 100% but it allows me to dismount easily, even when heavily loaded for touring. Then deploy the centre stand at my convenience. I have also moved the spring attachment point a bit further forward so the stand will just stay down by itself but will retract with the slightest knock. I have also done this previously with an 850 Le Mans III and I am happy with the result.
I have heard of no specific issues on the spoke wheel versions. Straight over conversion, if considered for aesthetics, isn't always a straight swap. Axle diameters can vary through the Guzzi range as do wheel bearing widths and spacers for the wheels. Differing fork diameters also come into play with regard to the spacing. Everything is possible but it may take some individual machining or sourcing different parts to achieve any change. The Guzzi spoked wheels for these earlier models are obviously designed for tubed tyres. I have read of owners sealing the spoke ends in the rim and using a tubeless tyre. Theoretically this may be possible but the method would want to be closely analysed. I have read of one supposed failure that caused a fatality but the materials reportedly used in this instance were doomed to failure. I haven't dealt with a spoked version of the small block but I would also doubt that the rims had the dipped internal profile designed for tubed tyres that prevent the tyre seperating during deflation.
The cast wheels generally give no issue unless they have been abused. They are also designed for tubed tyres but can be modified so that a tubeless tyre will work with a little bit of shaping of the valve aperture. Unfortunately the rim, though being able to seal a tubeless tyre doesn't have the internal profile designed for tubeless. I have run tubeless on these rims with no issue but if you do so then be aware they weren't designed for it. There are varying opinions on this from its fine
to are you crazy.
I won't comment further but at least you are aware of what you may be riding on. If you, like most, don't fit your own tyres and they are taken off into the Do Not Enter
workshop out of sight then these are questions to be asked. I now use a tyre business that allows me to be present when tyres are fitted and as they know me, I'm permitted to save some money by removing the wheels myself. The only times they have had real trouble getting a bead to seat has been on the front wheels of my 2 small blocks.There is obviously just something with the profile and modern tyres that make them a bit tricky and I have witnessed them having to use a lot
of pressure, clean the inside of the rim and rubber grease to get the bead to seat. In this case we replaced the over stressed tube before fitting to the bike. Once the tyre has beaded once it seems more compliant the next time.
When I purchased the GT I eventually discovered the front tyre was tubed and the rear tubeless. I have no idea why a previous owner would do this but it just shows that one should never assume.
The 16 inch wheels are specifically detailed below in the 4 valve section.
Brakes
All models that I am familiar with are fitted with the ubiquitous Brembo F05 calipers with 2 up the front and one on the rear mounted to the rear drive. The bikes use the Moto Guzzi Integral Brake System with links the rear and front left hand caliper via the rear master cylinder controlled by the right foot and the front right hand caliper being controlled by the lever with the right hand. Later bikes had a single rotor mounted on the front rear but is outside the parmeters of this older model
article.
This system was revolutionary when it was introduced well before ABS and tests at the time showed it reduced stopping distance by around 25%. Many of these bikes have been de-linked due to owners not appreciating the system or being incapable of adjusting their riding to it. Too often I read threads on forums of new owners wanting information to de-link the brakes. Why they didn't purchase a Ducati or BMW escapes me but be extra careful when testing a bike that this has been done on. It is clear that many of these de-linkers have absolutely no idea about hydraulic ratios or what they are doing.
The linked circuit has a few advantages besides a shorter stopping distance. It prevents any harsh diving under brakes and allows a certain amount of braking whilst cornering. It also gives the bike good redundancy as the single hand operated brake gives considerable redundancy if a failure occurs. I've never had one or heard of one but anything is possible I guess. Dr John Wittner had a Guzzi Le Mans Racer that won the long distance GP series in 85. He actually had all 3 brakes linked to a single master cylinder. Lets face it, how many brake controls does your car have for driving? One, a pedal.
The linked brakes can be a bit tricky to bleed due to the small master cylinder, lengthy plumbing and all the dips and joins. I personally use a pressure bleeder and just a few PSI to push the fluid through. Some use a vacuum bleeder to suck it through. Both will work if done properly. Lifting the calipers overnight sometimes helps too. Use a spacer to stop the pistons from popping out and bleed in the morning. One tip I will give on the bleeding is to use clear tubing from the master cylinder to the reservoir. Ensure the tubing rises evenly without any spots that will trap air. As the lever is used air will be forced up the feed tube from the master cylinder and rise away to the reservoir. The clear tube allows you to see when it stops.
The front brake can often be bled from the top. Position the bike and steering so the hose runs uphill continually from the caliper. Squeeze the lever in and tie it back. Occassionally give the caliper and plumbing a light tap. Leave it overnight then release the lever and squeeze it a few times. The air that has travelled up the hose should vent up into the reservoir.
Some Brembo spares can be difficult to source. I've read the story of an American who purchased a master cylinder rebuid kit, fitted the piston and seals incorrectly, sued Brembo in a U.S. court and won. If you have to purchase a full master cylinder and no one will sell you a rebuid kit then from my understanding you have him and the U.S. court system to thank.
Oil leaks around barrels
There are only 5 bolts holding the barrels and heads on a small block where there a 6 on a big block. Because of this they appear to be logically more susceptible to leaking around the join. I've heard this, I've read this but I've never experienced this. From what I can ascertain it is just a few bikes that this seems to afflict. Maybe its just when the 2 matching faces are at opposite ends of their machining tolerance or if someone hasn't torqued them down evenly in the correct sequence. Most times if I find an oil leak it is one of these things: The rocker cover hasn't been torqued down properly, the gasket is damaged and been re-used anyway or the breather hose on the inside of the rocker cover is leaking. Let's not forget either that the small blocks have a smaller bore diameter so the stud spacing is closer together too.
The advantage for the small blocks over the big blocks is that the rockers don't need to be removed to access any of the studs. Remove the rocker cover and the nuts for the 2 middle studs are right there on top. All the others can be accessed with the covers on so there really isn't any excuse for not having the heads torqued properly as part of regular maintenance.
Valve stretch
You may have heard horror stories about valve failure in the small blocks. I'll deal with that a bit later in the 4-valve section but basically the 2 valve models can suffer from valve stretch. If the valves and spring tensions haven't been set up right or wear on the valve seats has allowed hot gases to escape and cause a hot spot on the stems then the valves are on limited tenure. This isn't an acute problem. I've heard of figures of 60,000 km - 80,000 km on a set of valves but I do know of one Monza that got 195,000 km on a single set of valves. Many other makes of bikes don't even get close to this mileage. From 1991 the double set of springs on the Nevada was replaced by a single outer progressive spring. As this spring is the same size as the earlier outer spring it is a recommended fix for all earlier models also but, like the 4 valve models, there isn't total agreement on this either.
Initially the valve gaps recommended for the small blocks were 0.1 mm inlet and 0.15 mm exhaust but both of these were later increased by 0.05 mm to 0.15 mm inlet and 0.2 mm exhaust. Valve gaps (rocker clearances) are there to allow for heat expansion so that when the engine is hot the valves can still shut fully. It can therefore be guessed that this increase in valve gap was introduced to stop any potential flow of hot gases over the stem thus increasing the service life.
The 2 valve bikes generally give lots of notice that the valves are stretching. The valve gaps start to close between service intervals indicating that the stems are stretching. These should be set and checked on a cold engine at TDC on the compression stroke.
Carburetors
Early bikes were fitted with VHB square slide Dellortos and later bikes with PHBH style. Both seem to work fine for the bikes but the VHB's are known for wear due to the square shape but the point I wish to make here is that it is also possible with these to insert the slide backwards. If this is done then the bike won't run. The cut away or raised lip needs to be towards the air inlet. The PHBH's have a protrusion in the carb body and a slot on the side of the slide removing this possibility.
I've only worked on PHBH fitted small blocks so I'll refer to them, but the same may be true for the earlier bikes. Many of the bikes came with 40 cutaway slides and the ones I've dealt with tend to run rich at lower throttle openings. I've found that 50 slides, as fitted to V50's, tend to overcome the plugs fouling. Jetting changes may be required but generally not drastic ones. I have 2 V65's with identical carb bodies, fitted with 50 slides, identical air filters, different exhausts and different ignition systems and they both need different main/idle/needle settings so I won't offer any specific suggestions here. Bikes of this age seem to be quite individual.
The last of the carby models were jetted very lean to comply with increasing emission standards. With standard filters and exhausts they seemed to cope but I've read that the heat range of the spark plugs was changed to one grade cooler, probably to prevent pre-ignition. Any modifications to the bike's breathing may require careful re-jetting to prevent internal damage. These bikes tended to have the digiplex ignition system that had a vacuum input from the manifolds to help prevent this also. (Refer Ignition System)
Engine breather system
Many of the bikes have had their original filter boxes removed and pod filters fitted to replace them. What a lot of owners don't understand is the breather system that is connected to the filter box.
The purpose of the breather system is to return oil condensate to the sump. Without this a Guzzi engine would eventually pump itself dry of oil. The engine has a shared journal crank so even though the pistons are 90° apart there is still a constantly changing volume under the pistons in the crank case as the engine turns. The volume under the pistons changes by about 70% of the engines displacement every revolution.
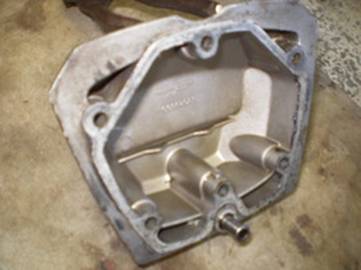
Photo courtesy of Rod Yeomans.
Early bikes only had a very small oil dowel (1 mm) feeding oil to the valve gear. The rest was supplied by the breather system. Oil vapour was carried up via the push rod ports to condensate on the inside of the rocker covers. This would then drain down to a ridge in the casting and there are 2 fangs that sit directly above the valves and direct the oil to fall on them. Moto Morinis of the same era used this system solely to lubricate the valve gear. On later small blocks the oil dowel was increased (3 mm) and the main oil feed is via that but the vapour system still works as long as the breather system is intact enough. Larger oil dowels were fitted from engine numbers: V35 / 24550, V50 / 25180, V65 / 1162. It is recommended that this modification is undertaken on earlier engines.
If the breather system is blocked off or restricted then the crankcase builds up pressure. This may cause the engine to leak from any of its joins and seals. At low speeds the breather will suck air in too as the pistons rise so it is a good idea to have the breather vent filtered. It originally vented into the clean, negative pressure side of the filter box. It makes me wonder if the removal or modification of the original systems and the subsequent reduction in oil condensate flow to the top end contributed to a shorter service life for the valves.
It should be noted that the breather flow is the reverse in a small block to a big block engine. The small block flows in parallel with thermal effect up the barrels and out the rocker breathers. The oil returns directly to the rear of the sump below the oil level, so it acts as a one way valve.
Sump spacer
There is a train of thought amongst some that because the small blocks only have 2 litres of oil in the sump and the later big blocks have 3 that the small blocks need more. Firstly to assist cooling and secondly to hold more oil so a low oil level won't cause an engine seizure. There are after market spacers that allow for additional oil. I have been told they hold an extra litre but I doubt this. Having looked at them and knowing the surface area of the sump I find it unlikely. Even a big block spacer holds only 0.8 litre. Neither of my bikes have one and I have no intention of getting one. The spacers I have seen have not been finned, just a smooth machined billet finish so this wouldn't increase cooling area significantly. Even if there is extra oil, without an effective surface area to help transfer heat then I can't see a significant advantage of having more hot oil.
The top surface area of a small block sump is much smaller than a big block too and the base is even corrugated to increase cooling and restrict wave action. This means the height of the oil over the screened intake is more than one might think. A rough measure and comparison to a later big block shows that the height of oil is roughly the same in both engine types and higher than the earlier big Tonti models.
The engine casings also incorporate a web that separates the crankcase from the sump. This alleviates any windage problems caused by the crank spinning in the vicinity of the oil. Big blocks are completely open in this regard and a special after market plate needs to be installed if this is thought to be an issue. This is also often touted as a reason for the sump spacer on the bigger models. It is worthy of note that Guzzi incorporated a sump spacer on the big block in the early 80's but has never seen fit to incorporate one on the small block for over 30 years. The Le Mans III, for example, came with a spacer as standard where the Le Mans I and II didn't.
My bikes have never exhibited symptoms of over heating and I live in Australia. I also think that if I didn't notice the first 2 litres of oil leaking out then what makes me think another part litre will save me? An often forgotten aspect is that many larger Japanese machines hold 3 litres of oil (Yamaha V11 as an example) but this is for both the engine and gearbox in a combined case. The Guzzis hold exactly the same if you take the gearbox into account. Considering the size and power of the engine the small blocks should have more than adequate.
If it helps you to sleep at night then spend your hard earned money, but my 1981 and 1989 bikes have coped so far without one. If one is fitted I don't know of any negatives besides a reduction in ground clearance and a lighter wallet.
Electrics
Italian motorcycle electrics have a bit of a reputation of being individual.
I think that's true of any older machine that is exposed to the elelments. Guzzi handlebar switches of this era are often maligned but I have several machines, 30 years or older with original switchgear. In fact I have never had to replace any of them but I have had to repair a couple. They are tricky though due to the solder connections being held by plastic.
The wiring tends to be light weight and the switches are plastic to save weight too. If you try to run a super high power headlight or other high amp accessories the loom will naturally struggle to cope and the resulting heat generated may cause a failure. The simple and common sense solution is to use the existing circuitry as a control circuit to a relay and run a nice big fused feed direct from the positive terminal of the battery. Like any older machine corrosion may have got in and many electrical faults are due to poor earth connections to the frame, also if a previous owner has decided to powder coat it and been reluctant to remove the coating adequately for the connection.
The advantages of the guzzi switchgear is that it is transferable across virtually the whole contemporary Guzzi range with the same switches being fitted to big block models like the SP 1000 and Le Mans III. The switches go to Molex connectors that easily just plug in and out.
Ignition system
The small blocks have their ignition pick ups on the end of the camshaft under the alternator cover. Early bikes came with a twin points plate and a mechanical timing advance system. The V50II came standard with electronic ignition but this model is reported to suffer from a flat spot on acceleration so the V50III went back to the points and the flat spot disappeared. There are after market systems such as the Dyna S that suit and replace the points and condensers while still using the mechanical advance. Many owners forget that the weights and springs need to be lubricated periodically so if the bike isn't running well then worn or sticking parts here may be the cause.
There are crank fired ignition systems available that have a wasted spark
on the off stroke. These tend to be more popular with those trying to get the best out of the big block models for historic racing. The big block uses a distributer unlike the small block's direct cam connected system so they have more to gain by removing any play in the system. I have heard of a few bikes burning to the ground that has been attributed to one of these systems. It appears that if excess fuel is allowed into the inlet manifold, either due to a few unsuccessful starting attempts, leaky needle valve or sticking float then if the right air/fuel mixture is present the wasted spark can cause a backfire to the air filter. In the case I know of best, the filter caught on fire being a wire mesh wrapped with oiled material, probably soaked in petrol by this time. There was nothing left to recover.
Later carburetor models from the late 80's came with the Motoplat ignition system. This is a solid state affair with twin modules, one for each cylinder. The Sessantacinque GT is fitted with this system. The Motoplat has been much maligned and the modules are expensive to replace if necessary but I've never had an issue with the one I have. It has been reported to provide a poor spark and I must admit it doesn't seem to be as bright as other machines but the bike starts and runs easily and the timing advances smoothly unlike the seemingly erratic jiggle of the mechanical system. In case of failure the twin system should allow the bike to be limped home or to some assistance too.
Swapping from an electronic system back to points may not be as simple as it sounds if that is what you have in mind. Not all camshafts are the same. There are a number of different part numbers for the bikes and I have been told that the front end may differ between the electronic advance and mechanical advance types. I've not bothered to investigate by pulling the timing chain off the bike to see. Both the V65's work fine. One with a Dyna S and the other with Motoplat.
The last of the carby models had the digiplex ignition system. This tended to be a link between the older carby models and fuel injection as the unit has a vacuum link from the inlet manifolds. This enables the sytem to adjust the timing, not only for revs but for fueling as well. I haven't dealt with one of these but I've been told that the vacuum is a retard system rather than an advance system to prevent pre-ignition with the lean fuel mixtures needed to comply with emission standards. There was an alternate connection in the unit that when activated retarded the timing by 2 degrees to allow for poor fuel. Again, I emphasise I haven't physically dealt with one of these so all this information is second hand.
Starter motor
There are a number of different brands available but basically they do the same job and look similar. Like any electrical motor it can have issues, brushes can wear and carbon can build up causing a short. Normal maintenance should prevent this but it is often forgotten until the starter complains. It is easy to diagnose due to the exterior location of the starter. Short out between the terminal for the positive feed terminal to the positive control terminal. If the starter fires its in the control circuit or relay. If not its internal, then often a firm tap on the starter helps the brushes to contact and it will work.
Some motors have the magnets glued in rather than attached by fasteners. I have known a few of these to fail due to the magnets coming loose.
After a while the starter may not get enough voltage through the control circuit into the starter relay. There is a common re-wiring of the relay to prevent this but generally if all connections and the terminals are cleaned this will also rectify the problem. I have one bike that has had the relay modification. It came to me like that. The other is standard. If the standard bike doesn't want to start I just jiggle the relay and away it goes. I clean the terminals and it is fine for another few years.
Clutch
There are 2 different clutch systems in the small blocks. I've only ever dealt with the Pittery & Violini
version but both use the same style friction plate. This plate is a pressed steel affair with 2 thin sheets riveted together. There are slots in both where the cush springs are trapped. The plate is similar to that from small Fiats, a 124 to name one model. It evidently stands up to the 4 cylinder vibration fine but with the Guzzi V-twin it has a tendency to fracture the thin plates over time. This can allow the cush springs to escape. They happily fling around in there with the rider usually completely unaware of the free ride they are getting. If the bike will not start and the starter motor will not turn over then this may be the reason. If jump or push starting simply locks up the rear wheel then a part of one of these nomadic springs may have jammed the starter bendix and ring gear. Removing the starter motor will clear out the debris and allow the bike to be ridden again. Look inside and you should be able to see little specks on the inside where the spring has hit the housing. This is inconsequential but a sign that there is a spring loose. I've read that the friction plate from a Renault 4/5 will fit and is a solid affair so it should alleviate this issue. I've also read that the standard clutch for a V50III or Monza is the same as a Renault 10. I intend to try the solid option next time, depending on input spline compatibility. So if purchasing a friction plate from an automotive source I strongly suggest that the input hub is checked for compatibility to the gearbox input shaft before purchase as even V50's and V65's differ. The fracturing isn't a chronic issue in normal service though and the standard clutch should last a long time. Dave Richardson in Guzziology states that the small block clutch is simply better than the big blocks.
As an addendum to the Renault solid clutch option: I was speaking to an ex V65 TT owner. He told me he had done this but the centre spline has a different longitudinal offset so some filing or grinding is needed for it to fit. He also mentioned that he had difficulty in removing any clutch lag from the system by the normal adjustments. He thought it had something to do with something springy
in the centre of the clutch. With no direct experience myself I have tried to copy his comments here as closely as my memory allows.
The clutch cable has only 2 adjustments unlike the big blocks due to the routing down through the vee of the engine rather than down the outside on the RH side. A mid cable adjuster would be very difficult to access because of this. The easily accessible adjustment is at the hand lever but if it doesn't provide enough there is a grub screw and lock nut that can be adjusted in and out on the actuating lever at the rear of the box. There is very little room there to adjust so, depending on what type of grub screw has been used, a measurement may need to be taken of how much the grub screw needs to move, then if it can't be done in situ the easiest remedy is to remove the actuating lever by first unhooking the clutch cable then taking out the split and then the pivot pin.
For operation there should be a few millimeters of slack in the cable to ensure the clutch rod isn't firm up against the spring plate during normal running. If it doesn't want to shift into neutral when stationary then it is probably due to the clutch binding so the slack needs to be decreased for more deflection on the spring plate.
Gearbox noise
The small block 5-speed gearbox is a joy to use in comparison to its big block counterpart. One of its strengths is that it is comprised of straight cut gears but the disadvantage of this is that straight cut gears tend to whine. After a while, when the hardening is a bit worn the box can develop a whine at around 4-5000 RPM. I was told by a very experienced, small block mechanic that some bikes whine and others don't. He has pulled noisy gearboxes apart at the insistence of their owners only to re-assemble them again with no changes.
The main issue with the noise is that it can mask other noises that may indicate a faulty bearing or other potential problem. I have one bike that whines and another that doesn't. I find that about 30% oil stabiliser helps to quieten the whine down considerably. Later bikes were fitted with a wider 5th gear to help spread the load but from the number of reports I've read this really hasn't solved the noise issue. Straight cut gears are straight cut gears. Strong but noisy.
Some riders with some bikes have trouble getting into 1st gear especially when the bike is cold. It is just an internal alignment issue due to the bike being stationary. A little bit of motion normally helps or the following will normally solve the issue. Place some preload on the gear lever with the clutch lever pulled in, ease the clutch lever out slowly and you will feel it slip into 1st. Pull the lever in until you are ready to move off.
Oil through gearbox breather
Initially 1 litre of 80W90 was recommended for the gearbox but it was found that the oil would escape through the breather at high speeds. To remedy this Guzzi reduced the volume of oil recommended to 0.9 litres. The perceived problem with this is that the box needs a full litre to help lubricate the higher gears and it is thought that this issue may contribute to the gear whine. Evidently later gearboxes had a deflector plate to assist in oil reaching the higher working surfaces but I have never dealt with one of these. I can't see it being a great advantage though, from the number of later fuel injected small block owners also reporting the gear whine.
There is a simple fix to the oil escaping by extending the breather so that there is a hose that is run higher. Any oil then returns via gravity. The only catch is that the original breather valve holds the selector detent spring so any modification needs to be the same depth in the threaded hole. A breather can easily be made by drilling a suitable bolt and lock nut or one can be sourced by using the breather from a big block and adding the hose.
Universal joint
The small block u-joint is a single cross affair but it is integrated with the drive shaft. Because of this it is expensive to replace as a whole. Replacement crosses are available as long as the splines are in good order. Regular greasing of the splines assists in a long service life.
The U-joint rotates enclosed by the gearbox casting around the output shaft. If a U-joint ever fails it can cause carnage in the cast alloy. These can be repaired by a good alloy welder but look for damage in this area. There is a mild steel bush that can be obtained that is inserted there to help protect the casting.
The swing arm alignment is via a spacer washer on the RH side between the inside of the swing arm and the casing. The LH pin should be adjusted in until the swing arm is just firm against the casing before the RH pin is screwed in just firm. So don't get too worried if you see a slightly larger gap on the LH side to the RH but correct alignment is important to minimise stress and wear on the joint.
Rear drive
I've added this issue in as an addition to the original article as it seems to have become a subject of interest every so often. It is well covered by Dave Richardson in Guzziology with the modification described and illustrated. Basically, from about 1987 Guzzi modified the rear drive on these models to improve oil supply to the pinion bearings. An additional oilway was drilled and the shim rotated to assist oil being fed to the bearings.
There is no visual way of telling if the drive has been modified so questions will need to be asked if you are concerned.
I have one V65 that is pre 87 and one that is post. I have never needed to strip the rear drive on either, so I haven't but I have stripped rear drives for others. I have no intention of stripping the drive in the 81 model, just to drill a hole, until an obvious need arises. When this occurs, then I'll consider it. It has lasted over 30 years with its original design and I wouldn't begrudge it new bearings.
What's better about small blocks?
Lino Tonti was the chief designer when the small blocks were designed. They came after the big block and incorporated some important improvements in design.
The small blocks are much lighter than their big block counterparts as I have already written but there are some other advantages too. The timing chain is virtually trouble free, the oil filter can be changed without removing the sump, the heads can be retorqued in a fraction of the time and the ignition pick-ups are directly on the end of the camshaft giving more accurate ignition timing.
For the rider the gearbox is a joy in comparison and the clutch, being a single plate affair works as it should.
When doing major work, the bike can be disassembled so the main frame and body can be tilted up and the front wheel can be used to wheel it away like a wheelbarrow to give easy access to the engine and transmission. Very useful for those owners that carry out repairs at home.
The 4 valvers!
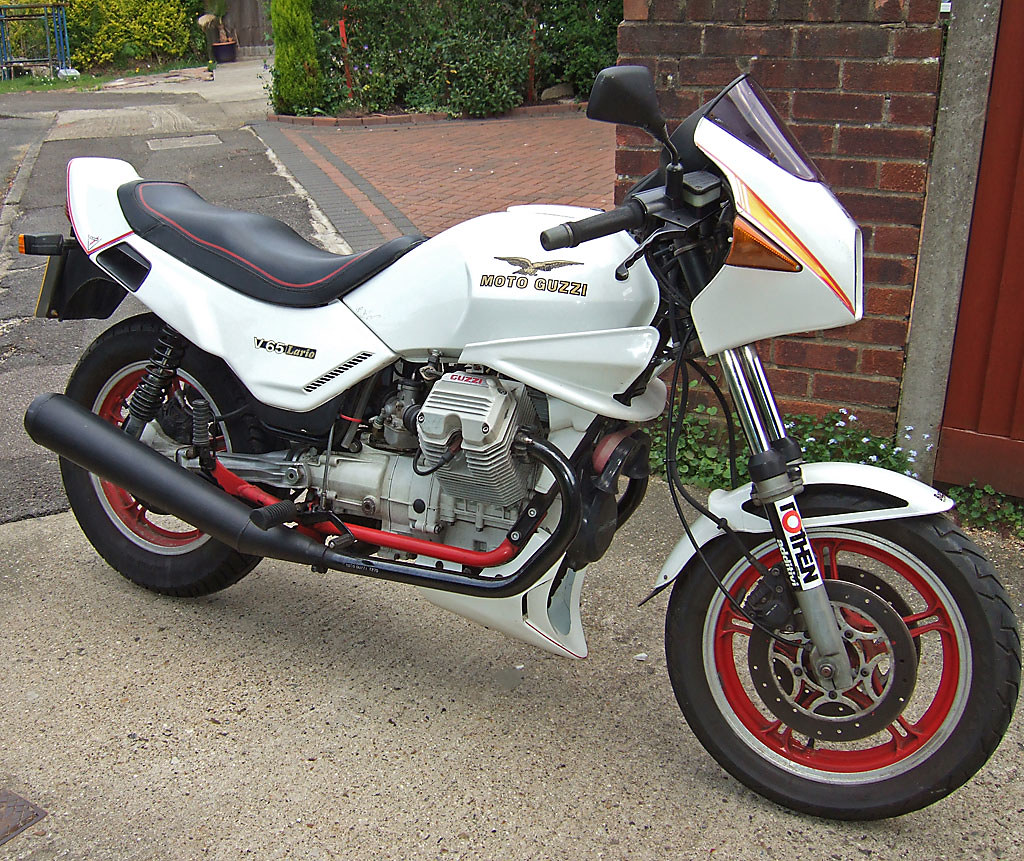
Photo courtesy of Nick Garrod.
I'm not going to write about the Imola II or the Monza II except to say that the Monza II has identical heads to the Lario so I can only presume they will have the same valve issues. The Imola II has smaller valves so the reduced weight may be a saving grace but I don't know for sure. Both the Imola II and Monza II were never imported to Australia in numbers. In fact I have never seen one in the flesh or known anyone who has owned one. The closest I have been is that a single Imola II was advertised for sale in Australia on ebay and it re-appears every so often. There are some 750/4's about but from what I can tell they are in bits too. I'll leave them alone also.
A friend of mine in the Army bought a Lario new. He really liked my white MK III Le Mans so he bought a white Lario. It lasted 16,000 km before the camshaft failed. There was a general recall and that issue was fixed. A hollow cam with increased oil flow replaced the solid unit. I have read that the Lario should use the 14 mm camshaft rather than the 12 mm version so it may be that this is the easy way to tell the earlier version from the later modified item. All the bikes should have had this modification done but they still have a reputation for grenade
heads. The fact is the 4-valve system apparently self-destructs without warning unlike the 2 valve models that normally give ample notice. The stems break and valve heads fall off at high revs!
I've read lots of theories about how to fix them but I've become a bit jaded. On some forums a new expert
occasionally arrives with theories and fixes. What I have gleamed is that many of the bikes have been hidden away in sheds for a lot of years with the owners too afraid to ride them. Some of these bikes seem to be appearing on the market now and then. Many of those writing fixes haven't actually ridden the bikes far enough to test their theories. One real problem is that there have been so many failures that certain replacement parts have become scarce. In Australia some parts are virtually unobtainable but the situation may be better in your part of the world.
Evidently the original valves were 2 piece, welded together and to attain the revolutions the valve springs were very strong. This caused the heads to eventually part from the stem with drastic consequences. Funnily when talking to race engine builders if I mention this problem they immediately say the springs are too weak, the valves aren't closing quickly enough and so they are getting too hot.
Fitting two piece welded valves is a very common practice. It has cost and practical advantages, minimising the amount of expensive material needed by the valve head but allowing another type of steel further up the stem to reduce wear in the valve guides and improve heat transfer.
What I also find amusing is that when I have mentioned the breather system oil distribution flow, it has been laughed at by Lario owners. They claim that it isn't necessary as the designers removed that feature so it was obviously unnecessary. There are no drip fangs on the inside of the 4V rocker cover. unlike the 2V covers. I have replied by asking are these the same designers who designed the solid camshaft and valve train that keeps failing?
In my opinion, if ever there was a model in need of more lubrication and cooling to the top end, by any means, this is it. Without direct access to one I haven't researched it but it may be possible to add a drip system to the underside of the rocker covers. Unlike the other models that drip onto the rocker spindle I'd be tempted to aim the oil onto the valves themselves. Let the dowel feed the spindle and the condensate cool the valves.
Another possible modification that may assist is K-lining the valve guides with sintered bronze. This has quite a good heat dissipation quality but how much more than the standard valve guides is difficult to say. This hasn't been tested by anyone as far as I know but I've included it as an option to be explored.
Valves from a Suzuki 250N evidently fit the Lario. One fix I have read, from a small block fan, is that the newer Nevada progressive valve springs are used with the Suzuki valves and engine redline is reduced by 1000 RPM. This is a similar fix to the 2 valve modification but with the use of different valves. The main advantage of the 4 valve bike is more performance due to higher revs being achievable. Remove this advantage due to fear of catastrophic failure and the question is raised, what's the point?
I have been informed that the original springs were so stiff that they would have been stable up to 12,000 RPM and the Nevada modification should be fine up to 9,000 RPM, well above the redline set on the bike's tachometer.
Here is a selection of other comments that I have cut and paste to illustrate the situation:
From a Lario owner:
- I have had a Lario for 5.5 years - I didn't ride it for the last 3 years but put 11,000 km on in the time I did. The speedo showed 47,000 km when I bought it but wear in various areas suggests that it has been around the clock at least once.
- The valve springs are dual coils, and quite stiff as well. This is not the original factory setup - I believe it was a factory approved mod flowing over from the 350 4-valve motor. I had decided to stop riding the bike fairly soon, since I was reaching the
magical100,000 mile mark.- Mario from Thunderbikes in WA (Oz) used to race one in the 80s after sorting out the valve issues. He found that the factory springs were way too strong - with smaller valves they had something like twice the valve spring pressure! He used Suzuki GN250 valve springs with original collets and replacement valve retainers at the top or bottom - now I am hazy. He regularly saw 9,000 RPM on his Lario while racing.
- Deciding I needed a
spareI bought another Lario in September, which had suffered a major blowup in the right head. Both exhaust valves had lost their heads, the head itself was destroyed but fixable if you are desperate (I am told). What worries me now is this engine has had the soft valve spring mod yet still popped at around 65,000 km, maybe a little more since I believe the speedo drive was faulty for a while.- There are stainless valves around which are supposedly better. I have one and will get the rest of 2 sets, because I am keen to do both bikes. I have stopped riding my Lario (which appears to have standard issue valves) because I believe it could pop at any time. While I have a spare set of heads it is not worth the risk.
And a Guzzi mechanic:
Early ones had cam and follower issues but the biggest issue with them was that the factory simply doubled up on the valve springs used on the 2VPC models and the spring pressures along with the very thin stemmed and not very cleverly made valves coupled with the under-finning and therefore heat build up in the heads leads them to shed exhaust valve heads like confetti.
There are a number of suggested remedies, probably the most successful I know of is using Suzuki GN 250 outer valve springs and caps with the Guzzi collets. No inner springs.
Thing is that tyres for them are hard to get, (Although this is improving again due to the number of big scooters with 16 inch wheels!) and many engine parts are now as rare as rocking horse **** so keeping 'em on the road can be a hassle.
And an ex Lario owner:
My understanding of the valve problem goes like this:-
The relatively heavy valve springs coupled with a somewhat soft material used in the valve stems, resulted in the ends of the valve stems mushrooming with use. This resulted in the valve adjuster being unable to slide on the end of the valve stem, causing the valve stem to flex back and forwards, eventually fracturing. This of course resulted in the valve heads dropping onto the top of the piston, destroying that side of the motor.
The factory fix for the problem was the issuing of a set of hard steel lash caps for the valve stems.
I fitted the lash caps, and also softer valve springs (Suzuki GN250). The motor seemed to be much happier with the softer valve springs. Fitting these caused a small problem, as the GN250 springs are slightly larger in diameter than the original Lario ones. This was overcome in the following manner. I obtained spring retainers from 2 different Suzuki models. From memory these were the GN 250 and a GSX250. One retainer was a properly machined steel retainer that fitted over the valve guides and provided a seat against the head that matched the increased spring diameter. The other retainer was a pressed steel one (like a bowler hat) that also matched the increased spring diameter, but significantly was exactly sized to fit over the Lario spring retainer without any play at all. This allowed me to use the standard Lario valves and collets, as the collets were still fitting into the Lario retainers.
With these mods, there was never a problem with the bike, I even re-purchased the bike in the late 90's with the mods still in place. The bike is still going strong - in the hands of yet another owner.
As shown there are a few ideas on this issue and I'm not getting too involved with the differences but the Suzuki 250N features quite a bit despite the variance of which parts should be incorporated. I'm just illustrating that the problem hasn't come to a definitive conclusion as far as everyone is concerned and opinions vary.
Lario wheels and tyres
The Lario and some other models run 16 inch wheels both front and back. The problem now is getting tyres, of the correct profile, especially for the rear. Some owners are buying front tyres and mounting them on the rear backwards. With a lot of smaller wheel scooters this may not be so much of an issue as it has been but it is something you may want to investigate before purchase.
A friend of mine, an engine re-conditioner, was repainting a Lario so he got the 16 inch wheels sent off for sandblasting. When he got them back he noticed hairline cracks at the spoke/rim join. His eyes were used to spotting cracks in cylinder heads so he saw them straight away. They were virtually invisible to the untrained eye though. He purchased another set of two wheels and sent them off. When he got them back it was the same thing, more cracks. Whilst this is a very small sample group I would like to point out it is a 100% failure rate for the wheels. Why they crack I don't know but it is something to consider. Maybe there isn't enough flex in the spokes of a 16 inch straight spoke wheel?
An addendum on the valve issue
Its been quite a while since I wrote the article above and the valve issue just keeps popping up. I decided to add a summary of this new information to assist as a resource for those looking at options.
Firstly, Ed Milich of Guzzipower in the U.S. sells valve kits for the small blocks. The valves have been sourced from Kibblewhite's in the U.S. as a special order as they aren't one of their standard production items. He sells valve and spring packages to suit the small blocks if you feel that your bike is in need.
A quote from one of his posts:
The smallblock top end/valve replacement packages I sell use Kibblewhite blanks with stem length cut to size and stems cut to locate keepers, and then 3 or 5 angle valve job performed depending on race/street. Smallblock valve replacement isn't plug and play. As I said, it's expensive to make the early bikes right.
He believes the valves are the issue. For normal road use he doesn't think the springs need replacing.
I've never seen stock valve springs break, so not much reason to replace them if they shim up.
And...
For a race bike, yes, replace springs with better stuff. For a street bike, meh. I would just see where the stock springs shim up. You can always back off on the installed height to drop spring force slightly, too. I'd get with a good cylinder head guy.
Smallblock top end needs re-engineered to be reliable anyway. Guzzi was seemingly reaching for straws to efficiently rework smallblocks after they left the factory and made all kinds of recommendations...lighter valve springs were probably a band aid.
And from another source a completely different opinion.
I was approached at a Historic Bike Club meeting recently by a gent who owned a Lario. He told me that he never had a valve failure with his bike and he has had it since new. He had carried out the conversion using Suzuki 250N valve springs, using the original valves. There appeared to be an issue when fitting due to the difference in the valve stem and the Suzuki spring cap but he discovered the Suzuki cap fitted neatly inside the original Guzzi cap so the Guzzi retaining collars could be used and no machining was necessary.
Once again there is a different approach to try and overcome the same problem. There is an included comment from another owner in the original piece that weren't as fortunate with this process.
4 valve parts update
May 2010 I read that original intake valves were no longer available for the Lario. This means there are none for the Monza II either as they are the same part. Another small block enthusiast posted this interesting piece of information:
More than valves had been discontinued. The tappets/lifters has too.
However - if you return the old ones when ordering new ones, you can still get them, as the normal small block tappets can be modified using the inside cone/cap from the old tappets. Martin Hagemann offers that service.
If you fail getting valves by applying already listed suggestions in this string, contact Martin Hagemann. His the chairman of the German Lario Club and great at getting
difficultparts.He has helped me and others on more than one occasion. If you contact him, tell him hi from me. (and I'm not getting kickbacks)
His email is shop@guzziepiu.de
He's running this shop/site http://www.guzziepiushop.de/
I have used Nissan valves in my Lario project. This is still untested, but will be up and running this season. Unfortunately, the guy I get them from is not willing to tell me the Nissan model. He wants to sell them himself as his idea. I did go to a Nissan dealership, but they just weren't able to tell me from looking at the valves.
He's Dutch and has this site http://www.startrick.nl/
He speaks English. So does Martin
Here is a picture of 2 Nissan valves. The one on the left has been machined to suit the collets and spring retainer on the modified Lario. Note the groove near the top.
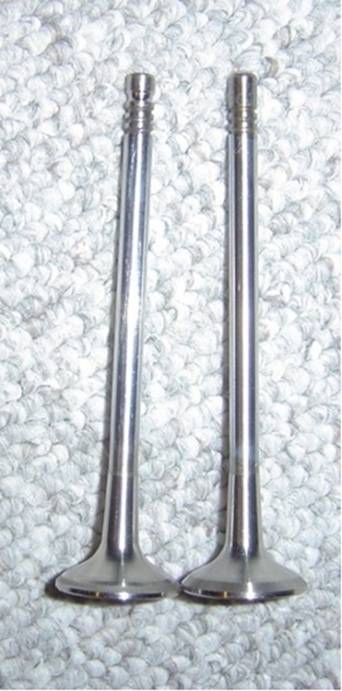
Photo courtesy of Brian (IceBlue).
I have no proof of which valves they are using but suspect they are the exhaust valves from a GA16DE engine which is a 16 valve, 4 cylinder motor that was in a lot of models.
Remember, I don't own a lario, nor do I work on one. All I did was to search for suitable valves with a 5.5 mm stem and 24 mm diameter. I have included a chart of the valve specifications of this motor. Please note that the stem length is a few millimeters shorter than a Lario's so the tappet adjustment should be near the top. My assessment of this has been visually confirmed by an owner who has had the Nissan valve modification. I'm keen to hear how the modifications cope but due to the nature of use the results may take years to deduce.
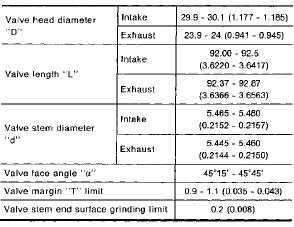
Photo courtesy of Rod Yeomans.
A local solution?
A friend recently dropped a valve in his Lario. Despite the warnings he thought it would be fine for a while and he would get the valves changed at his convenience. He waited too long.
He took the bike to a local motorcycle shop that prepares race engines. The real problem was sourcing a new head but once that was done the bike shop arranged for stainless replacement valve to be made and repaired the engine. The claim is that one of these stainless valves has never failed.
This is small business in regional Australia. If they can sort out this issue then there is a chance that there is a business, not that far from you that can do the same. You will just need to find a tradesman with the skills, equipment and interest to do so. Quality and hand made craftsmanship comes at a price so don't expect them to be as cheap as a cheap production line copy made in a sweat shop somewhere.
Like many busy tradesman Phil isn't into the internet. He has a more traditional approach to business. If you need to contact him then a phone call or letter will get to him. He does prefer to work from sample rather than a drawing and due to their scarcity the heads, if you wish him to assemble them, will be the owner's responsibility to source.
His details are:
Phil Rowen
Yandina Motorcycles and ATV
57 Cordwell Road
Yandina
Queensland 4561
Australia
From overseas: (61 7) 5472 7344
I have never dealt with this business personally but my friend is very happy with the work on his Lario.
Finally and a disclaimer
I hope I haven't put you off purchasing a small block Guzzi. Remember I am focusing on what to look for after 30 years of service
rather than what's usually good.
A very individual friend of mine owns an amazing Monza. Anybody who thinks that small blocks aren't robust just doesn't know of this machine. It is used
beyond belief and it is often seen at a rally leaning up against a tree with empty Guinness cans surrounding it. It doesn't have a stand, any leaning post will do but it just keeps running and running and running.
I really like both of mine and intend to keep them forever. These models are now over or nearing 30 years old so they have probably been through several, if not dozens of owners and have done unknown miles with unknown maintenance. I can only pass on known trends to you but a complete and thorough inspection of the machine can't be recommended highly enough.
I have no connection, or receive any commissions with any business or procedure listed. This article is for information, for the specific purpose to assist existing and prospective owners.
This article will never be complete. As I discover and learn more on these models I will edit the information accordingly. Some of the modifications mentioned are still being tested or are theoretical at best. No guarantee can be given to their effectiveness.
Useful references
- Guzziology. Dave Richardson
- Workshop Manual. Moto Guzzi
- Owners Manual. Moto Guzzi
- Parts Manual. Moto Guzzi
- Illustrated Moto Guzzi Buyers Guide. Mick Walker