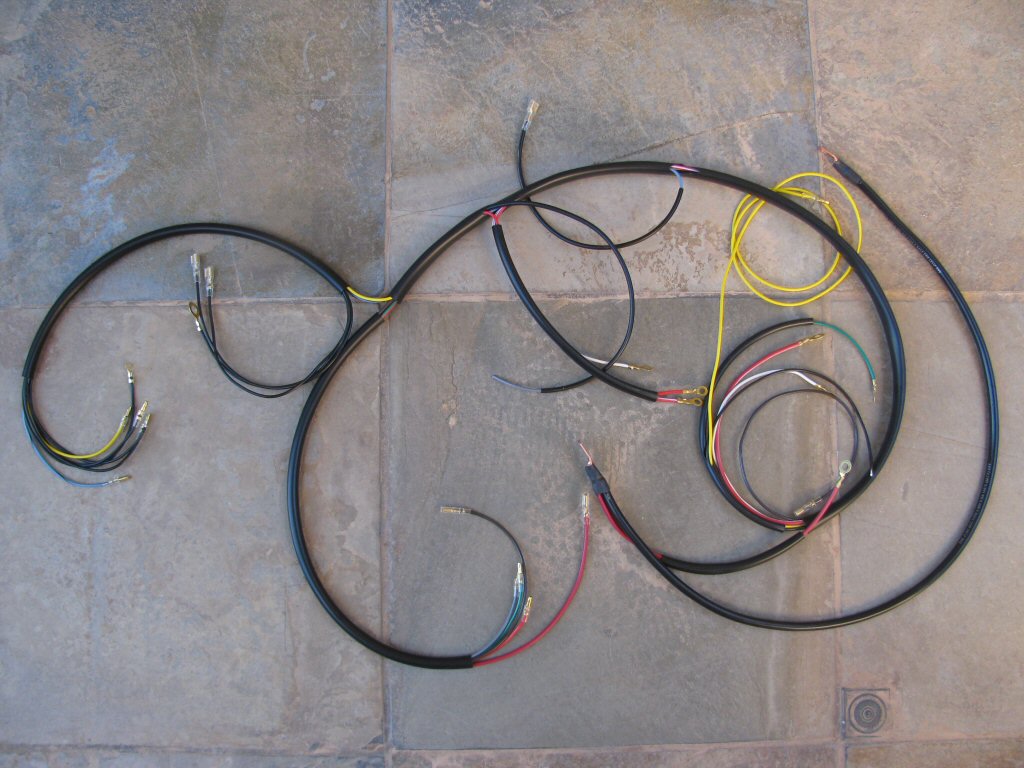
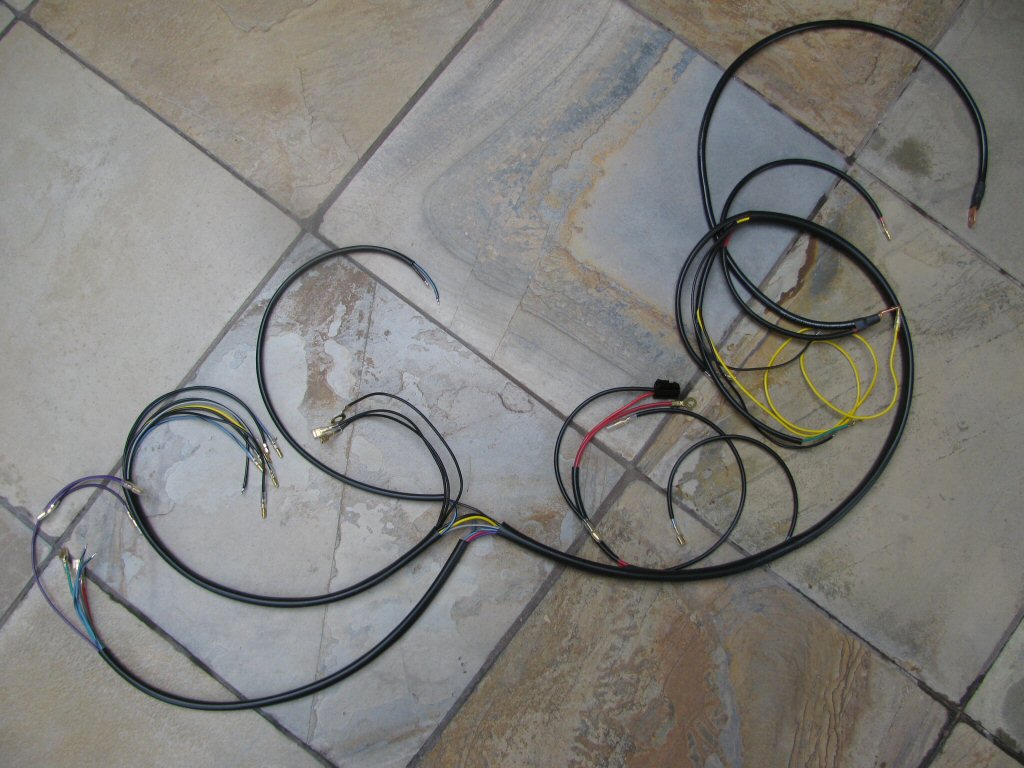
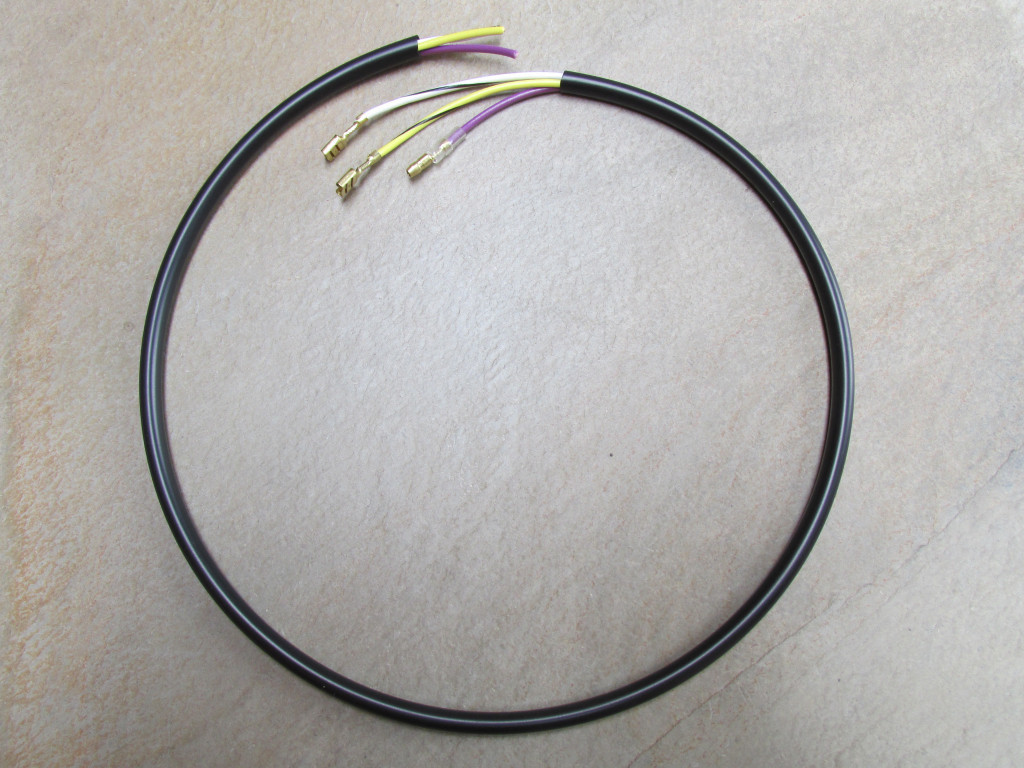
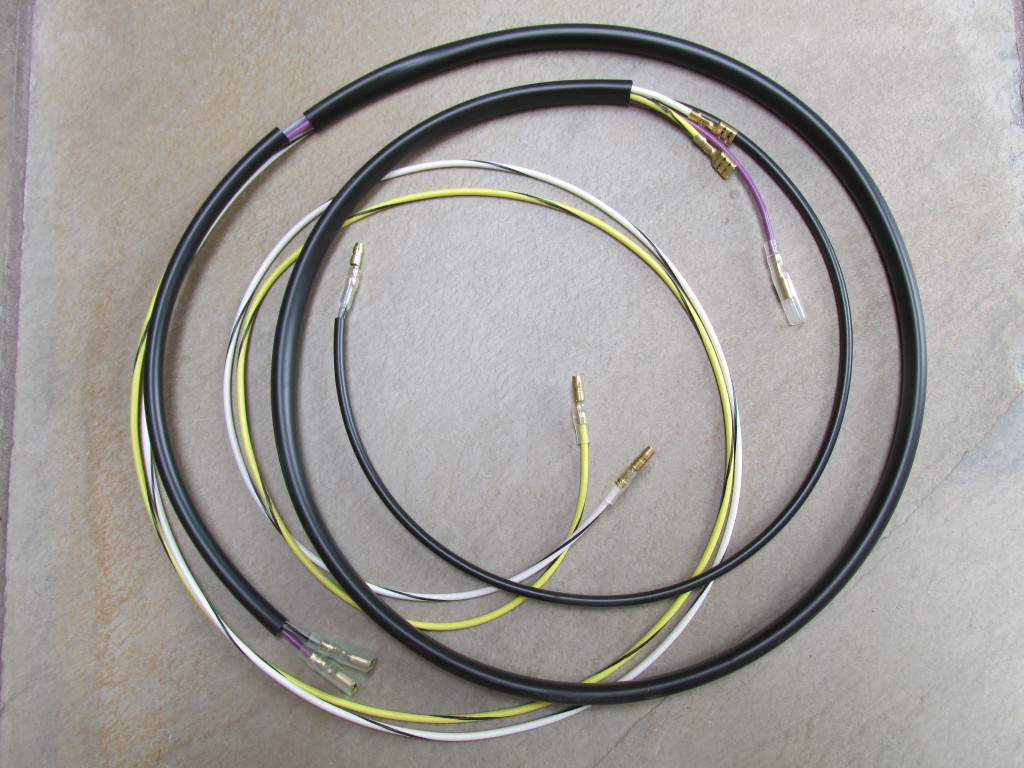
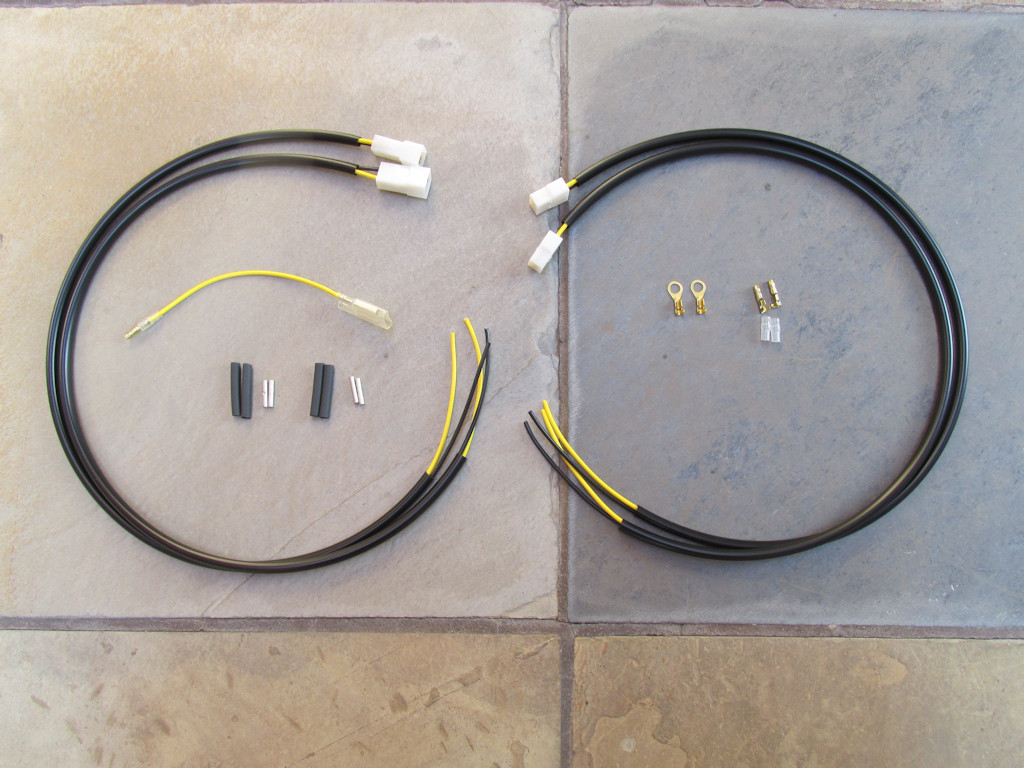
Loop frame wiring harnesses
Wire harnesses and looms to fit the 1967 - 1976 Moto Guzzi V700, V7 Special, Ambassador, 850 GT, 850 GT California, Eldorado, and 850 California Police motorcycles.
To order, email: greg@thisoldtractor.com
Installation is easily accomplished using my installation instructions.
Main harnesses
| Part Number | Description | Photo | Price |
|---|---|---|---|
| MG# 12747100 |
Main harness for V700 CIVILIAN models equipped with a Magneti Marelli charging system.
 |
 |
USD $96.00 |
| MG# 12747100-ALT |
Main harness for V700 CIVILIAN models equipped with an aftermarket alternator.
  |
 |
USD $96.00 |
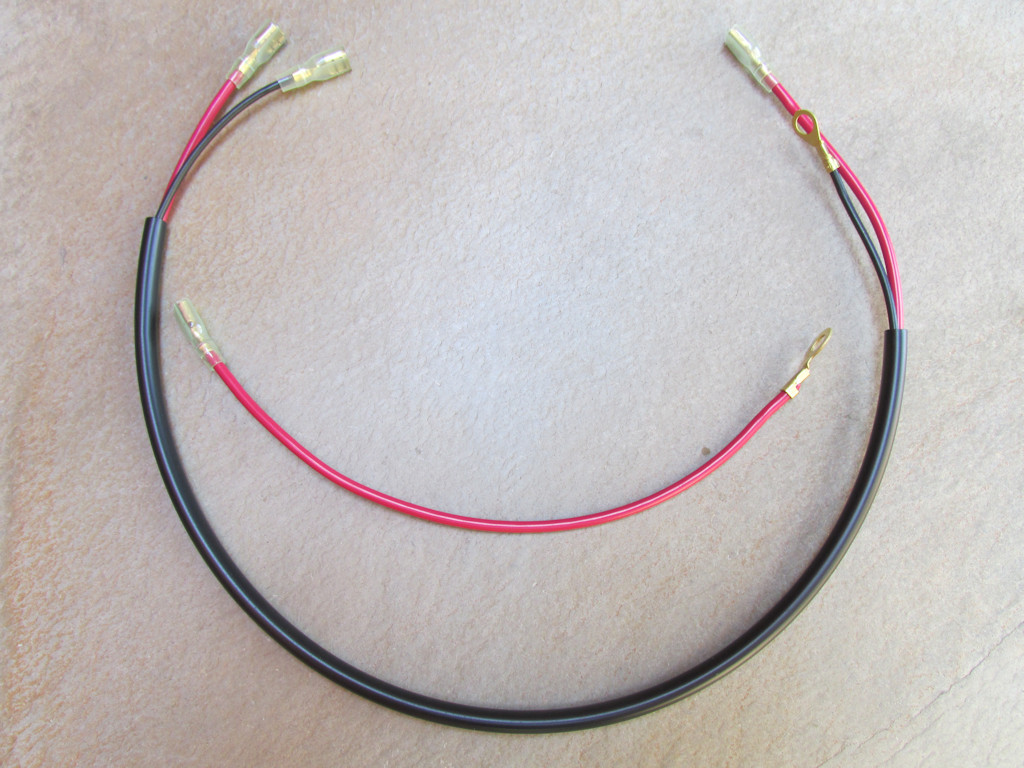
| MG# 12747102 |
Main harness for Ambassador and Eldorado CIVILIAN models equipped with a Magneti Marelli charging system.
|
 |
USD $96.00 |
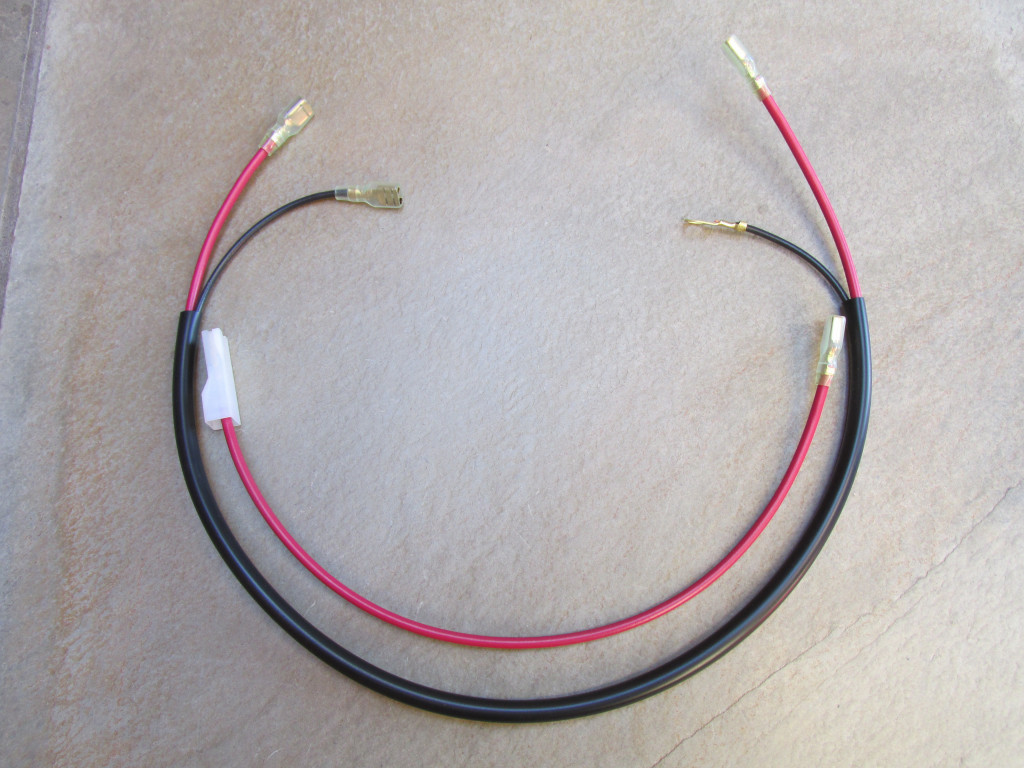
| MG# 12747107 |
Main harness for Ambassador and Eldorado CIVILIAN models equipped with a Bosch charging system.
|
 |
USD $96.00 |
| MG# 12747107-ALT |
Main harness for Ambassador and Eldorado CIVILIAN models equipped with an aftermarket alternator.
|
 |
USD $96.00 |
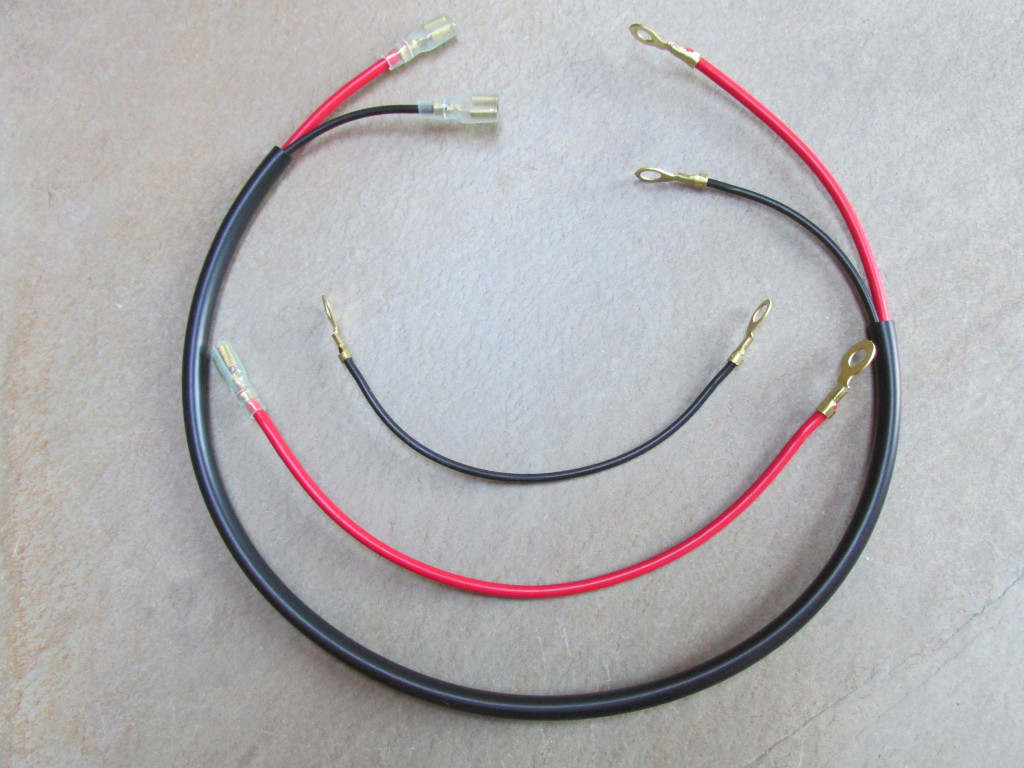
| MG# 13747144-MM |
Main harness for Ambassador and Eldorado POLICE models equipped with a Magneti Marelli charging system.
|
 |
USD $96.00 |
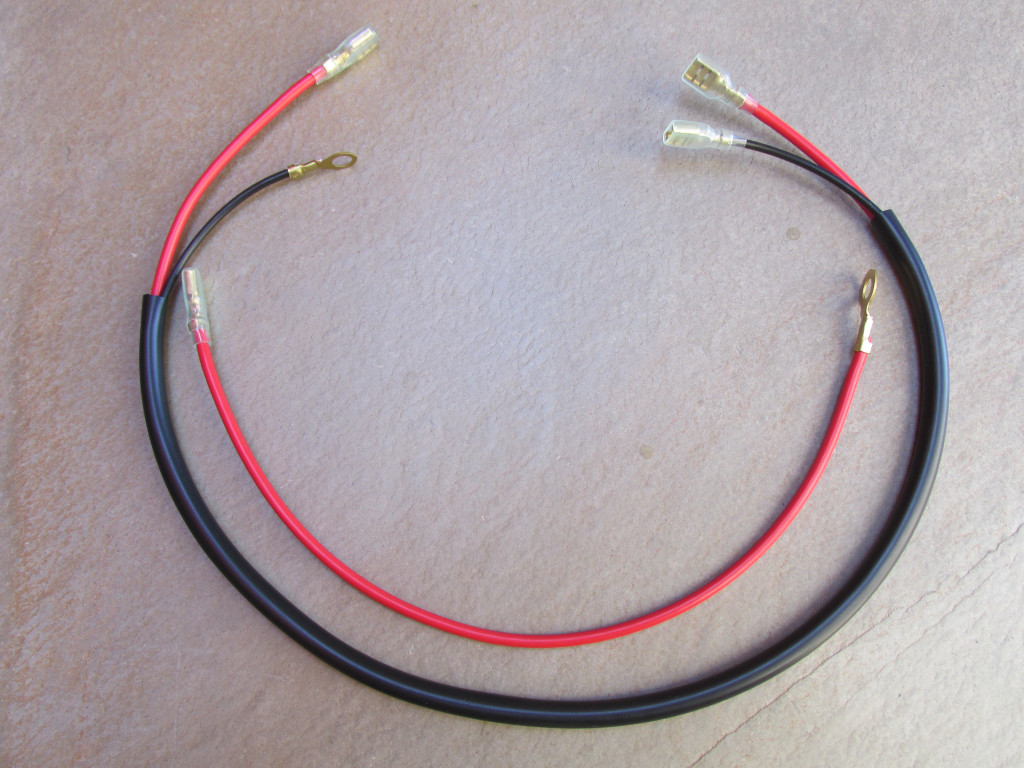
| MG# 13747144-BOSCH |
Main harness for Ambassador and Eldorado POLICE models equipped with a Bosch charging system.
|
 |
USD $96.00 |
| MG# 13747144-ALT |
Main harness for Ambassador and Eldorado POLICE models equipped with an aftermarket alternator.
|
 |
USD $114.00 |
Sub-harnesses used by All Models (Civilian & Police)
| Part Number | Description | Photo | Price |
|---|---|---|---|
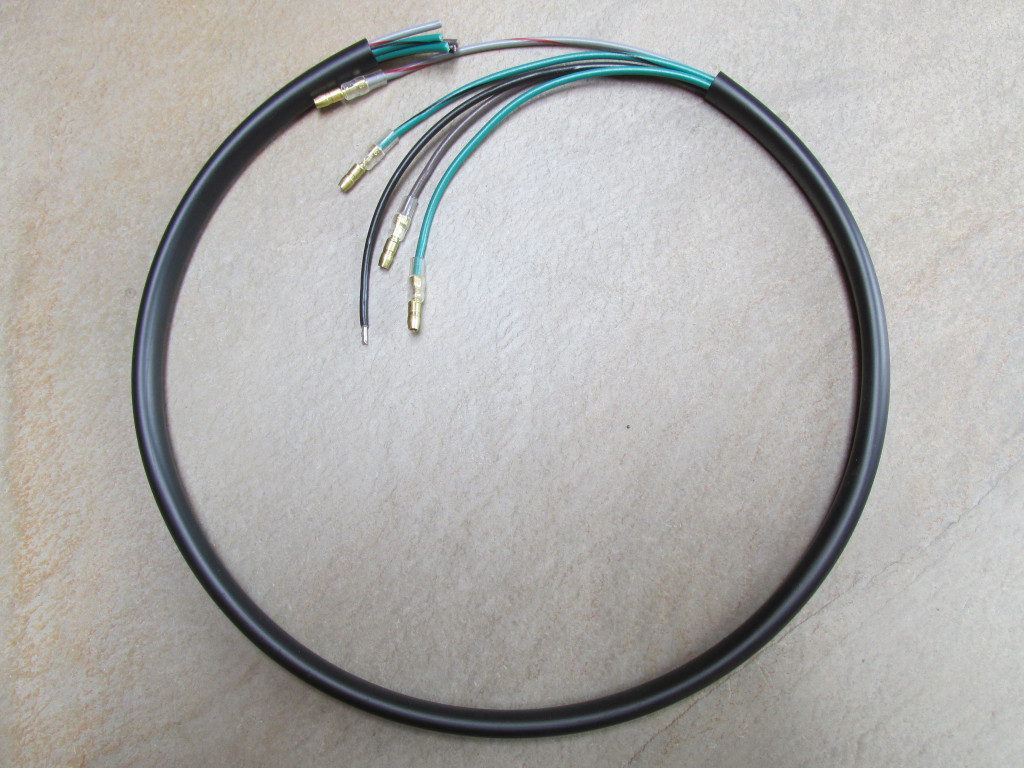
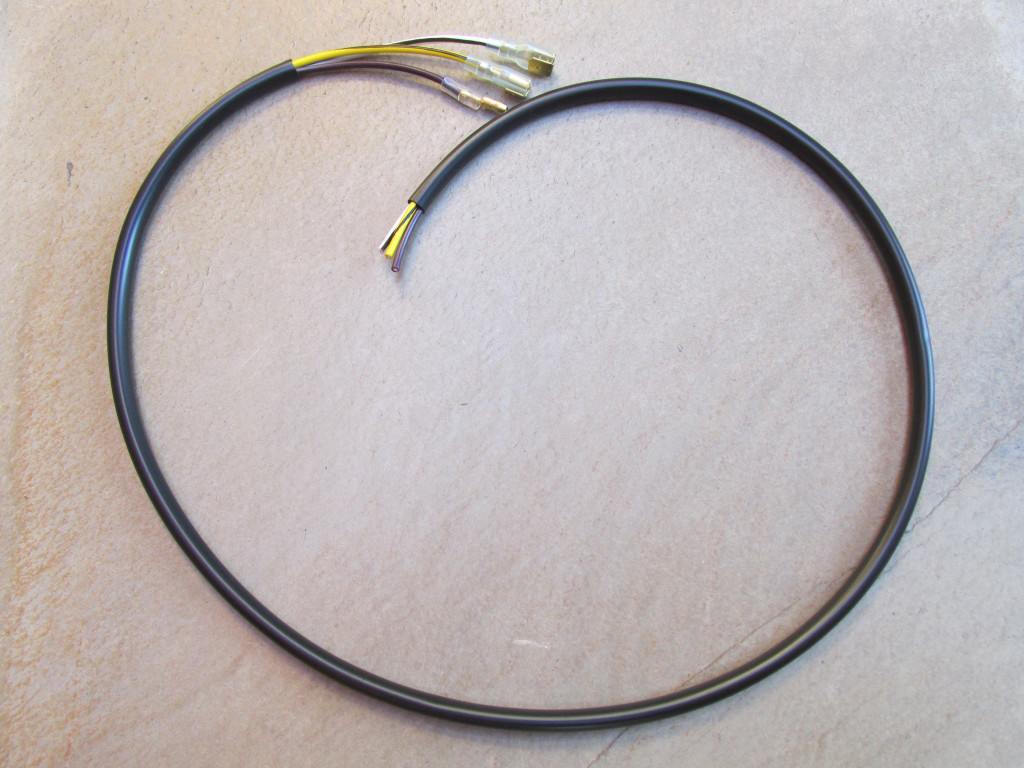
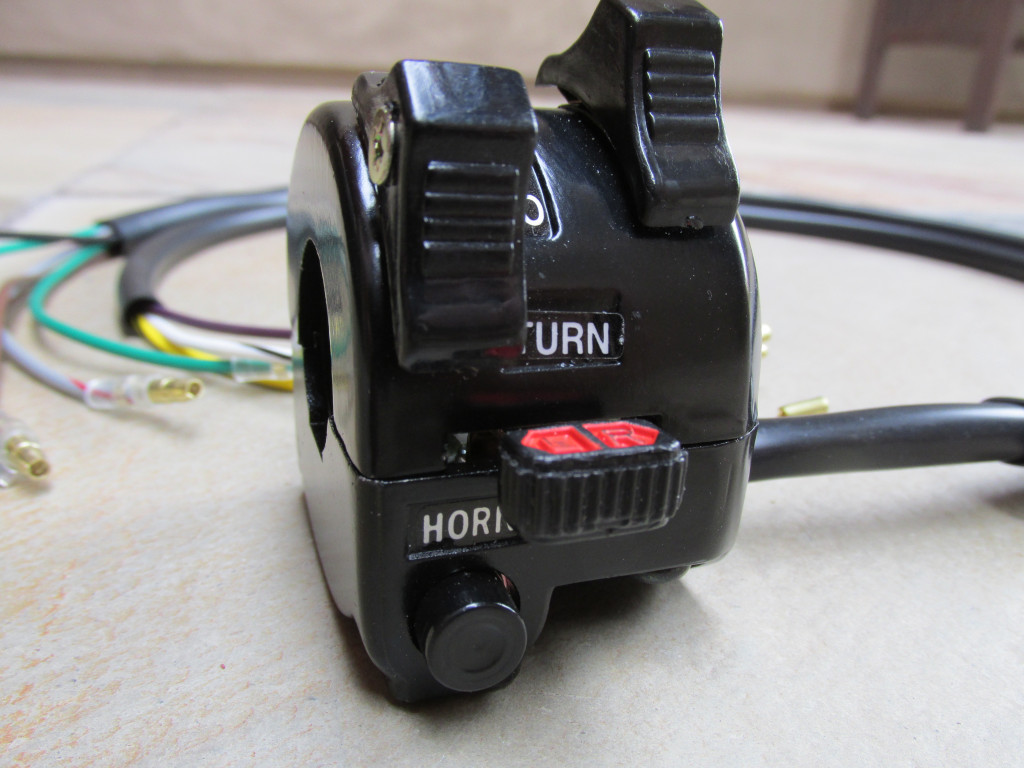
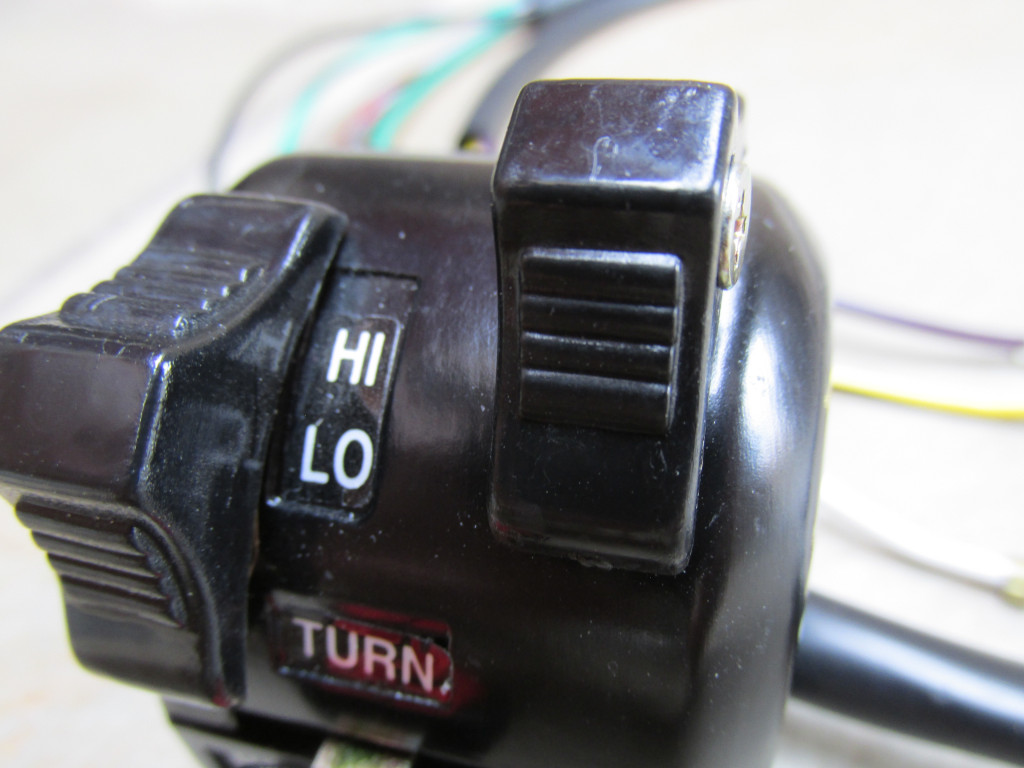
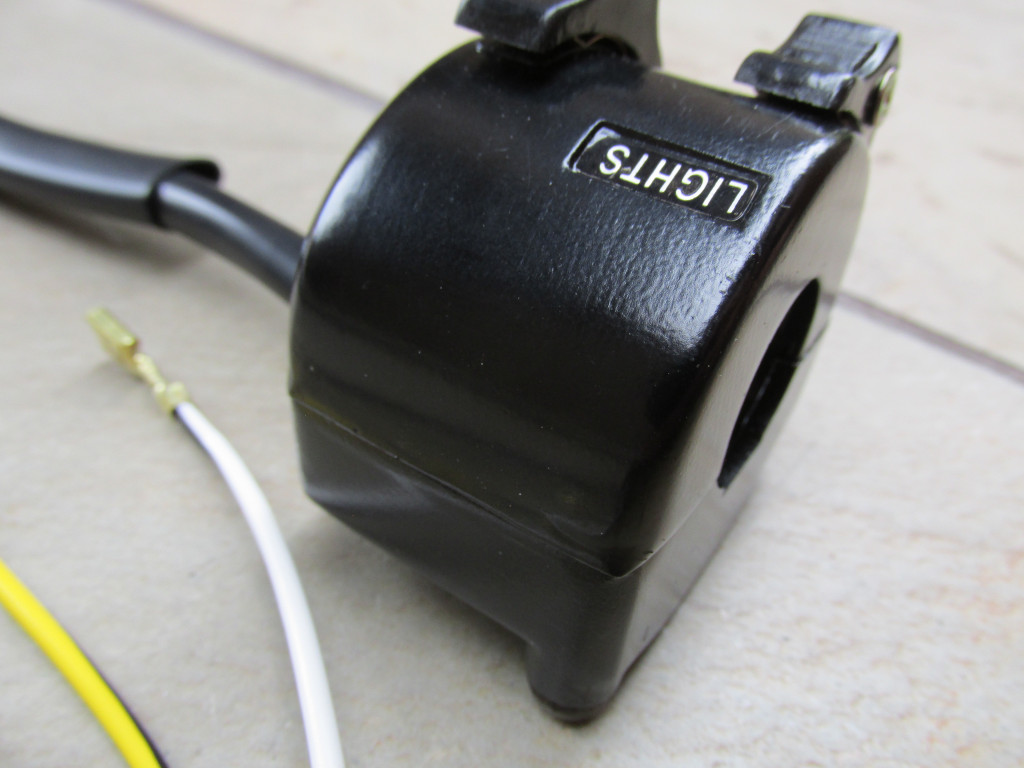
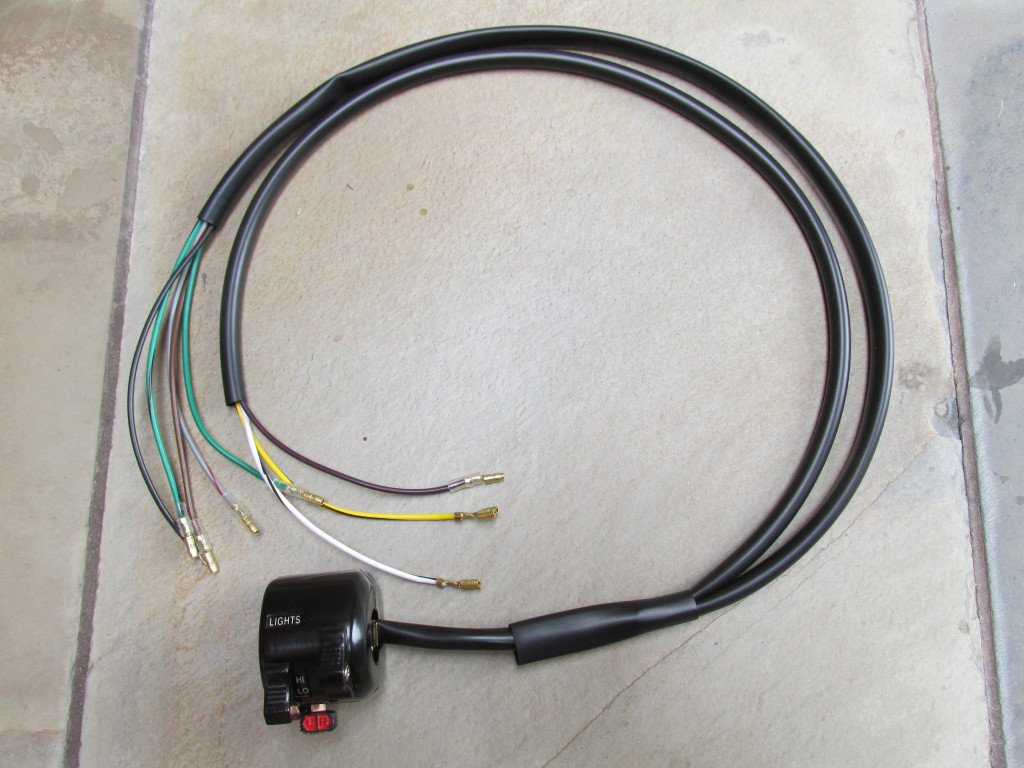
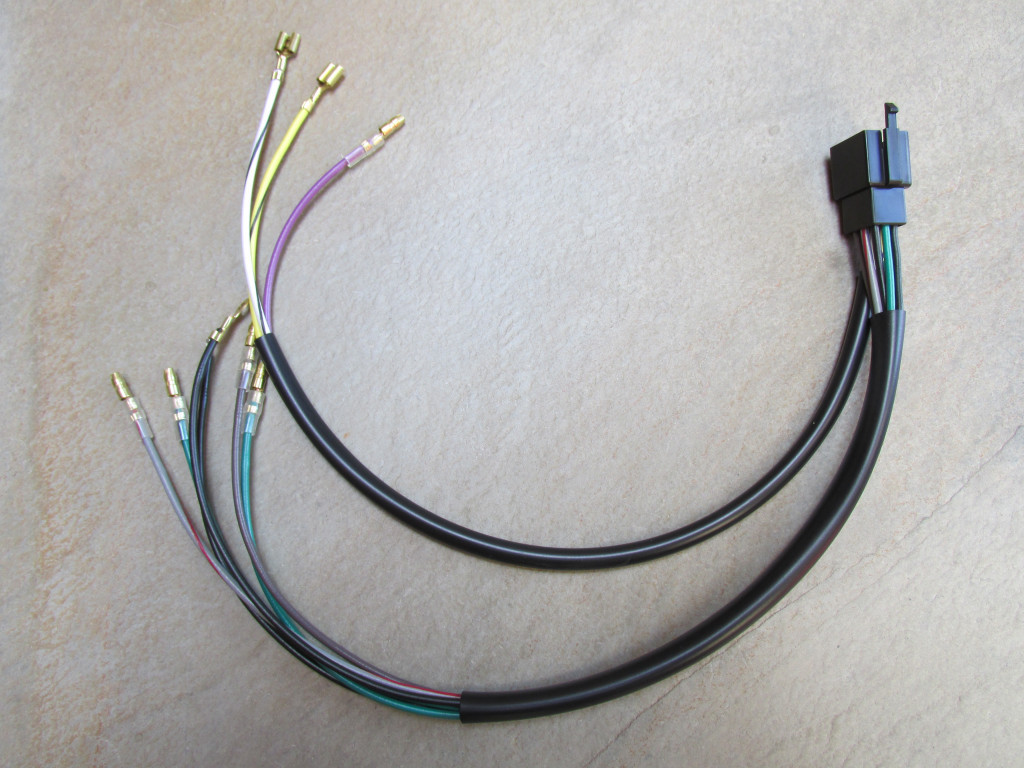
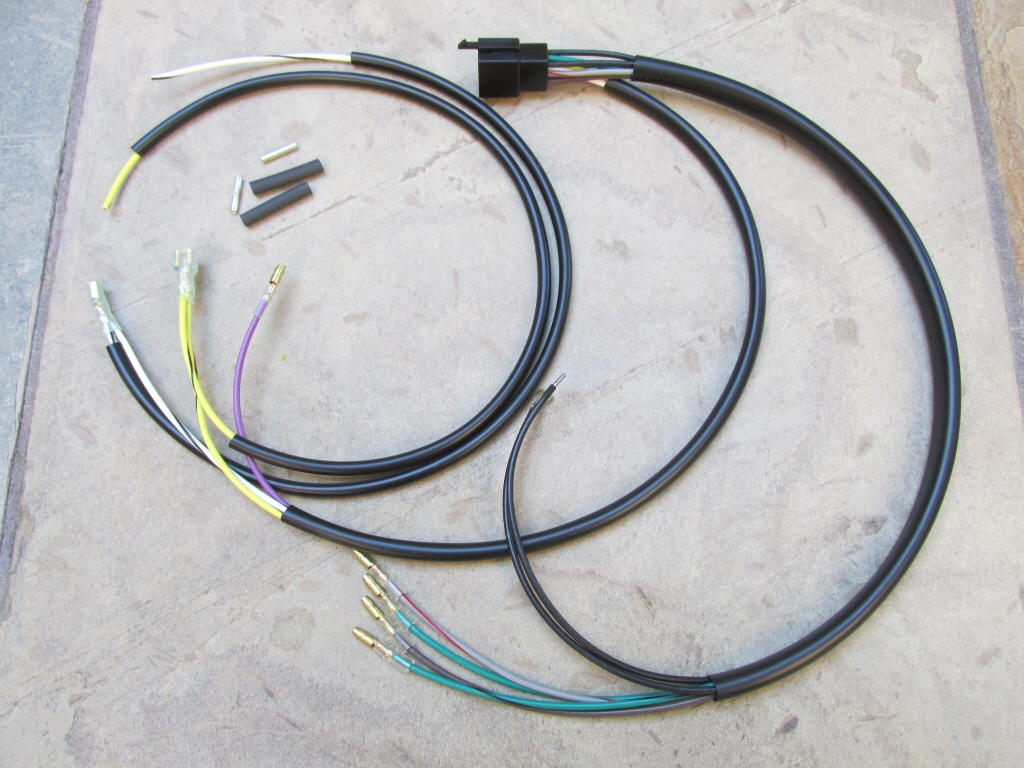
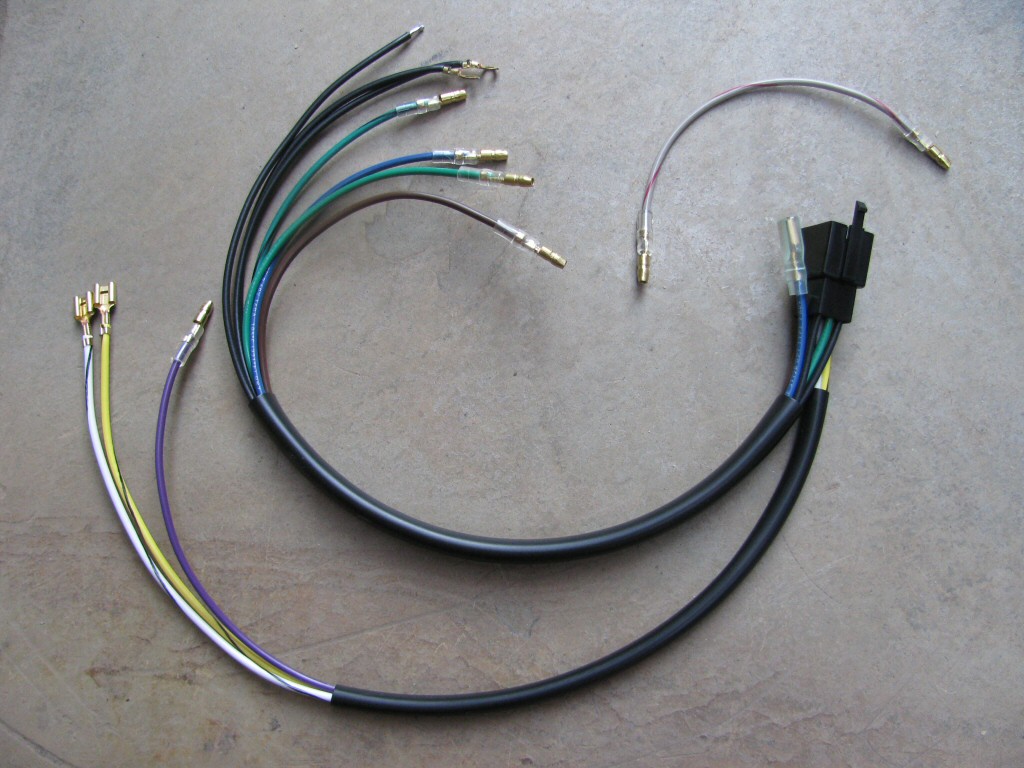
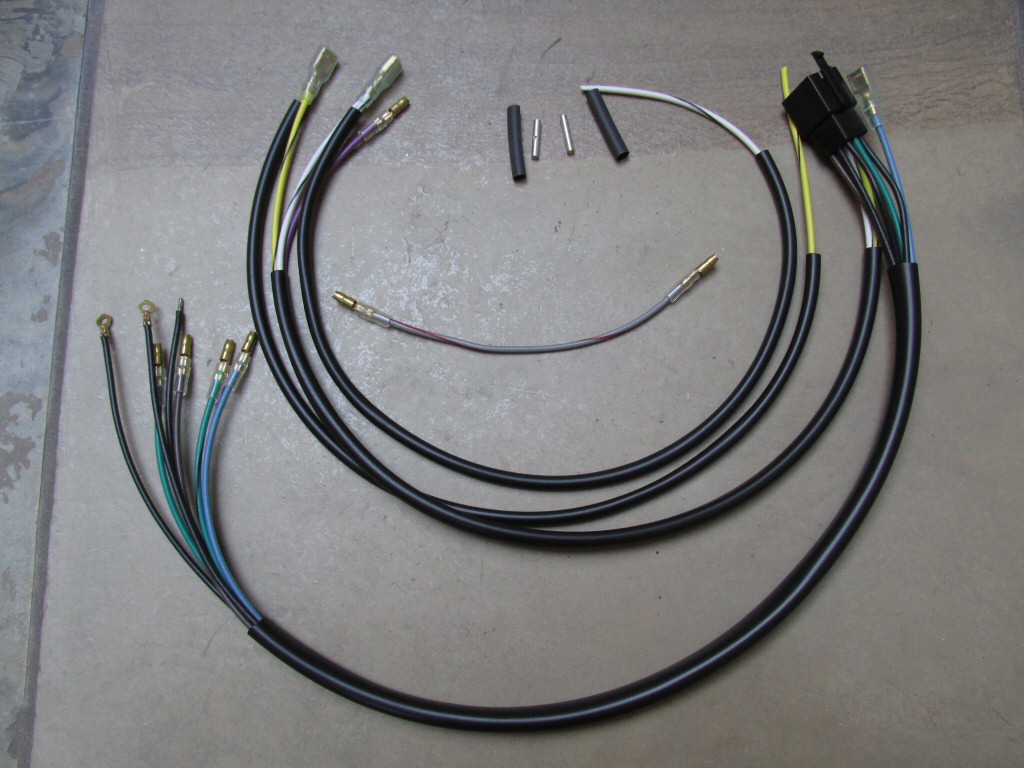
| MG# 12747320 |
Left handlebar switch Ready for your switch (MG# 12746020 or MG# 12746001). Works with switch pictured below (not included). When ordering: Please specify civilian or police handlebars. 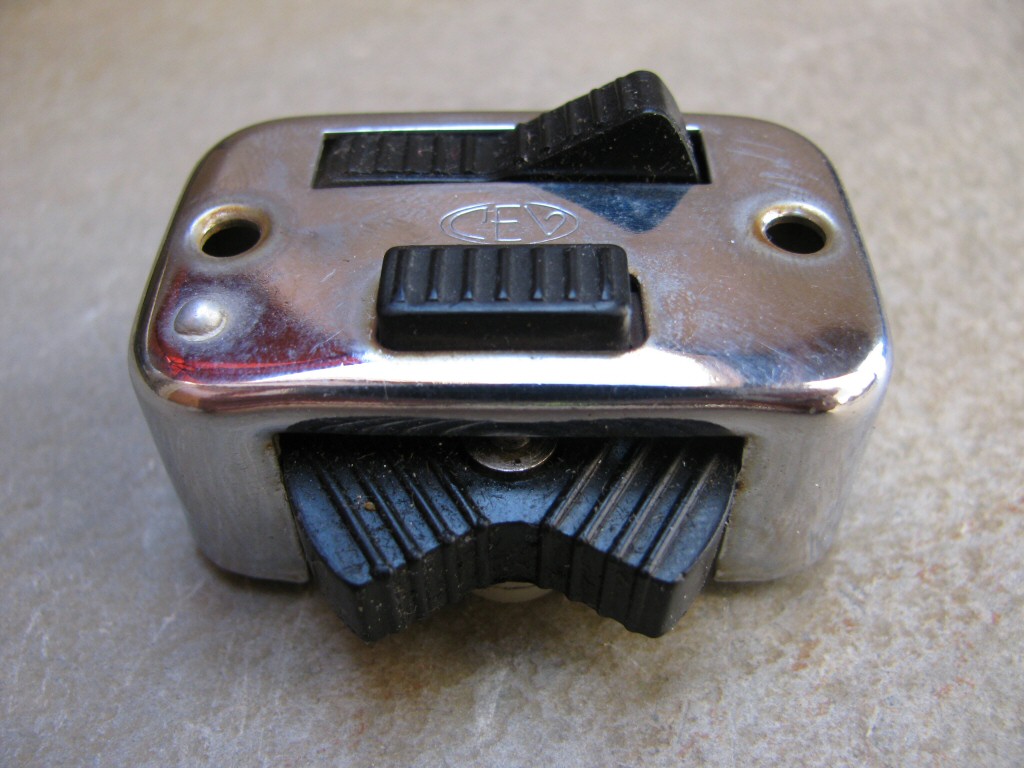 Please note:As with all switches actuating higher amperage components, I consider relays for the headlight low and high beam circuits a necessity. I sell a very nice relay kit specifically made for this very purpose. Warning:It is very easy to destroy original or aftermarket switches when using a conventional soldering iron. Even if you know exactly what you are doing and are very experienced with soldering procedures, the switches can very easily be rendered useless. Rather than using solder, I strongly recommend the following:
|
 |
USD $14.50 |
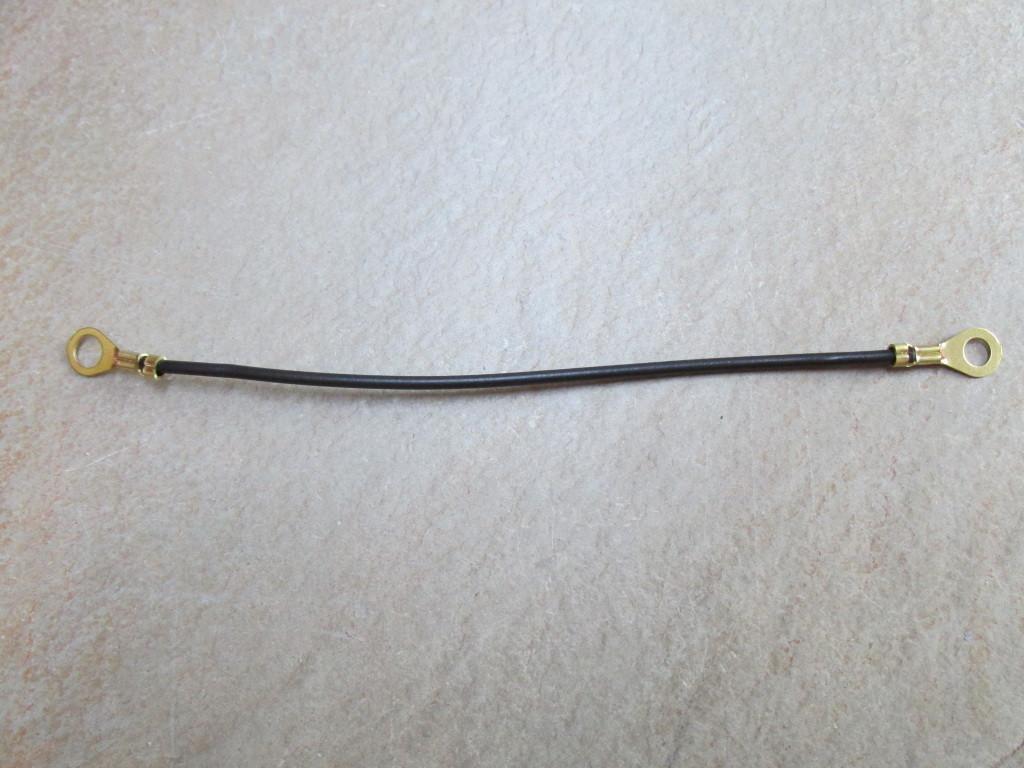
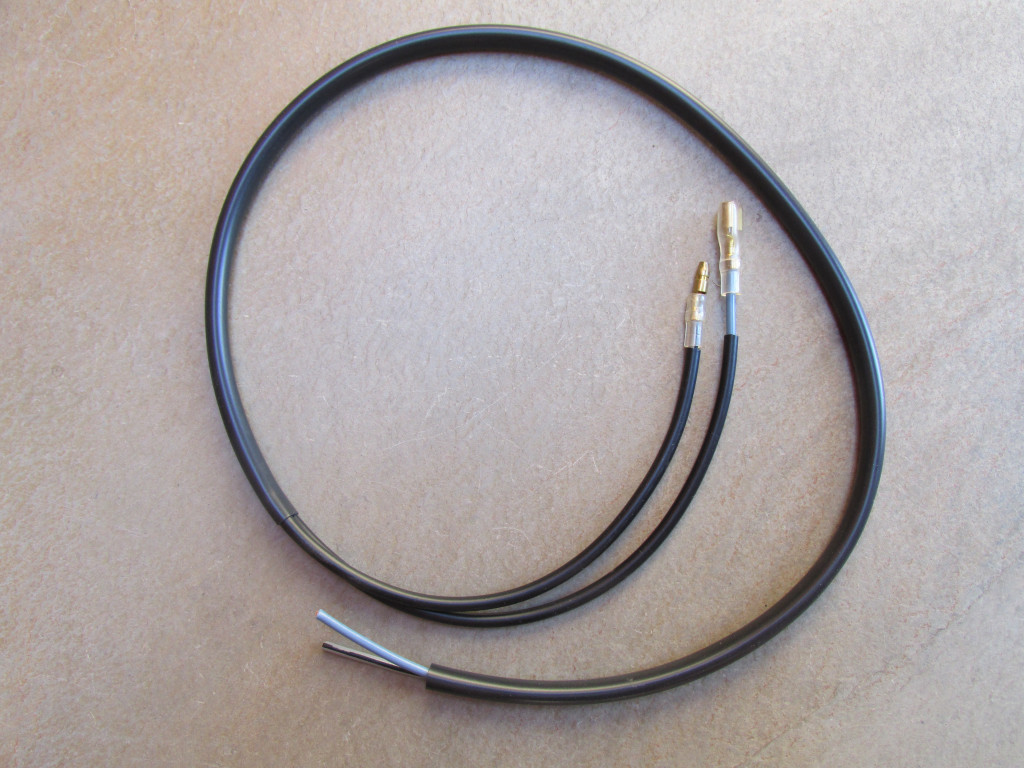
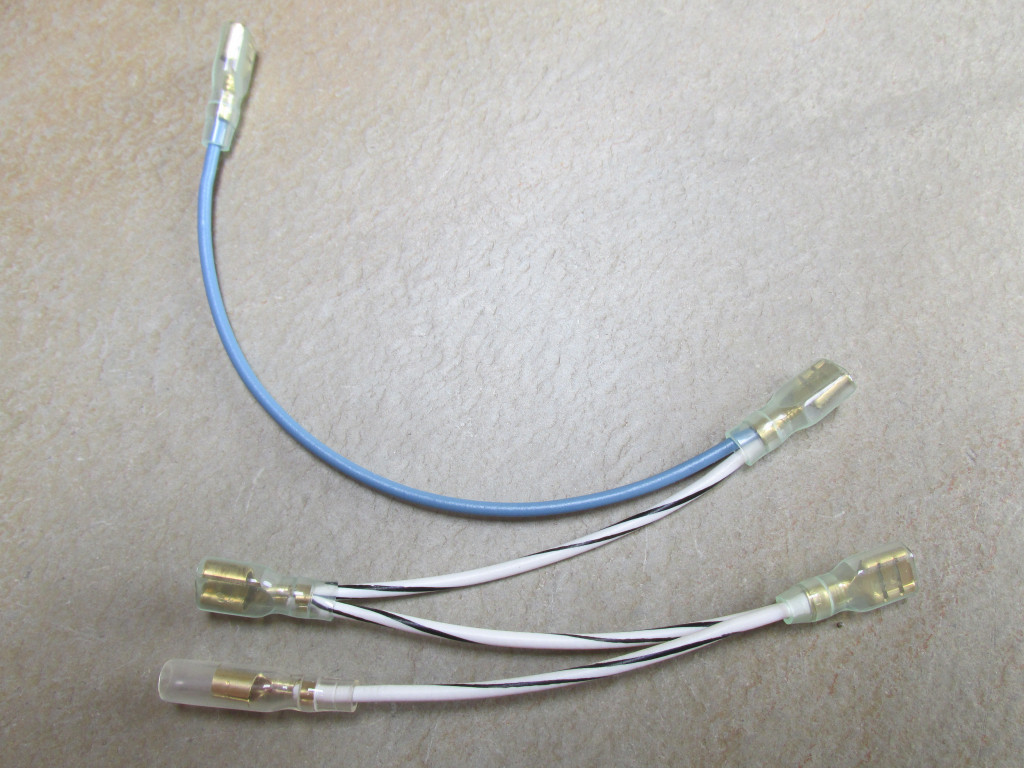
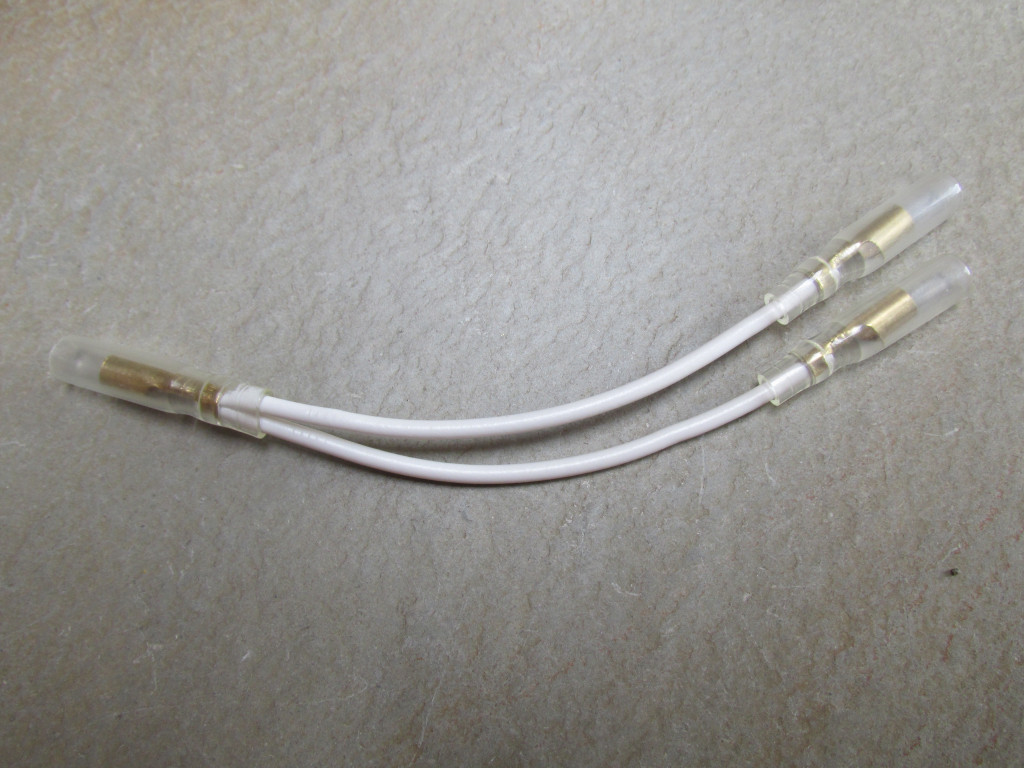
| MG# 12719300 |
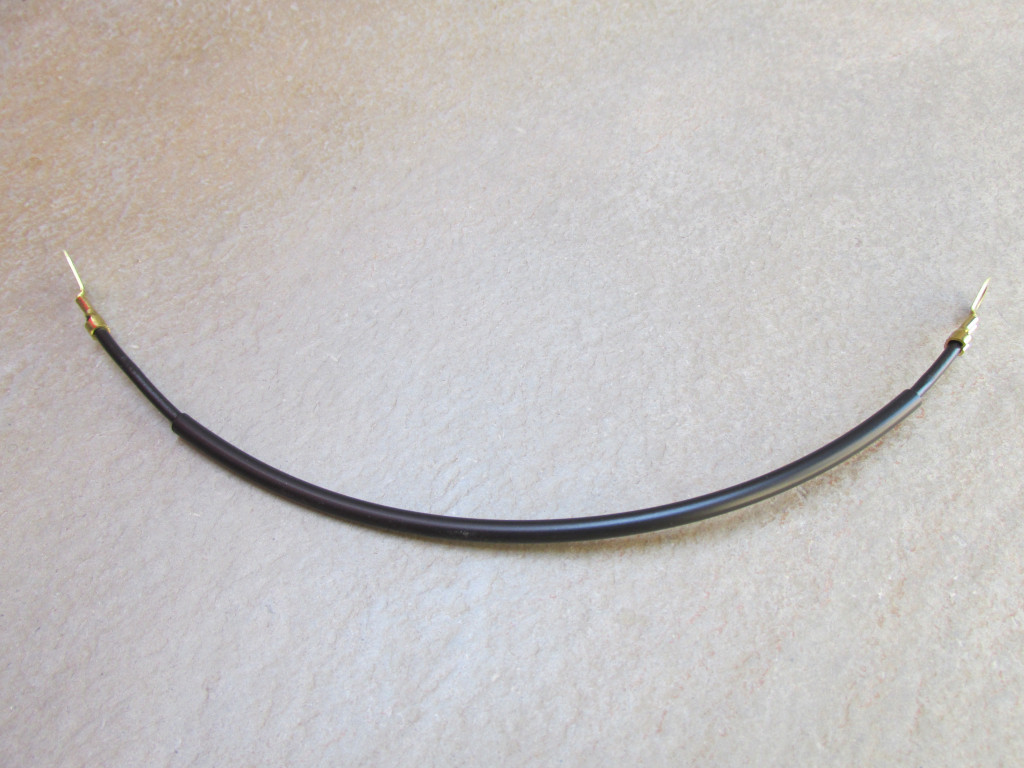
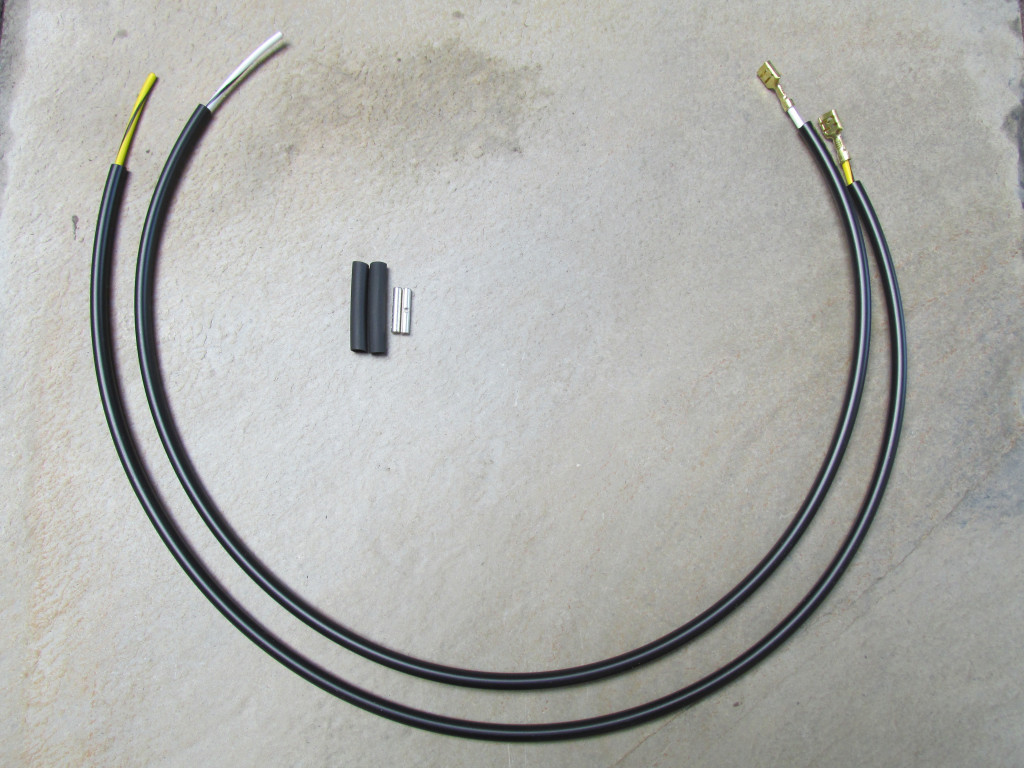
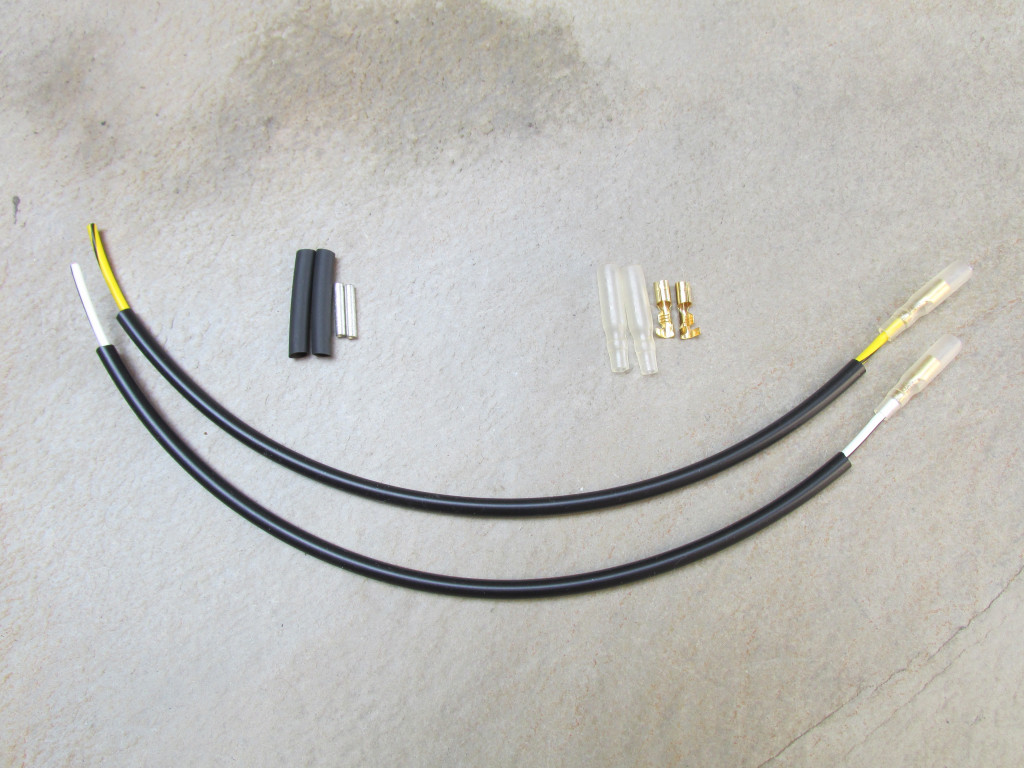
Negative terminal on the coil to the distributor - for Magneti Marelli coils Magneti Marelli coils accept 5 mm ring terminals; this sub-harness comes with the correct ring terminal. This harness also works with the Pertronix Flamethrower model 40611. |
 |
USD $2.50 |
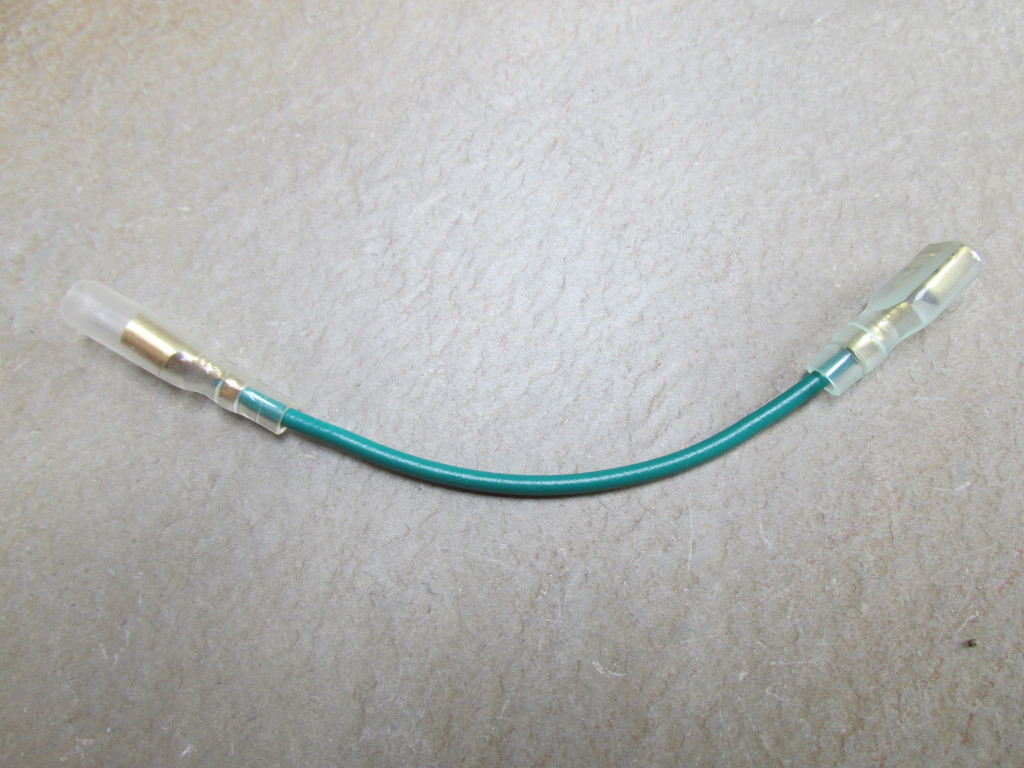
| MG# 12719305 |
Negative terminal on the coil to the distributor - for Bosch coils Bosch coils accept female spade terminals; this sub-harness comes with the correct female spade terminal. This harness works with the Bosch |
 |
USD $2.50 |
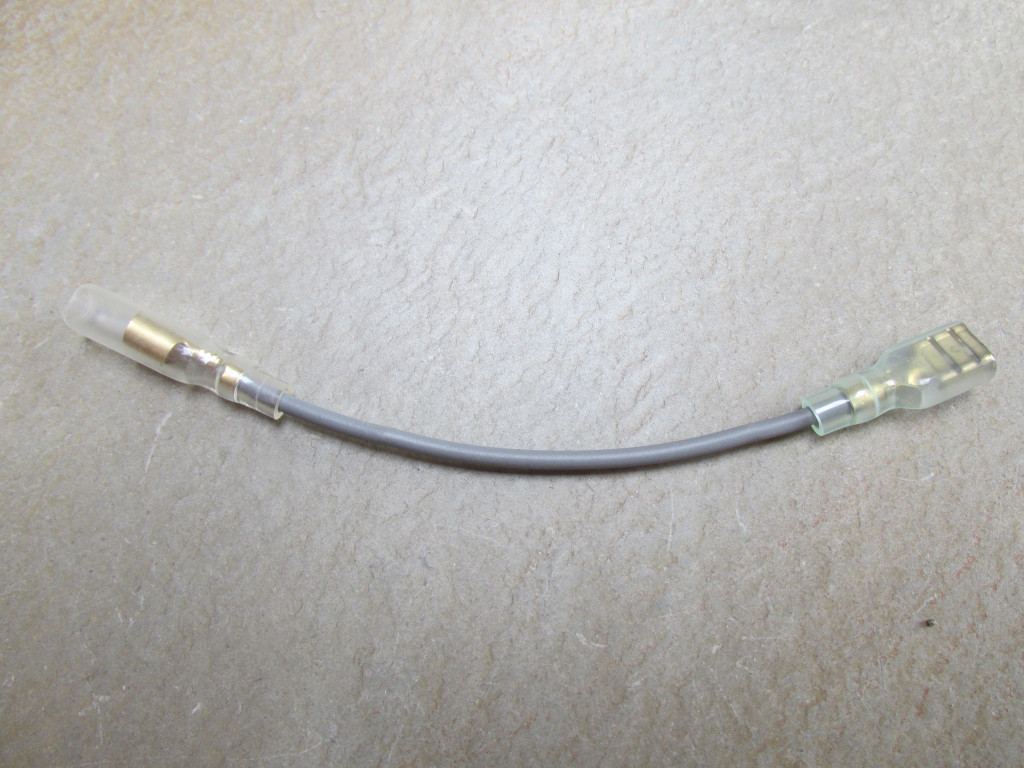
| MG# 12747501 |
Rear brake light switch to brake light Replaces MG# 12747500. |
 |
USD $2.50 |
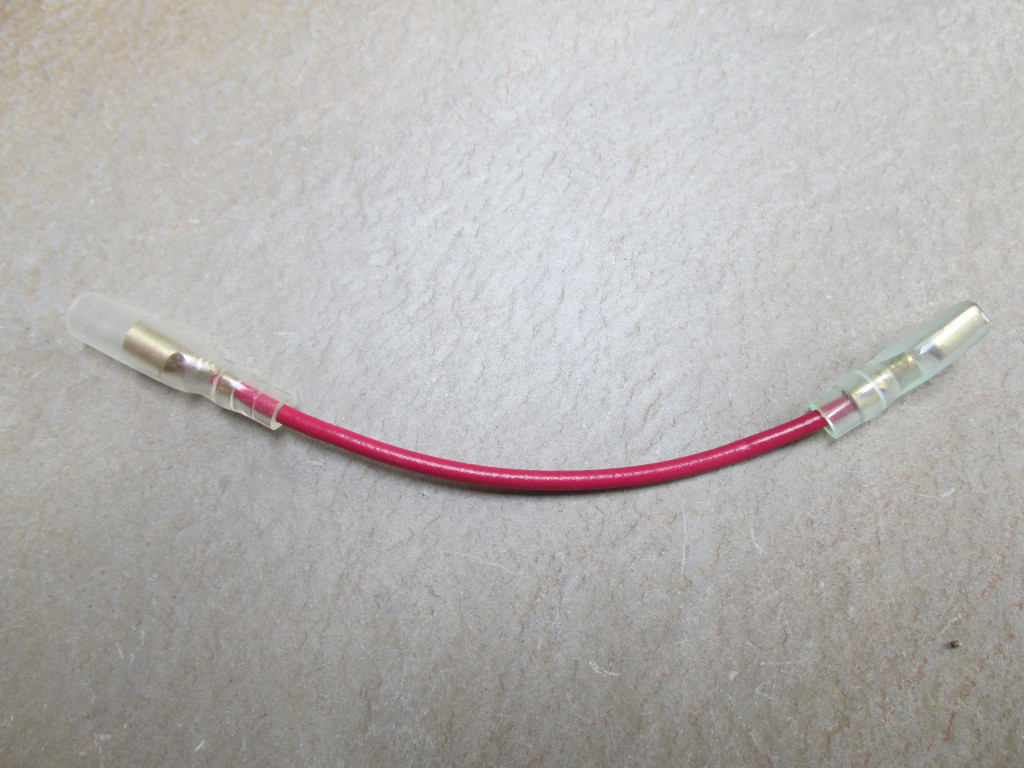
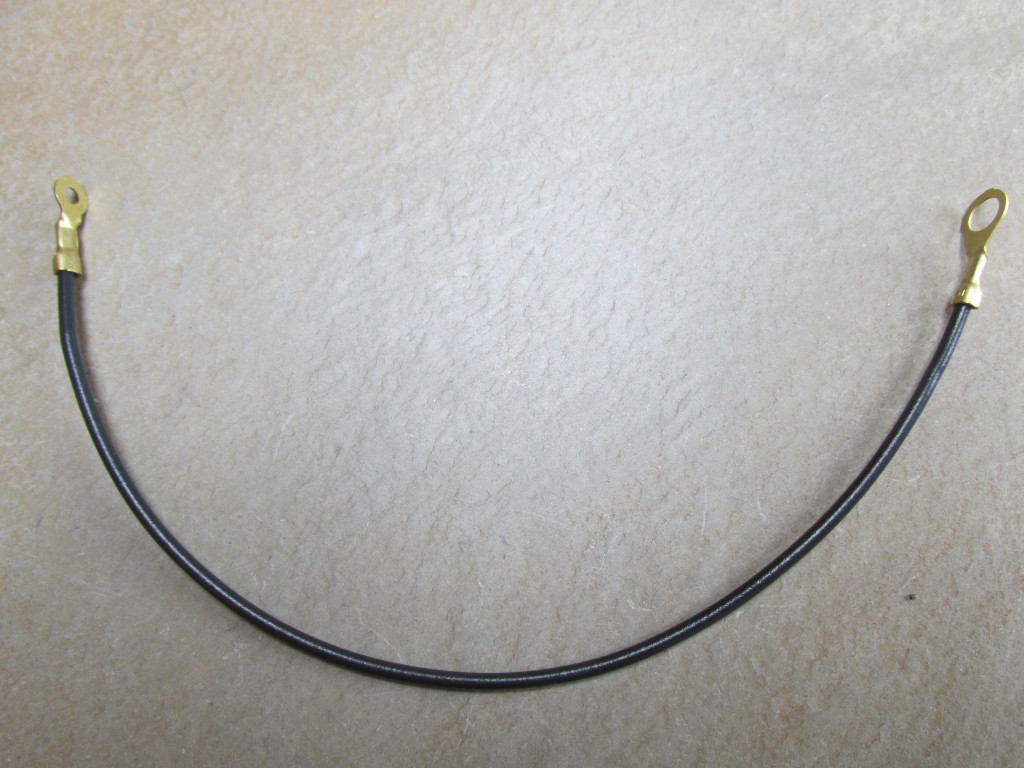
| MG# 12747700 |
Ground wire for voltage regulators (same for Magneti Marelli and Bosch voltage regulators) |
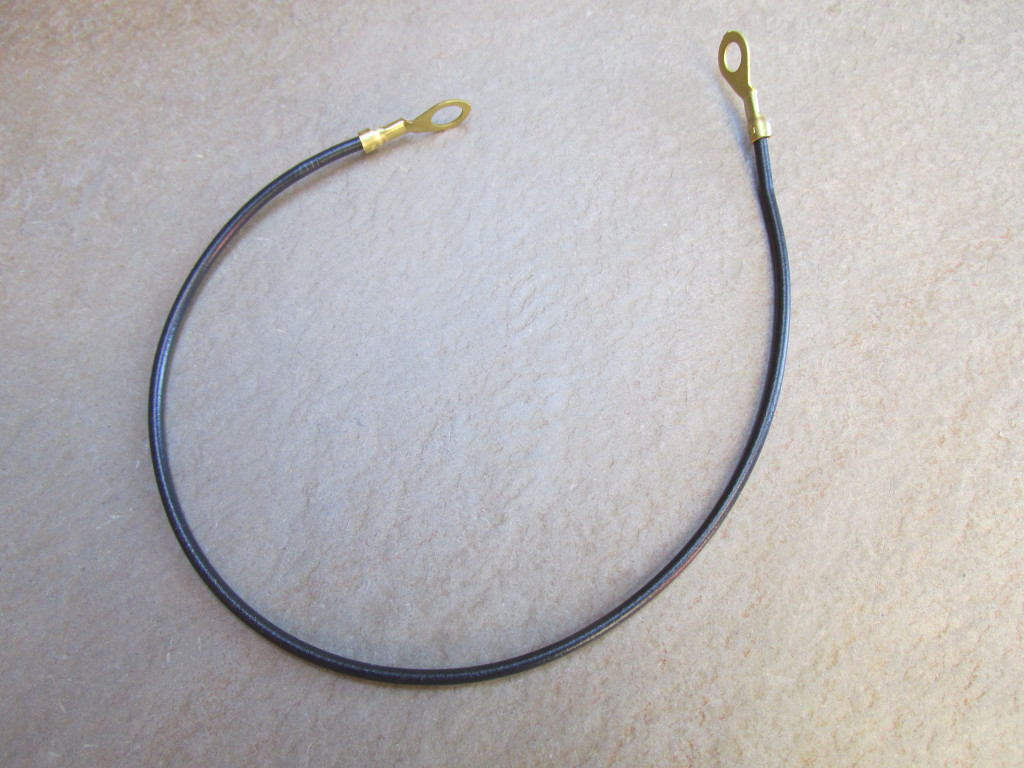 |
USD $2.25 |
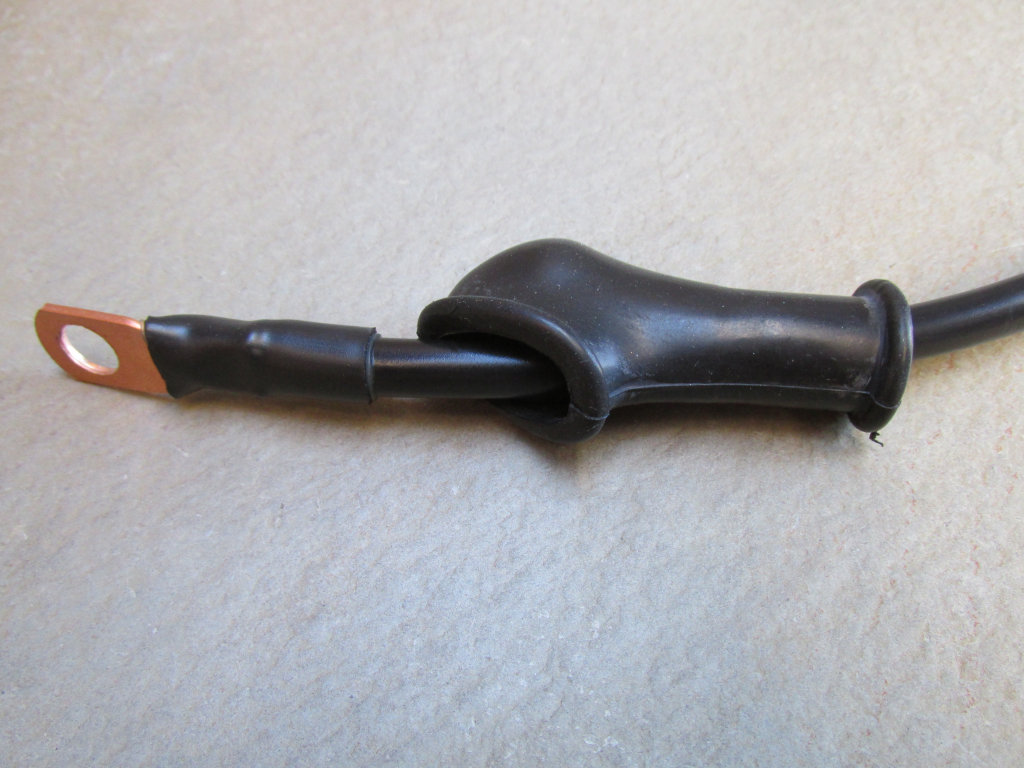
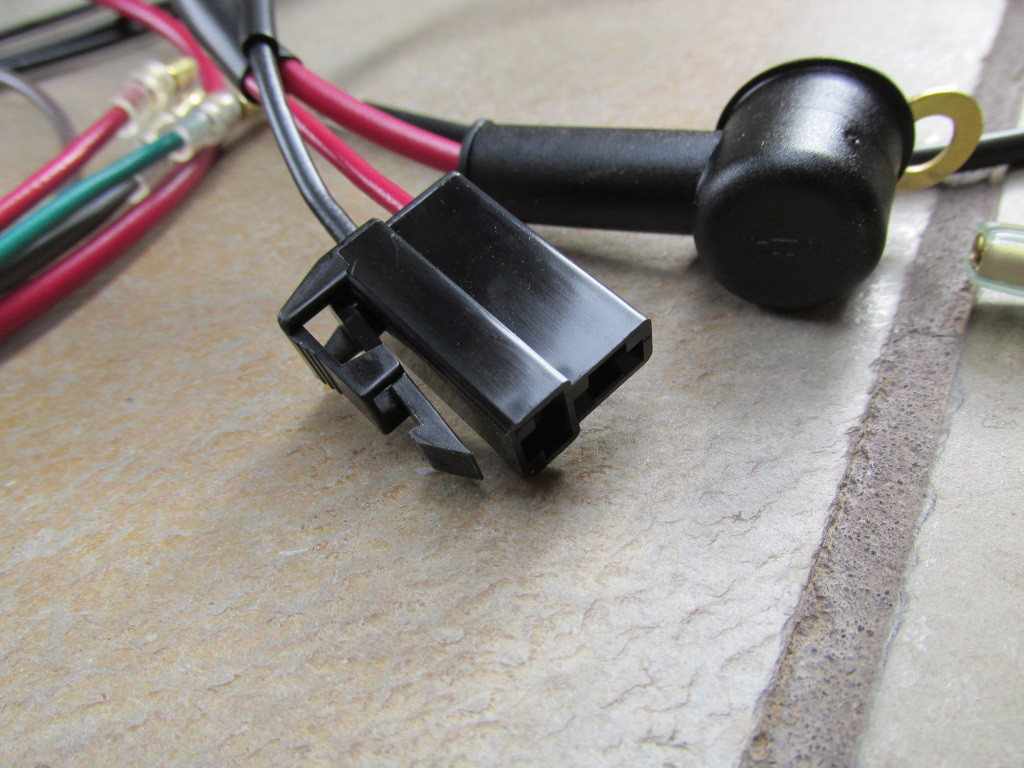
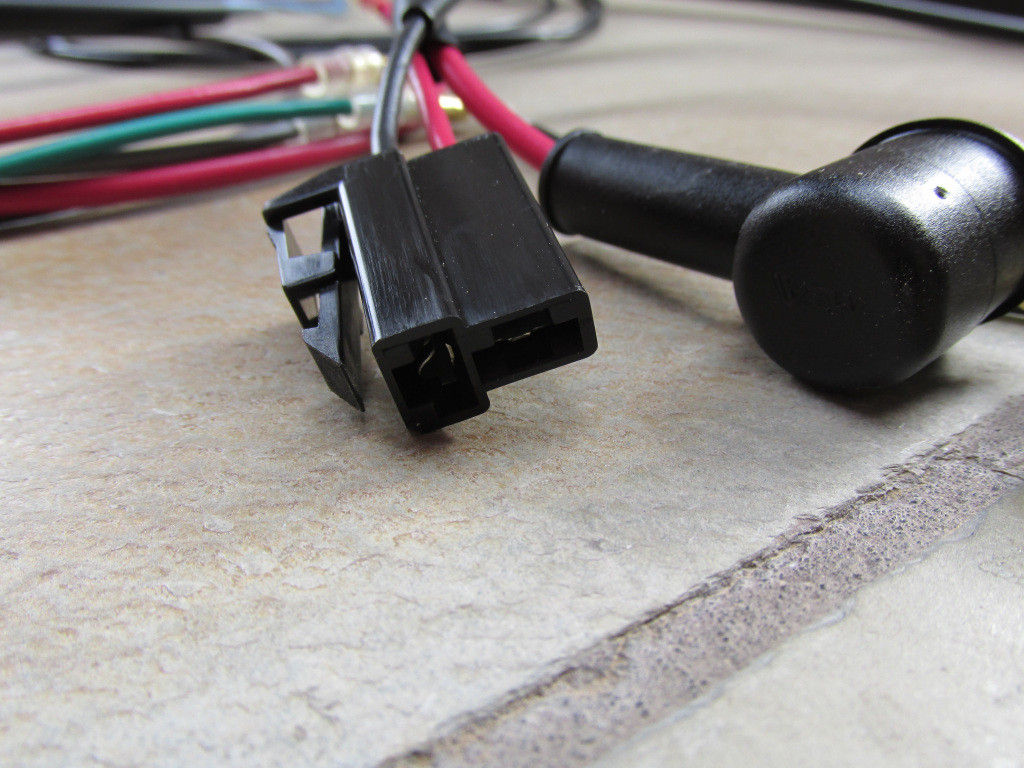
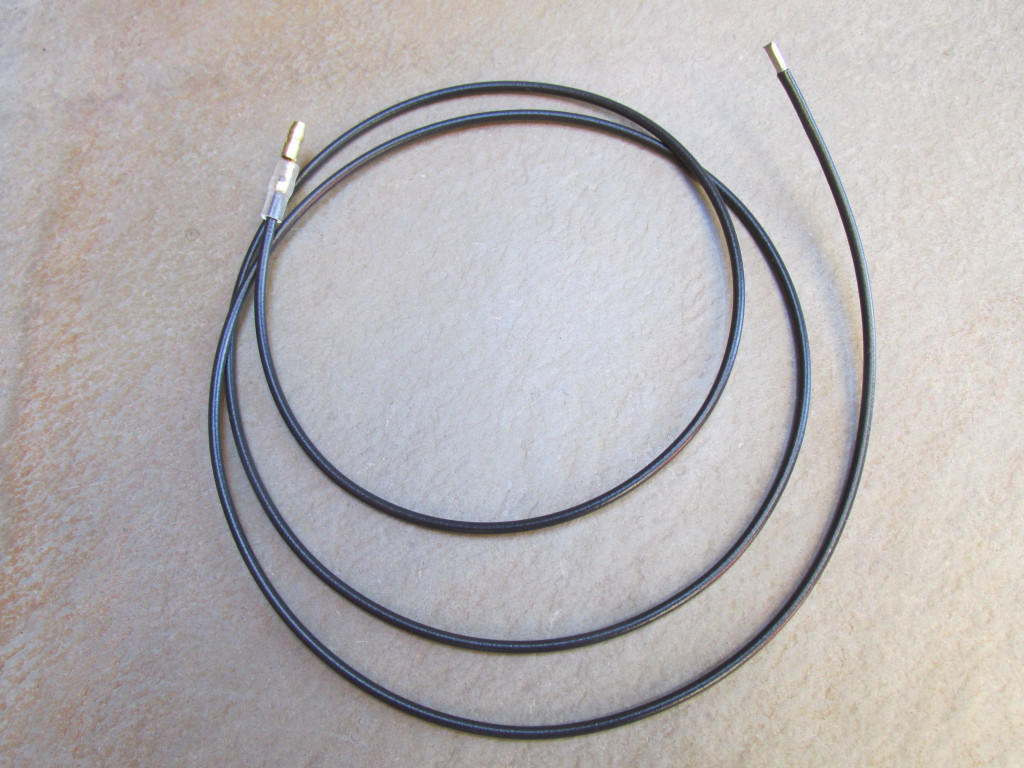
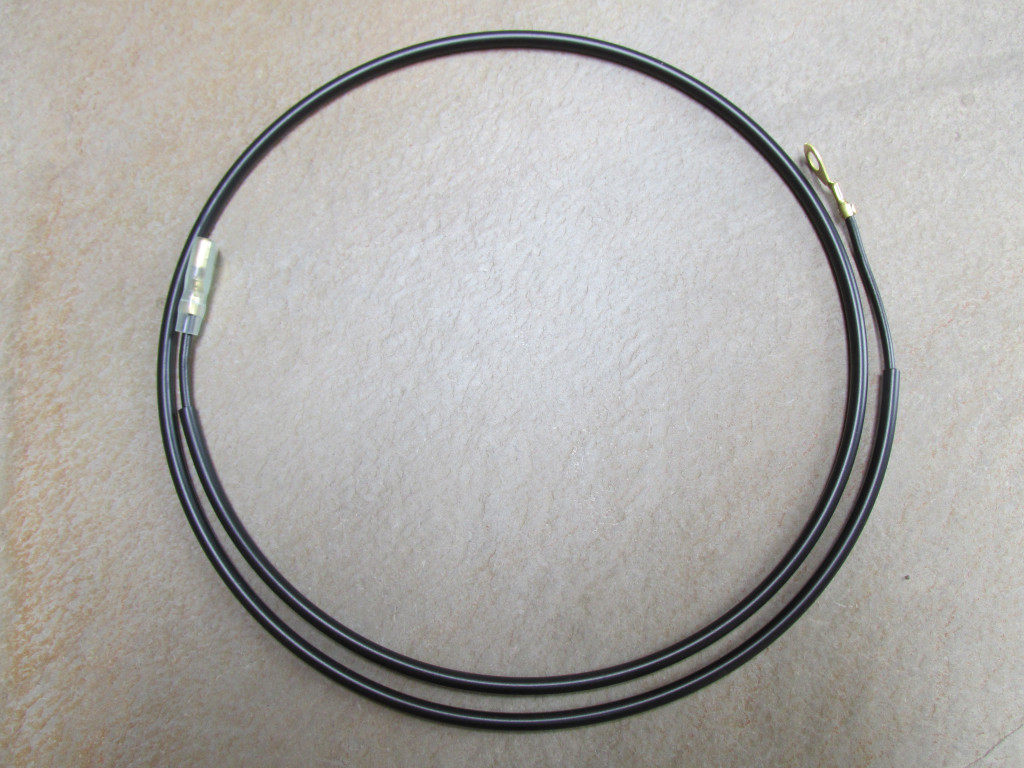
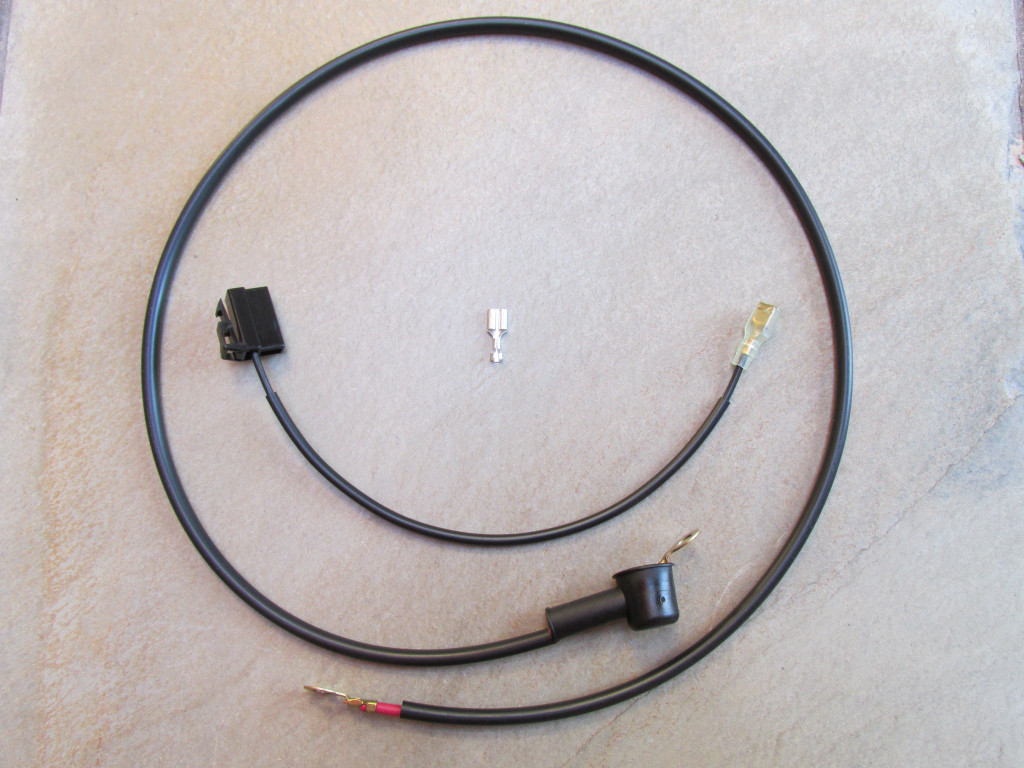
| MG# 12747900 |
Battery ground Originally, the terminal at the battery was a post style terminal. Since that style of terminal is very rare today with motorcycle batteries, I've chosen to fit a lug to accept a 6 mm bolt. Ground cable is 6 AWG and is 450 mm (~17 3⁄4 inch) in total length. If you require something different, please let me know. |
 |
USD $12.75 |
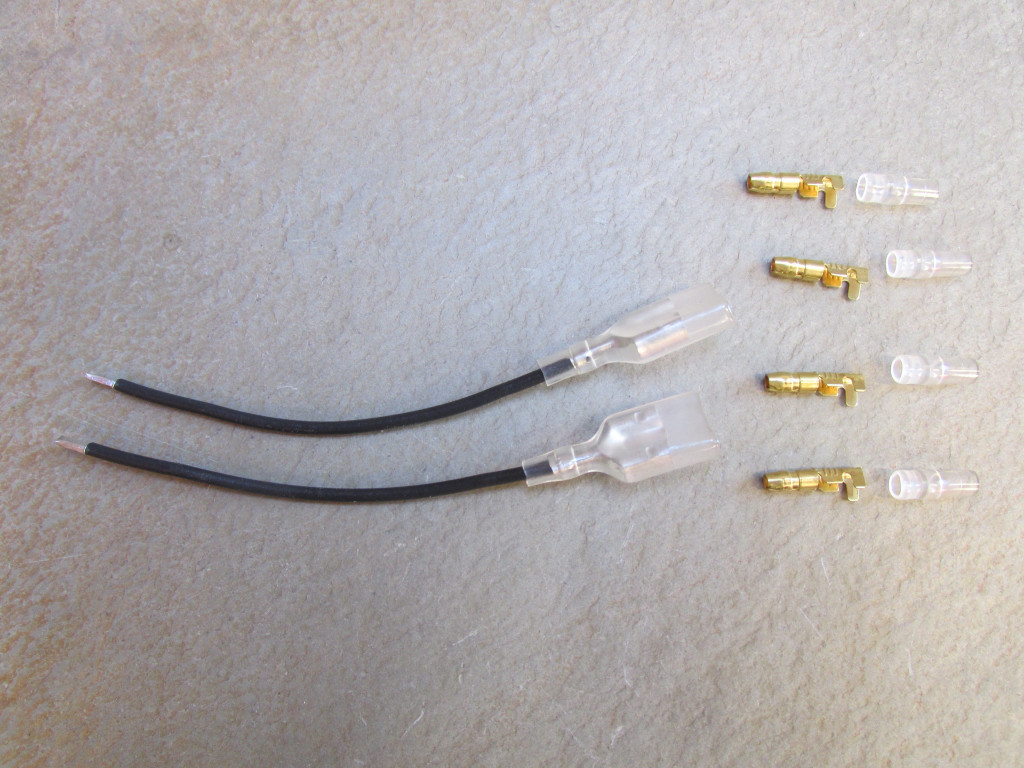
| MG# 12747420 |
Headlight plug Nice quality replacement headlight plug constructed using the correct wires and terminals. In contrast to the original, the back of the plug employs a cover to prevent accidental shorts. Plug securely 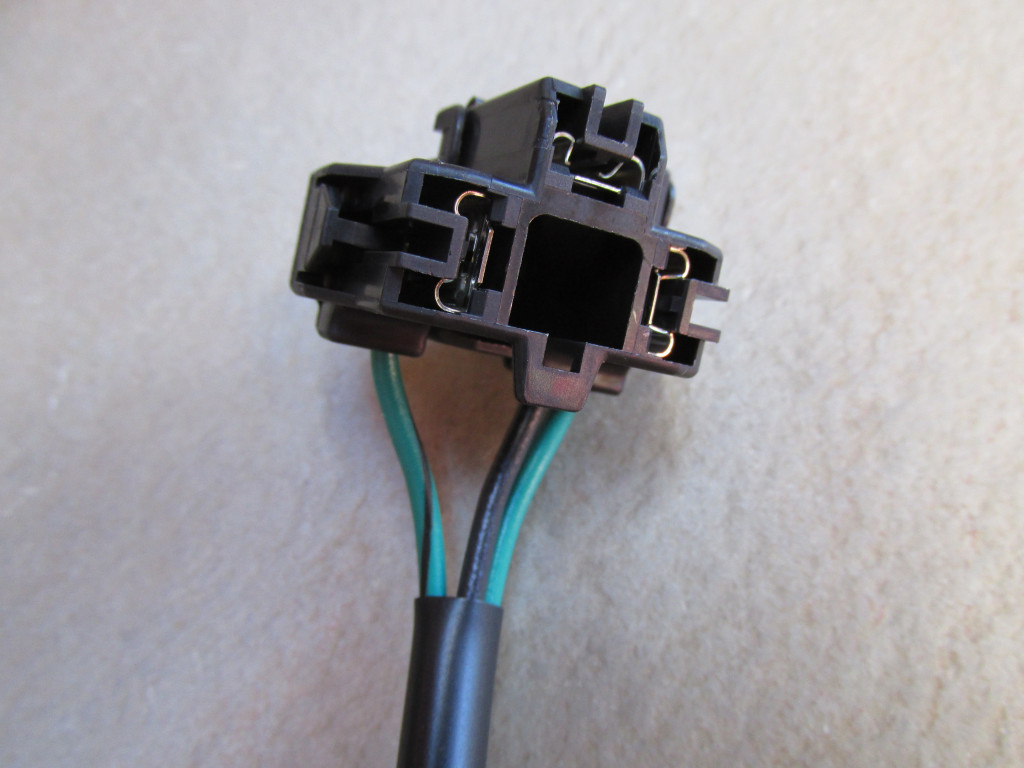 |
 |
USD $8.50 |
| CITY-LIGHT |
City light Wiring to connect the |
 |
USD $5.00 |
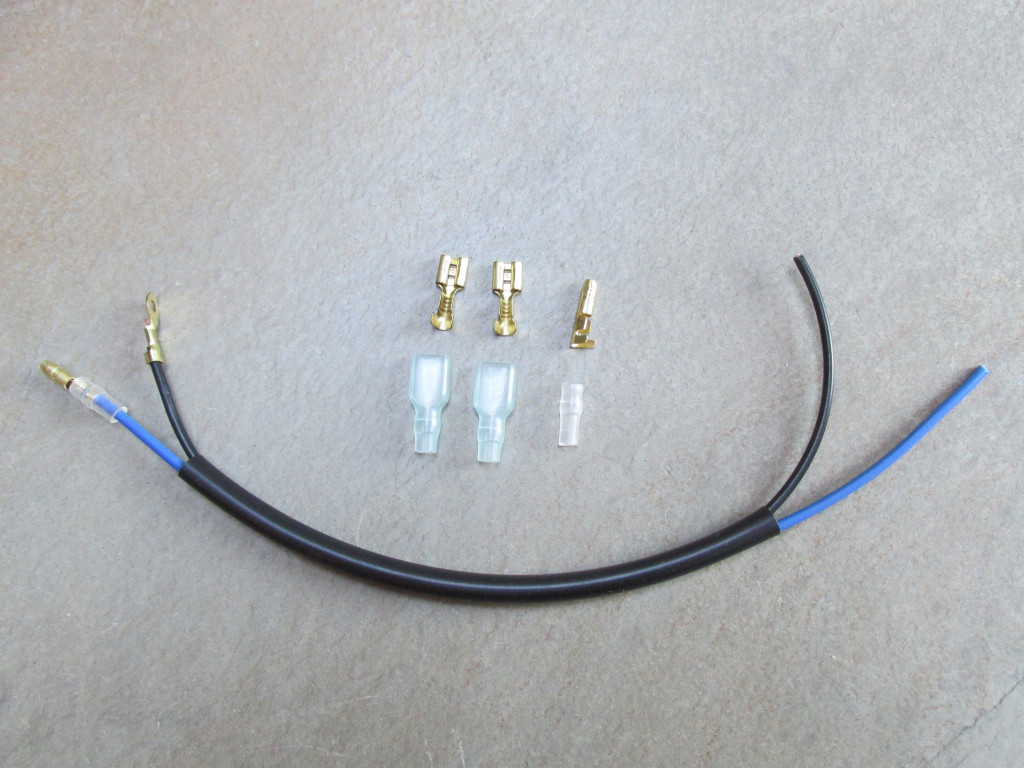
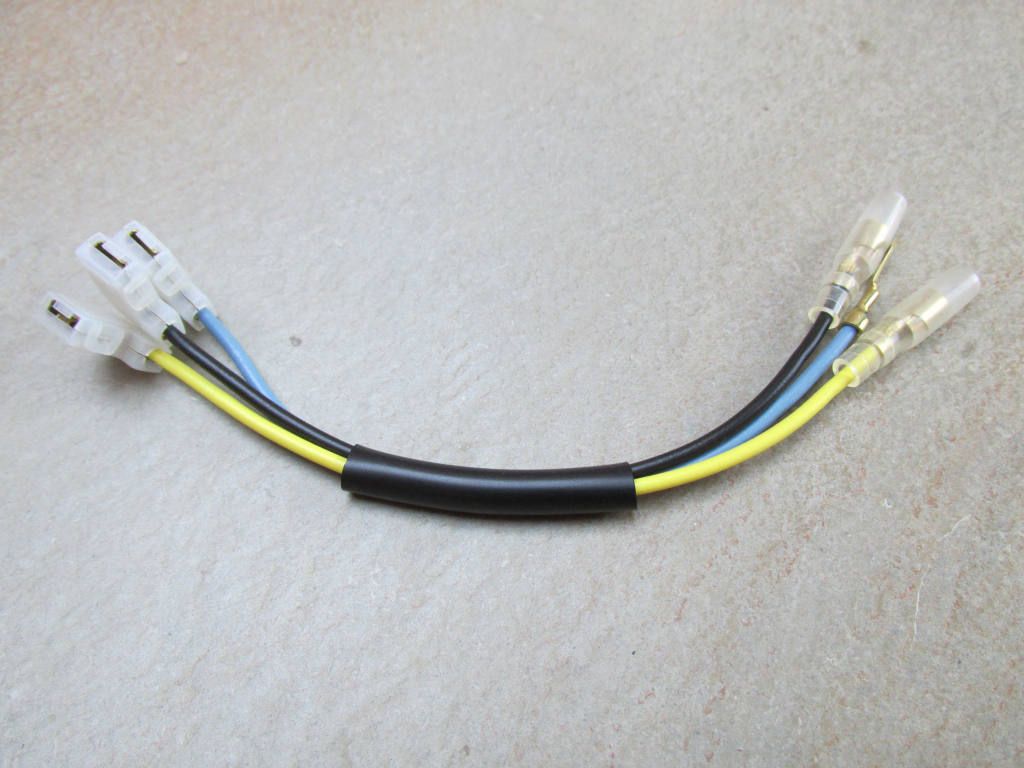
| TAIL-LIGHT |
Tail light harness applicable to several tail lights: MG# 10740900 MG# 12740900 MG# 12740920 MG# 14474900 A simple harness to replace the aging wires at your tail light. Includes longer springs to replace the originals. Once the wires are fit to the tail light, crimp the included female bullet terminals in place.  |
 |
USD $7.00 |
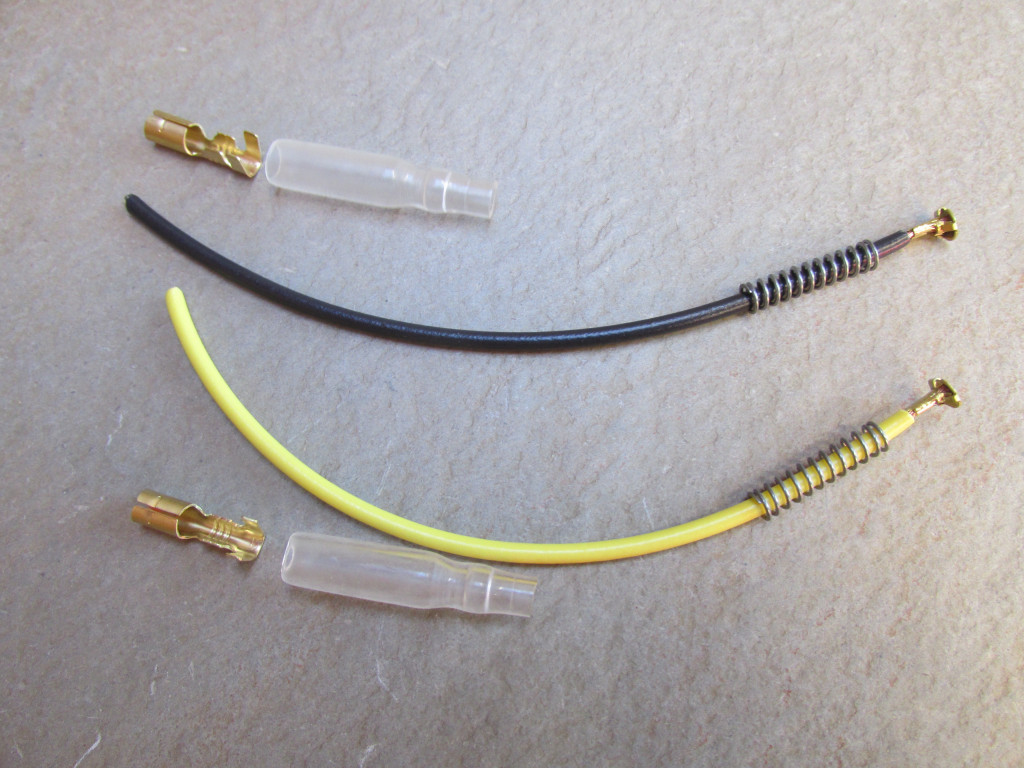
| MG# 14741724 |
Tail light harness applicable to several tail lights: MG# 14740920 MG# 17740900 Connects the main harness to the tail light.  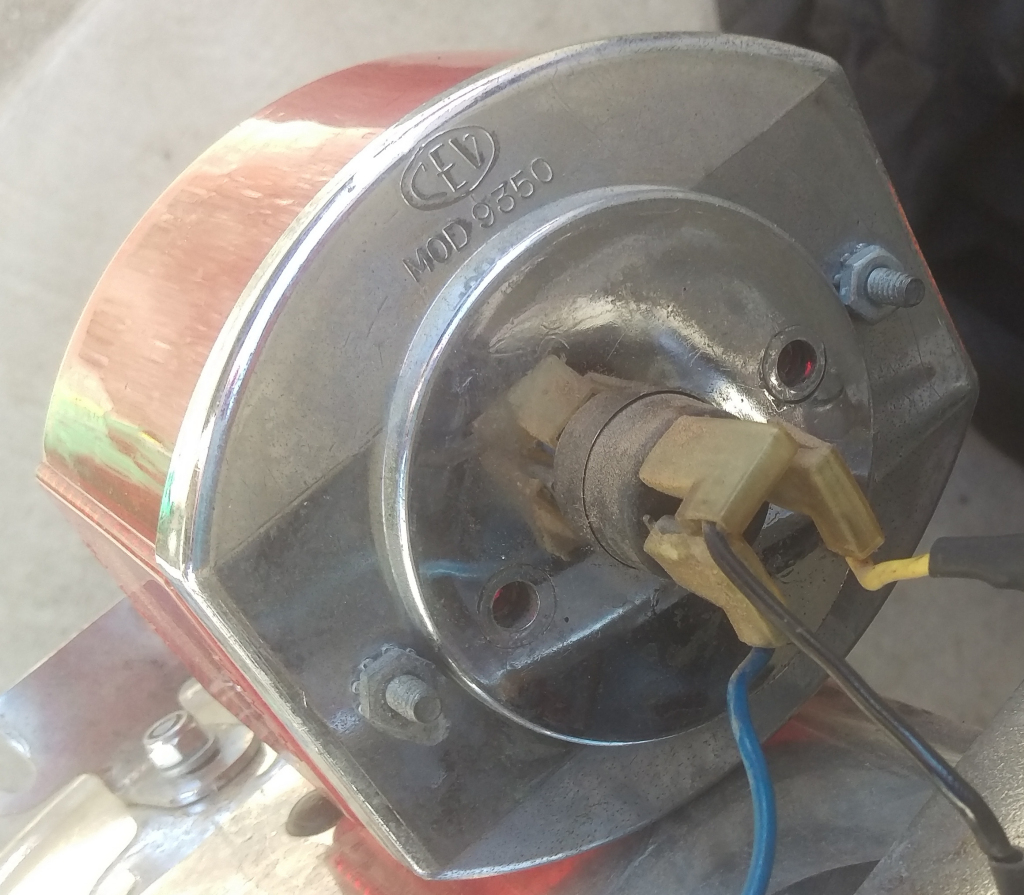 Photo courtesy of Chad Keller. |
 |
USD $5.50 |
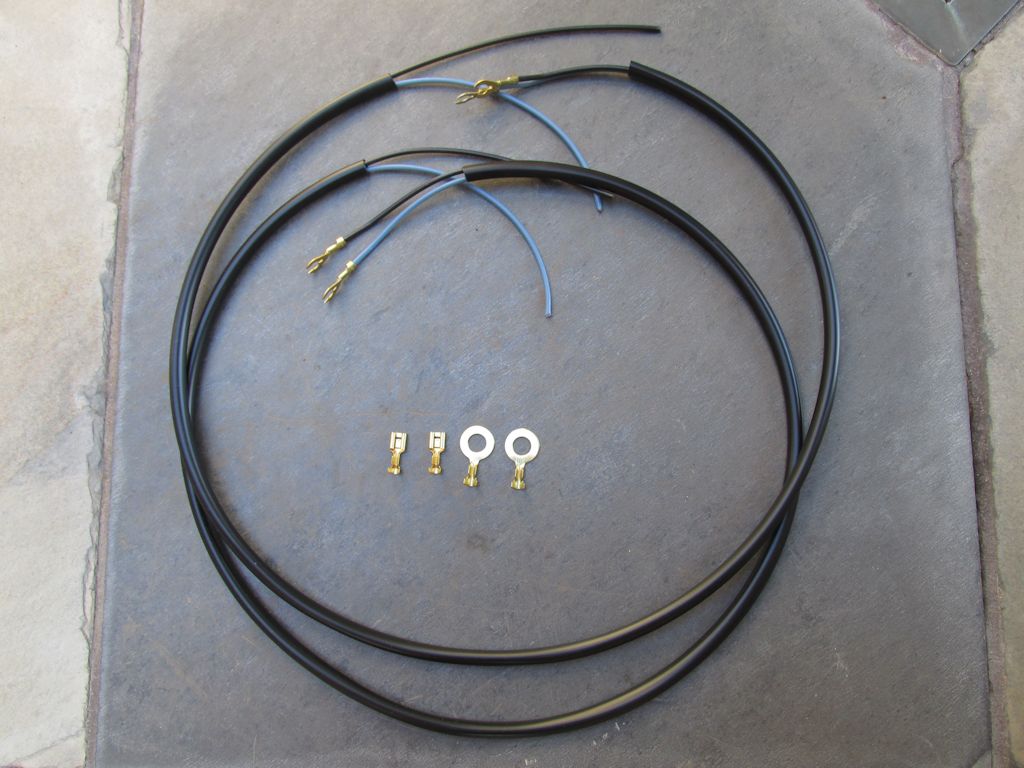
| MG# 12732605 MG# 12732705 |
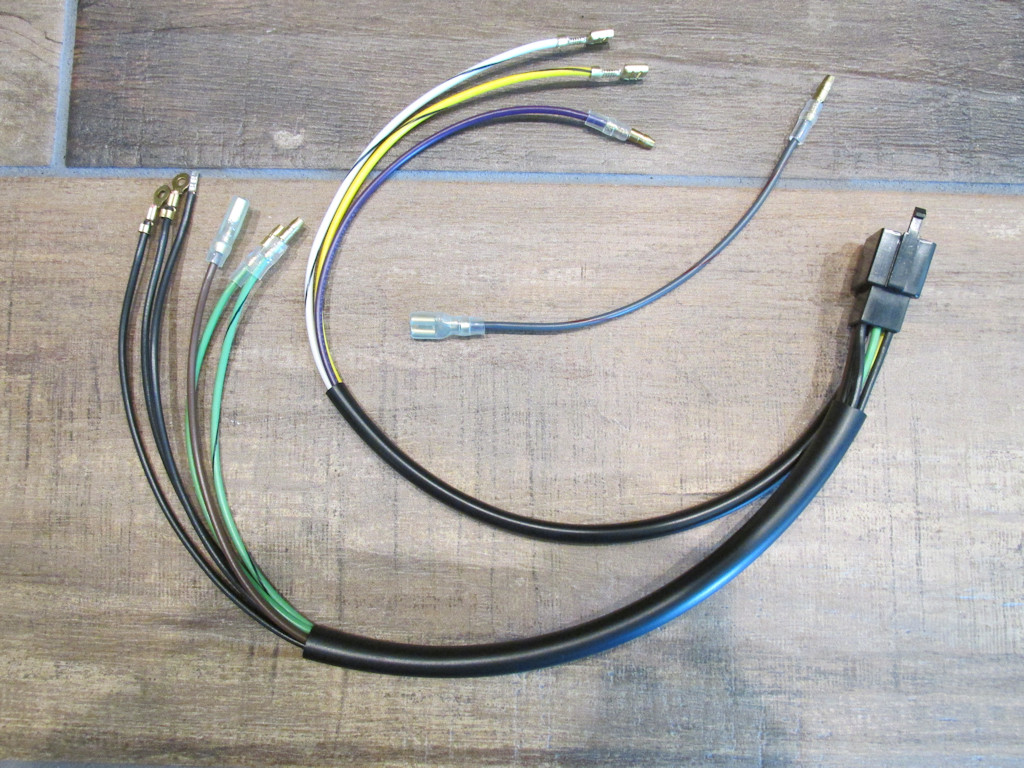
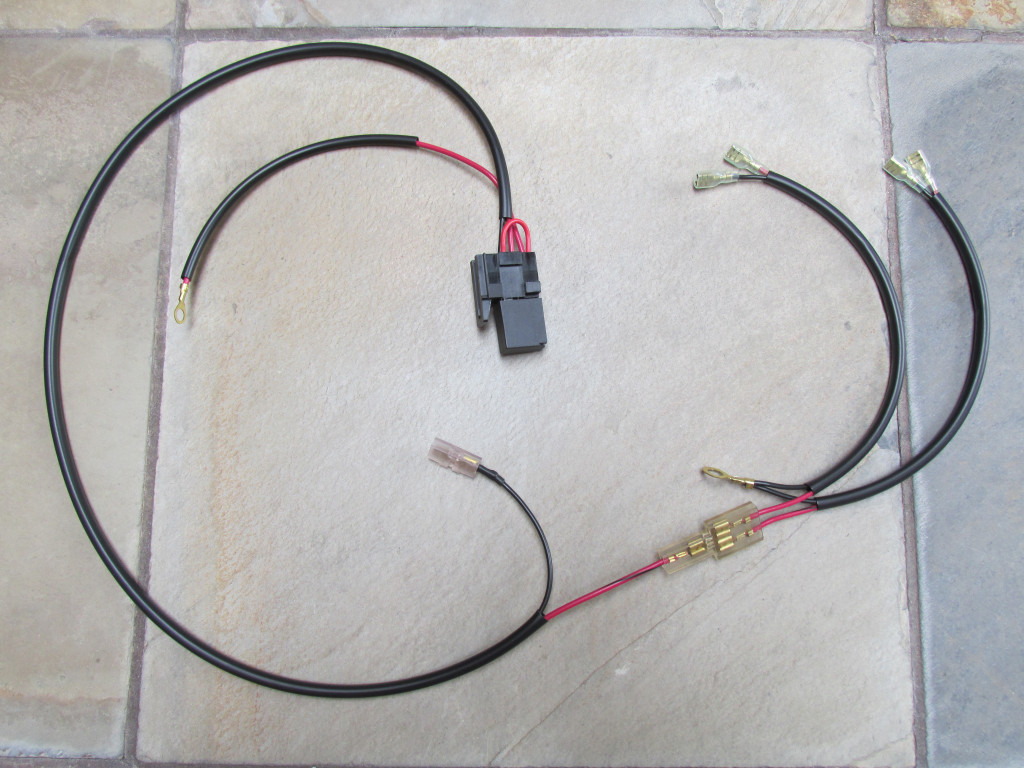
Wiring to connect the starter relay Wiring and terminals are specific to each charging system and starter. Connection to the neutral switch:I've chosen to use a 6 mm ring terminal instead of a 5 mm ring terminal on the black wire. Originally the neutral switch provided the ground for the starter relay, requiring the transmission to be in neutral for the motorcycle to be started. Since so many people permanently ground the starter relay using a 6 mm bolt on the transmission, I've decided to simply provide the 6 mm ring terminal. Should you desire the original 5 mm ring terminal, I will be happy to oblige. Magneti Marelli starter note:Early Magneti Marelli starters required a separate ground wire. The modern replacement solenoid also requires a separate ground wire. Given the inconsistent need for a ground wire, I've included one with all the Magneti Marelli sub-harnesses, just to be sure you have everything you need. Alternator note:With the original Magneti Marelli and Bosch charging systems, an unfused wire was run from the voltage regulator to the starter relay. Since the voltage regulator for the alternator is integrated into the altnerator itself, another means of providing power to the starter relay is required. This sub-harness includes a separate wire that connects the battery positive terminal to the starter relay. The length of this wire is 350 mm and a 6 mm ring terminal is provided for the connection to the battery. This should work for just about any battery / starter relay installation. When ordering:Specify your charging system:
Specify your starter:
|
 |
USD $12.50 |
 |
USD $12.50 |
||
 |
USD $12.50 |
||
 |
USD $12.50 |
||
 |
USD $12.50 |
||
 |
USD $12.50 |
||
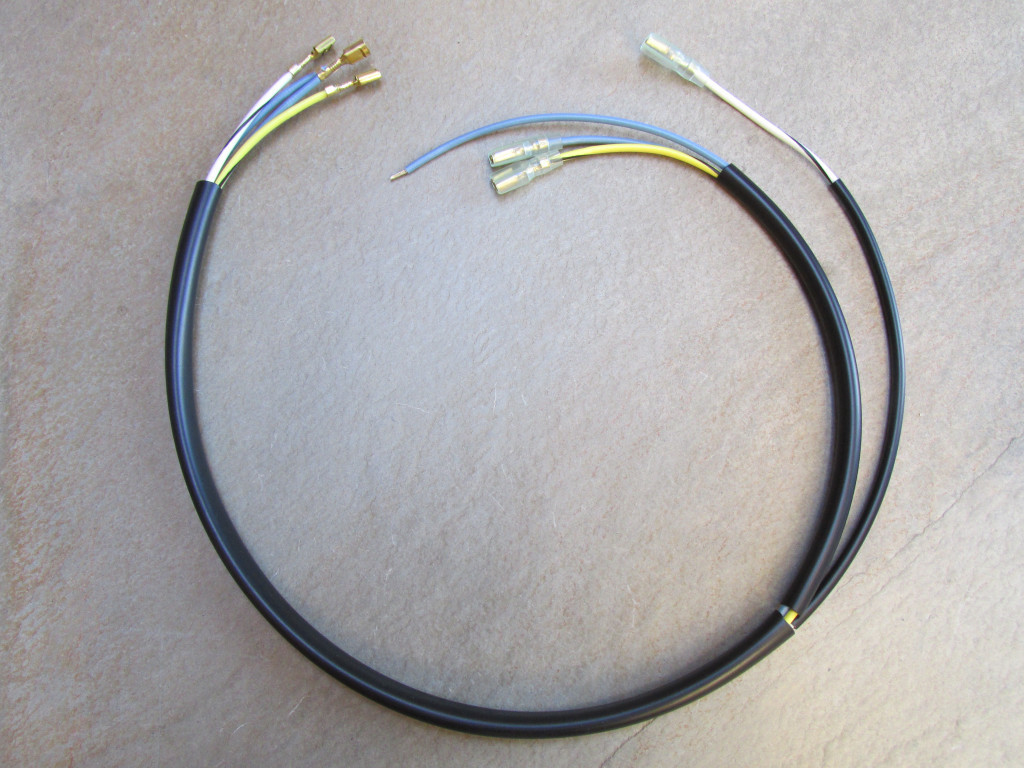
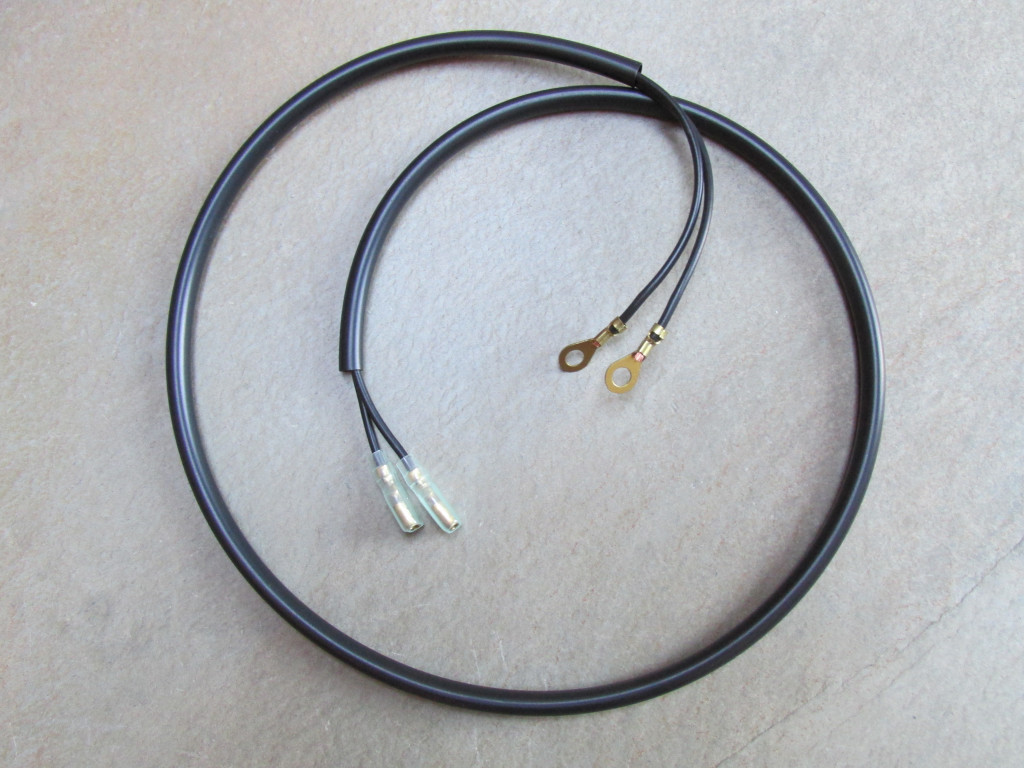
| MG# 12731000 |
Ground wire for some Magneti Marelli starter solenoids Already included with above harnesses for Magneti Marelli starters; sold here separately in case you need just this wire. |
 |
USD $2.50 |
Sub-harnesses used by All Civilian Models
| Part Number | Description | Photo | Price |
|---|---|---|---|
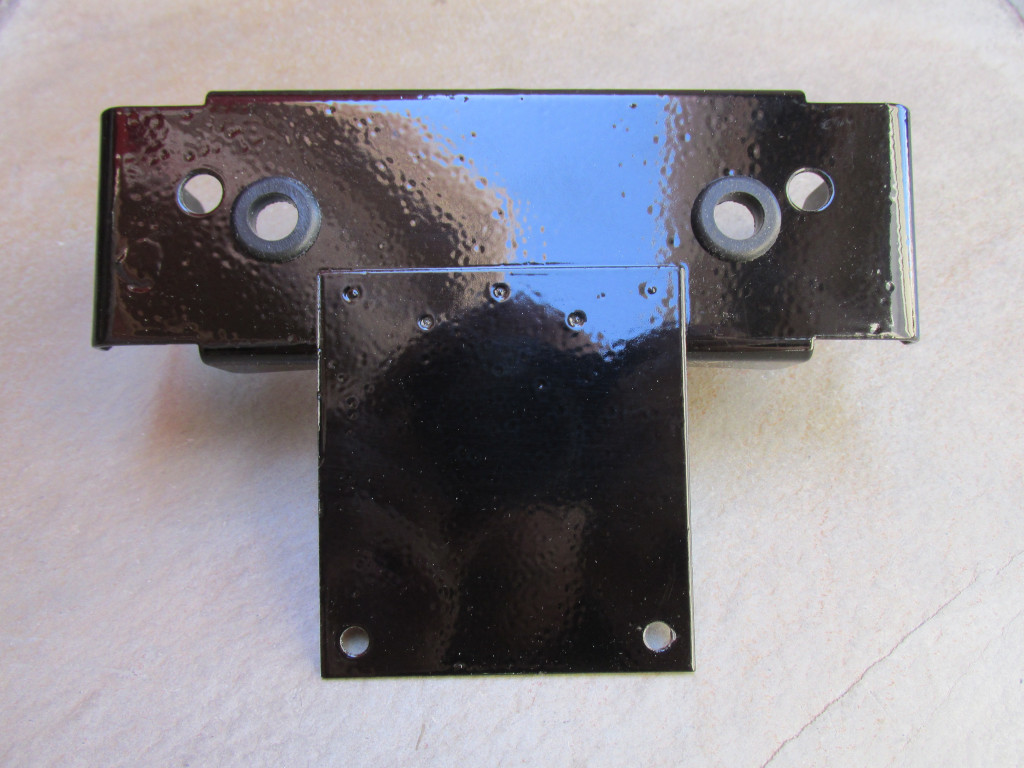
| MG# 12747200 |
Fuse box to dash |
 |
USD $14.75 |
Sub-harnesses used by All Police Models
| Part Number | Description | Photo | Price |
|---|---|---|---|
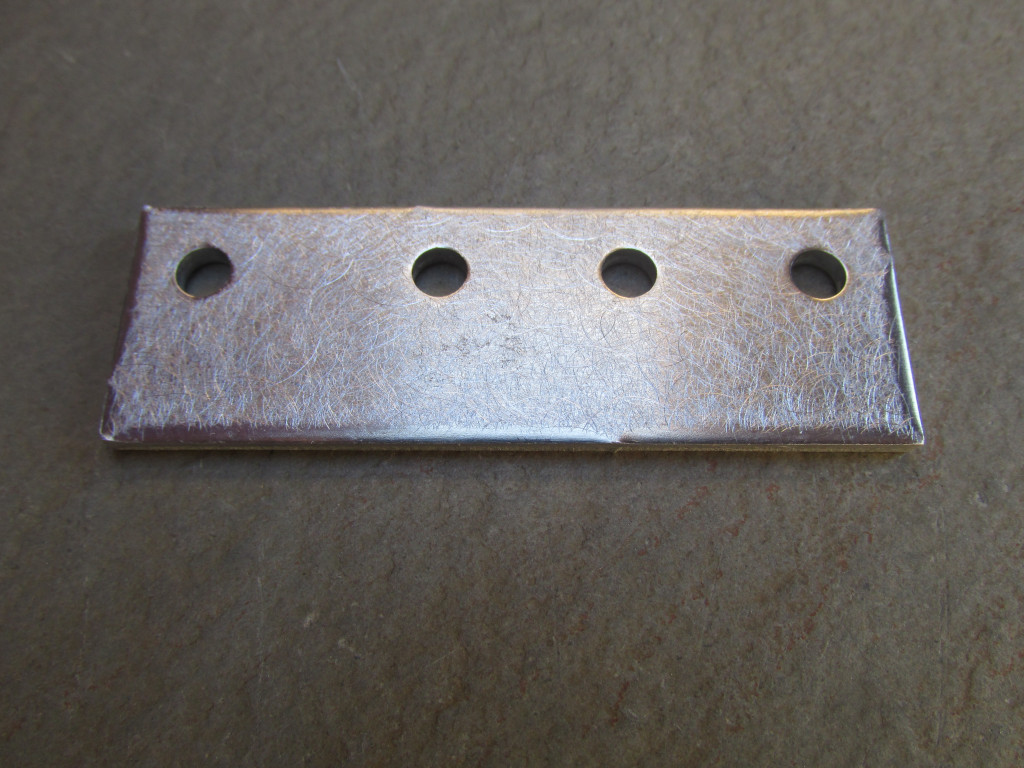
| MG# 13747241 |
Fuse box to dash |
 |
USD $9.00 |
| MG# 13761000 |
Indicator light interconnect Connects several of the lights on the dash. |
 |
USD $3.50 |
| MG# 13747641 |
Ignition switch (includes wires to rear turn signals) Correct green markers are used on the red wire, as original. |
 |
USD $33.50 |
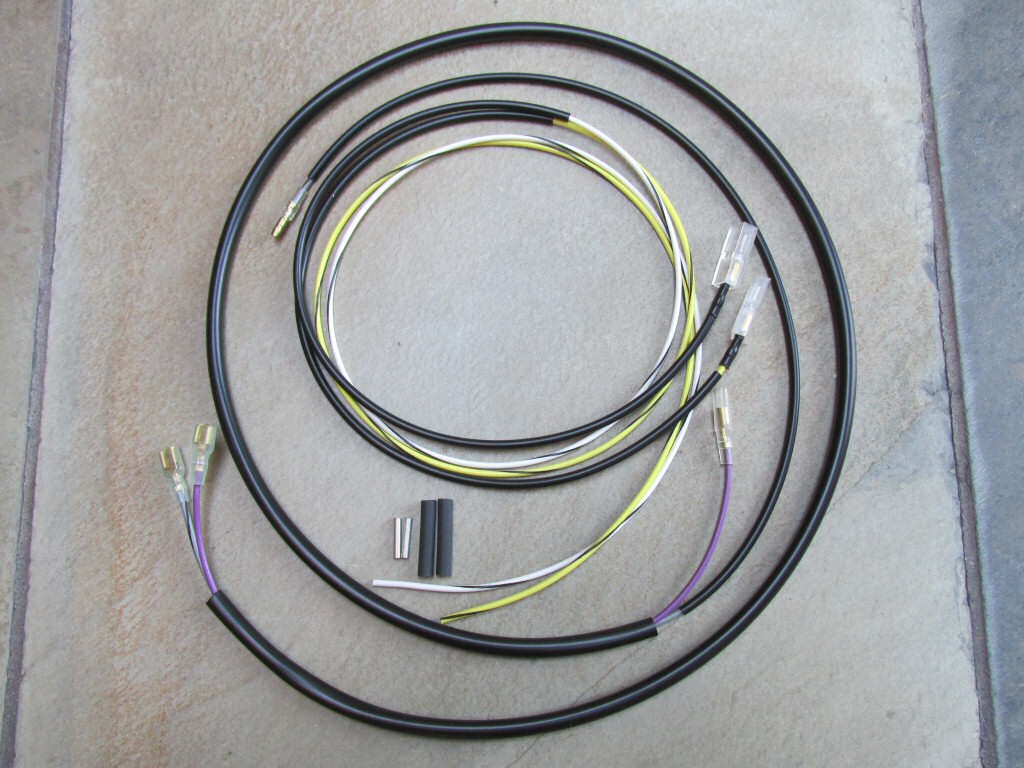
| MG# 13749441 |
Battery cable to the starter along with ancillary wires to voltage regulator and ignition switch Wiring and terminals are specific to each charging system. When ordering please specify Magneti Marelli or Bosch. Note: No need to purchase this sub-harness if you have an alternator installed...I've already neatly integrated these wires into the main wiring harness. |
 |
USD $27.00 |
 |
USD $27.00 |
||
| SH-POL-TS-TOGGLE |
Toggle switch to 3 connection female spade connectors Connects the toggle switch on the dash to the 3 connection female spade connectors. Supports turn signal and rear flashing (hazard) lights functionality |
 |
USD $8.50 |
| MG# 13748840 and MG# 13742540 |
Fuse box to left push-pull switch; includes MG# 13742540 The left push-pull switch is commonly used to to operate spot lights. Original style fuse holder included with 8 amp fuse. 8 amp is more than sufficient to operate two, 35 watt spot lights (most people fit 35 watt bulbs). Correct green marker is used on the white/black wire, as original. |
 |
USD $12.75 |
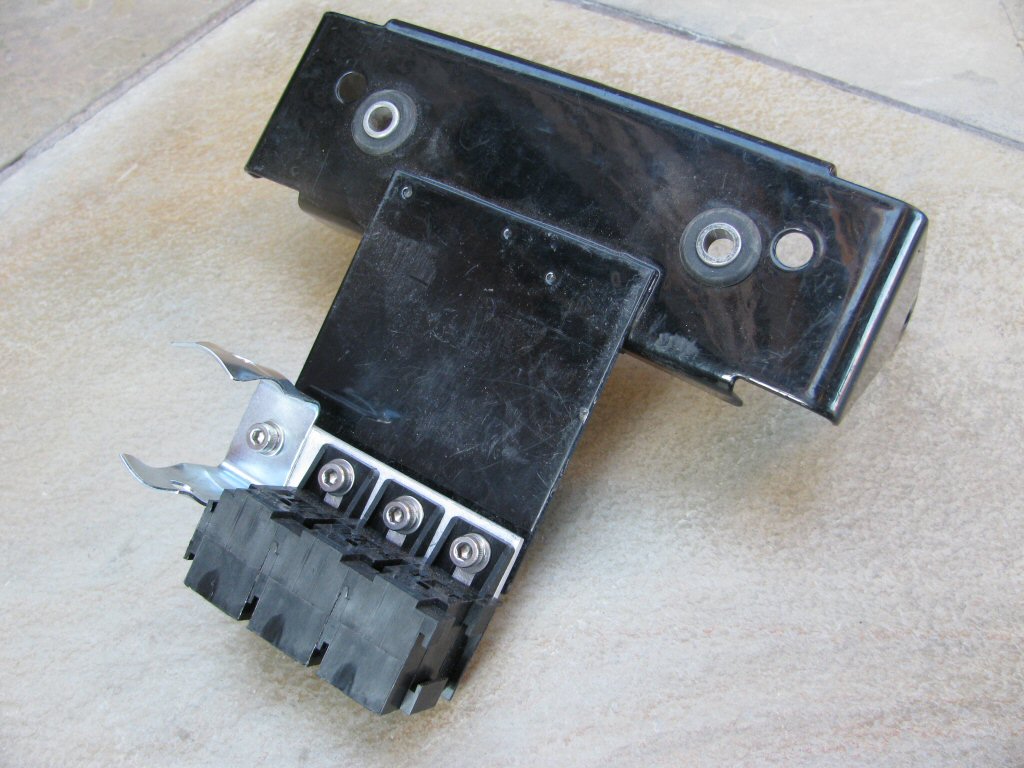
| MG# 13748140 |
Turn signals & spot lights This harness serves a couple of important functions:
|
 |
USD $12.25 |
| EXTEND-DIETZ-SPOT-LIGHTS |
Spot light extensions for Dietz spot lights Moto Guzzi never made a spot light. Instead, they provided brackets and wiring to support spot lights (or other front lights), but left it up to the individual police departments to fit their own spot lights. This harness provides color-matched wiring to connect Dietz spot lights to a 3 connection female spade connector located under the fuel tank. The 5 mm fork terminals connect to the terminals inside each spot light. Route the wires through the spot light body and under the tank. Cut the sheathing and wiring to your desired length. Crimp the female spade terminal to the blue wire (connect to the 3 connection female spade connector). Crimp the 8 mm ring terminal to the black wire (connect to the frame ground point under the tank). |
 |
USD $24.00 |
| EXTEND-SPOT-LIGHTS |
Spot light extensions Moto Guzzi never made a spot light. Instead, they provided brackets and wiring to support spot lights (or other front lights), but left it up to the individual police departments to fit their own spot lights. This harness provides color-matched pigtail extensions to connect |
 |
USD $9.75 |
| SH-POL-XTR-LHS |
Handlebar switch - early left extra Extra left hand switch used by some early Ambassador police models (later models combined this functionality with the right hand switch). Supports the use of the red front lights. Works with switch pictured below (not included). 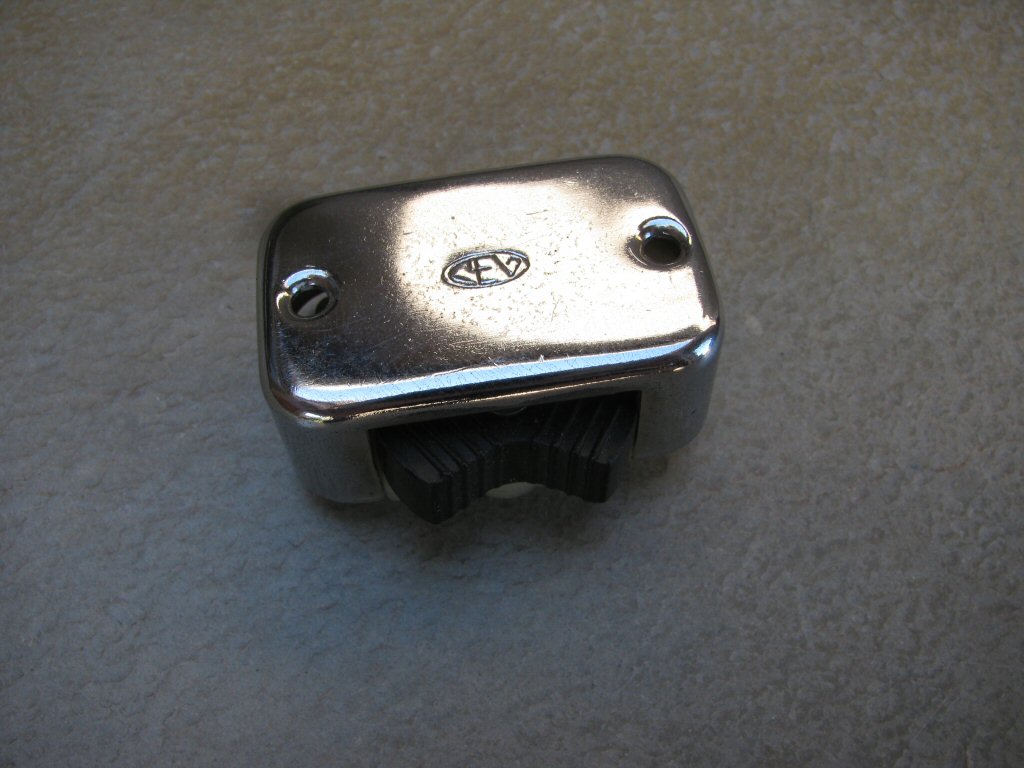 IMPORTANT NOTE: It is very easy to destroy original or aftermarket switches when using a conventional soldering iron. Even if you know exactly what you are doing and are very experienced with soldering procedures, the switches can very easily be rendered useless. Rather than using solder, I strongly recommend the following:
|
 |
USD $8.25 |
| SH-POL-EARLY-RHS |
Handlebar switch - early right Right hand switch used by some early Ambassador police models. NOTE: Since most people will not fit a working radio nor working front red and rear blue police lights, this is the perfect sub-harness to use for most Supports the use of the turn signals. Works with switch pictured below (not included).  IMPORTANT NOTE: It is very easy to destroy original or aftermarket switches when using a conventional soldering iron. Even if you know exactly what you are doing and are very experienced with soldering procedures, the switches can very easily be rendered useless. Rather than using solder, I strongly recommend the following:
|
 |
USD $12.50 |
| SH-POL-MID-RHS |
Handlebar switch - mid right Right hand switch used by some mid police models. Supports the use of the turn signals and front red lights. Includes butt crimps, heat shrink, and sheathing for connecting to the front turn signals. Works with switch pictured below (not included). 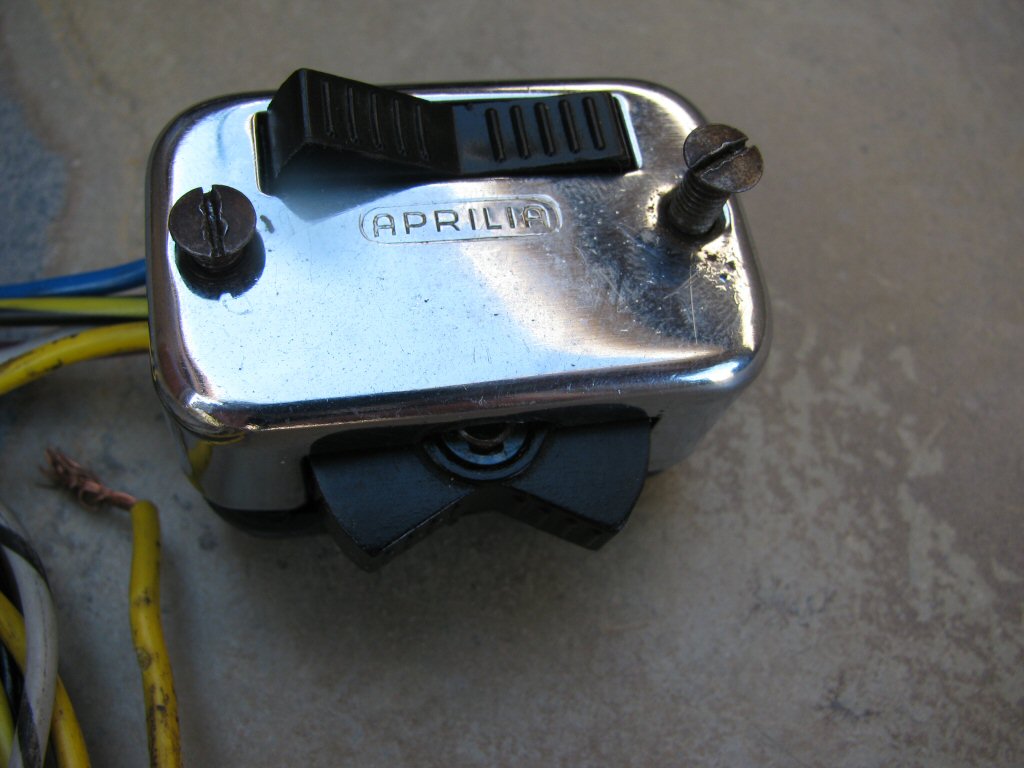 IMPORTANT NOTE: It is very easy to destroy original or aftermarket switches when using a conventional soldering iron. Even if you know exactly what you are doing and are very experienced with soldering procedures, the switches can very easily be rendered useless. Rather than using solder, I strongly recommend the following:
|
 |
USD $22.25 |
| MG# 13742242 |
Handlebar switch - late right Right hand switch used by most later police models. Supports the use of the turn signals, front red lights, and speaker operation. Includes butt crimps, heat shrink, and sheathing for connecting to the front turn signals. Works with switch pictured below (not included). 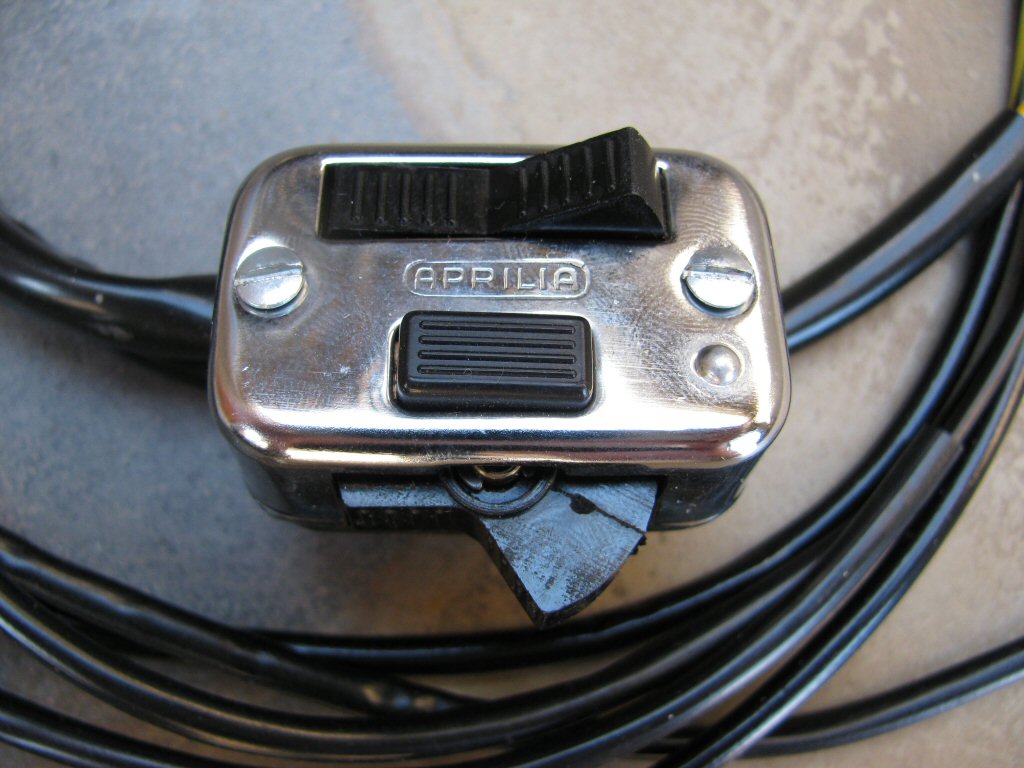 IMPORTANT NOTE: It is very easy to destroy original or aftermarket switches when using a conventional soldering iron. Even if you know exactly what you are doing and are very experienced with soldering procedures, the switches can very easily be rendered useless. Rather than using solder, I strongly recommend the following:
|
 |
USD $25.25 |
Sub-harnesses used by Models equipped with Dual Instrument Dashes
| Part Number | Description | Photo | Price |
|---|---|---|---|
| MG# 13761000 |
Indicator light interconnect (early) Three wire version used by early models equipped with dual gauge dashes. Use with MG# 13767700. |
|
USD $3.50 |
| MG# 13761001 |
Indicator light and tachometer positive terminal interconnect (late) Four wire version used by late models equipped with dual gauge dashes. Use with MG# 13767701. |
 |
USD $5.00 |
| MG# 13761100 |
Short pigtail for indicator light (neutral) |
 |
USD $2.00 |
| MG# 13761200 |
Short pigtail for indicator light (oil pressure) |
 |
USD $2.00 |
| MG# 13761300 |
Short pigtail for indicator light (generator) |
 |
USD $2.00 |
| MG# 13761400 |
Gauge/instrument illumination interconnect |
 |
USD $3.00 |
| MG# 13767300 |
Tachometer ground |
 |
USD $2.50 |
| MG# 13767700 |
Distributor to tachometer (early) Two wire version used by early models equipped with dual gauge dashes. Use with MG# 13761000. When ordering please specify your coil: Magneti Marelli or Bosch. Magneti Marelli coils accept 5 mm ring terminals. Bosch coils (and many modern aftermarket coils) accept female spade terminals. |
 |
USD $10.75 |
 |
USD $10.75 |
||
| MG# 13767701 |
Distributor to tachometer (late) One wire version used by late models equipped with dual gauge dashes. Use with MG# 13761001. Connects to the post on the distributor (post is shared with the wire from the condenser). |
 |
USD $5.75 |
Sub-harnesses used by All Models equipped with a Front Brake Light Switch
| Part Number | Description | Photo | Price |
|---|---|---|---|
| MG# 13748920 |
Front brake light switch Connects the front brake light switch to the rear brake light switch. Originally, Moto Guzzi used lamp cord. Instead, I prefer individual wires and sheathing for a higher quality final product. Note: Access to the rear brake light switch is very limited. I recommend using my additional sub-harness to greatly ease installation of wiring on the rear brake light switch. |
 |
USD $15.00 |
Sub-harnesses used by All Civilian Models equipped with Turn Signals
| Part Number | Description | Photo | Price |
|---|---|---|---|
| MG# 12750300 |
Right handlebar switch Ready to solder to your switch. Works with switch pictured below (not included). When ordering: Please specify civilian or police handlebars. IMPORTANT NOTE: It is very easy to destroy original or aftermarket switches when using a conventional soldering iron. Even if you know exactly what you are doing and are very experienced with soldering procedures, the switches can very easily be rendered useless. Rather than using solder, I strongly recommend the following:
|
 |
USD $9.75 |
| MG# 12748600 |
Turn signals Insulated female bullet terminals are included for the rear turn signal pigtails. The Moto Guzzi workshop manuals clearly indicate the use of a yellow/black wire for the left turn signal circuit and a yellow wire for the right turn signal circuit. However, every civilian turn signal harness I've inspected has not used this color combination. Instead, the harness for the right handlebar switch uses a yellow wire with a gray spiral tracer for the left turn signal circuit and a white wire with a gray spiral tracer for the right turn signal circuit. Furthermore, the turn signal harness uses a yellow wire with a black spiral tracer for the left turn signal circuit and a white wire with a black spiral tracer for the right turn signal circuit. I have chosen to use a yellow wire with a black spiral tracer and a white wire with a black spiral tracer throughout both the right handlebar switch harness and the turn signal harnesses. |
 |
USD $25.25 |
Sub-harnesses used by All Models equipped with Turn Signals (Civilian & Police)
| Part Number | Description | Photo | Price |
|---|---|---|---|
| EXTEND-FRONT-TURN-SIGNALS |
Front turn signal extensions Originally, the front turn signals had sufficiently long pigtails which precluded the need for a separate sub-harness. If your front turn signals still have those long pigtails, you are fortunate. For the rest of us, I've included color-matched pigtail extensions, complete with butt crimps, heat shrink, and sheathing. Fits many turn signals (e.g., MG# 12750605); includes sheathing (MG# 12750705) |
 |
USD $9.75 |
| EXTEND-REAR-TURN-SIGNALS |
Rear turn signal extensions Originally, the rear turn signals had sufficiently long pigtails which precluded the need for a separate sub-harness. If your rear turn signals still have those long pigtails, you are fortunate. For the rest of us, I've included color-matched pigtail extensions, complete with butt crimps, heat shrink, and sheathing. Fits many turn signals (e.g., MG# 12750605); includes sheathing (MG# 12750805) |
 |
USD $6.50 |
Handlebar switches and throttles
| Part Number | Description | Photo | Price |
|---|---|---|---|
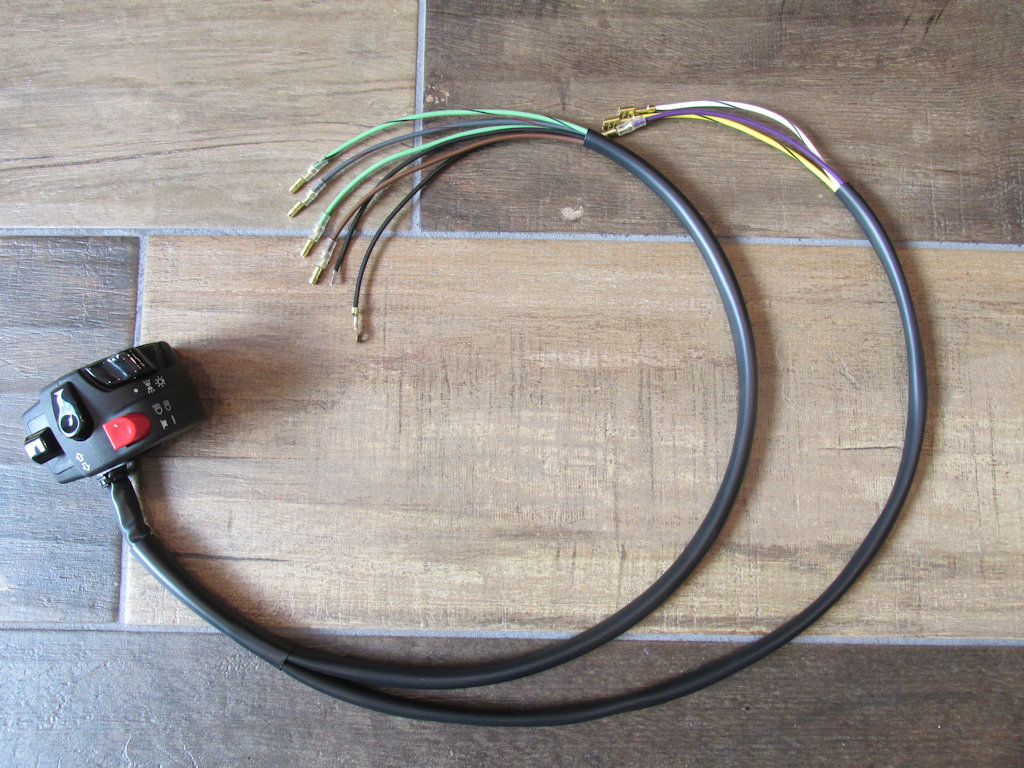
| SWITCH-LOOP |
Multifunction handlebar switch pre-wired for Moto Guzzi V700, V7 Special, Ambassador, 850 GT, 850 GT California, Eldorado, and 850 California Police After 10 years of building Moto Guzzi harnesses and supporting my customers, I have learned that people experience the most frustration and challenges when attempting to wire the left handlebar switch (by far). To help alleviate these issues, I am now offering this brand new switch with period appearance. The switch features a metal body and fits 22 mm (7⁄8 inch) handlebars. It is pre-wired so that you can mount it on your handlebar and plug in the wires quickly and easily. I chose this switch because of its functionality, size, and appearance. It is a good basic switch that is appropriate to the loop frames. While it does not boast all of the features and functions of a modern switch, it is much better than the original style CEV switches. I use a switch like this on my personal Ambassador and I find it easy to use and my thumb operates all of the controls with ease. As with all handlebar switches, I strongly recommend the use of relays for the headlight circuit. I have an excellent relay solution available for purchase.
   |
 |
USD $85.00 |
| 0060AA.9A.04-04-GUZZI-READY |
Domino left handlebar switch - Moto Guzzi ready! Ready to connect directly to your Moto Guzzi without any modifications needed to the original wiring harness. Made to whatever length your model requires. Price includes switch and modification. Excellent quality modern style left handlebar switch providing standard expected functionality that falls easily to hand. Pairs very nicely with the ">Domino right handlebar switch. Genuine Domino brand. Made in Italy. Sold each. Specifications:
I chose to sell this switch because of its outstanding quality, functionality, size, and appearance (this is not a cheaply made product). I use this switch on my personal V1000 I-Convert and V1000 G5 and I find it easy to use and my thumb operates all of the controls with ease. As with all handlebar switches, I strongly recommend the use of relays for the headlight and horn circuits. I have an excellent relay solution available for purchase.      |
 |
USD $155.00 |
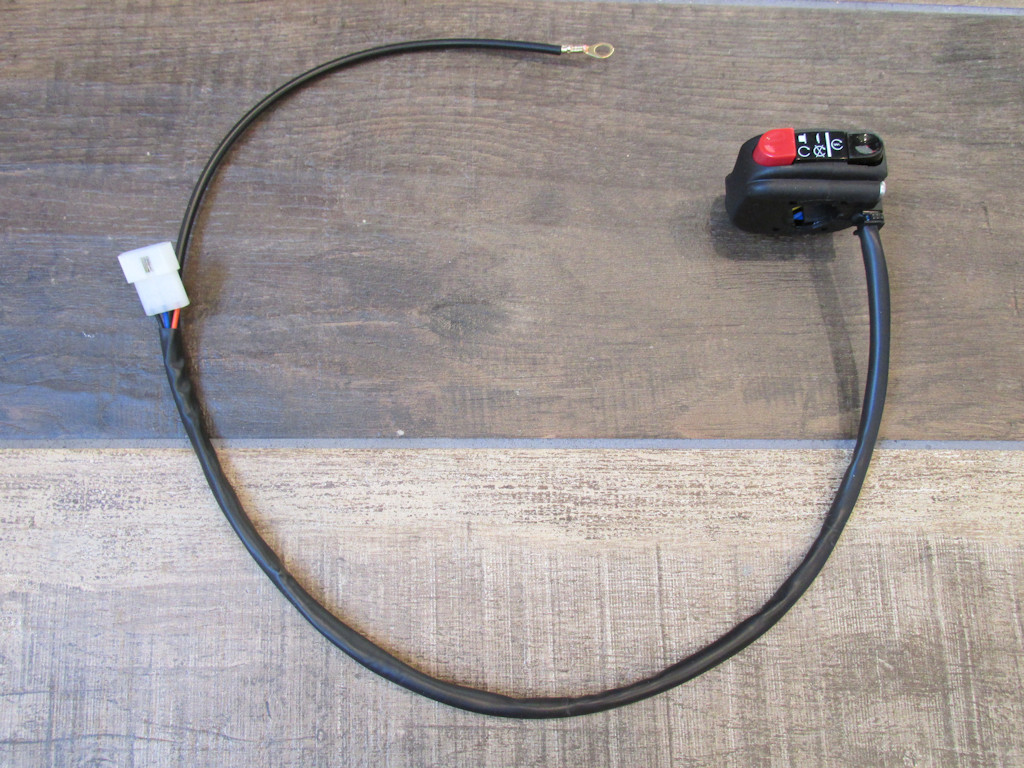
| 0351AB.9A.04-00-GUZZI-READY |
Domino right handlebar switch - Moto Guzzi ready! Ready to connect directly to your Moto Guzzi without any modifications needed to the original wiring harness. Made to whatever length your model requires. Price includes switch and modification. Ground wire extends to connect to the 6 mm bolt that secures the front brake light splitter to the lower triple tree. Excellent quality modern style right handlebar switch providing standard expected functionality that falls easily to hand. Pairs very nicely with the ">Domino left handlebar switch. Genuine Domino brand. Made in Italy. Sold each. Specifications:
I chose to sell this switch because of its outstanding quality, functionality, size, and appearance (this is not a cheaply made product). I use this switch on my personal V1000 I-Convert and V1000 G5 and I find it easy to use and my thumb operates all of the controls with ease. As with all handlebar switches, I strongly recommend the use of relays for the starter and coil circuits. I have an excellent relay solution available for purchase.     |
 |
USD $62.00 |
| MG# 14603450 |
Tommaselli Daytona 2C Throttle - Black body Excellent quality dual-cable throttle that can be fit to many different Moto Guzzi, Ducati, Benelli, Laverda, and other motorcycles. Includes both handlebar grips and cable boot. Made in Italy. Sold each. Also referenced as MG# 17603400. Specifications:
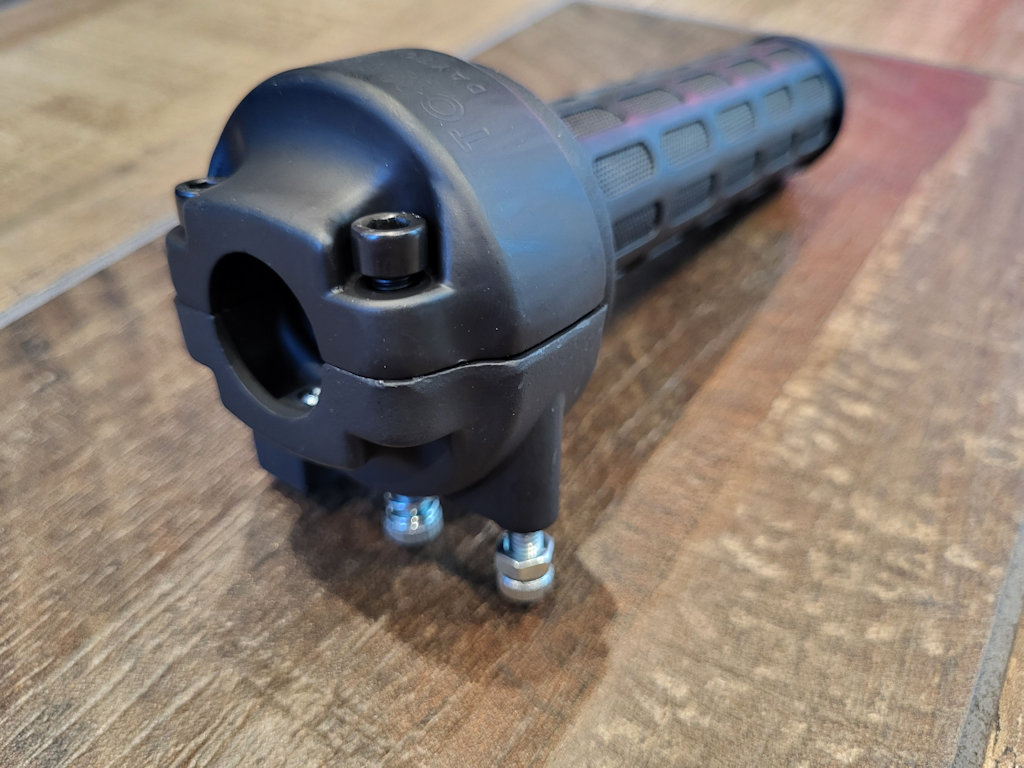       |
 |
USD $79.95 |
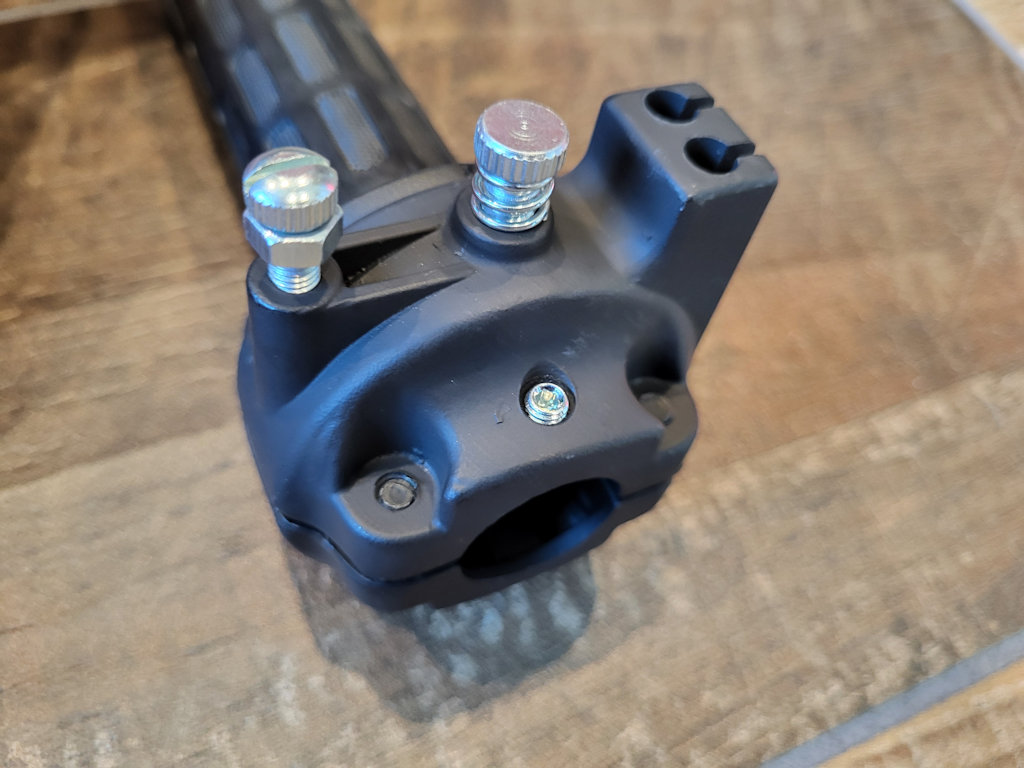
| MG# 17603401 |
Tommaselli Daytona 2C Throttle - Chrome body Excellent quality dual-cable throttle that can be fit to many different Moto Guzzi, Ducati, Benelli, Laverda, and other motorcycles. Includes both handlebar grips and cable boot. Made in Italy. Sold each. Also referenced as MG# 17603400. Specifications:
       |
 |
USD $86.00 |
| 0060AA.9A.04-04 |
Domino left handlebar switch Excellent quality modern style left handlebar switch providing standard expected functionality that falls easily to hand. Pairs very nicely with the Domino right handlebar switch. Genuine Domino brand. Made in Italy. Sold each. Specifications:
I chose to sell this switch because of its outstanding quality, functionality, size, and appearance (this is not a cheaply made product). I use this switch on my personal V1000 I-Convert and V1000 G5 and I find it easy to use and my thumb operates all of the controls with ease. As with all handlebar switches, I strongly recommend the use of relays for the headlight and horn circuits. I have an excellent relay solution available for purchase.   |
 |
USD $75.00 |
| 0351AB.9A.04-00 |
Domino right handlebar switch Excellent quality modern style right handlebar switch providing standard expected functionality that falls easily to hand. Pairs very nicely with the Domino left handlebar switch. Genuine Domino brand. Made in Italy. Sold each. Specifications:
I chose to sell this switch because of its outstanding quality, functionality, size, and appearance (this is not a cheaply made product). I use this switch on my personal V1000 I-Convert and V1000 G5 and I find it easy to use and my thumb operates all of the controls with ease. As with all handlebar switches, I strongly recommend the use of relays for the starter and coil circuits. I have an excellent relay solution available for purchase.  |
 |
USD $42.00 |
Custom sub-harnesses to support aftermarket handlebar switches
| Part Number | Description | Photo | Price |
|---|---|---|---|
| KS12-0030 |
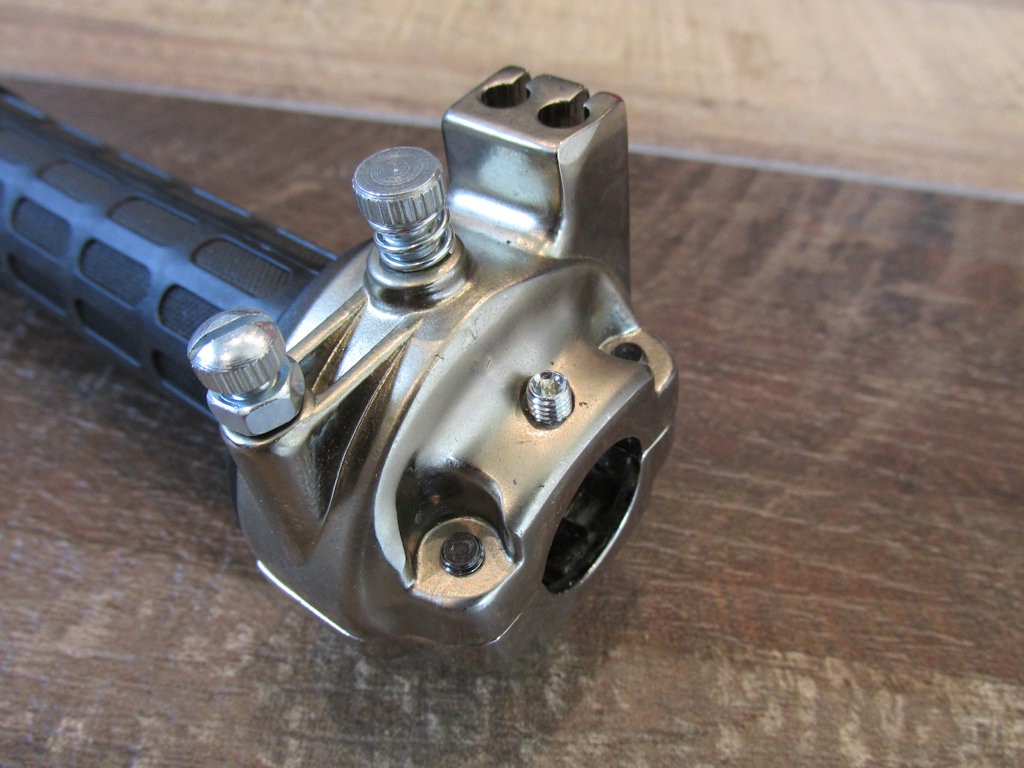
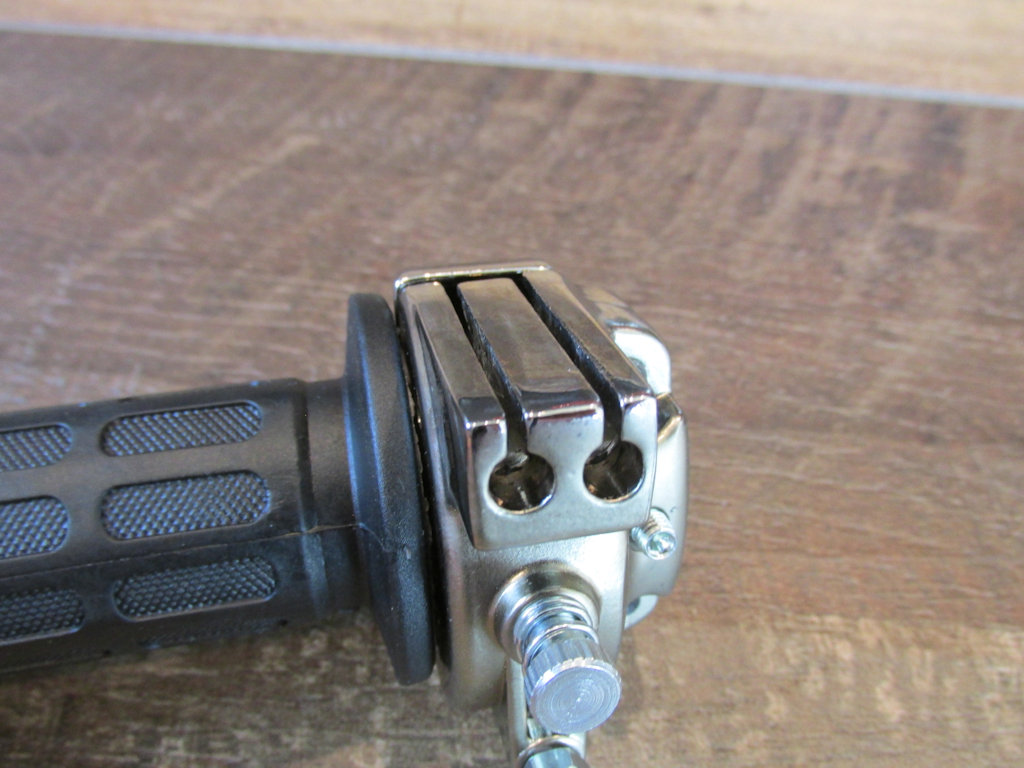
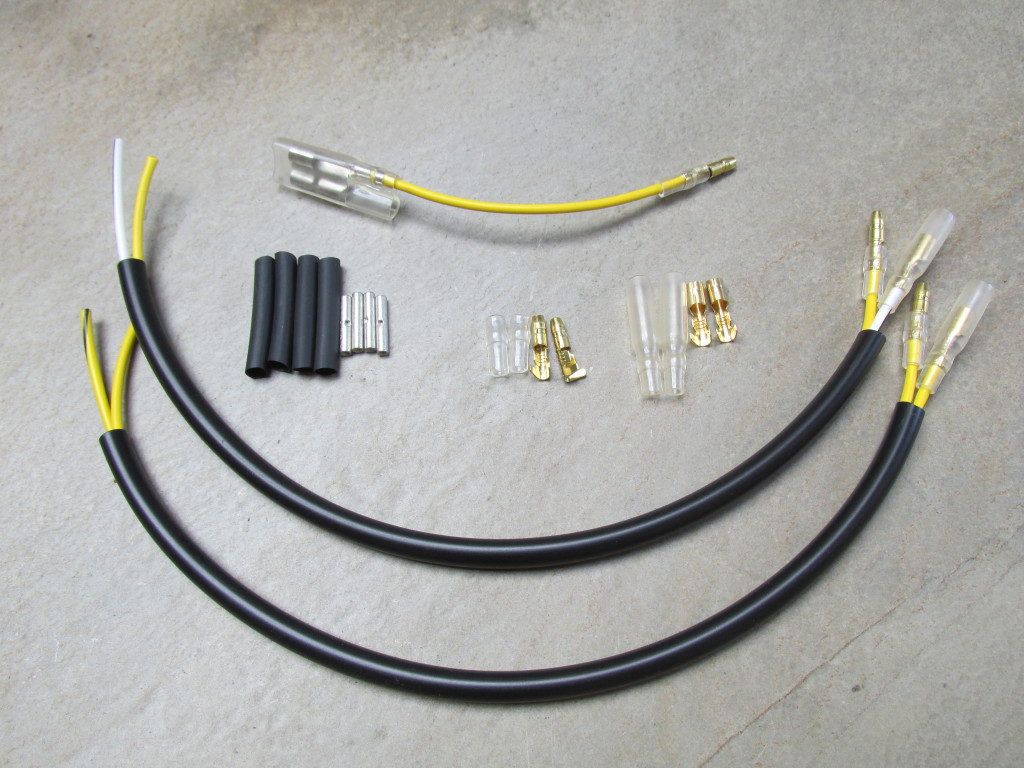
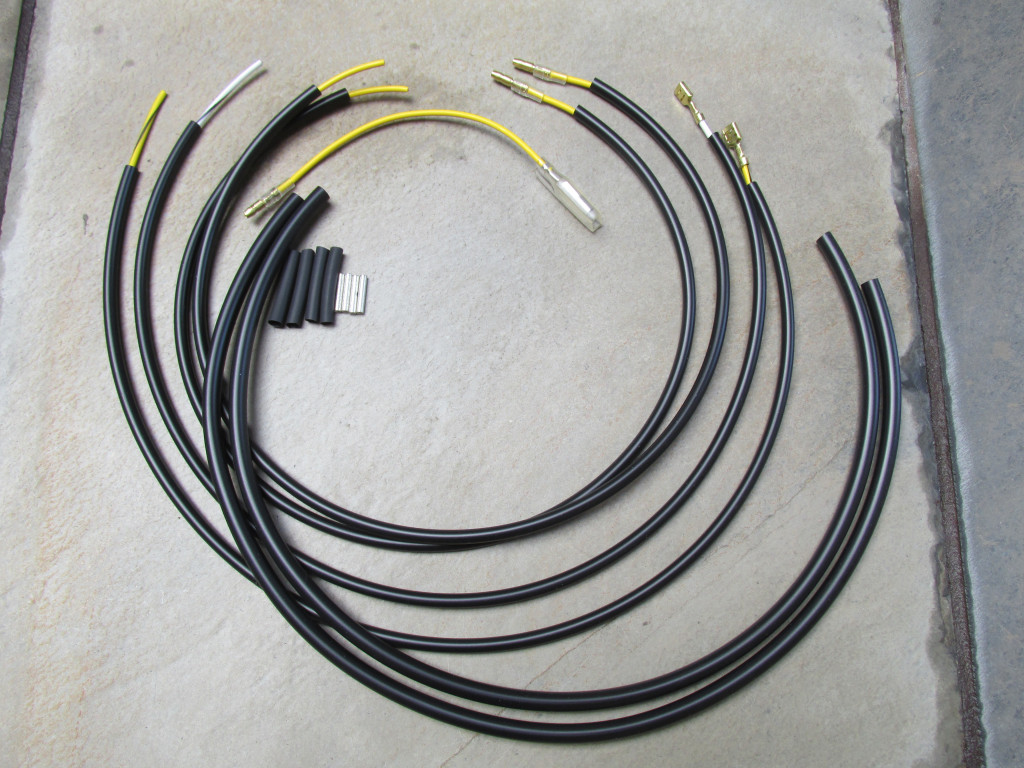
Sub-harness to support the use of the K&S 12-0030 universal handlebar switch. No more need to fiddle with butt connectors, soldering, or heat shrink. Just plug the 9-pin connector into the plug that came with your K&S switch, and the other ends into locations inside the headlight. Greatly simplifies installation. This sub-harness combines the functionality of the original left and right handlebar switches to work with the K&S 12-0030 handlebar switch. Extra ground wire provided because the switch body does not provide the ground. Works with switch pictured below (not included). Many other universal switches would use a very similar wiring harness. I would be happy to create a custom harness for you. When ordering: Please specify civilian or police handlebars. The K&S 12-0030 switch is the most popular NOTE: Civilian applications refer to the civilian method of wiring turn signals (directly to the flasher). Police applications refer to the police method of wiring turn signals (through the toggle switch located on the dash). Please note:As with all switches actuating higher amperage components, I consider relays for the headlight low and high beam circuits a necessity. I sell a very nice relay kit specifically made for this very purpose. 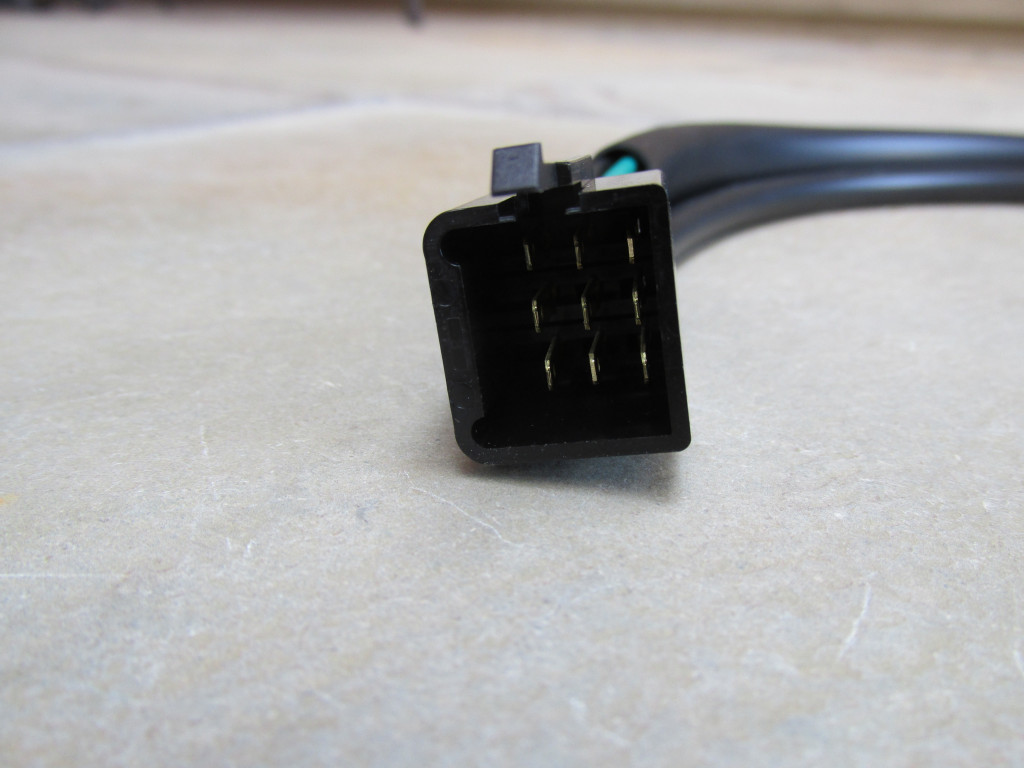 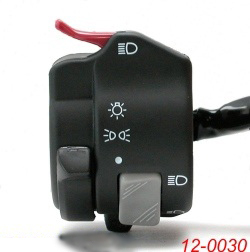 Photo courtesy of K&S. Installation instructions Reference the standard installation instructions and these additional notes. Connect the following wires the same as with the original left and right handlebar switches:
The following wires require different connections:
|
 |
USD $22.50 |
 |
USD $30.50 |
||
| KS12-0040 |
Sub-harness to support the use of the K&S 12-0040 universal handlebar switch. No more need to fiddle with butt connectors, soldering, or heat shrink. Just plug the 9-pin connector into the plug that came with your K&S switch, and the other ends into locations inside the headlight. Greatly simplifies installation. This sub-harness combines the functionality of the original left and right handlebar switches to work with the K&S 12-0040 handlebar switch. Extra ground wire provided because the switch body does not provide the ground. This switch incorporates a When ordering: Please specify civilian or police handlebars. The K&S 12-0040 switch is not as popular as the 12-0030 because it lacks a NOTE: Civilian applications refer to the civilian method of wiring turn signals (directly to the flasher). Police applications refer to the police method of wiring turn signals (through the toggle switch located on the dash). Please note:As with all switches actuating higher amperage components, I consider relays for the headlight low and high beam circuits a necessity. I sell a very nice relay kit specifically made for this very purpose.  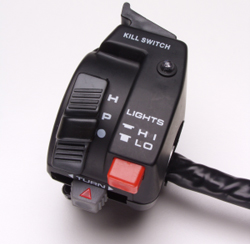 Photo courtesy of K&S. Installation instructions Reference the standard installation instructions and these additional notes. Connect the following wires the same as with the original left and right handlebar switches:
The following wires require different connections:
|
 |
USD $21.25 |
|
USD $30.50 |
||
| KS12-0041 |
Sub-harness to support the use of the K&S 12-0041 universal handlebar switch. No more need to fiddle with butt connectors, soldering, or heat shrink. Just plug the 9-pin connector into the plug that came with your K&S switch, and the other ends into locations inside the headlight. Greatly simplifies installation. This sub-harness combines the functionality of the original left and right handlebar switches to work with the K&S 12-0041 handlebar switch. Extra ground wires provided because the switch body does not provide the ground. Additional power wire provided for the passing light functionality. When ordering: Please specify civilian or police handlebars. The chrome finish and metal housing make the K&S 12-0041 switch an attractive choice. Unfortunately, this switch lacks an NOTE: Civilian applications refer to the civilian method of wiring turn signals (directly to the flasher). Police applications refer to the police method of wiring turn signals (through the toggle switch located on the dash). Please note:As with all switches actuating higher amperage components, I consider relays for the headlight low and high beam circuits a necessity. I sell a very nice relay kit specifically made for this very purpose.  Photo courtesy of K&S. Installation instructions Reference the standard installation instructions and these additional notes. Connect the following wires the same as with the original left and right handlebar switches:
The following wires require different connections:
|
 |
USD $26.25 |
 |
USD $34.50 |
||
| KS12-0055CN |
Sub-harness to support the use of the K&S 12-0055CN universal handlebar switch. No more need to fiddle with butt connectors, soldering, or heat shrink. Just plug the 9-pin connector into the plug that came with your K&S switch, and the other ends into locations inside the headlight. Greatly simplifies installation. This sub-harness combines the functionality of the original left and right handlebar switches to work with the K&S 12-0055CN handlebar switch. Extra ground wires provided because the switch body does not provide the ground. Additional power wire provided for the passing light functionality. When ordering: Please specify civilian or police handlebars. The narrow width of the K&S 12-0055CN switch makes it an attractive choice. Unfortunately, this switch lacks a parking light functionality, leaving the lights on any time the ignition switch is turned on. NOTE: Civilian applications refer to the civilian method of wiring turn signals (directly to the flasher). Police applications refer to the police method of wiring turn signals (through the toggle switch located on the dash). Please note:As with all switches actuating higher amperage components, I consider relays for the headlight low and high beam circuits a necessity. I sell a very nice relay kit specifically made for this very purpose. 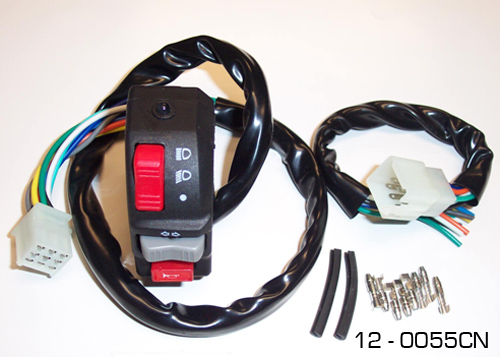 Photo courtesy of K&S. Installation instructions Reference the standard installation instructions and these additional notes. Connect the following wires the same as with the original left and right handlebar switches:
The following wires require different connections:
|
 |
USD $26.25 |
|
USD $34.25 |
||
| YHA206 |
Sub-harness to support the use of the Yamaha YHA205 & YHA206, Suzuki 577-6 & 577-8, Kawasaki 004 (and similar) handlebar switches. Combines the functionality of the original left and right handlebar switches. Butt connectors and heat shrink are included to splice the sub-harness directly to the wires from the switch. Wires should be staggered to yield a smaller overall finished diameter. Several sizes of sheathing are also included for a finished appearance. Switch body provides ground, as original. Many other universal switches would use a very similar wiring harness. I would be happy to create a custom harness for you. When ordering: Please specify civilian or police handlebars. NOTE: Civilian applications refer to the civilian method of wiring turn signals (directly to the flasher). Police applications refer to the police method of wiring turn signals (through the toggle switch located on the dash). Please note:As with all switches actuating higher amperage components, I consider relays for the headlight low and high beam circuits a necessity. I sell a very nice relay kit specifically made for this very purpose. |
 |
USD $40.25 |
 |
USD $52.25 |
Fuse panels and related components
| Part Number | Description | Photo | Price |
|---|---|---|---|
| MG# 13742540 |
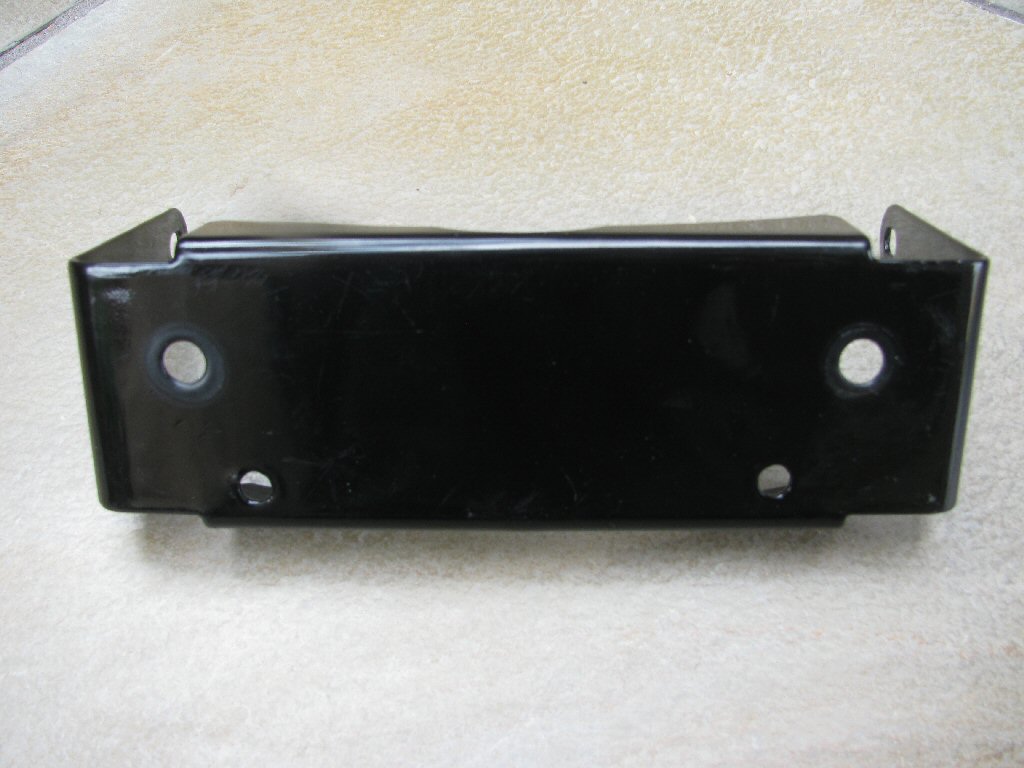
Original single fuse holder One exceedingly cool fuse holder and very close to the original used on the 750 and 850 police models to send power from the fuse box to the left push-pull switch. Perfect for use whenever adding fused circuits for additional functionality. Uses the same ceramic fuses as the original fuse box (carry the same and fewer spares!). Compact size fits easily inside the headlight shell, as original. 25 amp capacity. Price is for one complete fuse holder, 8 amp fuse included. 8 amp is more than sufficient to operate two, 35 watt spot lights (most people fit 35 watt bulbs). Wires not included (shown for assembly reference only). Sold each. |
 |
USD $5.75 |
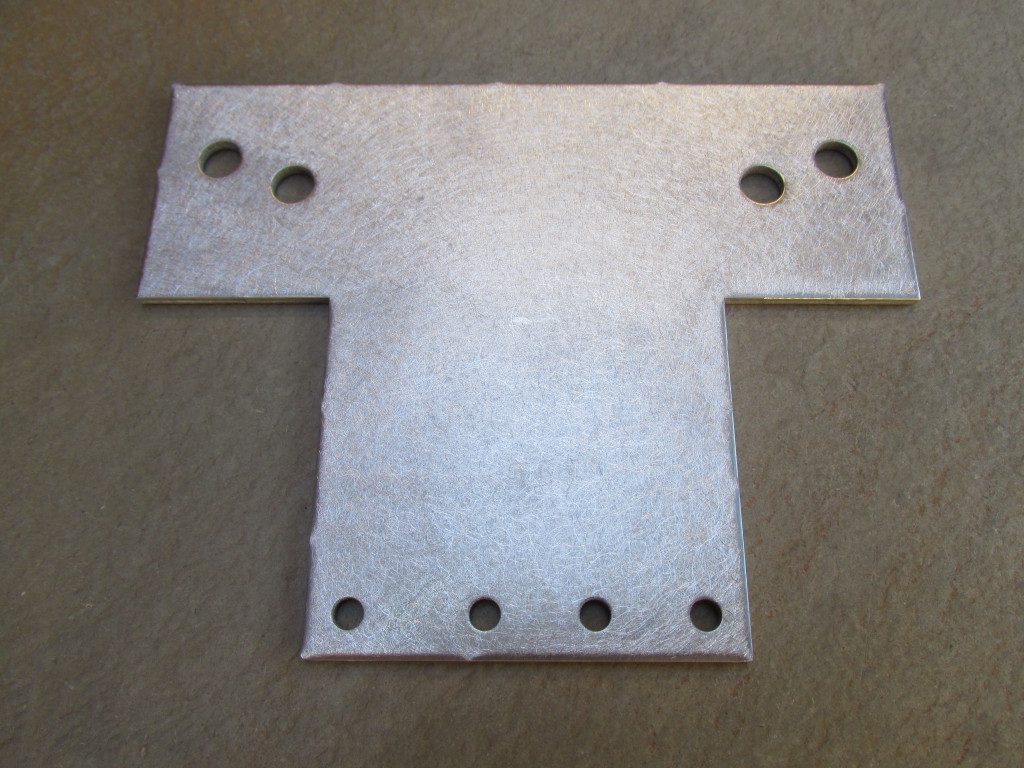
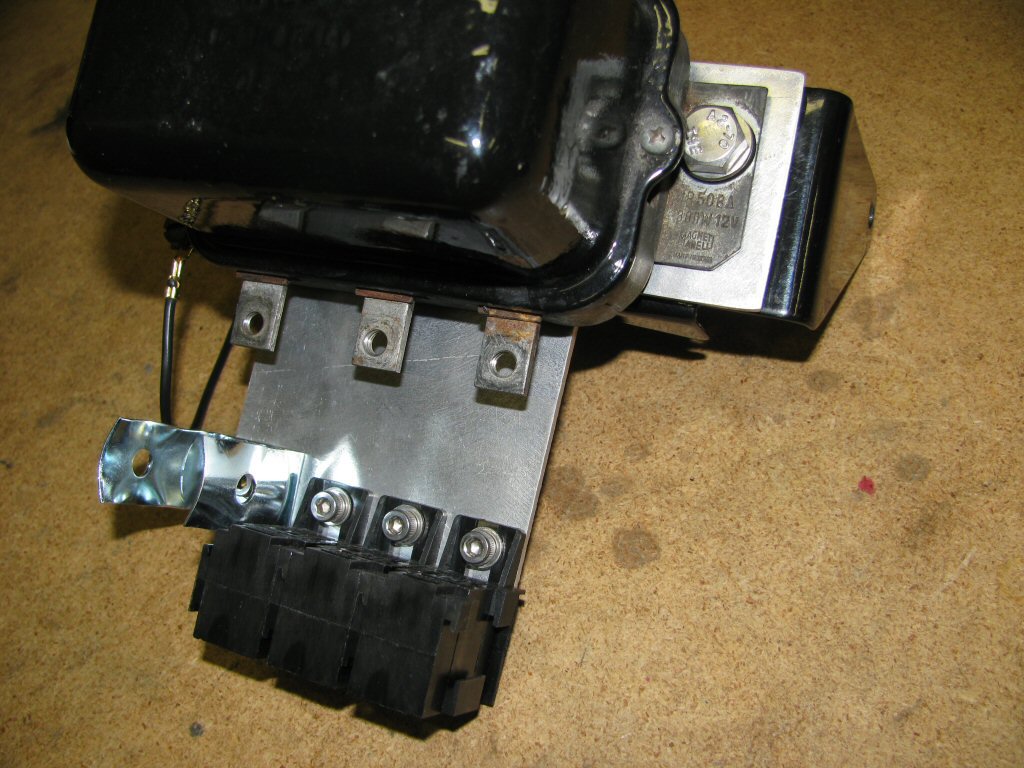
| MG# 12743023 |
Replacement fuse panel/fuse box Replacement fuse panel/fuse box to fit all 1967 - 1976 Moto Guzzi V700, V7 Special, Ambassador, 850 GT, 850 GT California, Eldorado, and 850 California Police motorcycles. Fits in the original location within the original headlight bucket without modification. Supports the wiring needs for both civilian and police models. Very well made by Josh Cole. Uses standard glass fuses to achieve a slim form that is actually slightly thinner than the original fuse panel. This gives you as much room as possible to avoid interference with the headlight plug. Accepts female spade terminals. I will fit the required terminals to any harness you purchase from me. Josh also includes female spade terminals and insulators with the fuse panel. 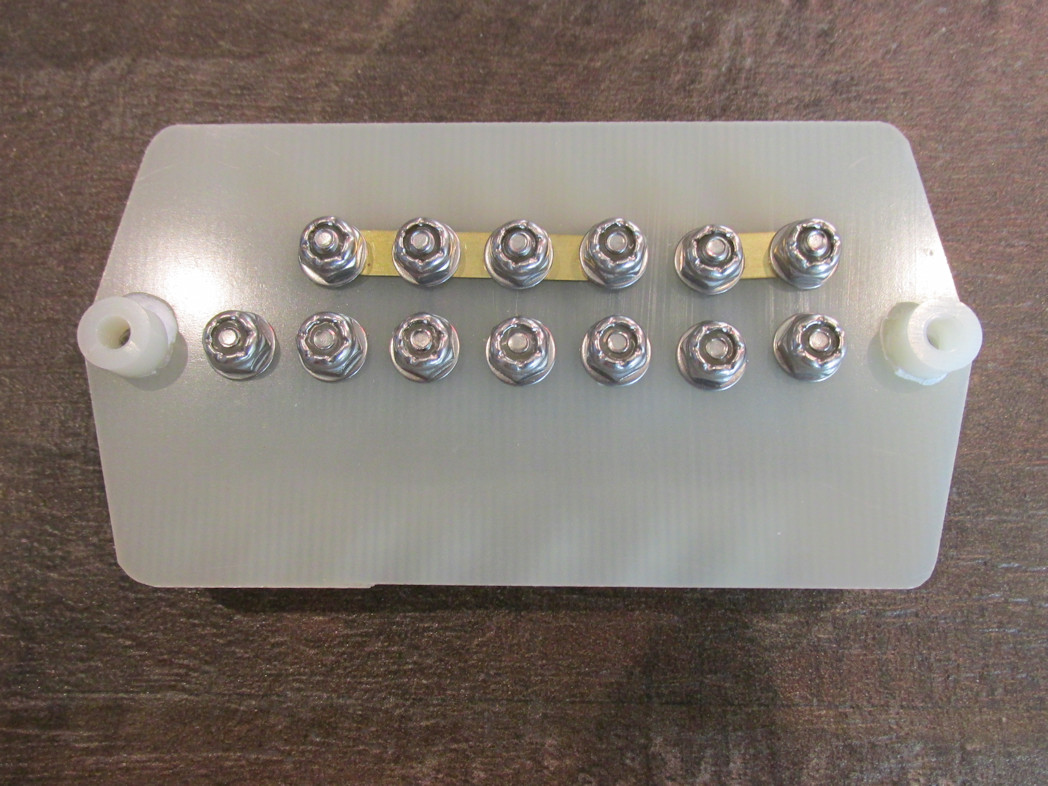 |
 |
USD $100.00 |
| MG# 12743023-DECALS |
Replacement decals to fit to the original fuse panel/fuse box and distribution panel Four piece set of adhesive-backed decals to fit the original fuse and distribution panels. Excellent reproduction with accurate colors. |
 |
USD $16.00 |
| MG# 12742500 |
25 amp fuse Original size and style fuse to fit the original fuse block. Nine required for the original fuse block. Also fits the single fuse holder. Sold each. |
 |
USD $0.50 |
| FUSE-AGC |
15 amp AGC fuse Good quality AGC fuse. Sold each. |
 |
USD $0.75 |
Ignition switches
| Part Number | Description | Photo | Price |
|---|---|---|---|
| MG# 12735300 |
Replacement ignition switch Replacement ignition switch to fit all 1967 - 1976 Moto Guzzi V700, V7 Special, Ambassador, 850 GT, 850 GT California, Eldorado, and 850 California Police motorcycles. The design is very similar to the original ignition switch. In fact, a top-nut from an original loopframe ignition switch will fit the threads on this switch perfectly! Fits in the original location within the original dash or police bracket. Supports the wiring needs for both civilian and police models. Accepts female spade terminals. I will fit the required terminals to any harness you purchase from me. Switch has four positions
Terminal connections for civilian models
Terminal connections for police models
      |
 |
USD $30.00 |
Relay harnesses
| Part Number | Description | Photo | Price |
|---|---|---|---|
| RELAY-HARNESS |
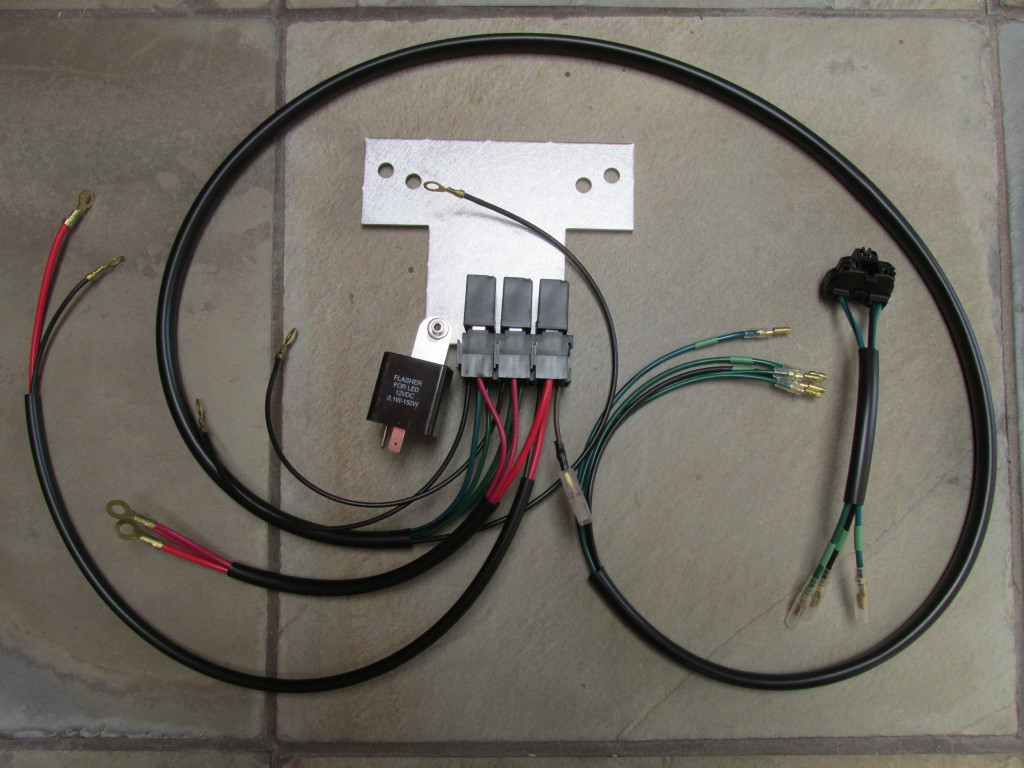
Relay solution for the starter and headlight No more excuses! Relays greatly improve the performance of the starter and headlight. Your headlights will burn brighter and your starter solenoid will receive the high amperage current it needs when you use relays. Relays also dramatically extend the life of the starter button and headlight switch (especially the lovely and valuable original CEV switches). I wrestled long and hard to create a solid solution that is in line with what I believe Carcano and Todero would have designed. A few points I'll mention:
  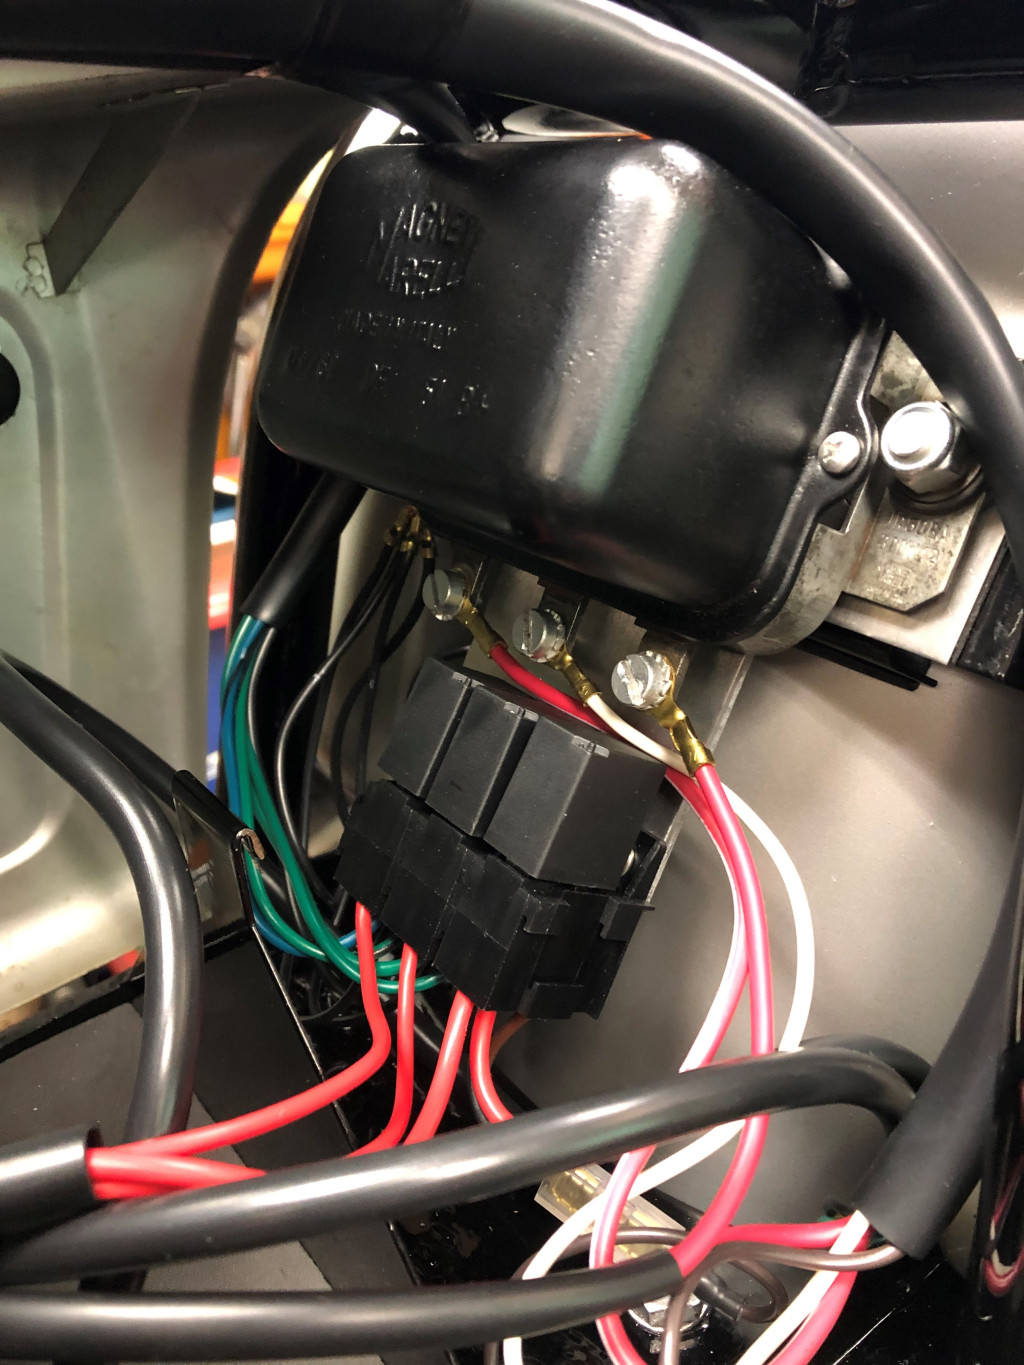 Photo courtesy of David Swanson. 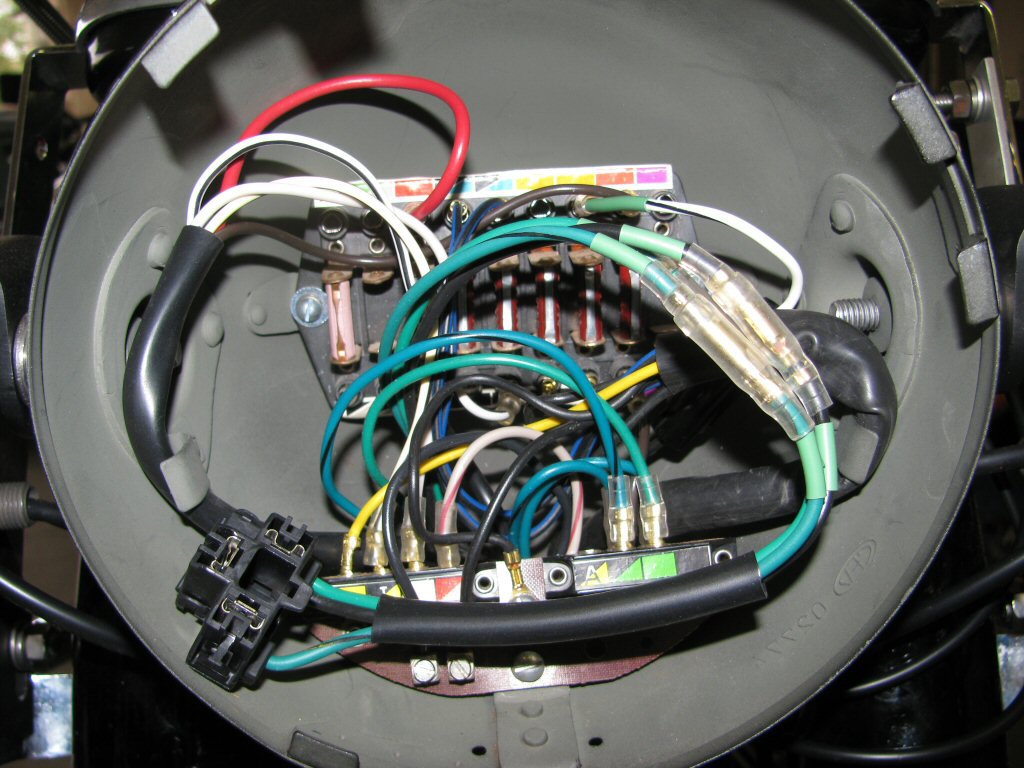 |
       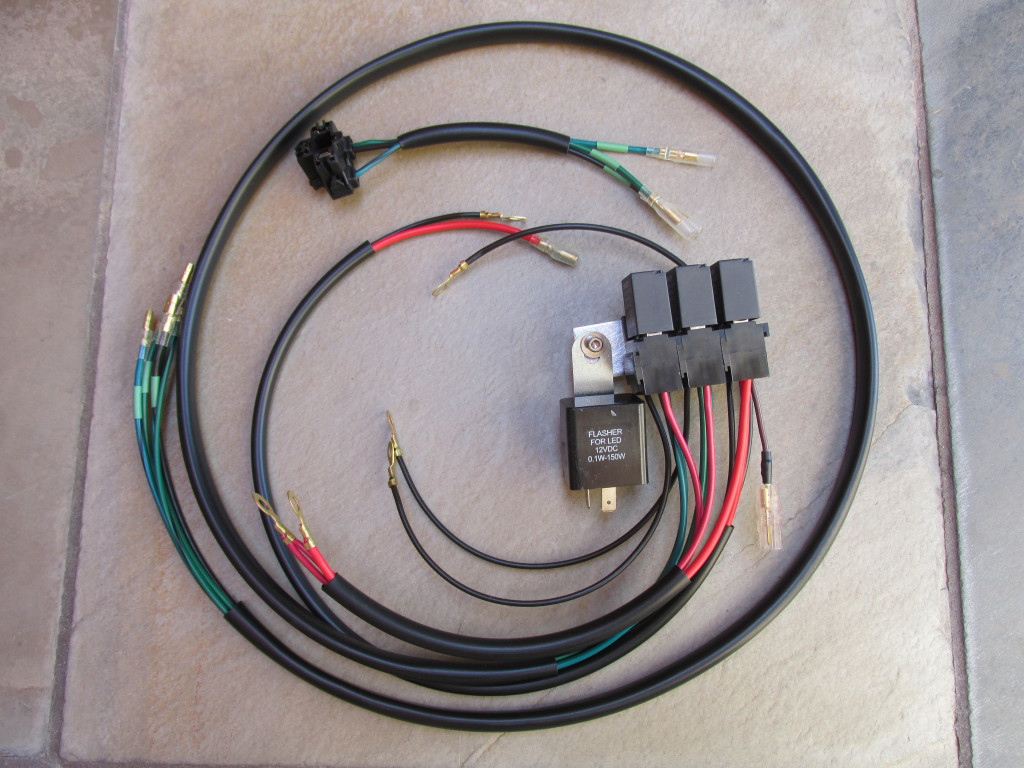 |
USD $113.00 |
| RELAY-HARNESS-DUAL-HORNS |
Relay solution for dual horns A great way to add the power of a relay when you want to operate twin horns. Gangs perfectly with the standard relay solution. Simple installation. 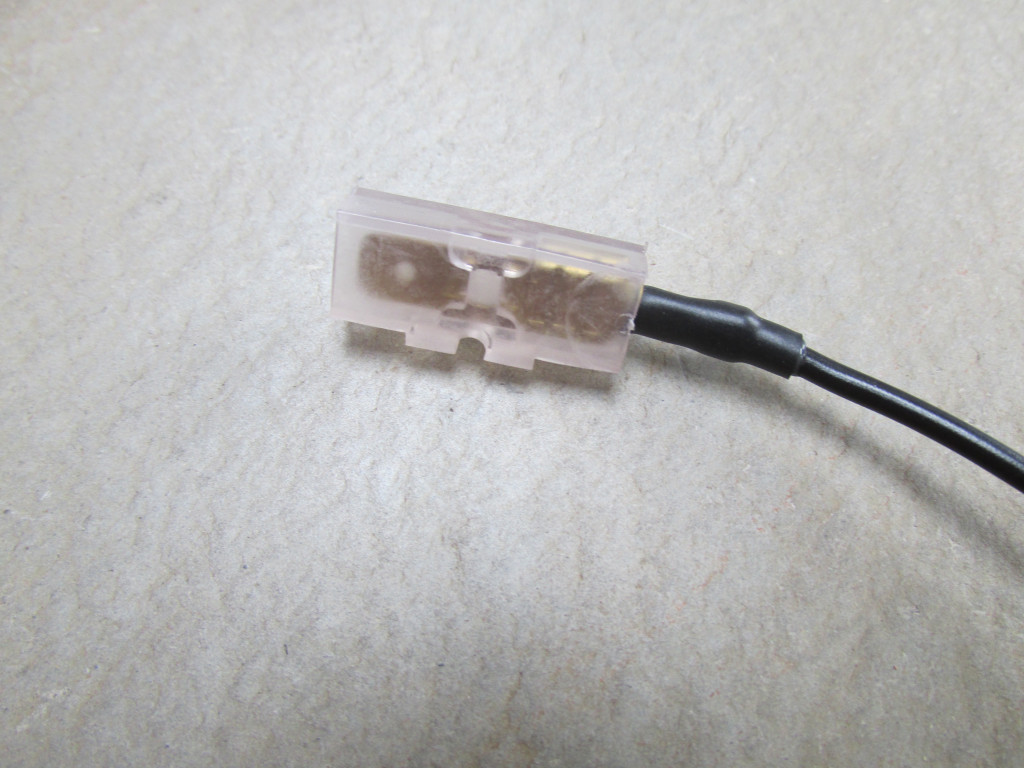 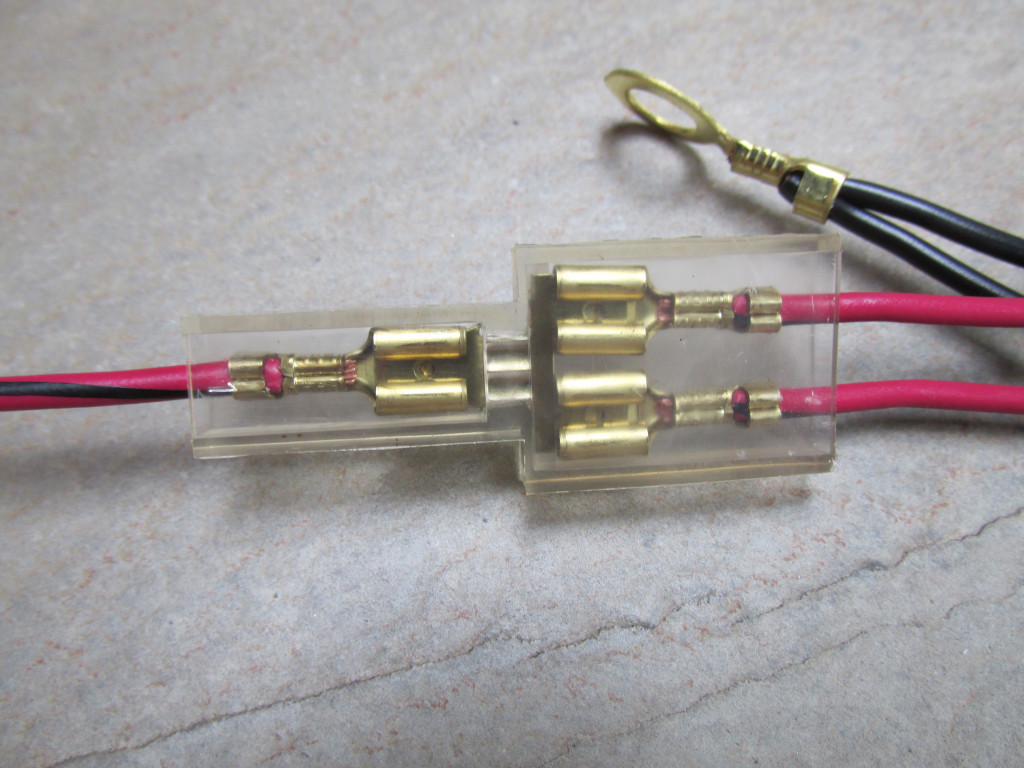   |
 |
USD $36.50 |
| RELAY-HARNESS-SPOT-LIGHTS-POLICE |
Relay solution for spot lights on police models A great way to add the power of a relay for your police spot lights. Gangs perfectly with the standard relay solution. Simple installation. 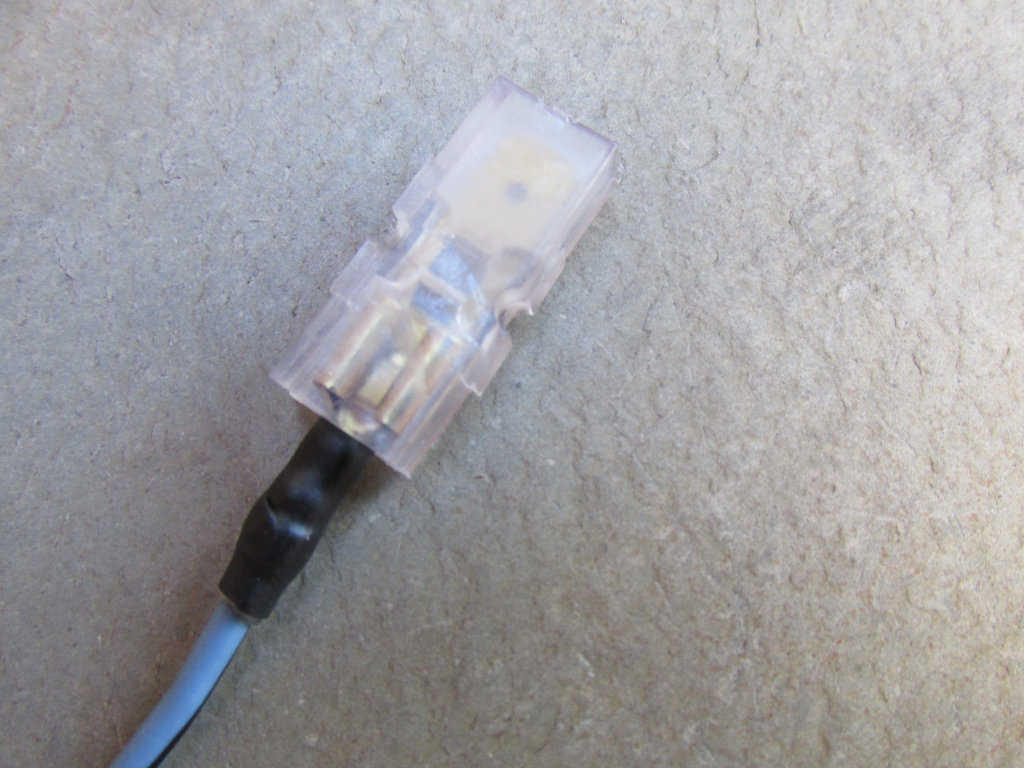  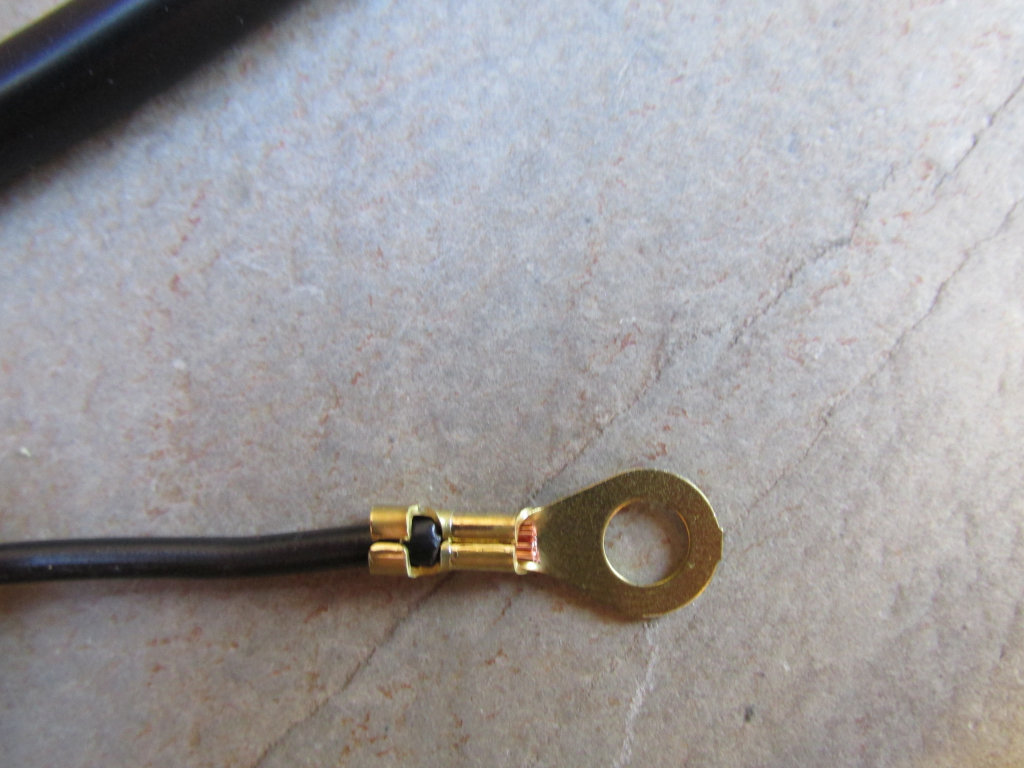 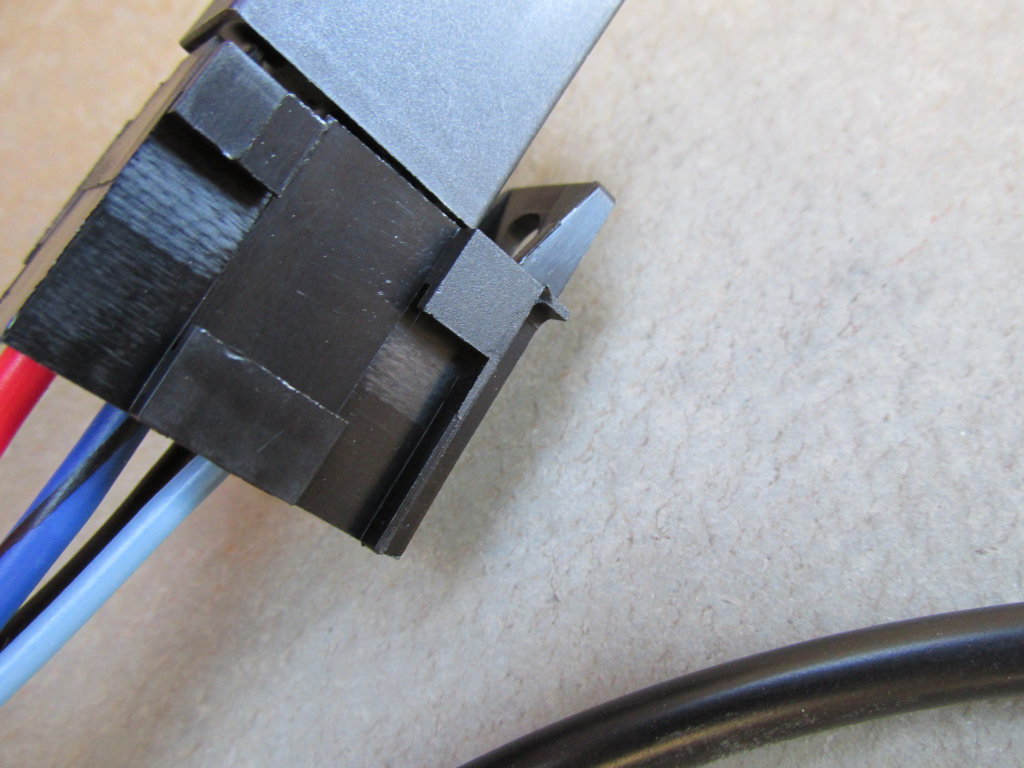 |
 |
USD $44.50 |
Custom sub-harnesses
| Part Number | Description | Photo | Price |
|---|---|---|---|
| POLICE-4-WAY-FLASHER |
Solution to support 4-way flashers with the police toggle switch From the factory, the police toggle switch only operated front or rear flashers, but not both front and rear flashers. These simple adapters add 4-way flasher capability without any modification to the original wiring harness. Toggle switch sold separately. Both required adapters are included. To install, plug in the adapters as shown, then plug the existing white/black and yellow/black wires into the connectors. The remaining two terminals on the toggle switch will no longer be connected. 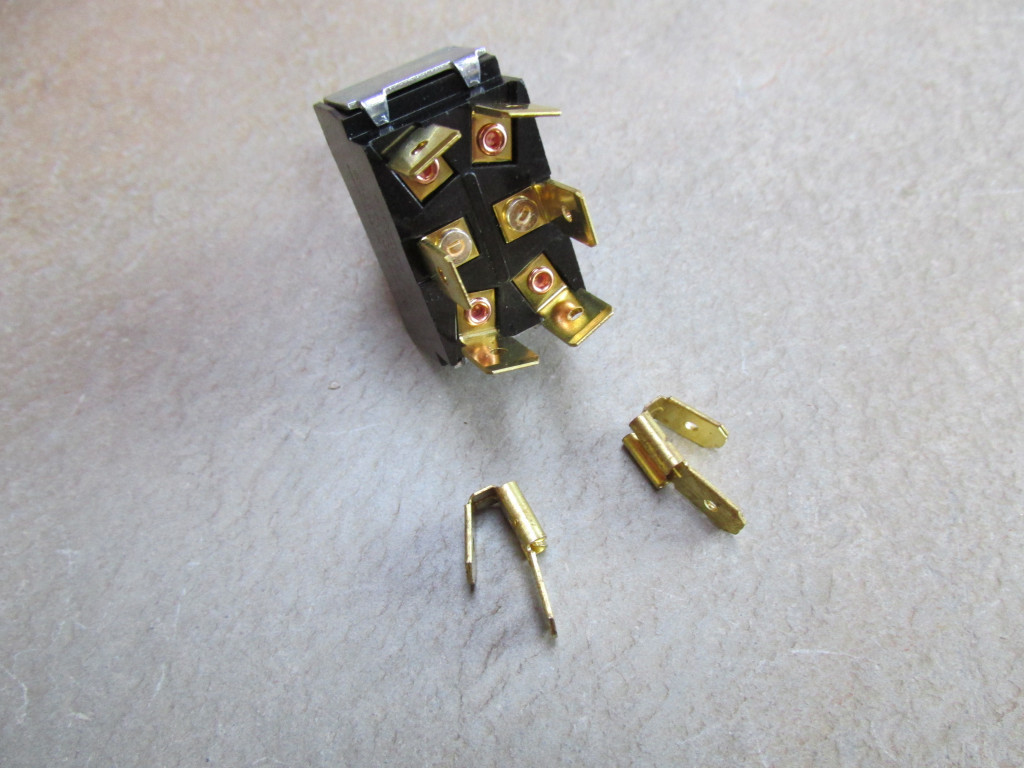 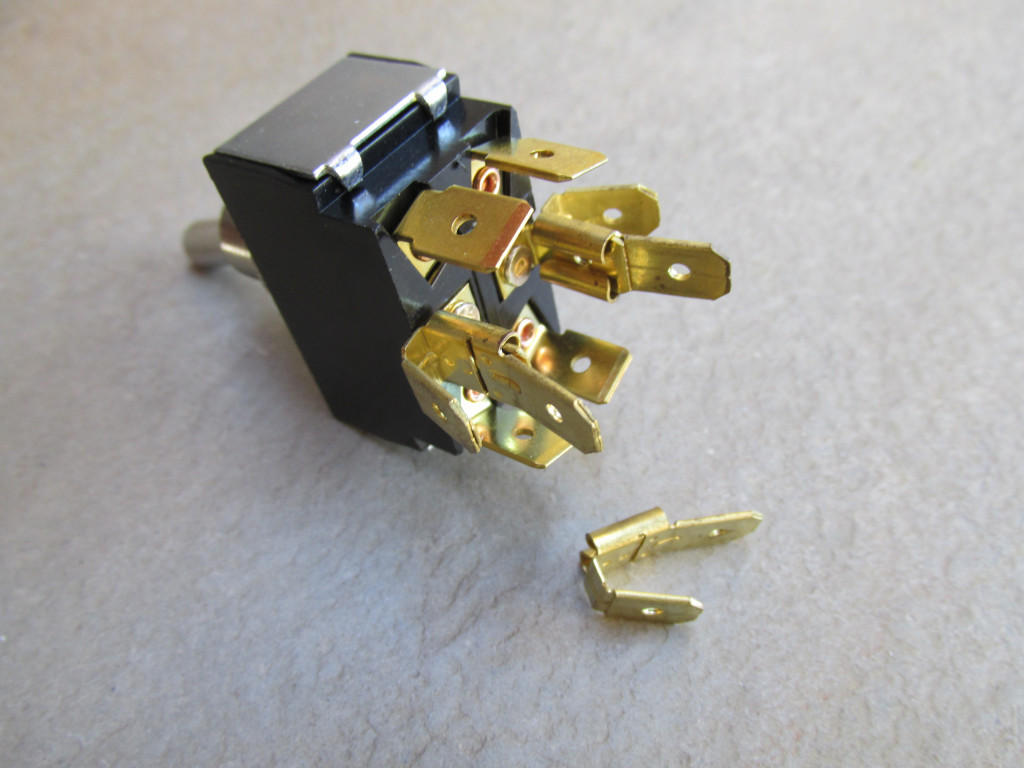  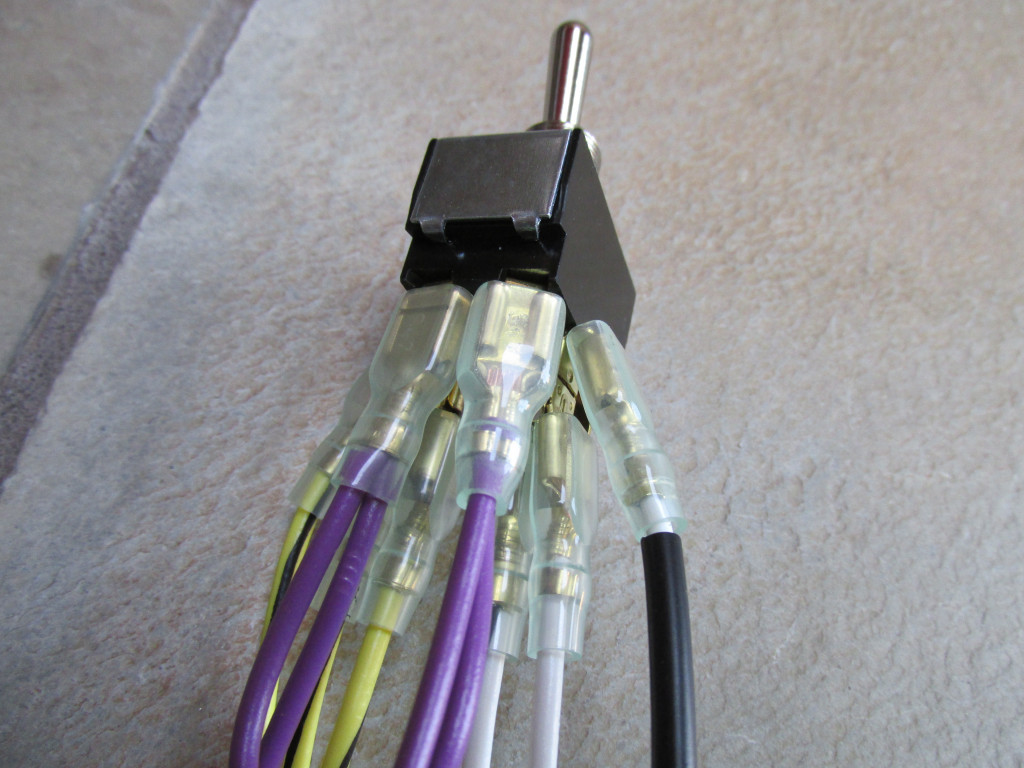  |
 |
USD $1.00 |
| DUAL-ELEMENT-REAR-TURN-SIGNALS |
Sub-harness to support the use of two element rear turn signals A simple and elegant solution for splitting the power at the tail light for dual element rear turn signals. Typically the Crimp the provided male bullet terminals to pigtail wires coming from the turn signals (for the running or parking lights), then join those two wires into the adapter. The yellow wire from the main harness will also plug into the adapter. Finally, the short yellow wire will plug into the tail light. |
 |
USD $12.75 |
| DUAL-ELEMENT-FRONT-TURN-SIGNALS |
Sub-harness to support the use of two element front turn signals A simple and elegant solution for splitting the power at the distribution block for dual element front turn signals. Typically the Using the provided wires and sheathing, extend the existing pigtail wires coming from the turn signals (for the running or parking lights), then join those two wires into the adapter inside the headlight shell. The yellow wire from the main harness will also plug into the adapter. Finally, the short yellow wire will plug into the distribution block. Includes butt crimps, heat shrink, and two sizes of sheathing for connecting to the front turn signals. |
 |
USD $28.00 |
| SADDLEBAG-LIGHT-EXTENSIONS |
Sub-harness to extend wiring from running lights inside saddlebags to the tail light Connector plugs provide an easy way to disconnect wires and remove the panniers. Black wires provide ground via 6 mm terminals at the tail light. Yellow wires provide signal via male bullets terminal at the tail light. Yellow wires connect to the yellow wire at the tail light via the multi-terminal adapter. Provides an extension of 700 mm on either side of the connection plug (~1400 mm total). Includes butt crimps, heat shrink, and sheathing. 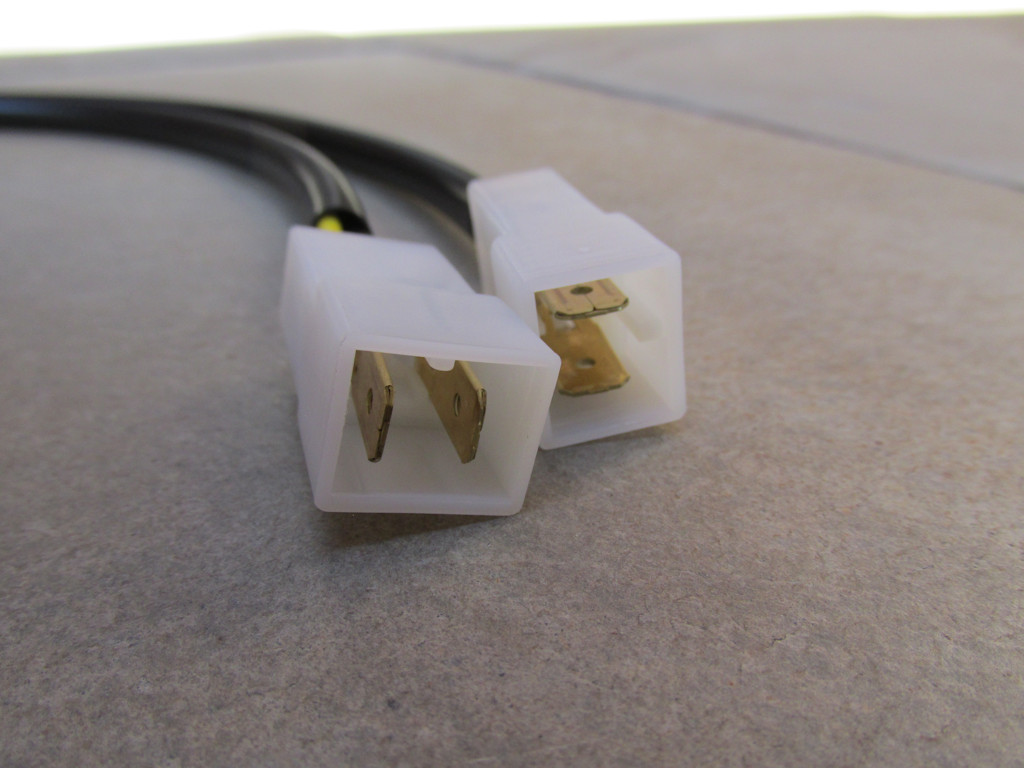  |
 |
USD $38.75 |
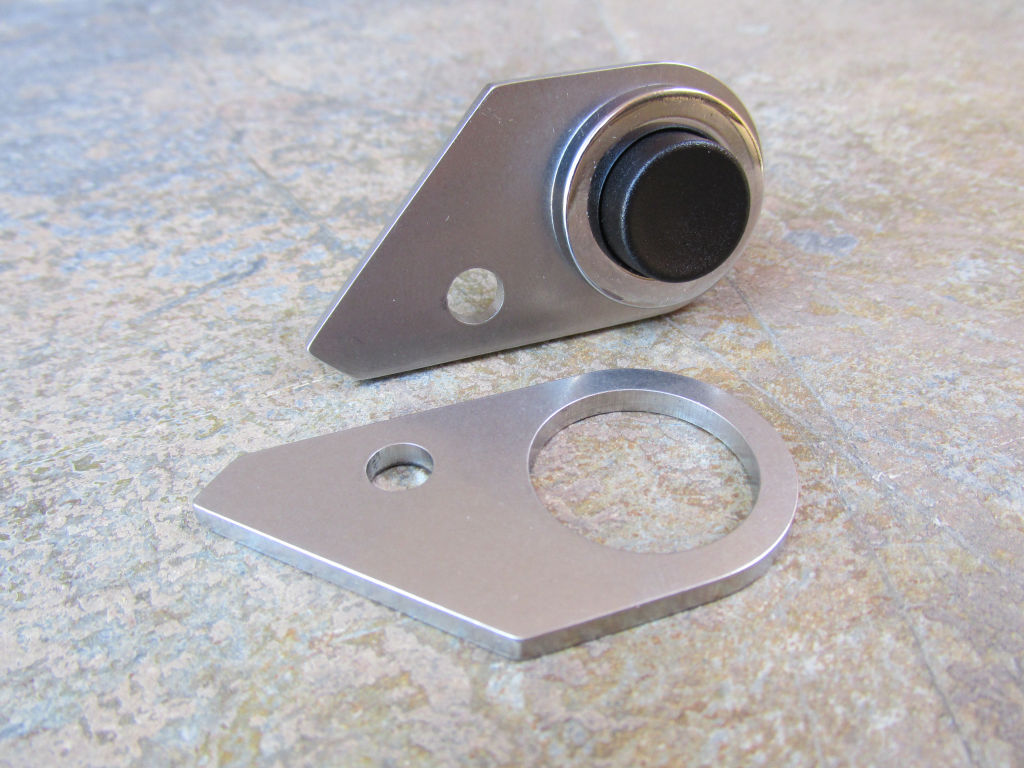
| SPOT-LIGHT-KIT |
Spot light kit Moto Guzzi never made a spot light. For police models, they provided brackets and wiring to support spot lights (or other front lights), but left it up to the individual police departments to fit their own spot lights. For civilian models, there was never any factory means of powering spot lights. This complete kit is intended for use on civilian models and provides fused power directly from the battery to a police-style push-pull switch. The push-pull switch is mounted in a stainless steel bracket that is a mirror image of the starter button. The intent is for this bracket to be mounted on the left side clutch perch. From the push-pull switch, wiring is routed to a 3 connection female spade connector located under the tank. The leads from each spot light are connected to the 3 connection female spade connector. Heavy gauge wire is used to provide ample power to the spot lights. Fuse holder accepts an original style 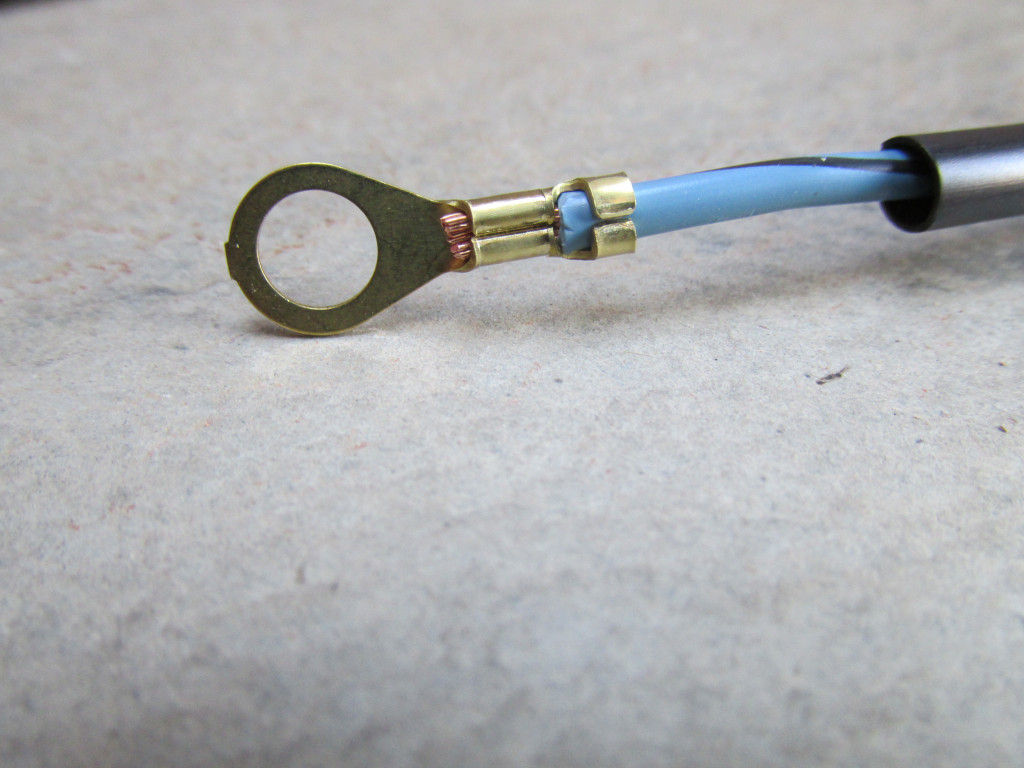  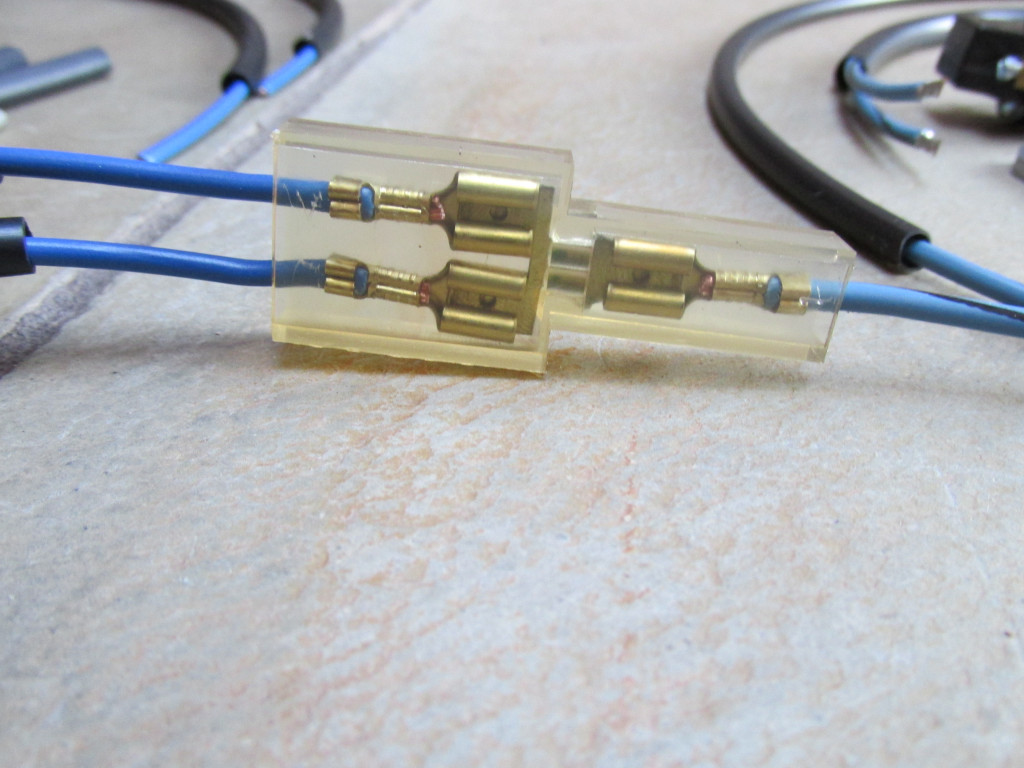  |
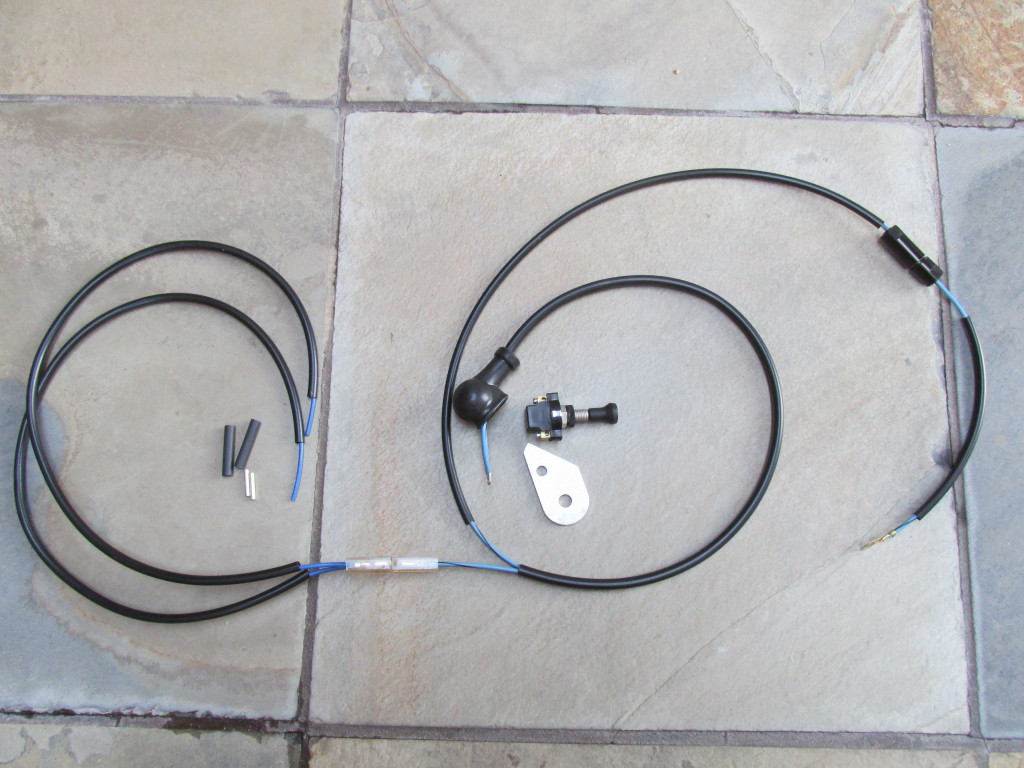 |
USD $51.00 |
| REAR-BRAKE-SWITCH-SPLITTER |
Sub-harness to greatly ease installation of wiring on the rear brake light switch Installing the wires into the rear brake switch is tedious at best. These two sub-harness greatly simplify installation. I like to install these pigtails with the rear brake switch off of the bike. Then I mount the switch and simply plug in the bullet terminals. Bullet terminals for the needed wires included/installed. 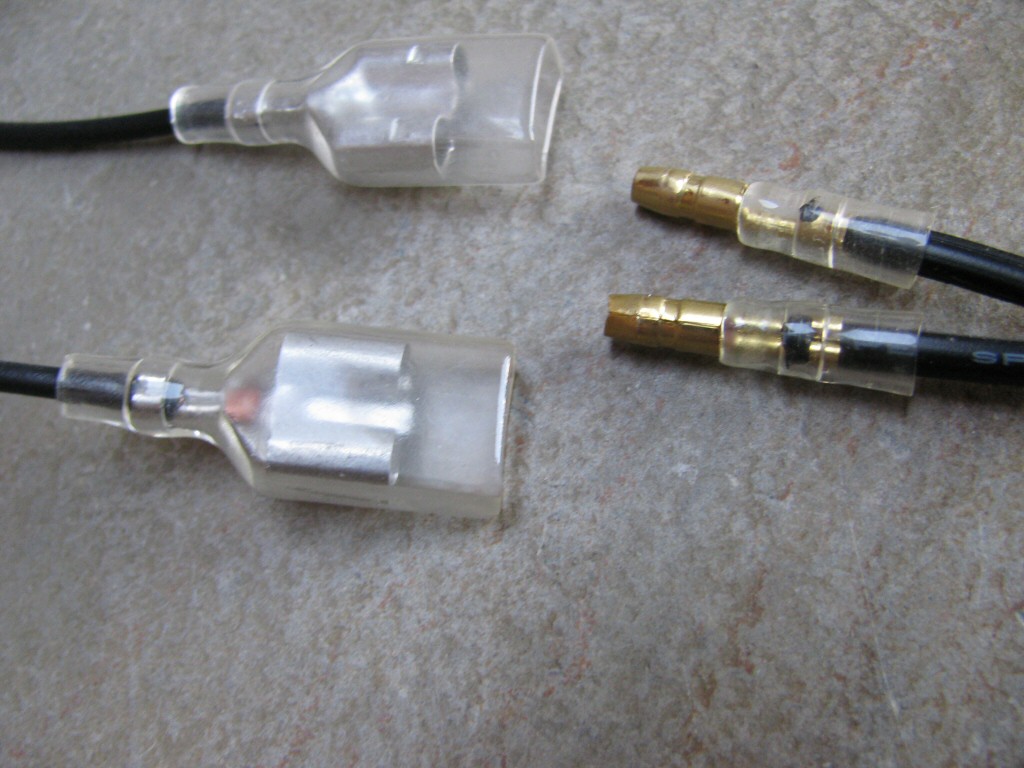 |
 |
USD $6.25 |
| BAR-END-TURN-SIGNALS |
Sub-harness to support the use of Hella bar-end turn signals (civilian applications) The turn signal flasher location and basic wiring flow remains the same as the original turn signal harness.  Photo courtesy of MG Cycle. |
 |
USD $27.75 |
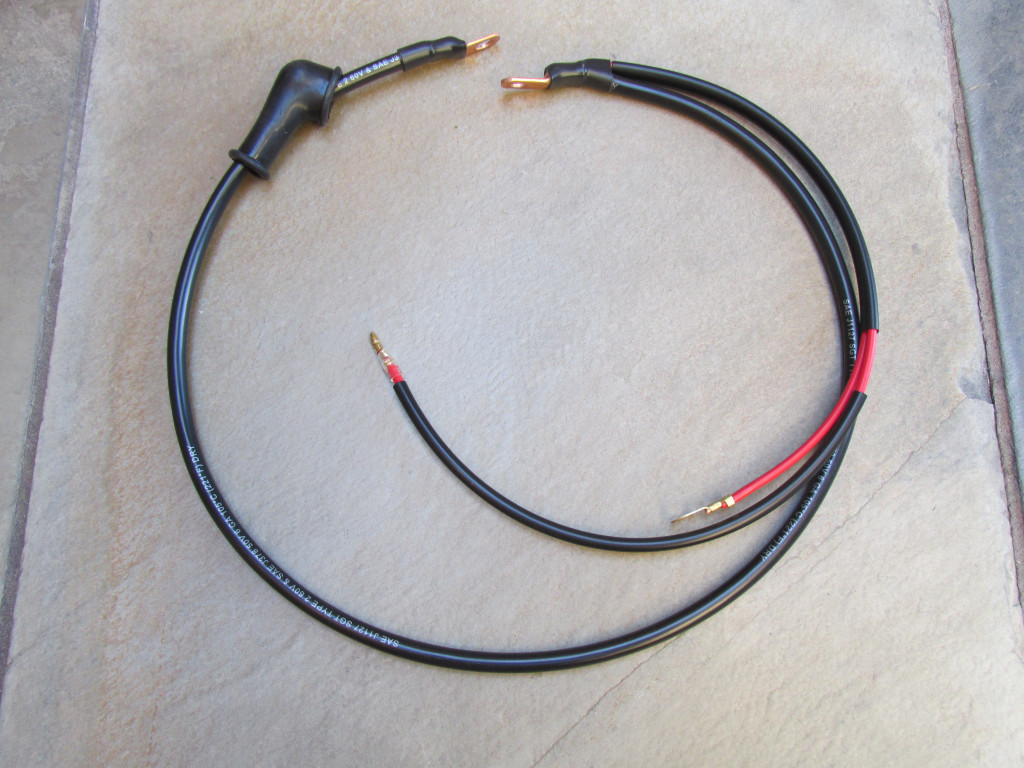
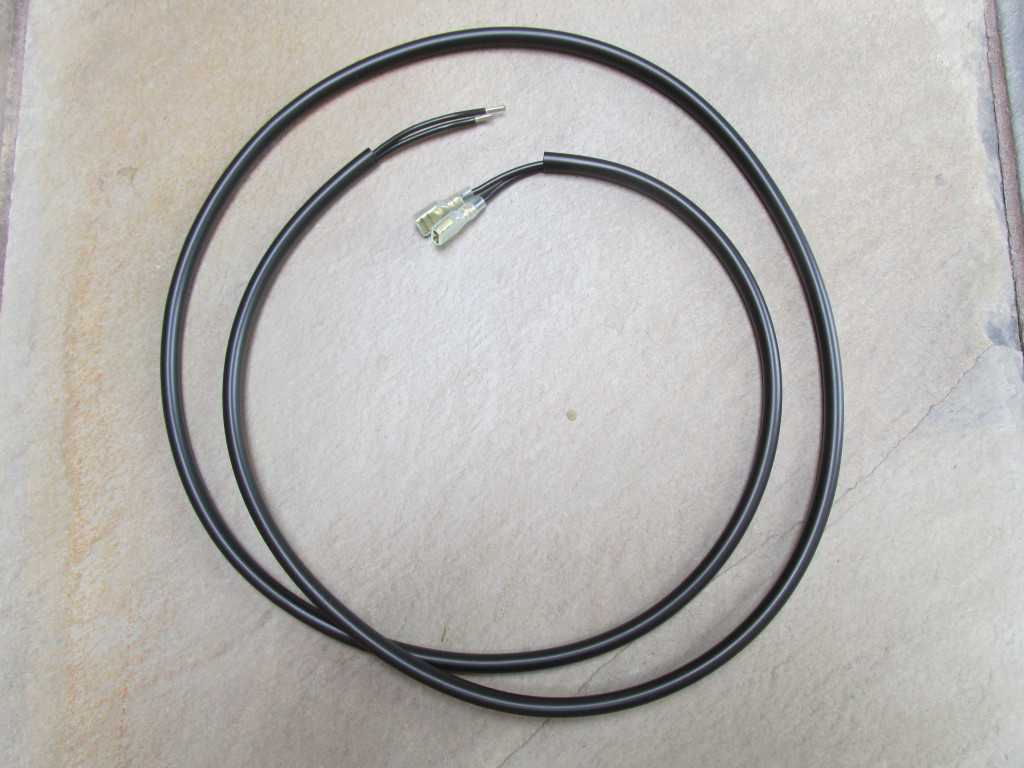
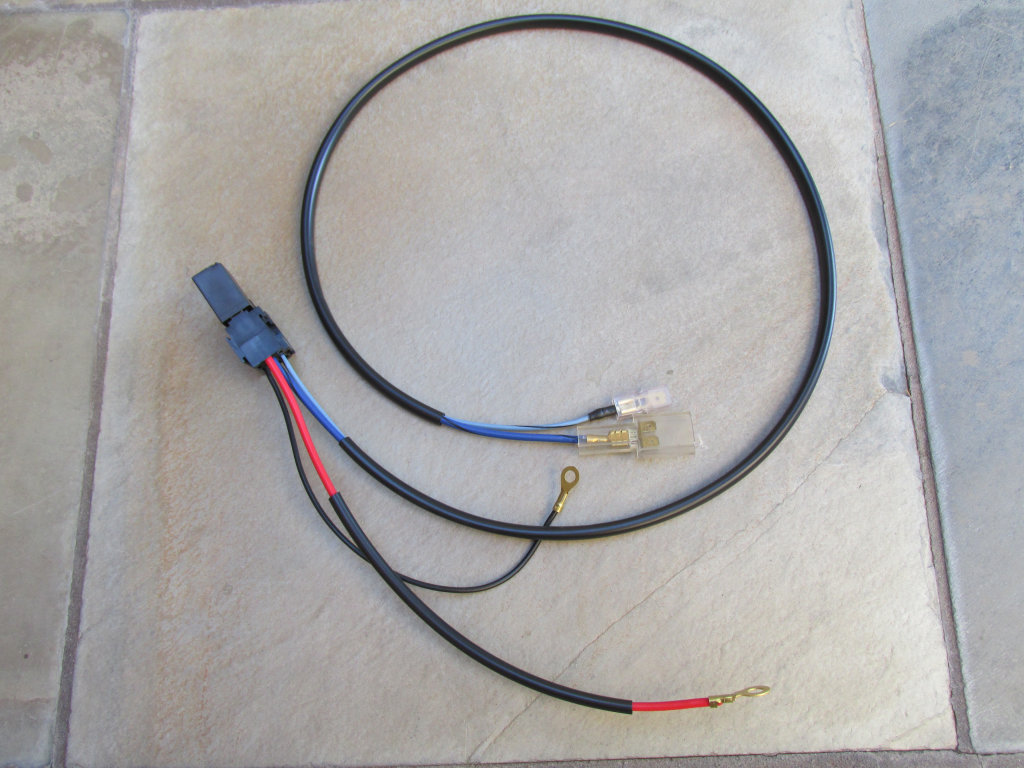
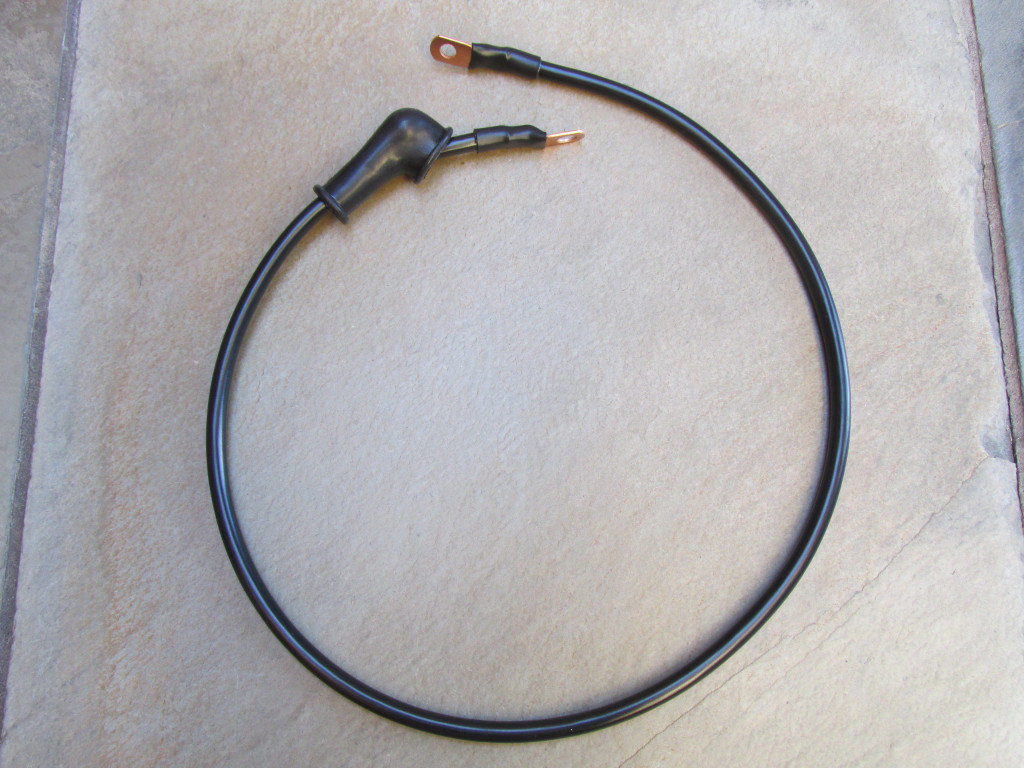
| BAT-POS |
Battery positive cable For civilian applications, this cable is already integrated into the main harness. For police applications, this cable is already integrated with wires to the voltage regulator and ignition switch. Should you wish a separate cable, however, this is what you'll need. Originally, the terminal at the battery was a post style terminal. Since that style of terminal is very rare today with motorcycle batteries, I've chosen to fit a lug to accept a 6 mm bolt. Cable is 6 AWG and is 830 mm (~32 1⁄2 inch) in total length. If you require something different, please let me know. |
 |
USD $20.00 |
| GEN-GROUND |
Generator ground Originally the generator was grounded through the body of the generator, through the bracket, to the engine block. Painted generator bodies can insulate the generator and prevent this necessary grounding point. This short wire easily solves the problem. Magneti Marelli generators: Secure the 6 mm ring terminal under the top nut at the rear of the generator. Secure the 8 mm ring terminal at the frame grounding point inside the Bosch generators: Secure the 6 mm ring terminal under the 6 mm bolt located on the left side of the generator body. Secure the 8 mm ring terminal at the frame grounding point inside the |
 |
USD $2.50 |
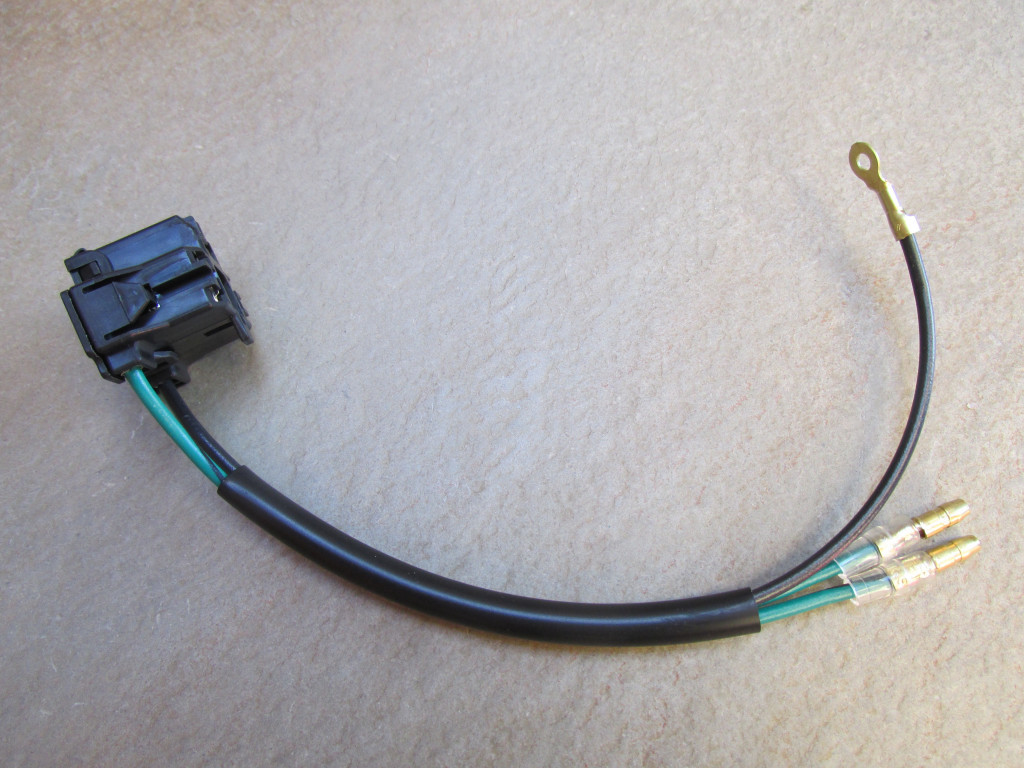
| ALT-HARNESS |
Alternator wiring harness Features the correct plug for the usual Nippondenso / Denso alternators and clones. Works with the alternator kits produced by Greg Field/Bob Nolan or Kevin Hahn of Scrambler Cycle. Note: This sub-harness is not needed if you are purchasing one of my main harnesses for an Alternator equipped machine. I've already included the plug and correct wiring with those main harnesses. Instead, this is a stand-alone harness to be used with a pre-existing main harness when adding an alternator.
When ordering please specify your coil: Magneti Marelli or Bosch. Magneti Marelli coils accept 5 mm ring terminals. Bosch coils (and many modern aftermarket coils) accept female spade terminals. 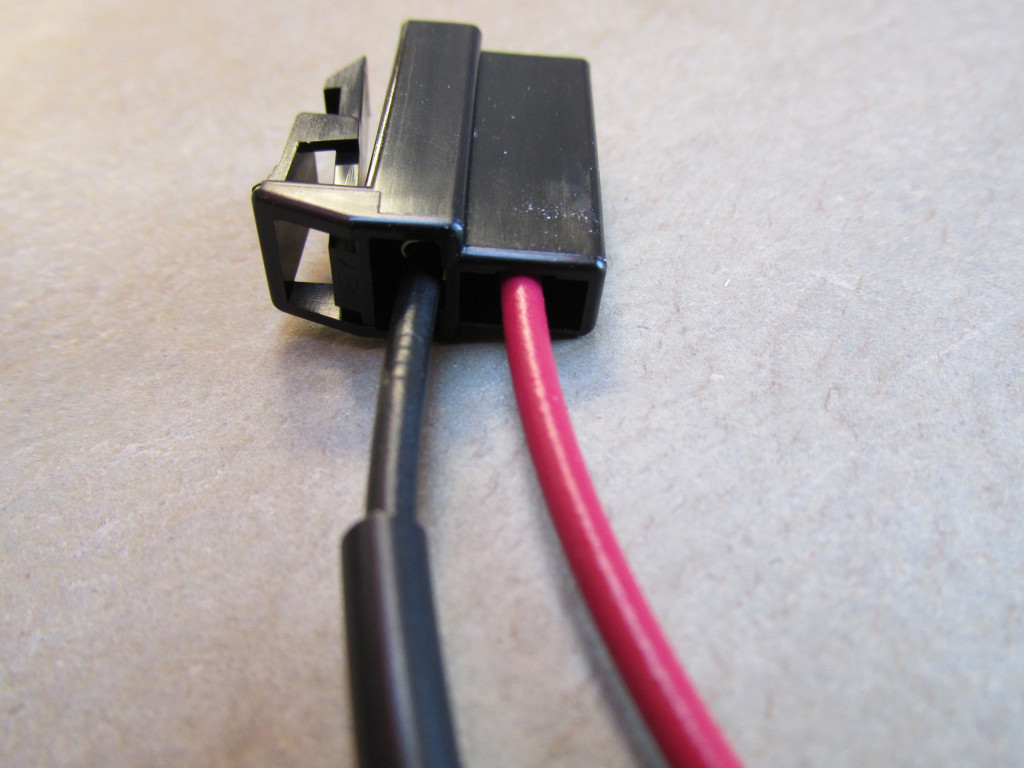 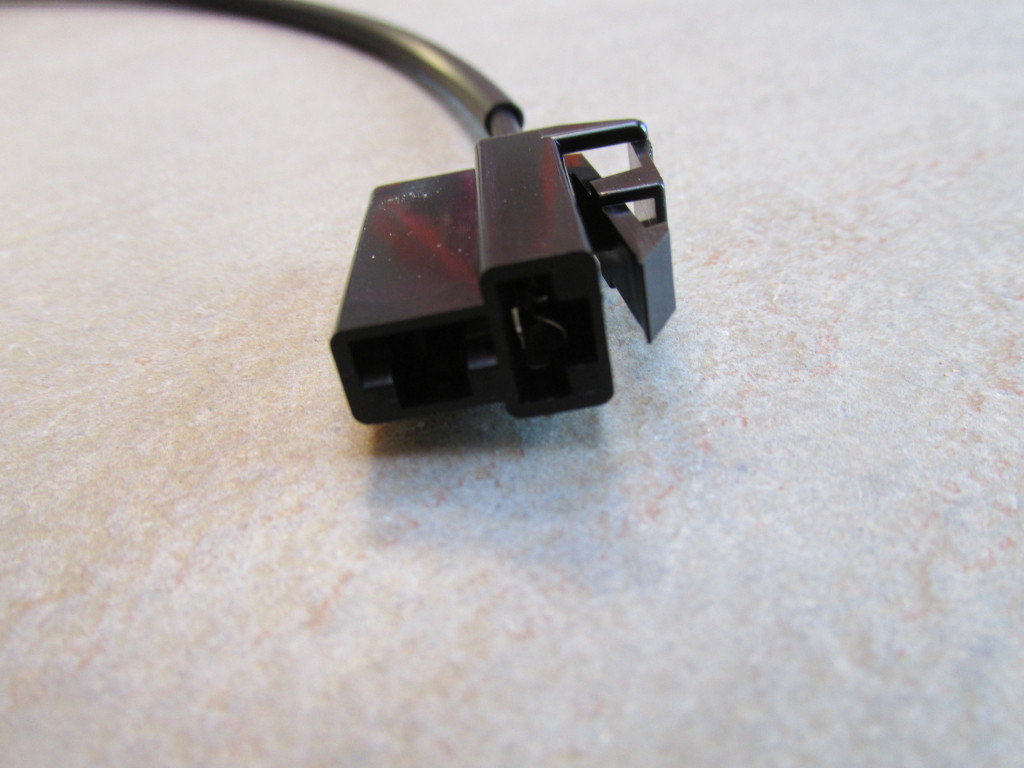  |
 |
USD $15.75 |
 |
USD $15.75 |
||
| DASH-TURN-SIGNAL-FLASHER |
Sub-harness to flash the high beam dash indicator light when the turn signals are in operation Reallocates the high beam dash indicator light to function instead as a single bulb that flashes when either of the turn signals are flashing. The dash light no longer functions as a high beam indicator. Uses diodes and replaces the original 3 connection female spade connectors with a pair of 4 connection female spade connectors for the wire connections under the fuel tank. Single green/yellow wire is then routed up to the dash and plugged into the high beam bulb holder. |
 |
USD $29.50 |
| SHEATHING-REAR-FENDER |
Sheathing for the wires inside the rear fender Originally, Moto Guzzi did not sheath the wires inside the rear fender. This sheathing is sized to fit the parking light, brake light, left turn signal, and right turn signals wires. Instructions: Cut to length, route wires through sheathing, crimp on male bullet terminals to the end of each wire. Note: Terminals for these wires will not be crimped on the harnesses. You will need to crimp the terminals after routing the wires through the harness. This is done to ease installation. |
 |
USD $4.75 |
Components
| Part Number | Description | Photo | Price |
|---|---|---|---|
| MG# 12702900 |
Rubber boot/cover for small wire terminals. Intended to cover smaller wires with ring terminals. Sold each. 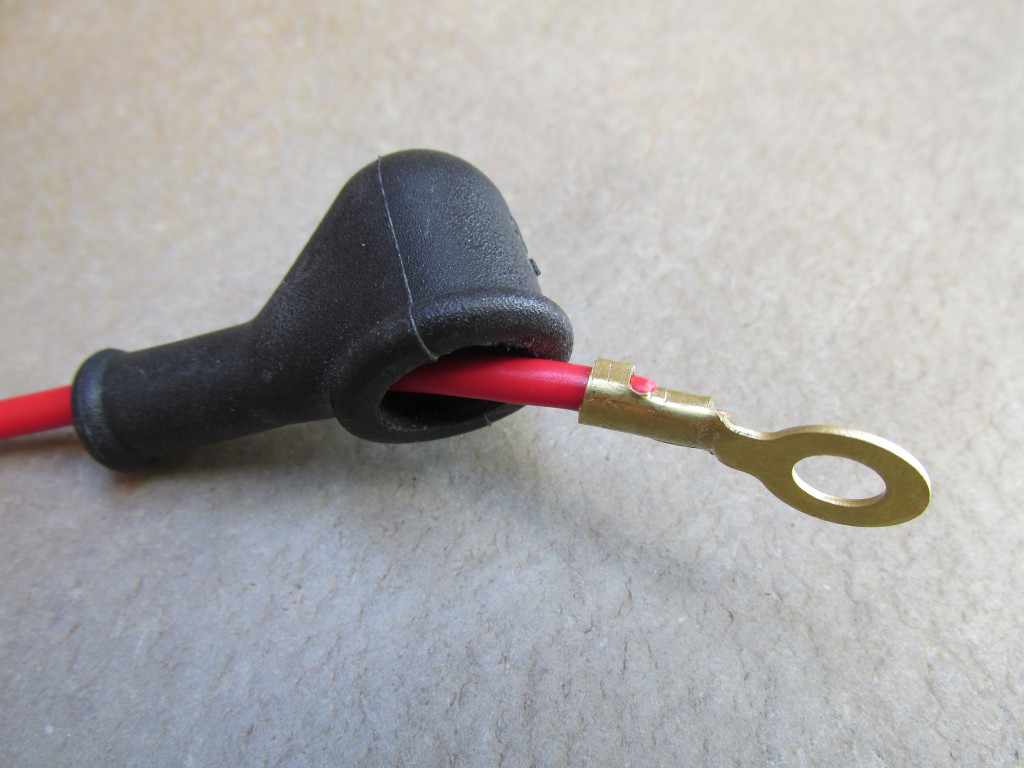 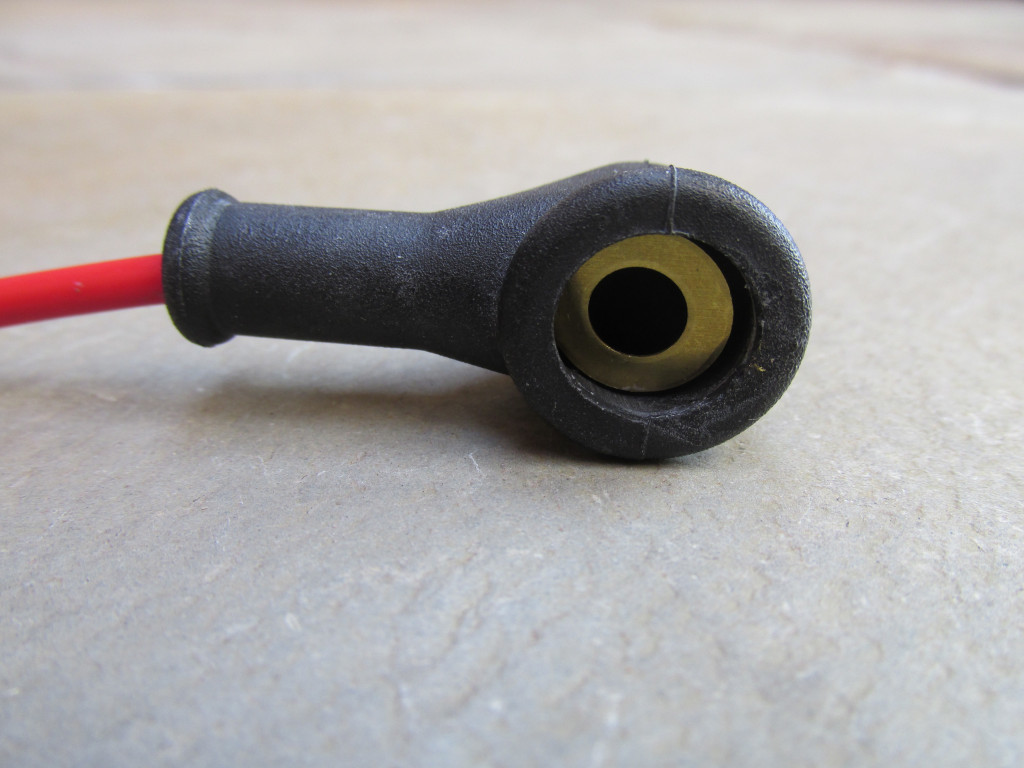 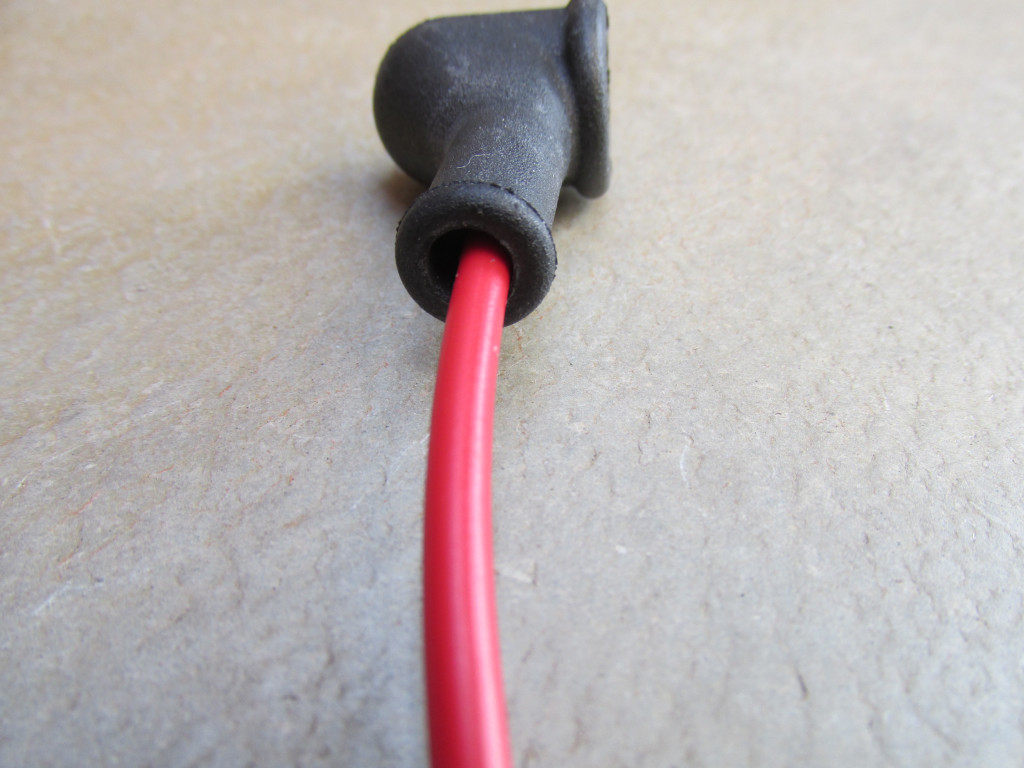
|
 |
USD $2.50 |
| MG# 12703000 |
Rubber boot/cover for battery cables. Intended to cover the terminal located at the starter solenoid. Not suitable for fitment at battery terminals. Sold each.  |
 |
USD $2.50 |
| MG# 12735100 |
Rubber boot/cover for starter button and disc brake light switches. Intended to cover the starter button used on the V7 Sport and 750 S. Also applicable to the front and rear brake light switches on disc brake models. Sold each.  
|
 |
USD $2.50 |
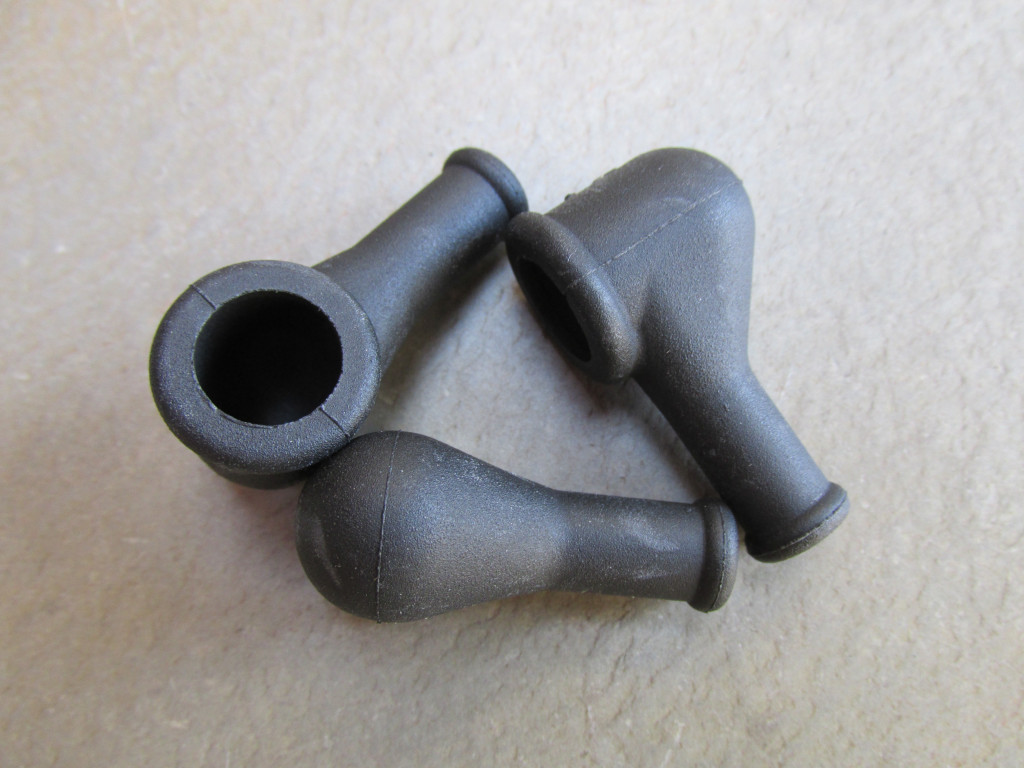
| GROMMETS-HEADLIGHT |
Set of three grommets to fit the headlight bucket Superb fitment in all three holes. |
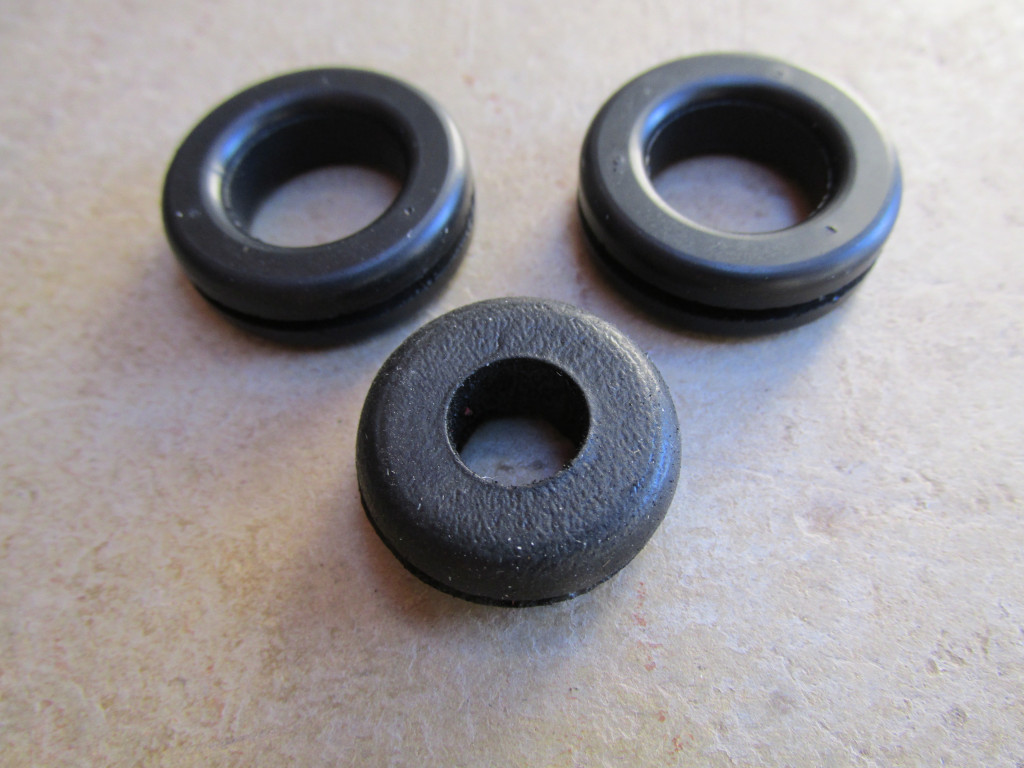 |
USD $3.75 |
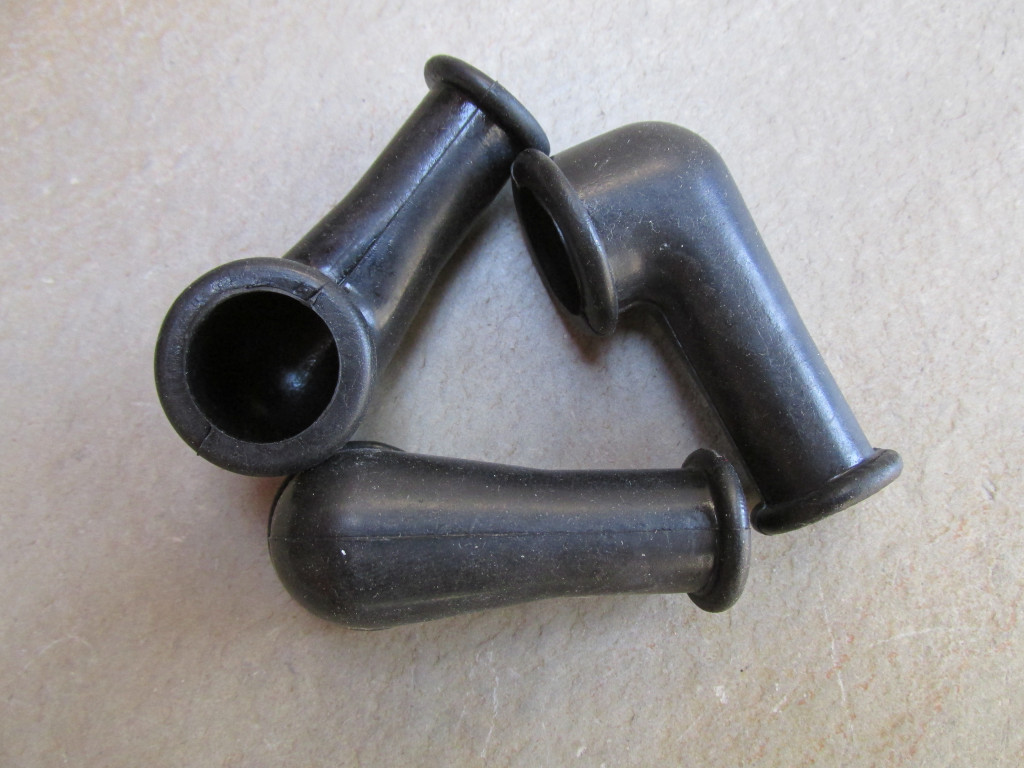
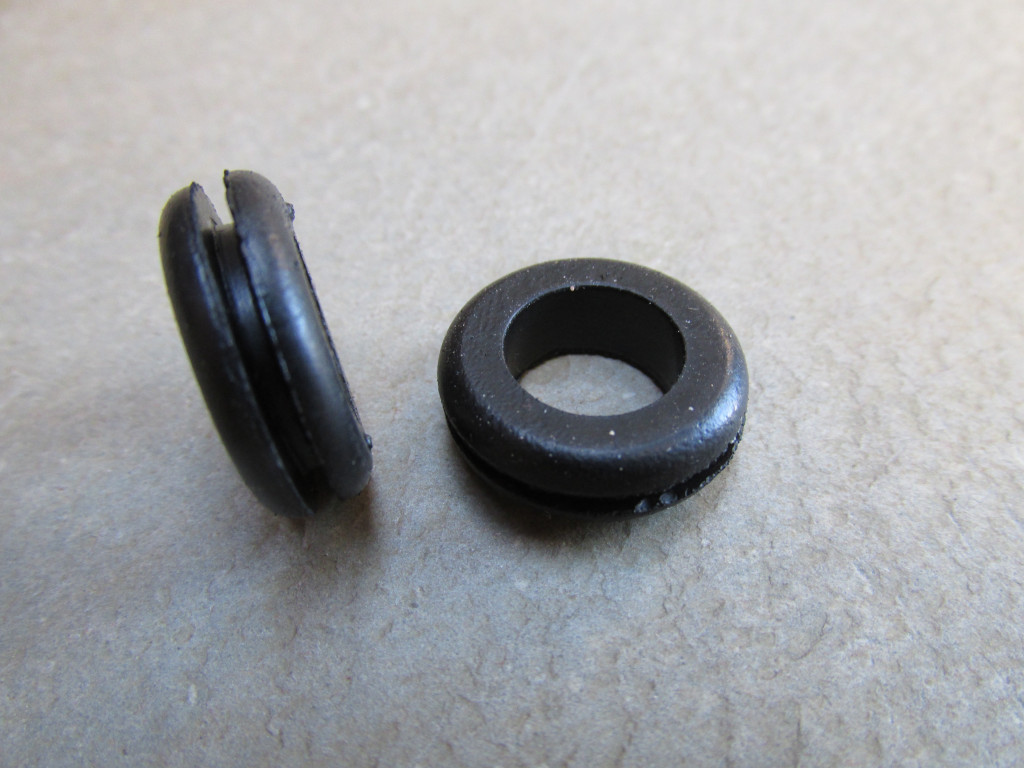
| MG# 91551131 |
Set of two grommets to fit the top triple tree Nice fitment and large inner hole provides ample space for routing wires. |
 |
USD $3.00 |
| MG# 12706800 |
Set of four grommets to fit the holes in the battery tray which accept the tabs from the side covers These fit in the battery tray and accept the corresponding pins from the side covers/battery covers. These fit very well. |
 |
USD $2.50 |
| MG# 91551053 |
Set of two grommets to fit the holes in the voltage regulator bracket for Bosch voltage regulators For Bosch voltage regulators. Provides vibration cushioning. These fit the diameter of the holes very well. Then, corresponding spacers (distance tubes) fit nicely inside. |
 |
USD $2.00 |
| MG# 90706076 × 4 |
Set of four O-rings to seal the bulb holders on dual instrument civilian dashes |
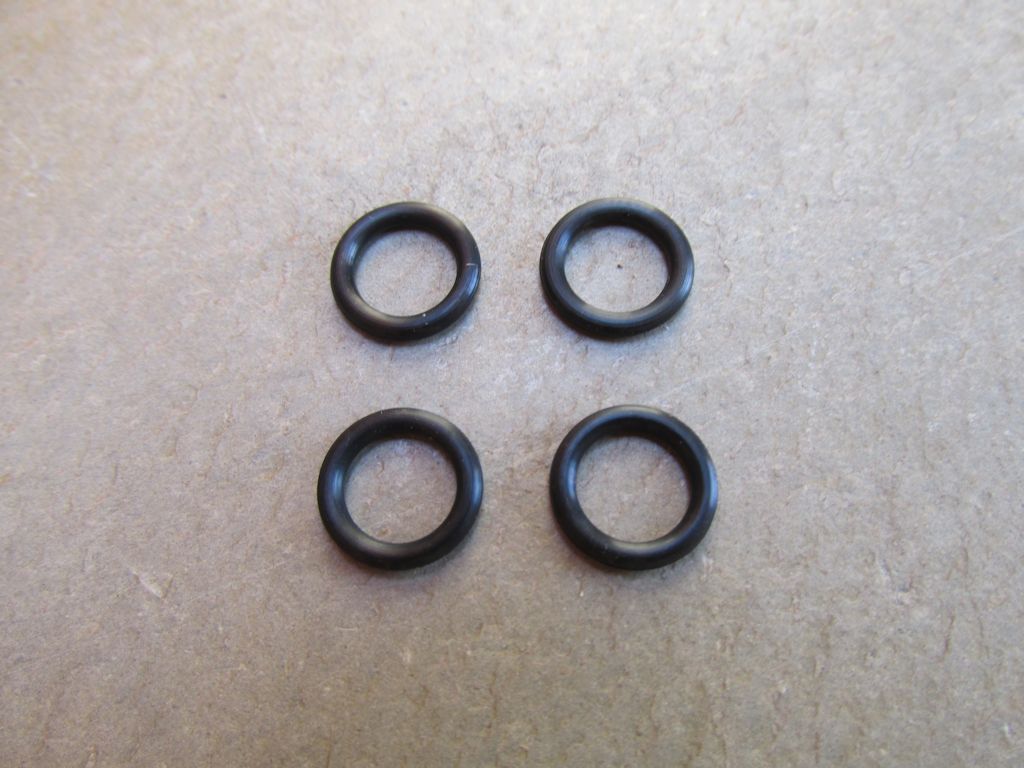 |
USD $1.00 |
| MG# 90706076 × 7 |
Set of seven O-rings to seal the bulb holders on single instrument police dashes |
 |
USD $1.75 |
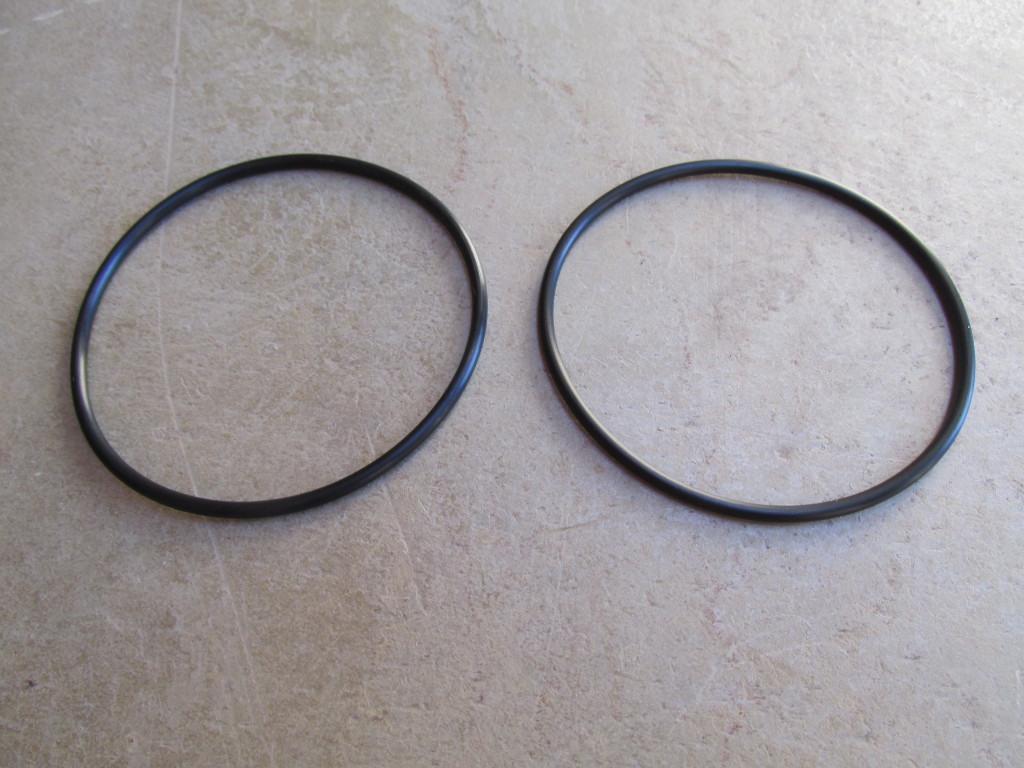
| MG# 90706765 |
O-ring to seal the large, 100 mm speedometer to the single gauge civilian or police dash. This O-ring seals the speedometer to the dash. Sold each. |
 |
USD $2.00 |
| MG# 90706746 |
Set of two O-rings to seal the smaller, 80 mm speedometer and tachometer to the dual gauge civilian dash. These O-rings seal each gauge to the dash. |
 |
USD $4.00 |
| MG# 13707300 |
Set of two rubber washers to fit between the side cover and the frame. These rubber washers do an excellent job of keeping the side cover knobs tight and secure and help prevent the loss of the knob or side cover due to vibration. |
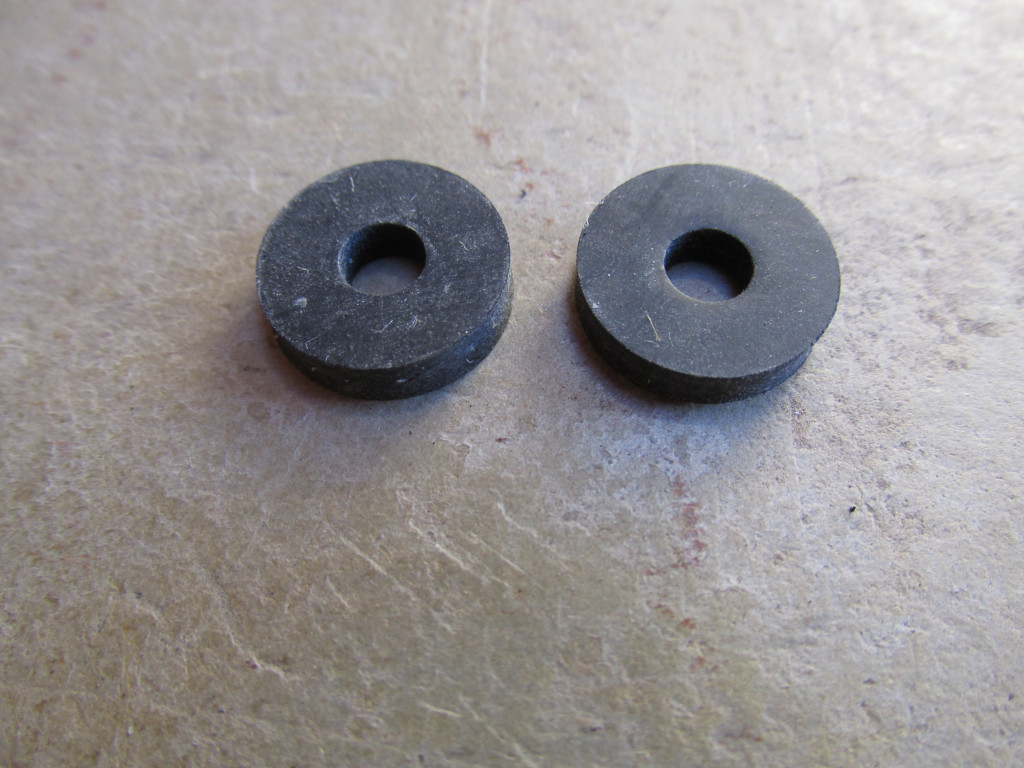 |
USD $2.25 |
| MG# 93400964 |
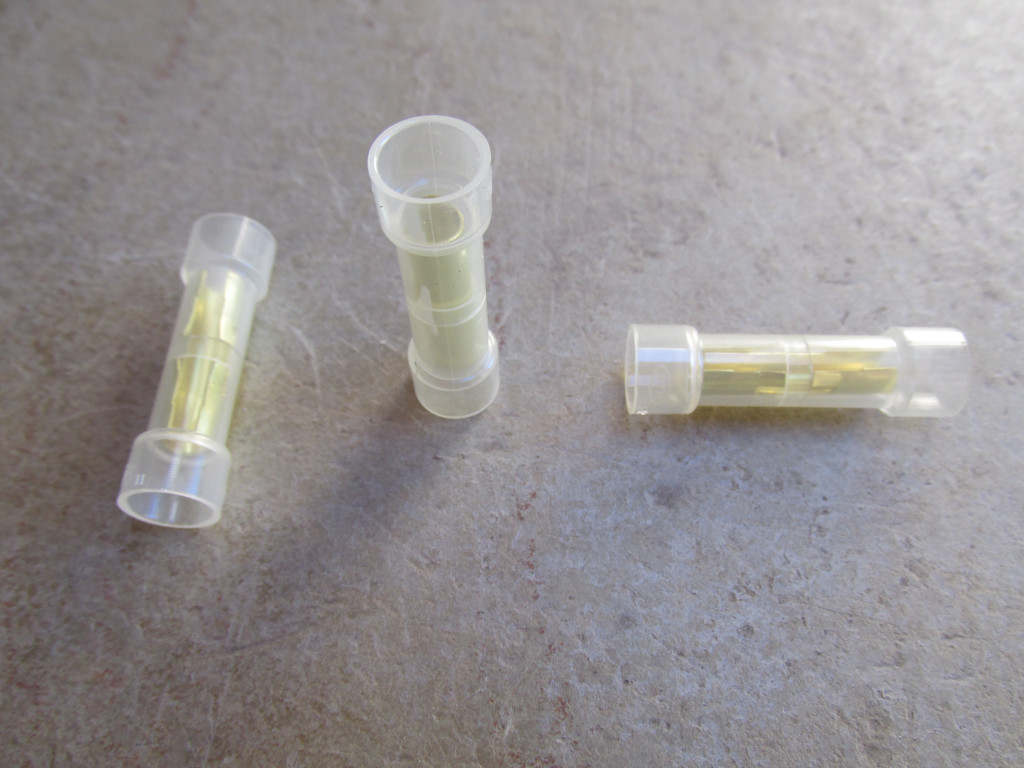
4 connection female spade connector A great way to connect four wires without the need for male spade terminals (Moto Guzzi typically did not use male spade terminals on wiring harnesses). Accepts 6.3 mm (1⁄4 inch) terminals. Sold each. Best to use a needle-nosed pair of pliers to insert and remove terminals. |
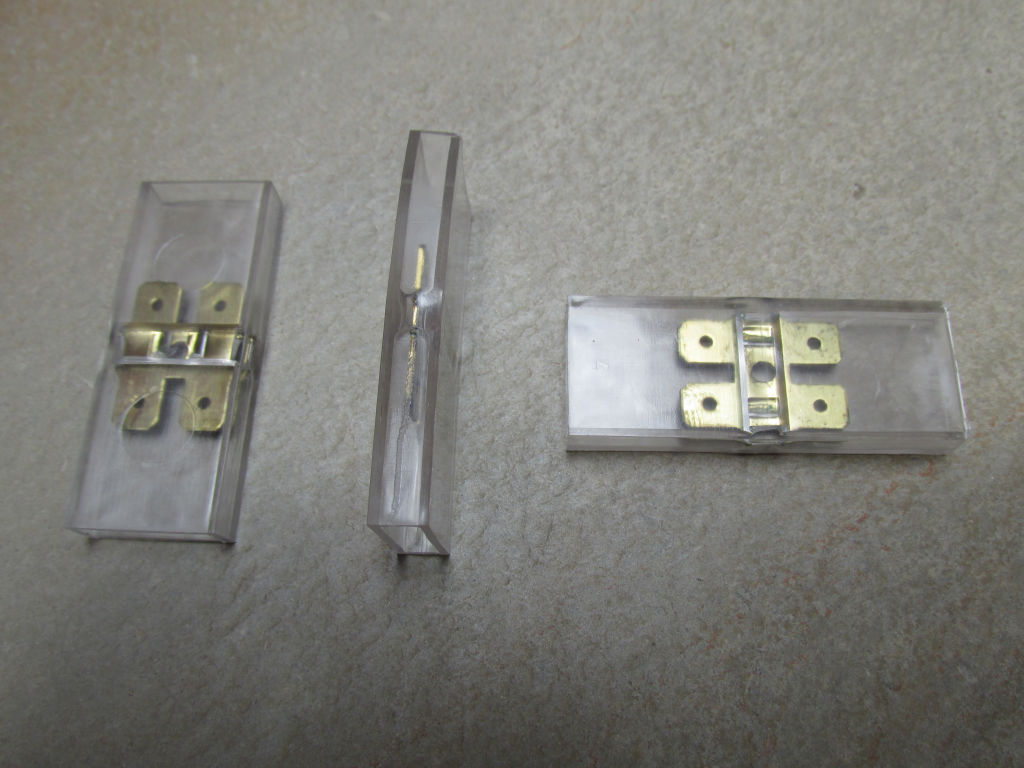 |
USD $8.00 |
| MG# 93400863 MG# 93400963 |
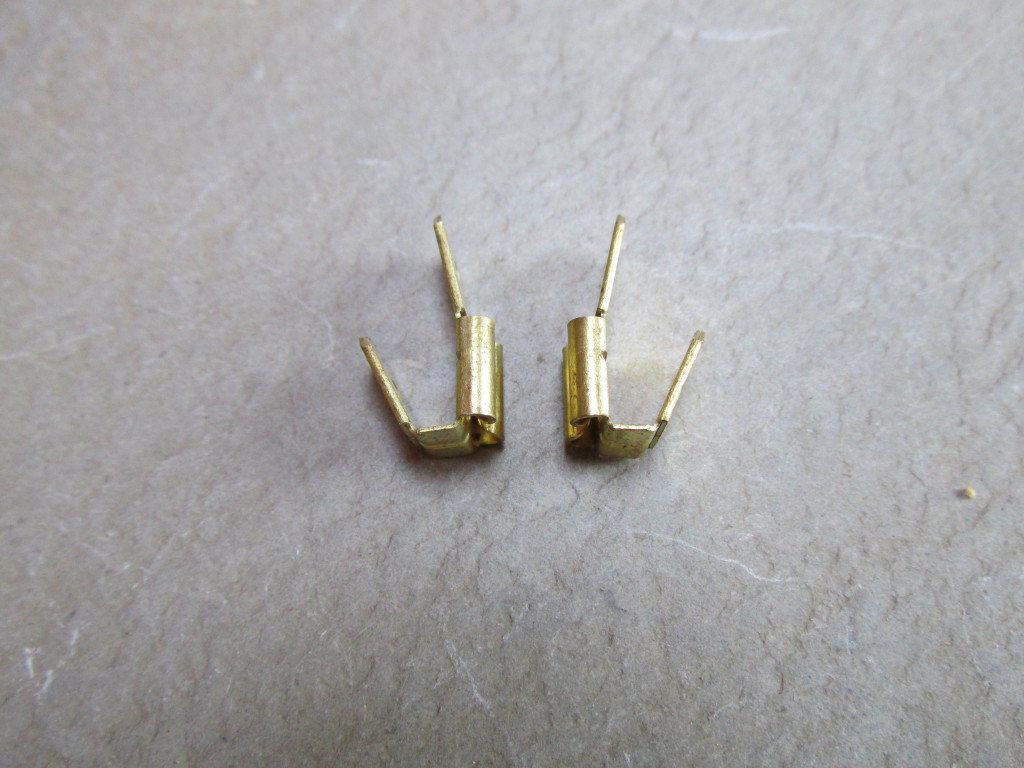
3 connection female spade connector Just like Moto Guzzi used to split power to the front and rear turn signals (
Best to use a needle-nosed pair of pliers to insert and remove terminals. |
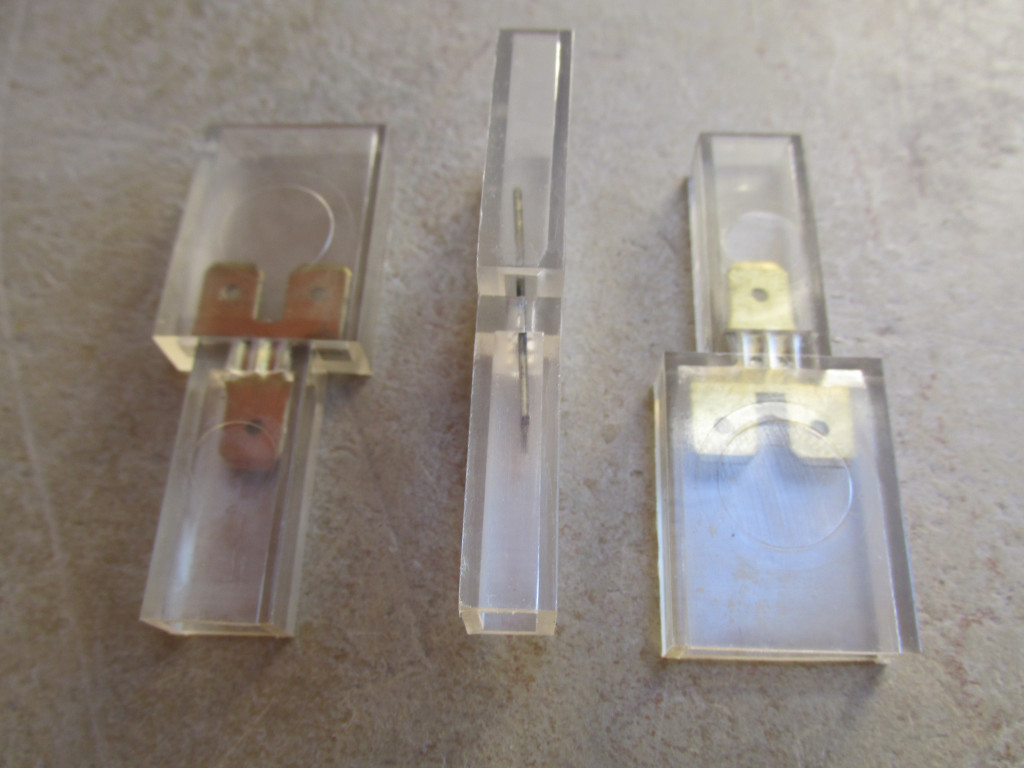 |
USD $6.00 |
| MG# 93400962 |
2 connection female spade connector A great way to connect two wires without the need for male spade terminals (Moto Guzzi typically did not use male spade terminals on wiring harnesses). These are used on the Tonti framed models ( |
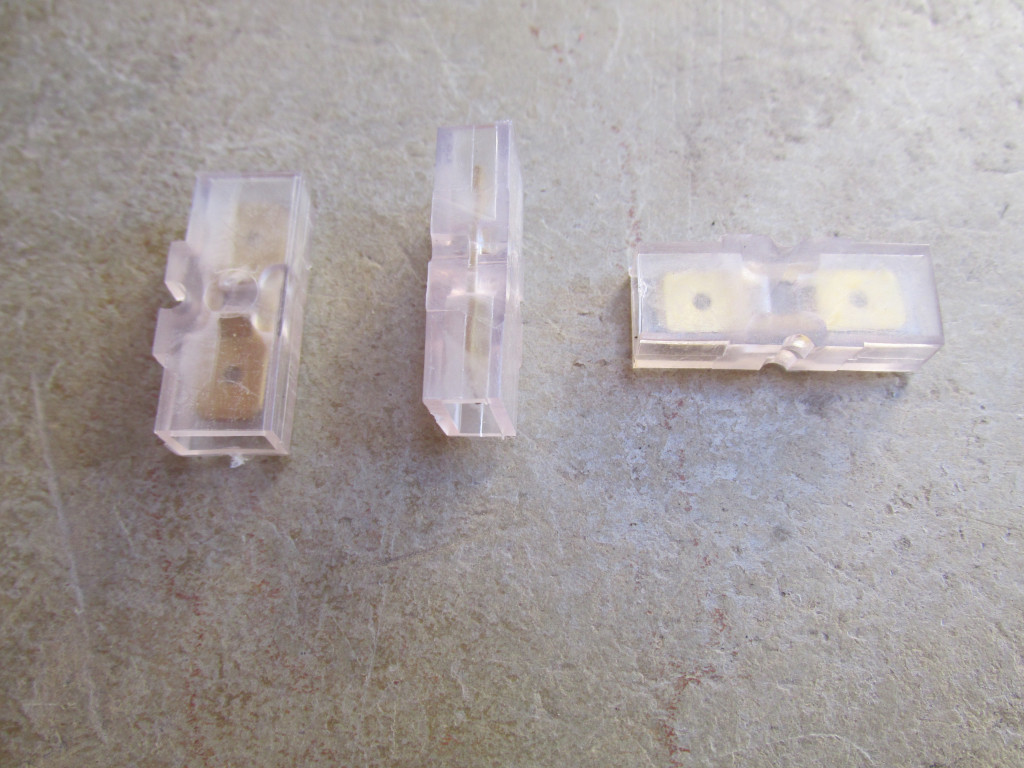 |
USD $3.00 |
| BULLET-CONNECTOR |
2 connection bullet connector A great way to connect two male bullet terminals (double bullet connector). Accepts 4 mm (0.157 inch) terminals. Sold each. |
 |
USD $0.50 |
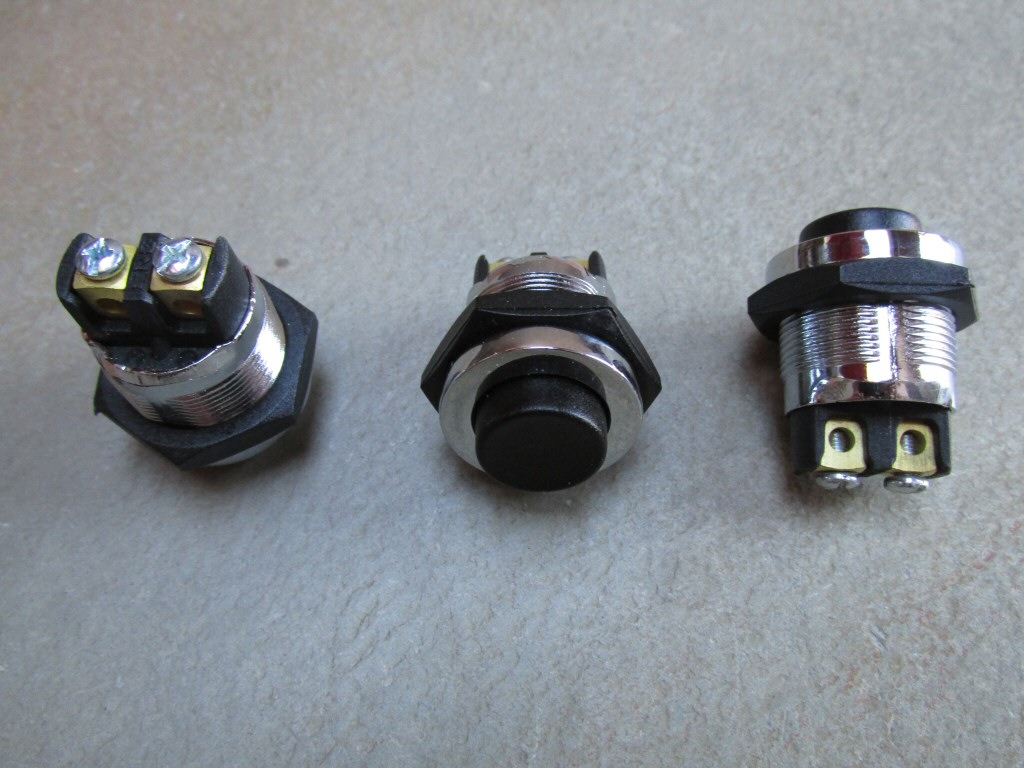
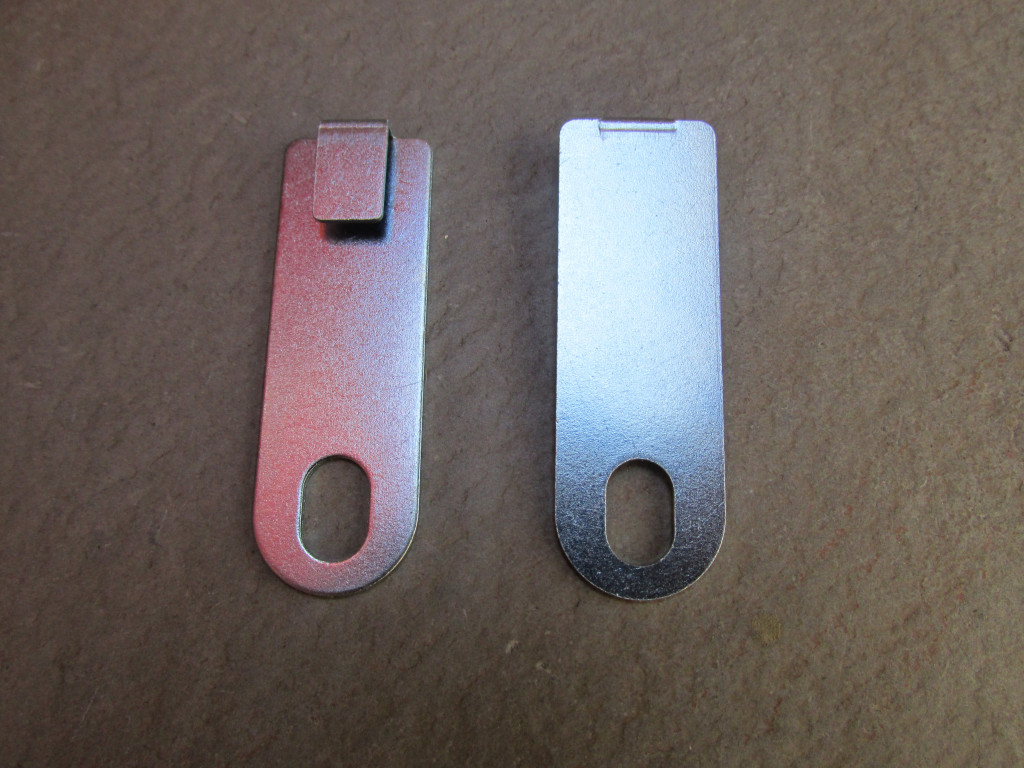
| MG# 12734900 |
Starter button bracket Bracket to fit the original starter button (22 mm diameter mounting hole). Stainless steel. Very nice. Starter button sold separately. Sold each. |
 |
USD $15.50 |
| MG# 26735001 |
Starter button Momentary push button switch to actuate the starter. Fits the original bracket perfectly (22 mm diameter mounting hole) and comes complete with set screw terminals just like the original. Nice quality housing and securing nut. Sold each. |
 |
USD $20.00 |
| MG# 26735001-BLACK |
Starter button Momentary push button switch to actuate the starter. Fits the original bracket perfectly (22 mm diameter mounting hole) and comes complete with set screw terminals just like the original. Nice quality housing and securing nut. Sold each. |
 |
USD $14.00 |
| MG# 26735001-BLACK-ALT |
Starter button Momentary push button switch to actuate the starter. Fits the original bracket perfectly (22 mm diameter mounting hole) and comes complete with set screw terminals just like the original. Economy version. Sold each. |
 |
USD $10.00 |
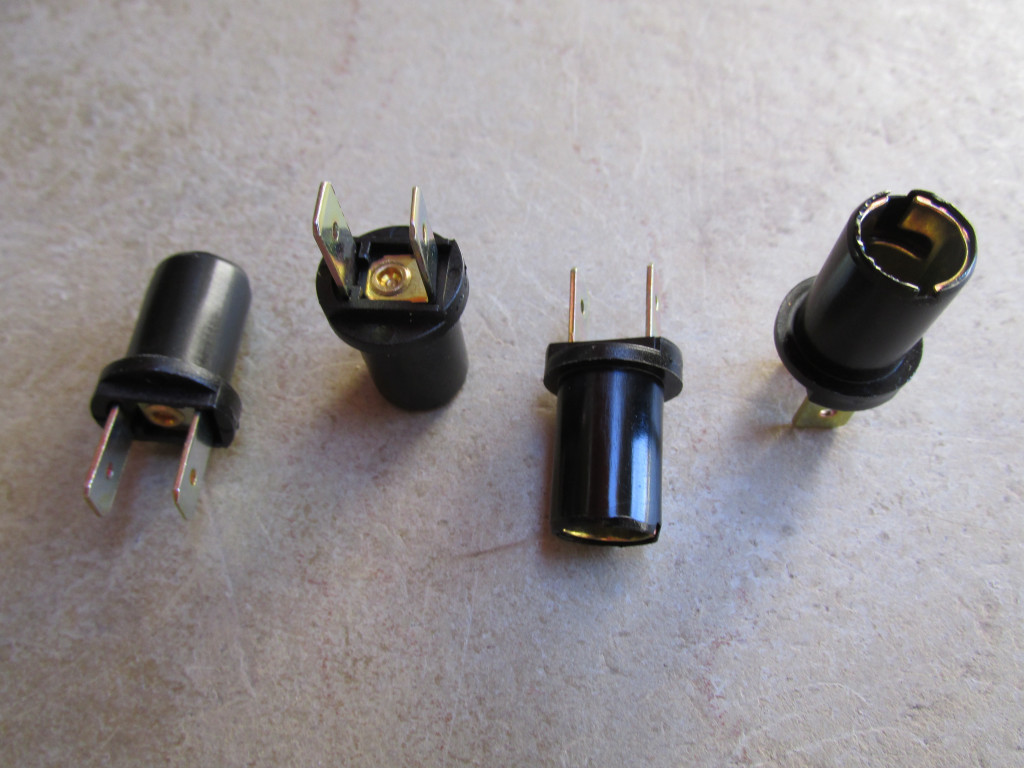
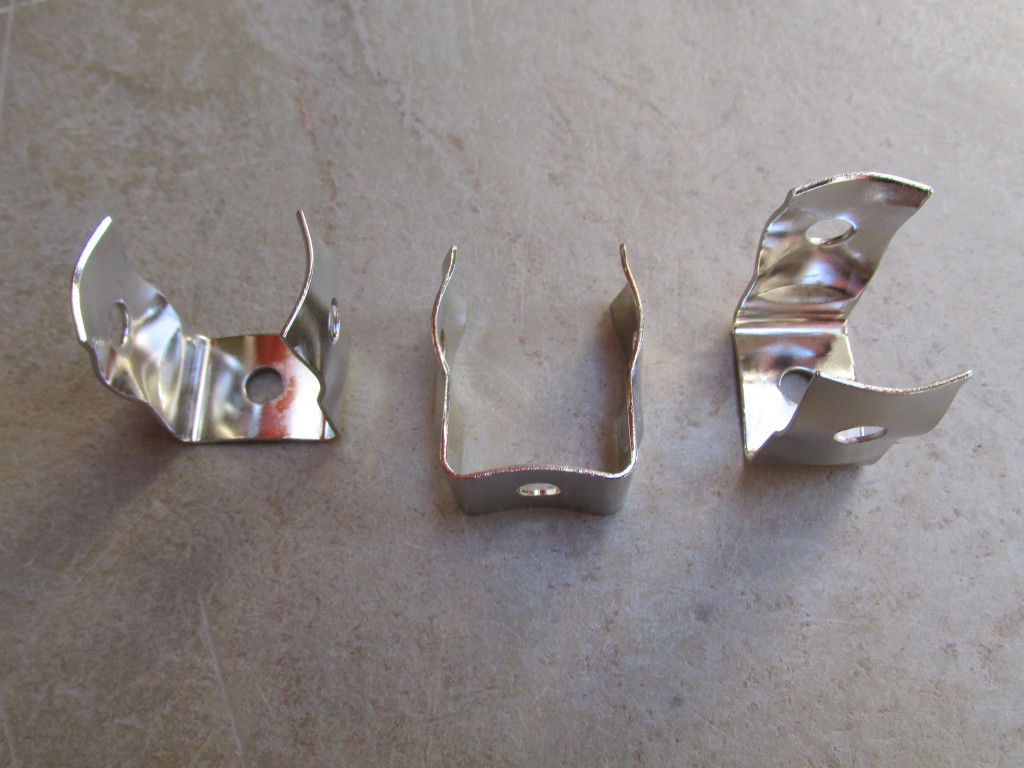
| BULB-HOLDER-SINGLE |
Single terminal bulb holder A very nice single terminal bulb holder with excellent fitment within the When ordering: Please specify wire color and terminal.
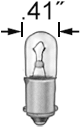 Photo courtesy of McMaster-Carr. 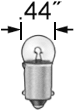 Photo courtesy of McMaster-Carr. |
   |
USD $7.50 |
| BULB-HOLDER-DUAL |
Dual terminal bulb holder A great replacement dual terminal bulb holder and very close to the original in design. Accepts two 6.35 mm female spade terminals, just like the original. Excellent fitment within the
Photo courtesy of McMaster-Carr. Photo courtesy of McMaster-Carr. |
 |
USD $5.00 |
| MG# 93450322 MG# 93450122 |
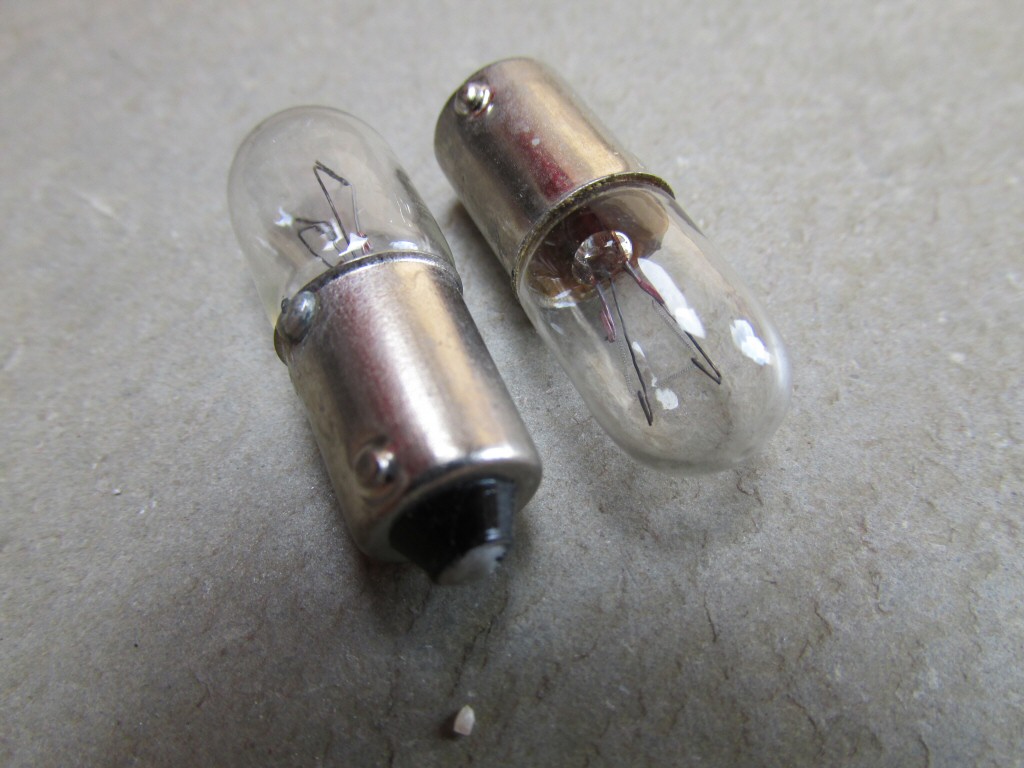
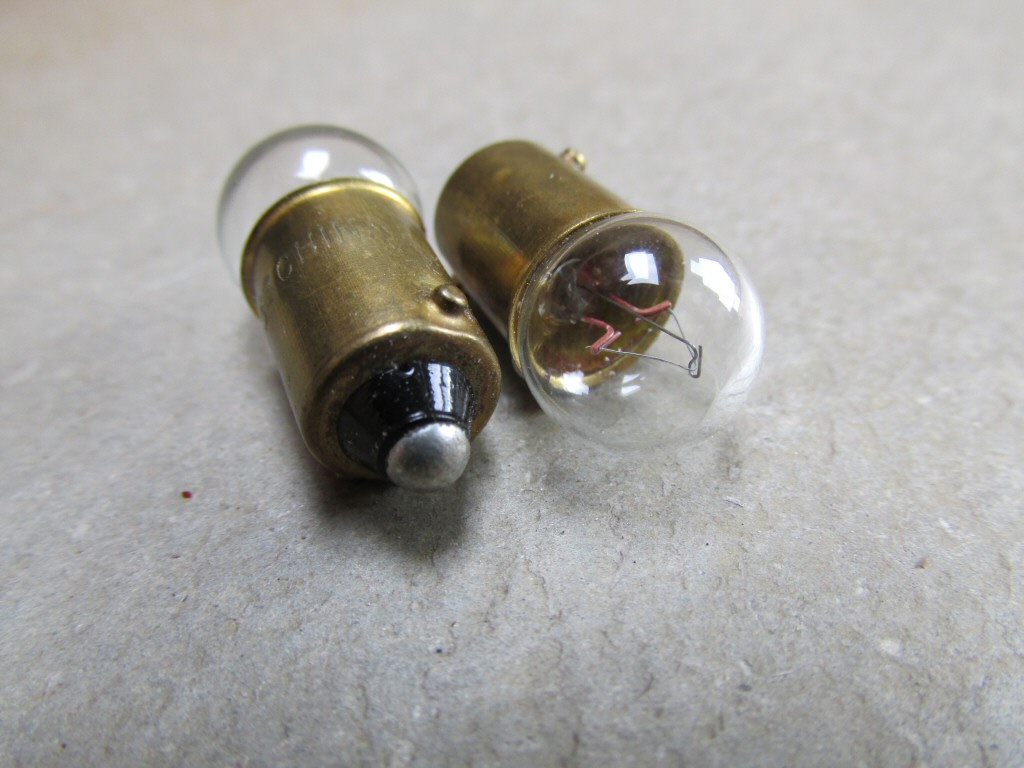
Light bulb for gauge and indicator lights 3.36 watt lamp, bayonet base, 500 hour average life, approximately 10 mm (0.41 inch) in diameter. Sold each.
This bulb may also be used as a |
 |
USD $1.00 |
| MG# 10744910 |
Light bulb for gauge and indicator lights 1.728 watt lamp, bayonet base, 1000 hour average life, approximately 10 mm (0.41 inch) in diameter. Sold each.
|
 |
USD $1.00 |
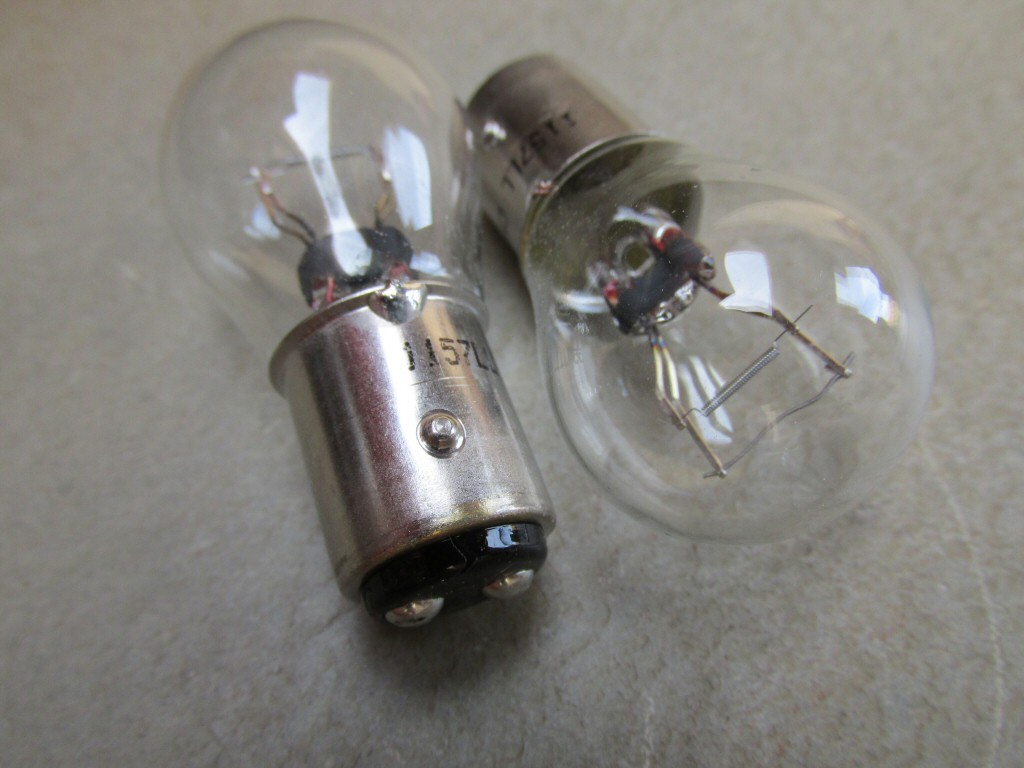
| MG# 93450224 |
Light bulb for tail light Long life bulb to help prevent failure due to vibration (1157LL), dual element, 26.88 / 8.26 watt lamp, bayonet base, 2400 / 10000 hour average life. Sold each.
|
 |
USD $1.75 |
| MG# 93450129 |
Light bulb for turn signals and parking lights Long life bulb to help prevent failure due to vibration (1156LL), single element, 26.88 watt lamp, bayonet base, 2400 hour average life. Sold each.
|
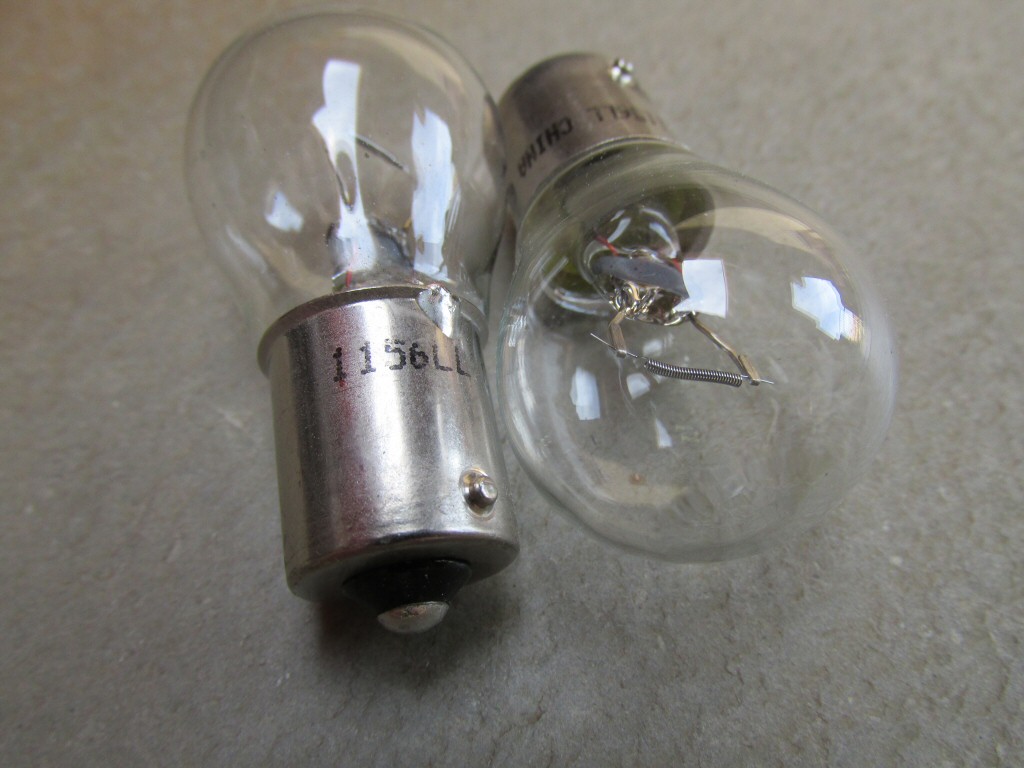 |
USD $1.75 |
| MG# 13741640-LED |
Bracket for mounting LED turn signal flashers Designed specifically for LED flashers that are rubber mounted. Mounting hole is 7 mm in diameter. Sold each. 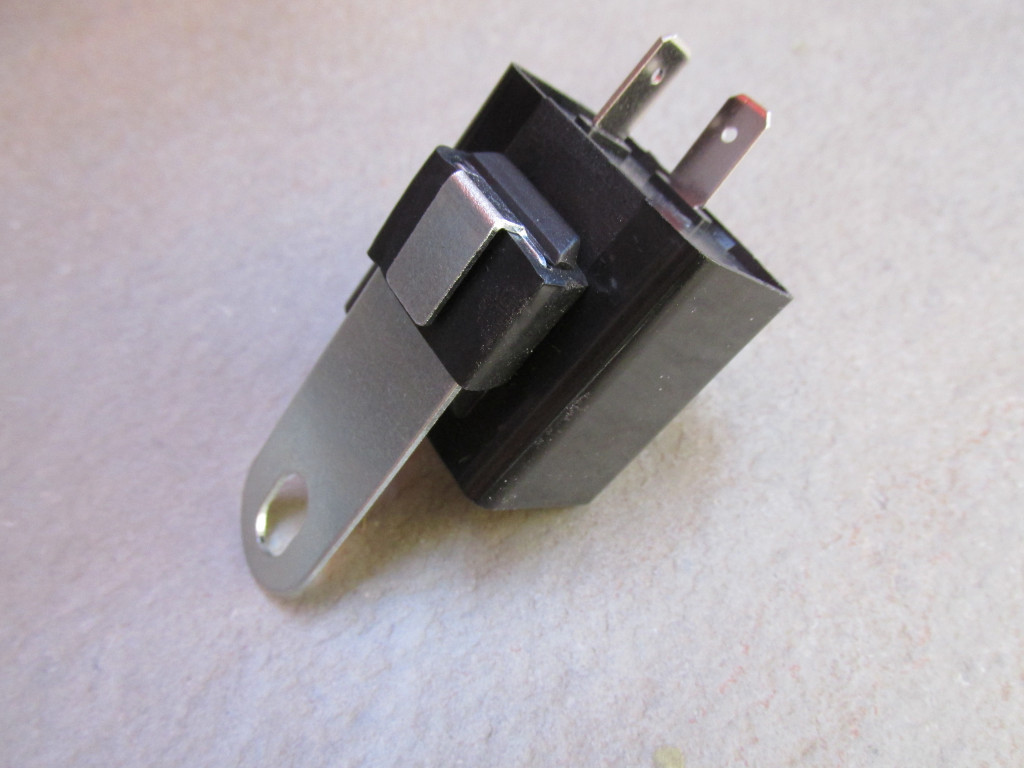 |
 |
USD $3.00 |
| MG# 13741640 |
Bracket for mounting turn signal flashers Fits standard sized round thermal and electronic flashers. Mounting hole is 6 mm in diameter. Sold each. |
 |
USD $3.00 |
| MG# 12745760 |
Push-pull switch for police dash Good quality switch with screw-type terminals (as original). 25 amp capacity, should work well with most spot lights or coils without the need for a separate relay. Knob unscrews for fitment to dash. 8 mm × 1 mm threads. Two are needed per police dash. Sold each. |
 |
USD $5.00 |
| MG# 12734900ALT |
Bracket for push-pull switch This bracket is identical to the starter button bracket, except the hole is ~8 mm in diameter. The intent is to mount this bracket on the left clutch perch, mirroring the starter button bracket. Then, a push-pull switch may be fit to the bracket and used to conveniently actuate spot lights or other electrical components. Stainless steel. Very nice. Push-pull switch sold separately. Sold each. |
 |
USD $15.50 |
| MG# 13745740 MG# 17745760 MG# 18745701 |
Toggle switch for police dash Excellent quality SEALED switch with six quick connect terminals (as original). 15 amp capacity, on-on double pole double throw, comes complete as shown with mounting hardware (as shown). One is needed per police dash. Sold each. |
 |
USD $24.75 |
| TOGGLE-BOOT-HALF |
Half height toggle switch boot for police dash Original style half-height boot for the toggle switch used on the police dash. Uses standard 15⁄32-32 inch threads. Be sure to rotate the toggle with the boot when fitting the boot to the switch. Sold each. |
 |
USD $4.50 |
| TOGGLE-BOOT-FULL |
Full height toggle switch boot Full-height boot for the toggle switch. Uses standard 15⁄32-32 inch threads. Be sure to rotate the toggle with the boot when fitting the boot to the switch. Sold each. |
 |
USD $4.00 |
| MG# 12732500 |
5 pin mini relay (SPDT) with mounting bracket. 40 amp rating. Sealed construction. Resistor is used across the coil terminals for long life and reliable service. 40 amp maximum continuous current rating on the normally open circuit. 30 amp maximum continuous current rating on the normally closed circuit. Great replacement for the starter relay or for use with custom functions. Mounting bracket has a 5.5 mm diameter hole. Sold each. |
 |
USD $5.00 |
| MG# 28732560 |
5 pin mini relay (SPDT) without mounting bracket. 40 amp rating. Great replacement for the starter relay or for use with custom functions. Sold each. |
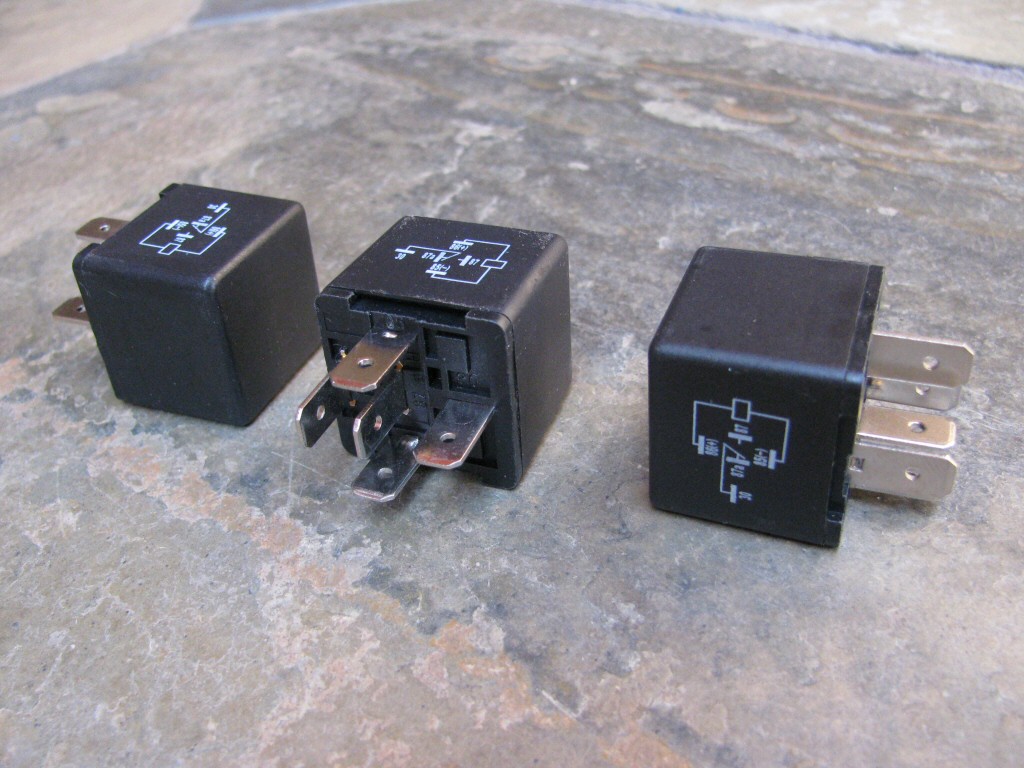 |
USD $5.00 |
| MG# 30732510 |
5 pin mini relay (SPST) without mounting bracket. Sealed construction. 40 amp maximum continuous current rating. So far, the only Guzzis I know of that require this relay are the 1000 SP III and the 1000 S series 2 with the later Digiplex ignition module. As far as I know, all other applications should use MG# 28732560. Sold each. |
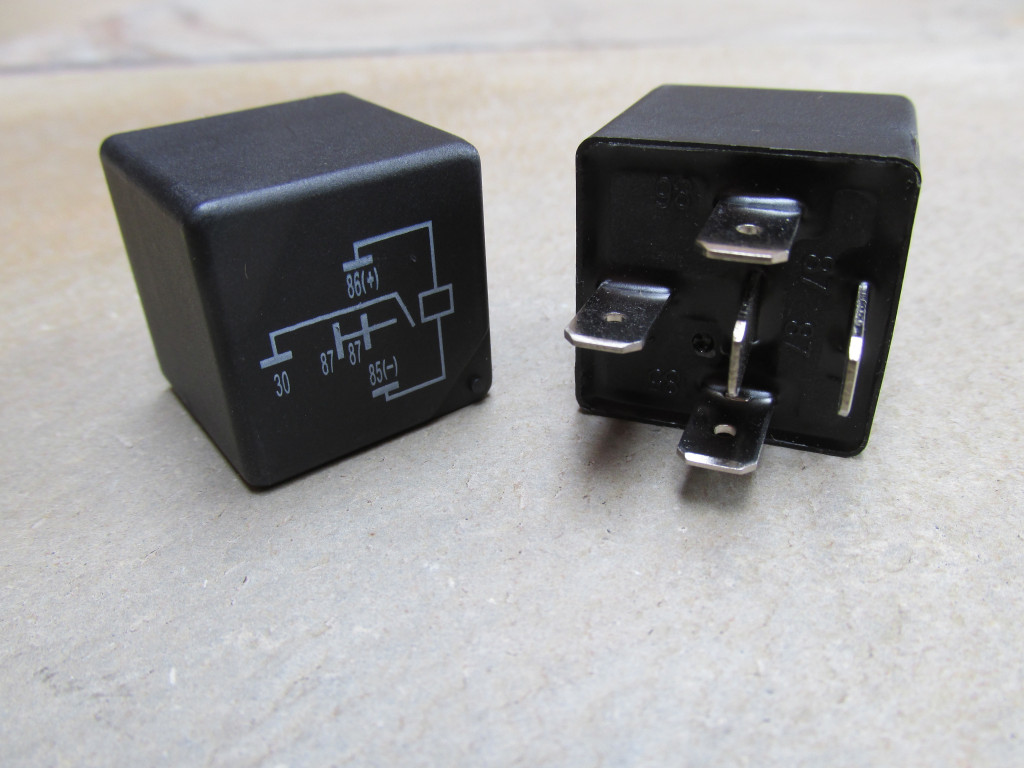 |
USD $7.50 |
| MG# 30732560 |
5 pin micro relay (SPDT) without mounting bracket. 30 amp rating. Sealed construction. Resistor is used across the coil terminals for long life and reliable service. 30 amp maximum continuous current rating on the normally open circuit. 20 amp maximum continuous current rating on the normally closed circuit. Used on many later Guzzis. Fits my custom relay solution. Great for use with custom functions. Sold each. |
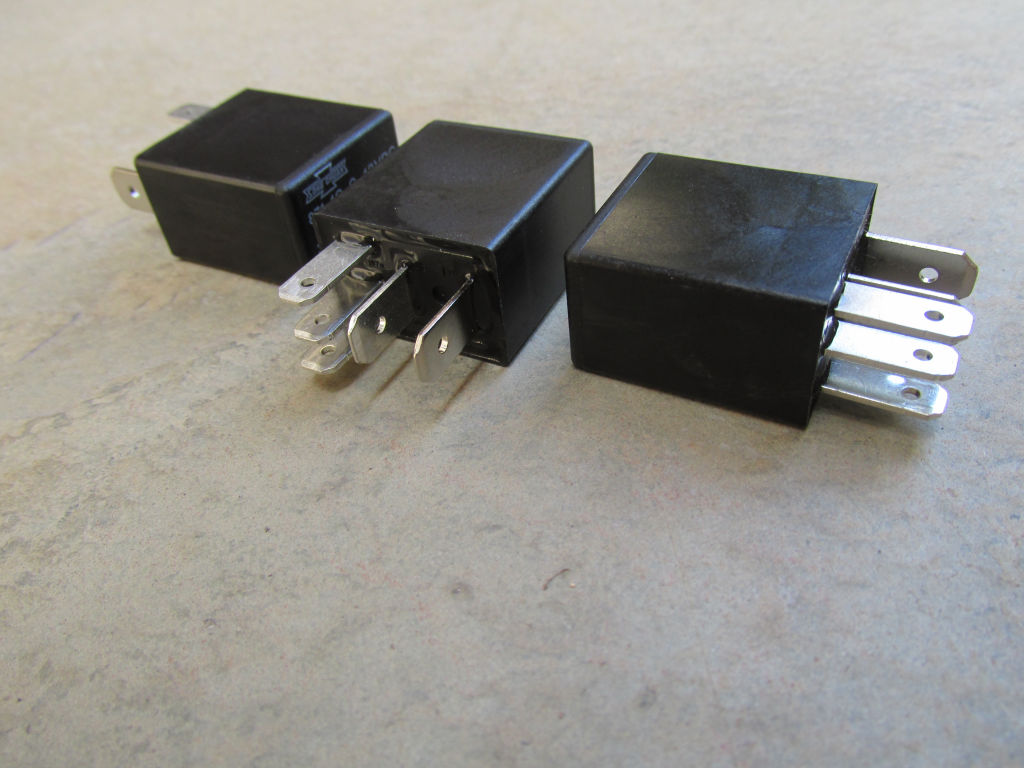 |
USD $5.00 |